ElasticSearch Practice(2)

목표
- K8S에 ES + kibana를 배포해보자.
- RestAPI를 통해 테스트해보고 예상한대로 작동하는지 확인해보자.
- Kibana를 통해 데이터를 확인해보자.
Directory Structure
elasticsearch
├── LICENSE
├── README.md
├── elasticsearch
│   ├── elasticsearch.yml
│   ├── jvm.options
│   └── log4j2.properties
├── kustomization.yaml
└── resources
    ├── client.yaml
    ├── data.yaml
    ├── loadbalancer.yaml
    └── master.yaml
kibana
├── LICENSE
├── README.md
├── kibana
│   └── kibana.yml
├── kustomization.yaml
└── resources
    ├── deployment.yaml
    └── loadbalancer.yaml
Code
https://github.com/HoneyJung/k8s-elasticsearch-kibana
es.zip
Cluster 구성
- kubectl apply -k elasticsearch
- kubectl apply -k kibana
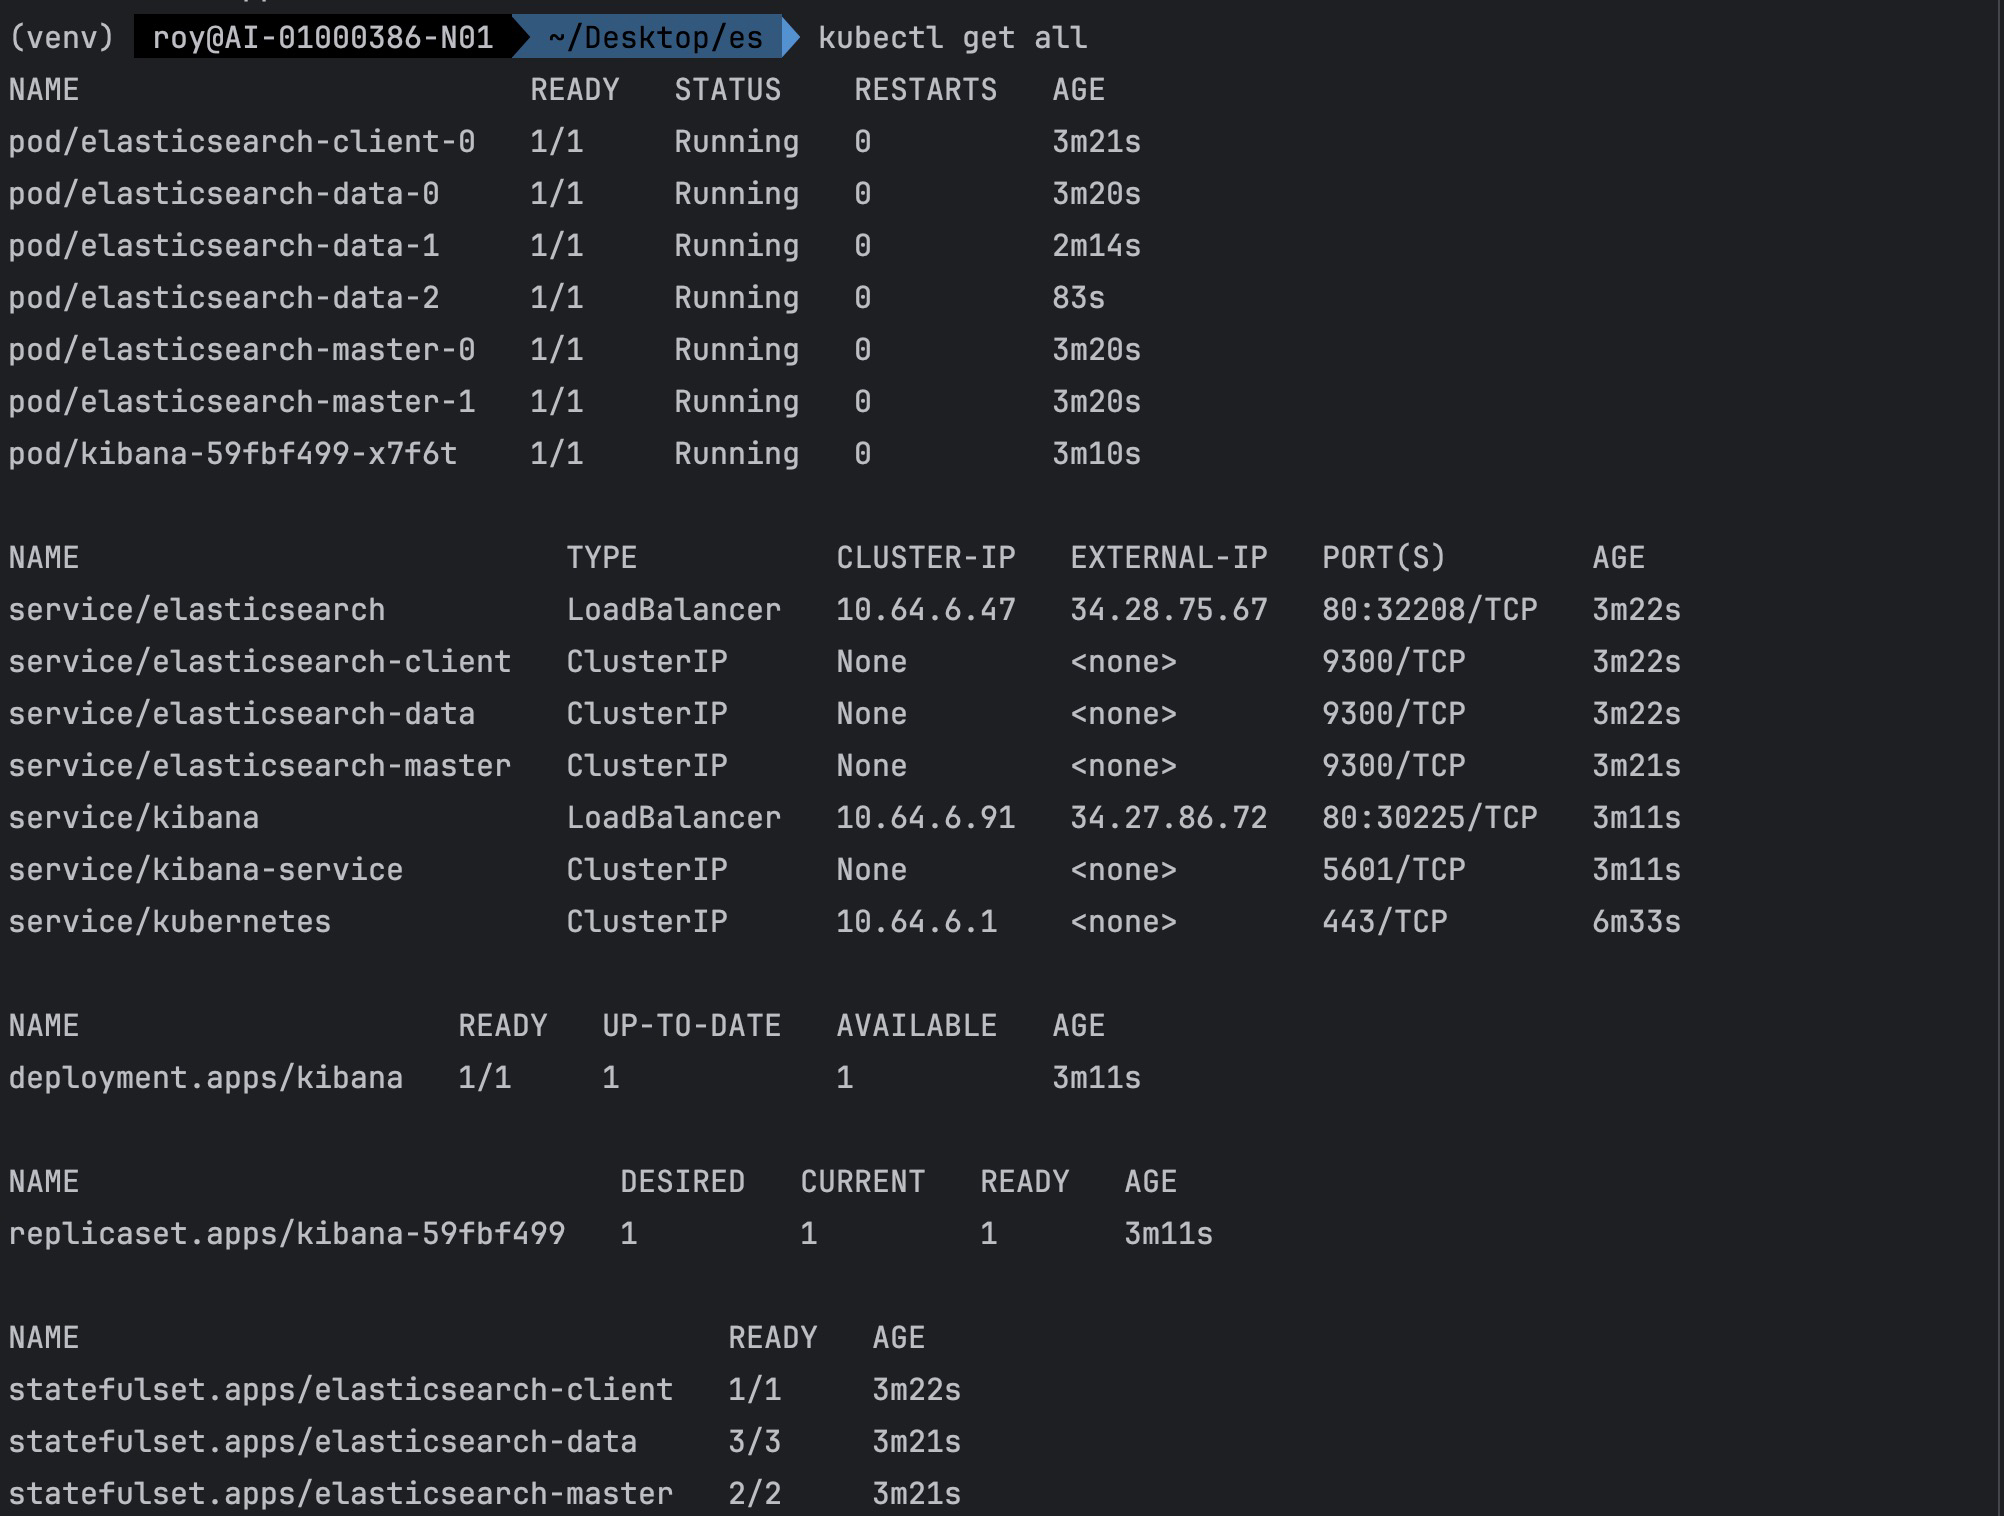
- kubectl get all 결과
insert하고 search 해보자
- Create Index

- Insert data
(똑같은 방식으로 데이터를 하나 더 넣었음)```jsx curl -XPOST "http://34.28.75.67/test_index/_doc" -H 'Content-Type: application/json' -d' { "name": "정재헌", "message": "Backend 개발자" }' ```

- search 해보기
-
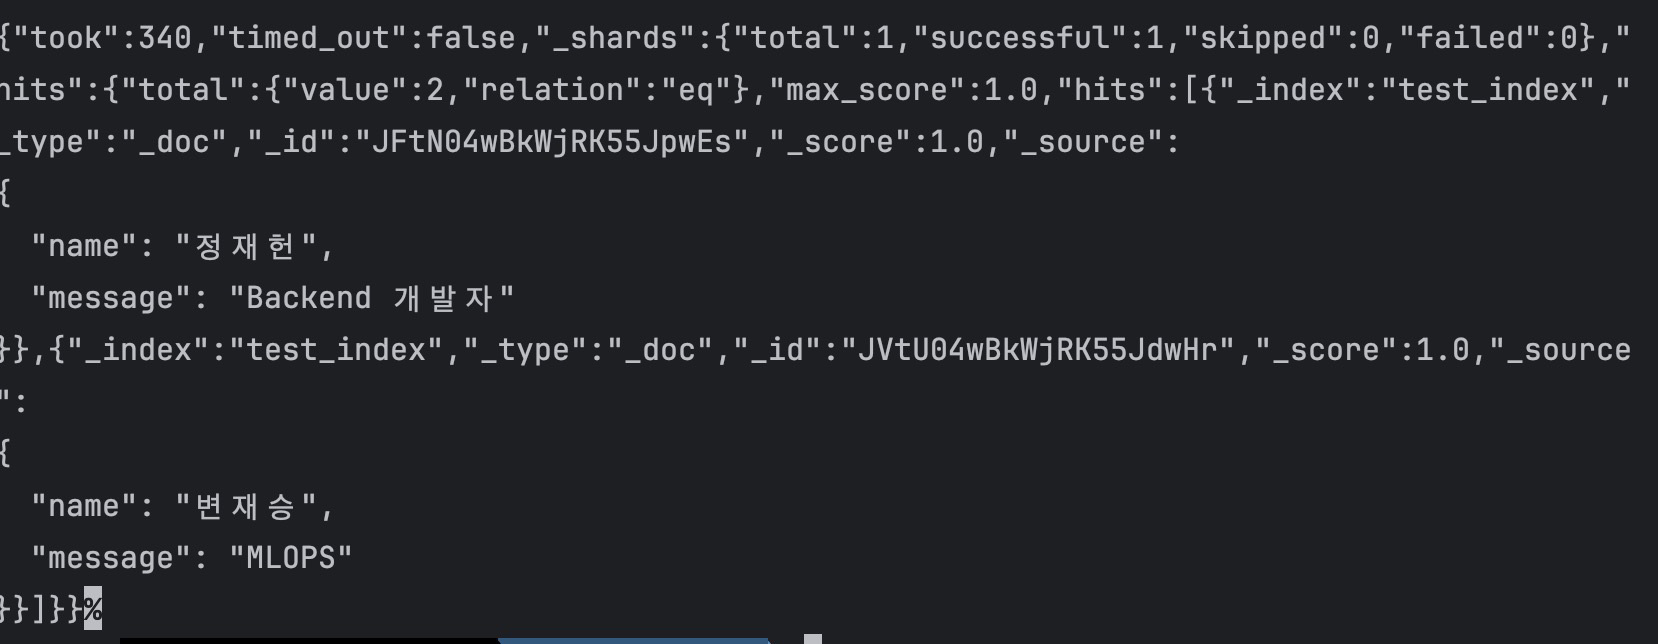
search all
curl -X GET "http://34.28.75.67/test_index/_search" -H 'Content-Type: application/json' -d'
{
  "query": {
    "match_all": {}
  }
}'
-
 2. search
```jsx
curl -X GET "http://34.28.75.67/test_index/_search" -H 'Content-Type: application/json' -d'
{
"query": {
"match": {"name": "정재헌"}
}
}'
```

3. Kibana에서 데이터 확인하기
2. search
```jsx
curl -X GET "http://34.28.75.67/test_index/_search" -H 'Content-Type: application/json' -d'
{
"query": {
"match": {"name": "정재헌"}
}
}'
```

3. Kibana에서 데이터 확인하기

잘 들어가 있다.
Node, Shard, Replica

p ⇒ primary, r ⇒ replica라는 뜻이다.
1개의 primary shard가 1번 노드에 저장되어 있고 1개의 replica가 0번 노드에 저장되어 있다는 것을 알 수 있다. primary shard와 replica 모두 2개의 데이터와 8.8kb 크기인 것을 확인할 수 있다.
데이터를 좀 더 넣어보자.

10개가 됐다. 근데 뭔가 이상하다. 데이터 노드가 3개로 설정되어 있는데 왜 정작 사용되는건 2개이다.
💡 An Elasticsearch index consists of one or more primary shards. As of Elasticsearch version 7, the current default value for the number of primary shards per index is **1**. In earlier versions, the default was 5 shards.
💡 The number of replicas each primary shard has. **Defaults to 1**. WARNING: Configuring it to 0 may lead to temporary availability loss during node restarts or permanent data loss in case of data corruption. Auto-expand the number of replicas based on the number of data nodes in the cluster.
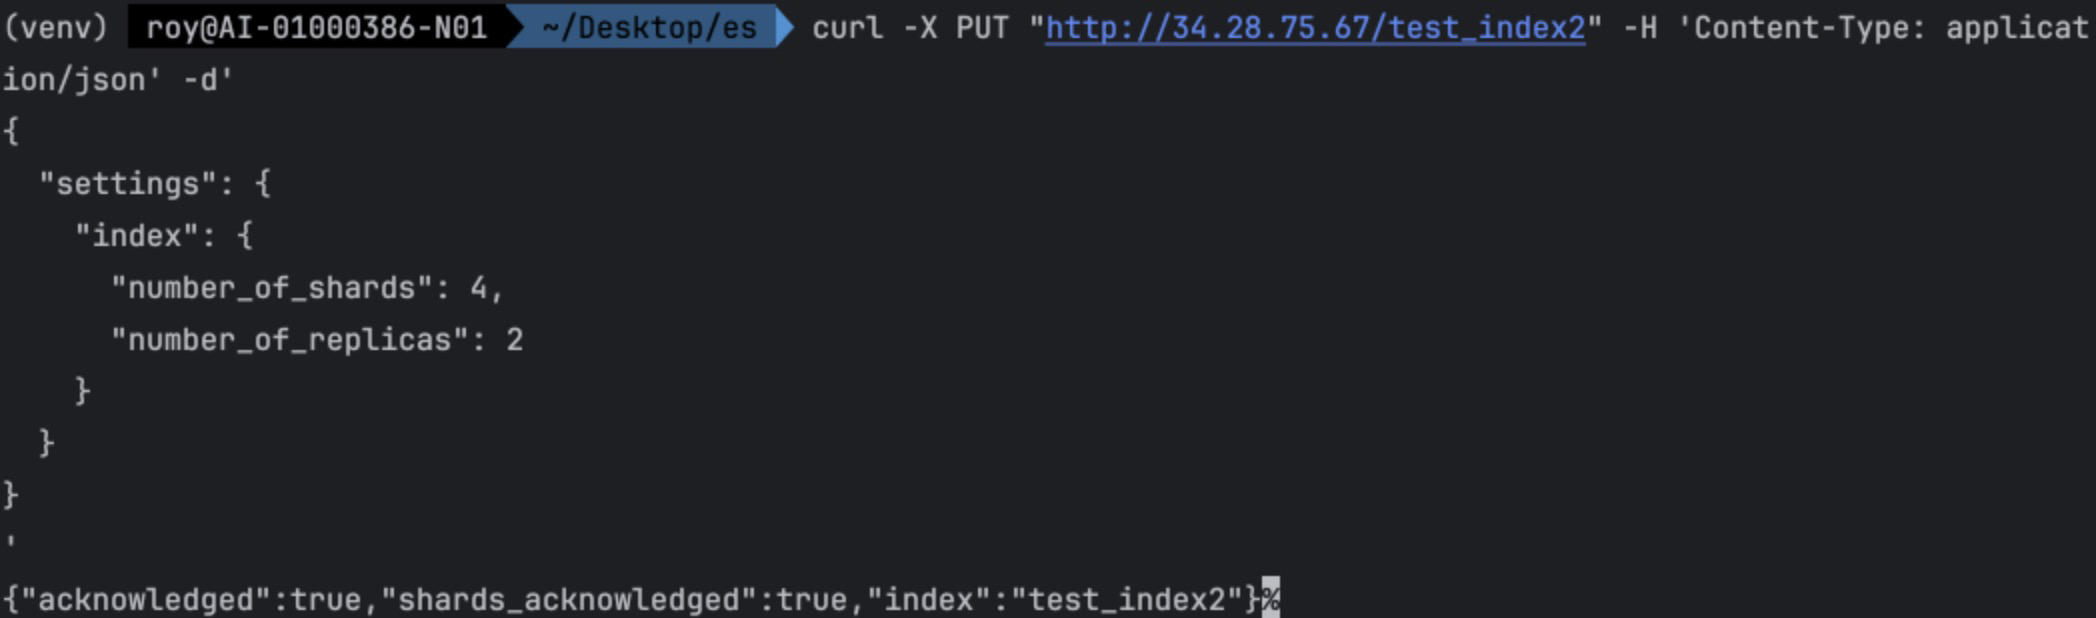
Primary shard와 replica 수의 default 값이 1이다. 현재 클러스터에서 test_index만 운영한다고 했을 때는 이 default 값은 효율적이지 않다. 설정 값을 바꿔보자. 근데 es는 기본적으로 존재하는 index의 primary 수를 바꿀 수 없다. 바꾸는 방법이 있긴 하다. 궁금하면 이곳을 참고하자. 지금은 그냥 새롭게 index를 만들어 보자.
- 생성
- 데이터 insert
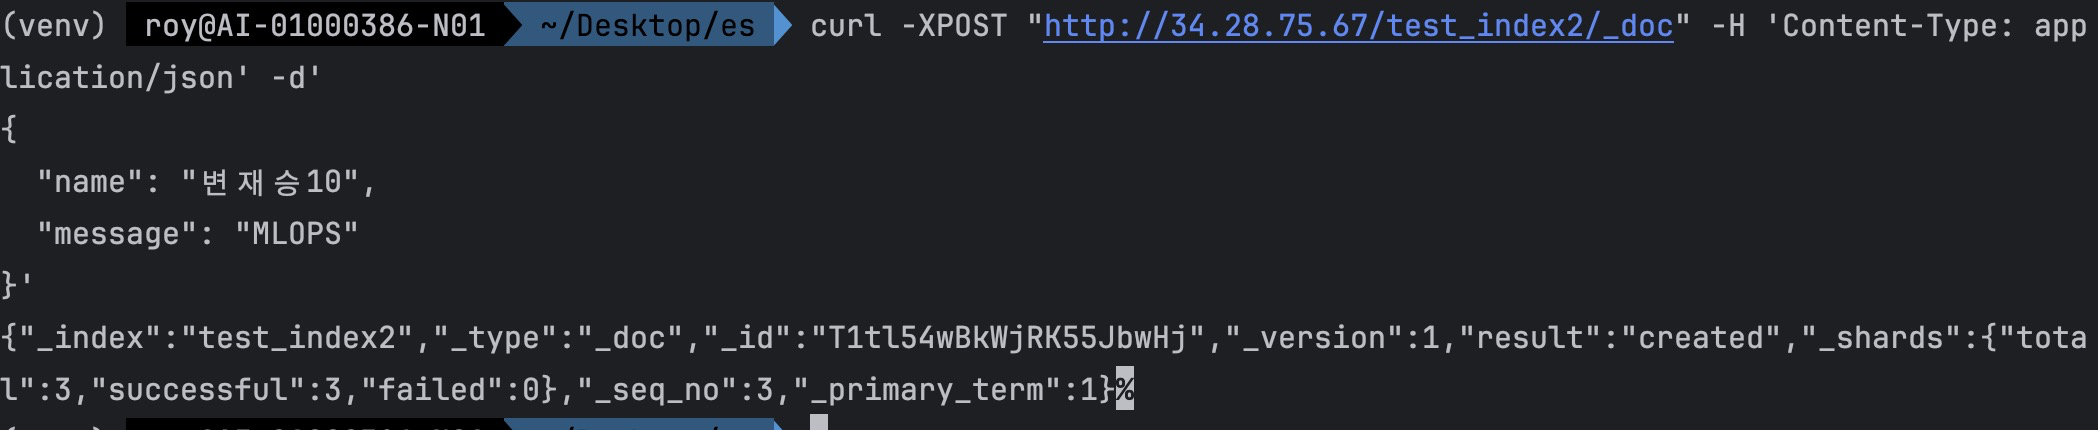
response가 달라졌다. shard 수가 3으로 나온다. 3의 의미는 primary shard + replica 2개를 의미한다.
curl -X GET "http://34.28.75.67/_cat/shards"

Reponse Info
index shard prirep state docs storage ip node

index: 인덱스의 이름
shard: 샤드의 번호
prirep: primary 또는 replica 샤드인지를 나타냄 (p: primary, r: replica)
state: 샤드의 상태 (STARTED, UNASSIGNED 등)
docs: 샤드에 속한 문서의 수
storage: 샤드가 차지하는 디스크 공간 크기
ip: 샤드가 위치한 노드의 IP 주소
node: 샤드가 위치한 노드의 이름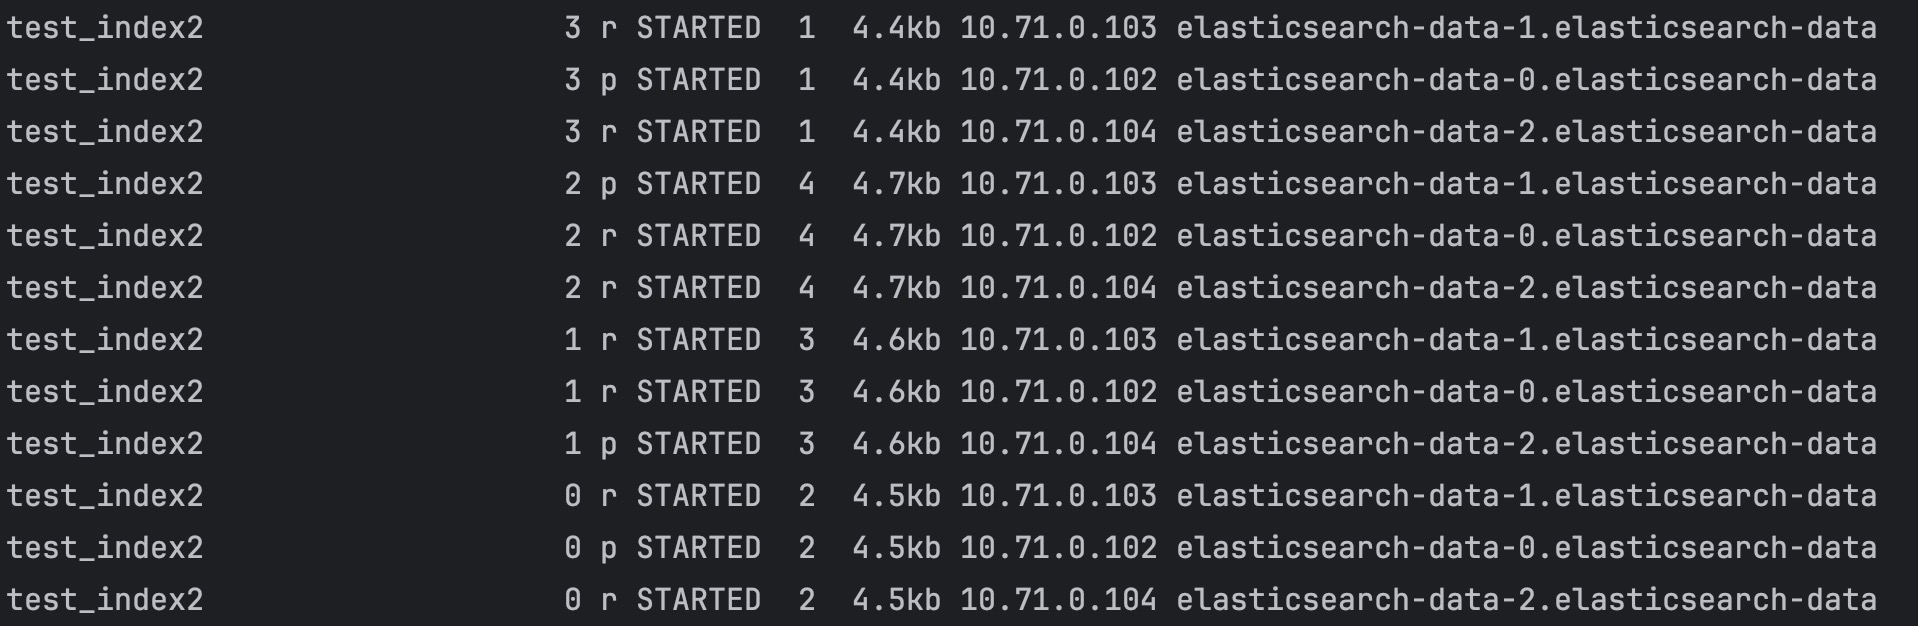
총 10개를 넣었는데 분산되고 replica도 잘 작동하는 듯 하다.
NRT(Near Realtime)
사실 insert 후에 shard 상태를 보는 작업을 할 때, insert 했음에도 shard 상태에 변화가 없는 경우를 확인할 수 있다. es는 batch 형태로 refresh 되기 때문이다. 그런 경우에 refresh api를 사용하면 된다.
curl -X GET "http://34.28.75.67/test_index/_refresh"