
Jenkins CI/CD 구축(1)에서 젠킨스 설치까지 마쳤습니다.
이제 nginx를 통해 프록시 등록을 해보고 젠킨스에 접속하는 것까지 해보겠습니다.
amazon-linux-extras에서 nginx를 지원하는지 확인합니다.
amazon-linux-extras list | grep nginx$ amazon-linux-extras list | grep nginx
38 nginx1=latest enabled [ =stable ]
- nginx가 아닌 nginx1이므로 nginx1로 설치합니다.
sudo yum clean metadata && sudo amazon-linux-extras install nginx1- nginx 설치가 끝나면 nginx.conf 파일에서 프록시 설정을 합니다.
sudo vim /etc/nginx/nginx.confserver {
listen 80;
listen [::]:80;
server_name _;
root /usr/share/nginx/html;
# Load configuration files for the default server block.
include /etc/nginx/default.d/*.conf;
// 추가
location / {
proxy_pass http://localhost:8080;
proxy_set_header X-Real-IP $remote_addr;
proxy_set_header X-Forwarded-For $proxy_add_x_forwarded_for;
proxy_set_header Host $http_host;
}
error_page 404 /404.html;
location = /40x.html {
}
error_page 500 502 503 504 /50x.html;
location = /50x.html {
}
}- 이제 nginx를 실행합니다.
sudo systemctl start nginx- nginx가 정상적으로 실행됐는지 확인합니다.
sudo systemctl status nginx$ sudo systemctl status nginx
● nginx.service - The nginx HTTP and reverse proxy server
Loaded: loaded (/usr/lib/systemd/system/nginx.service; disabled; vendor preset: disabled)
Active: active (running) since Tue 2023-05-16 16:41:21 KST; 1 weeks 3 days ago
Process: 27947 ExecStart=/usr/sbin/nginx (code=exited, status=0/SUCCESS)
Process: 27943 ExecStartPre=/usr/sbin/nginx -t (code=exited, status=0/SUCCESS)
Process: 27942 ExecStartPre=/usr/bin/rm -f /run/nginx.pid (code=exited, status=0/SUCCESS)
Main PID: 27954 (nginx)
CGroup: /system.slice/nginx.service
├─27954 nginx: master process /usr/sbin/nginx
└─27955 nginx: worker process
Active : active (running) 상태면 정상적으로 실행이 된 것을 의미합니다.
-
인스턴스의 인바운드 규칙에 80포트를 추가합니다.

-
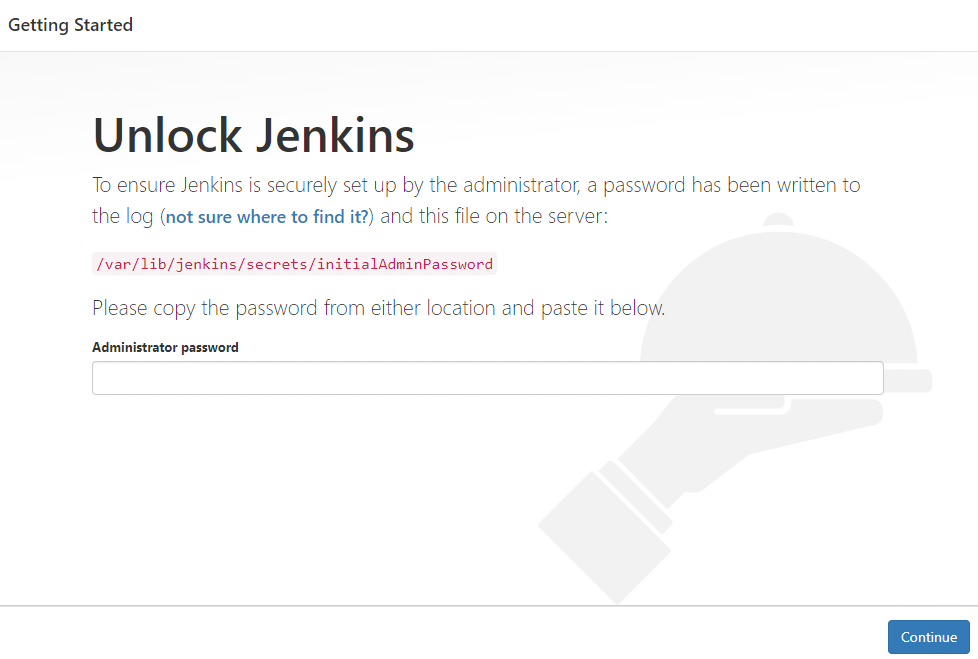
인스턴스의 퍼블릭 IP로 접속해보시면 아래처럼 젠킨스로 접속할 수 있습니다.
-
이제 비밀번호를 입력해야 하는데, cat 명령어를 통해 비밀번호를 확인한 후, 비밀번호를 복사하여 입력합니다.
sudo cat /var/lib/jenkins/secrets/initialAdminPassword-
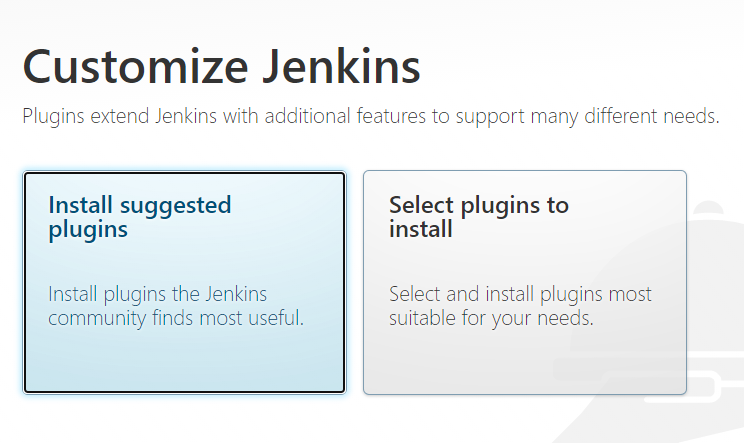
비밀번호를 입력하면, 아래와 같은 화면으로 이동하게 될 것입니다. 여기서 [Install Suggested Plugins]를 선택하여, 플러그인을 설치합니다.
-
설치가 완료되면 젠킨스를 접속할 때 사용할 계정을 생성합니다. 그 후, url 설정이 나올 것인데, 넘어가시고 start 하시면 됩니다.
아마 젠킨스 홈 화면으로 이동한 것을 확인할 수 있을 것입니다.
이상으로 nginx를 통해 프록시 등록을 해보고 젠킨스에 접속하는 것까지 해봤습니다.

꾸준함으로 성장하는 개발자 지망생