
충돌 회피를 위한 모션 플래너는 매우 사용하기 쉽게 되어 있습니다.
작은 파라미터 부터 시작하기 Start with small parameters
객체가 새로 로드 될때마다 경로가 다시 설정되어야 합니다. 작은 파라미터 값부터 시작하면 최적의 경로를 찾는데 시간 낭비를 줄일 수 있습다.
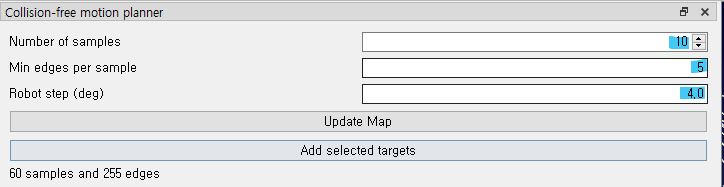
처음 경로 생성시에 추천 파라미터 값은 다음과 같습니다.
Number of samples: 10
Edges per sample: 5
Robot step (deg): 4.0
Collision Avoidance - Image 29
Finally, before generating the robot program, it may be a good idea to generate an even larger roadmap (e.g. with parameters of 500, 50, 2.0). This will take a long time to generate but will produce the most efficient motions.
조인드 리밋을 이용하기
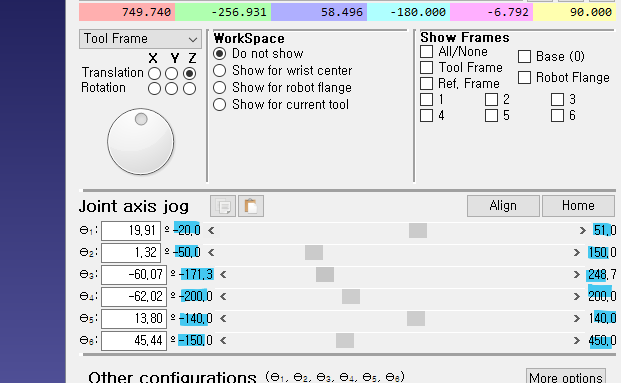
6축 관절의 최소, 최댓값을 미리 정해줌으로써 랜덤으로 설정 되는 좌표의 수를 획기적으로 줄임여서, 더 효율적으로 로드맵을 구성할 수 있다.
Robot Motion Planning (
Use Joint Limits
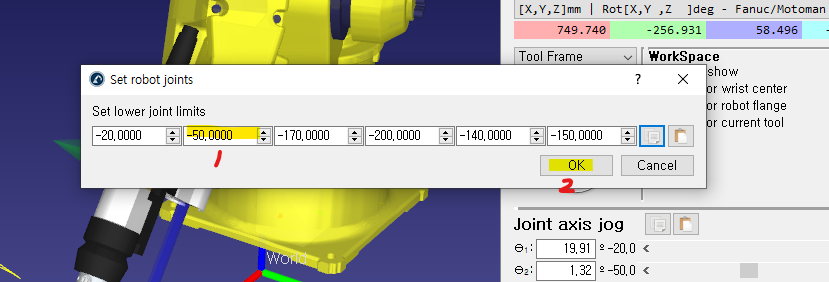
Setting the robot joint limits (as described in the previous section Constrain Joint Limits) has a dual benefit. Firstly, it can make the construction phase quicker in some cases. Secondly, it ensures that the roadmap actually contains locations which will be useful for the robot program. It is easy to forget about this vital step.
Properly define the collision map
Collision detection is triggered when 2 objects collide. You can specify the correlation between each moving object in the Collision Map settings. Reducing the number of interactions (green check marks) will speed up collision checking.
Faster collision checking
The time it takes to calculate collision-free paths depends on many factors as described in the collision detection section. Among other things, you can increase the robot step for collision checking, constrain the joint limits or simplify the 3D geometry to speed up collision checking.
Offset your 3D models
The term "collision-avoidance" suggests that the motion planner will always avoid collisions in all situations. This is certainly true in the simulation environment. However, in the real world, the robot can still collide with objects if it comes too close to them. This usually occurs because of slight differences between the simulated robot and the physical robot.
A common instance of such collisions is when the robot "clips" the edge of an object when moving away from a task. This can usually be avoided by including an "offset" in the program. See this blog article for more information about using offsets effectively.
Operate in the Robot's Most Dexterous Zone
Not all areas of the robot's workspace are equal. The robot will have more "reachability" in some areas of its workspace than others. In areas with high reachability, the robot will be able to access points from many orientations. In areas with low reachability, the robot will only be able to access points from one or two orientations.
Sometimes, the motion planner will fail to find a path between two targets in the workspace. Often, this problem can be solved by simply increasing the number of samples in the roadmap, but not always.
If the motion planner continually fails to connect targets, ensure that the task is located within the area of the robot's workspace with most reachability. View the robot's workspace by opening the robot panel (right click on the robot in the station tree and choose Options) and selecting Show for current tool in the WorkSpace section.
Collision Detection
Collision Free Planner - PRM with RoboDK
