🌀 앱의 생명주기 Lifecycle 🌀
- 아이폰 설정 > 배터리를 보면, 실제로 앱을 몇시간 썼고, 백그라운드에서 어떻게 동작되었는지 나옴
About Background..
멜론 음악 재생, 유투브 작은 화면, …
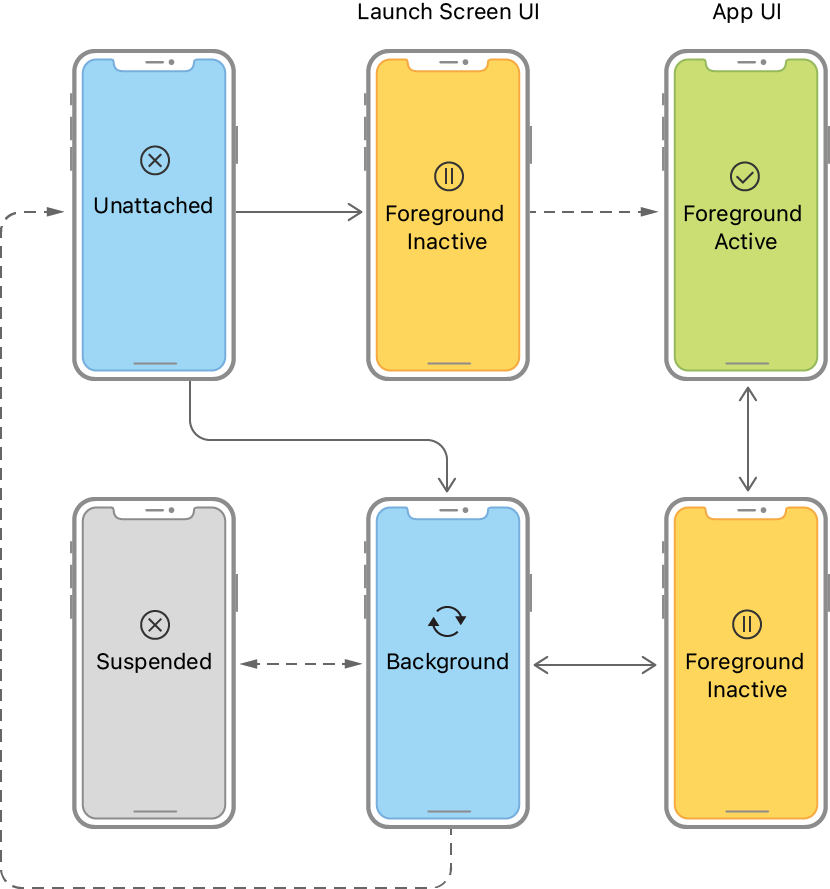
앱의 상태 관리
🥏 1. Not Running
- 앱 시작하기 전 상태
Foreground로 들어왔다고 함
- 앱에 진입
- Active, Inactive
🥏 2. Active
- 앱이 화면에서 실행중인 상태
- 항상 1개임.
🥏 3. Inactive
- 앱이 화면에서 실행중이나 어떤 신호도 받지 않는 상태
🥏 4. Background
- 앱이 화면에 보이지 않지만, 코드를 실행하고 있는 상태
🥏 5. Suspend
- 앱이 곧 종료될 상태
백그라운드에 있는 앱을 다시 키면, 다시 LaunchScreen 부터 뜰 때가 있고,
내가 이전에 쓰던 화면부터 켜질 때가 있음
→ 필요한 시점에(메모리가 많이 필요하면 알아서 백그라운드 정리(Suspend→Not Running으로)) 알아서 할 때가 있음
⇒ 종류를 알면 된다!
⇒ 이걸 관리하는게 AppDelegate
iOS 12이전 버전 앱은 SceneDelegate가 없을 수 있음. 그 이후에 나온거라.
AppDelegate만 존재함
왜 나왔나?
- iOS13에 처음으로 iPadOS가 등장했음. 아이패드는 있었는데 iOS가 들어갔거든. 한 4년전만해도 아이폰, 아이패드 유사하게 동작함.
- 아이패드에 적합한 기능을 위해(아이패드 splitview - 앱 2개를 동시에 띄울 수 있음)
- active인 상태가 너무 많아지잖아. 그래서 SceneDelegate가 생겨따. 같은 앱을 여러개 실행할 수도 있게 되었음
iOS 12 and earlier
- App Delegate에서 Process, UI의 생명주기 모두 관리했음
iOS 13
- App Delegate: Process Lifecycle
- Scene Delegate: UI Lifecycle
더이상 App Delegate에서 UI의 생명주기를 관리하지 않게 됨.
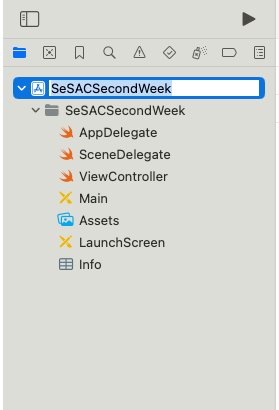
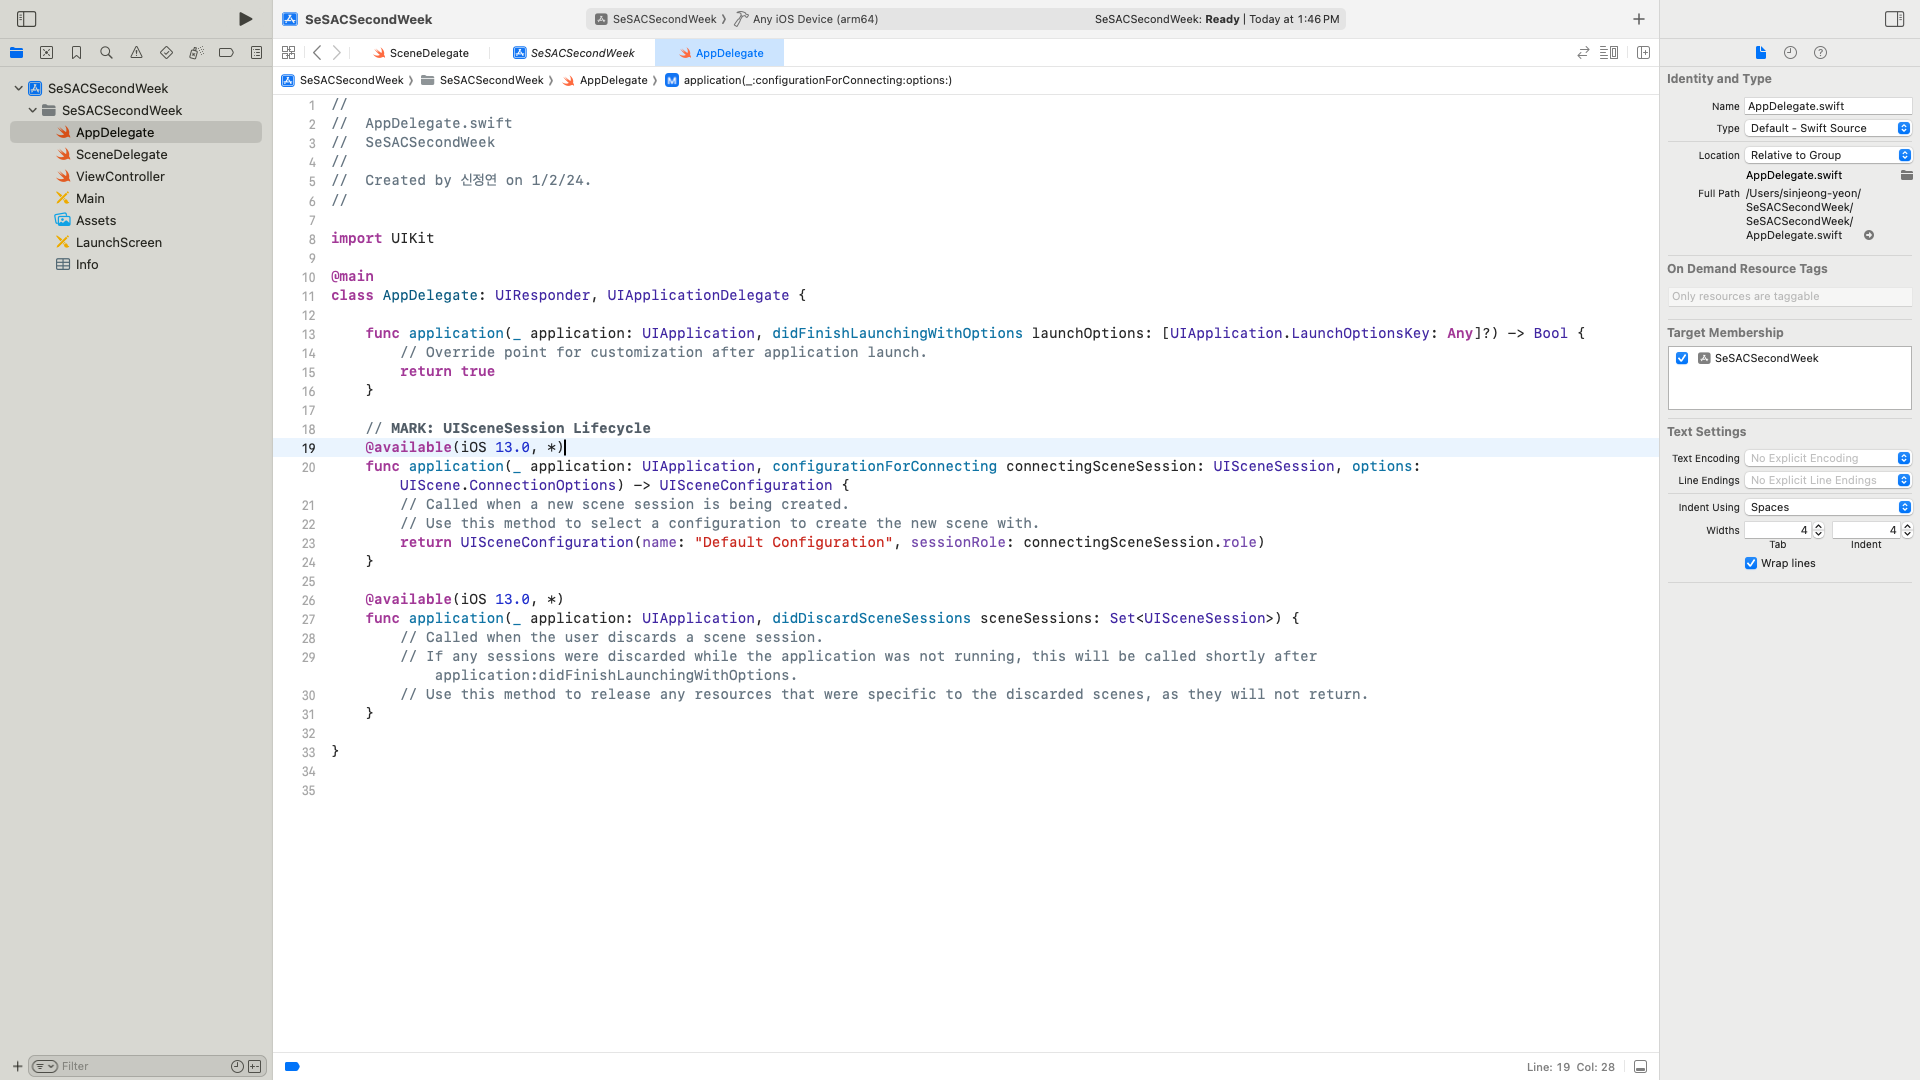
AppDelegate
//
//  AppDelegate.swift
//  SeSACSecondWeek
//
//  Created by 신정연 on 1/2/24.
//

import UIKit

@main
class AppDelegate: UIResponder, UIApplicationDelegate {

-> 첫번째 function은 런치스크린때 작동
    - sleep 같은거

    func application(_ application: UIApplication, didFinishLaunchingWithOptions launchOptions: [UIApplication.LaunchOptionsKey: Any]?) -> Bool {
        // Override point for customization after application launch.
        return true
    }

    // MARK: UISceneSession Lifecycle

-> 두번째는 SceneDelegate랑 연결

    func application(_ application: UIApplication, configurationForConnecting connectingSceneSession: UISceneSession, options: UIScene.ConnectionOptions) -> UISceneConfiguration {
        // Called when a new scene session is being created.
        // Use this method to select a configuration to create the new scene with.
        return UISceneConfiguration(name: "Default Configuration", sessionRole: connectingSceneSession.role)
    }

-> 세번째는 discard 끝내는거
    func application(_ application: UIApplication, didDiscardSceneSessions sceneSessions: Set<UISceneSession>) {
        // Called when the user discards a scene session.
        // If any sessions were discarded while the application was not running, this will be called shortly after application:didFinishLaunchingWithOptions.
        // Use this method to release any resources that were specific to the discarded scenes, as they will not return.
    }

}
아래와 같은 함수가 예전에 있던거임. SceneDelegate없이 UI 생명주기 통제하깅

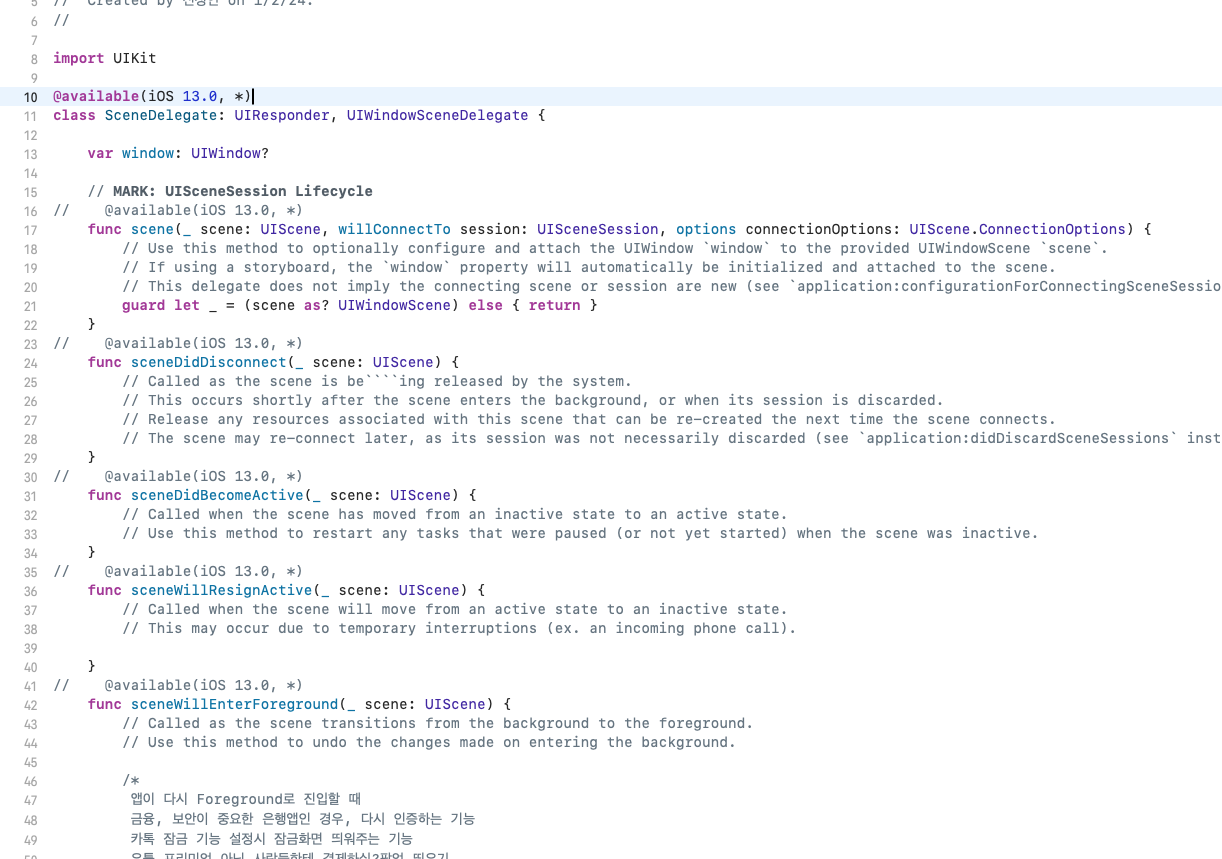
SceneDelegate
//
//  SceneDelegate.swift
//  SeSACSecondWeek
//
//  Created by 신정연 on 1/2/24.
//

import UIKit

class SceneDelegate: UIResponder, UIWindowSceneDelegate {

    var window: UIWindow?

    func scene(_ scene: UIScene, willConnectTo session: UISceneSession, options connectionOptions: UIScene.ConnectionOptions) {
        // Use this method to optionally configure and attach the UIWindow `window` to the provided UIWindowScene `scene`.
        // If using a storyboard, the `window` property will automatically be initialized and attached to the scene.
        // This delegate does not imply the connecting scene or session are new (see `application:configurationForConnectingSceneSession` instead).
        guard let _ = (scene as? UIWindowScene) else { return }
    }

    func sceneDidDisconnect(_ scene: UIScene) {
        // Called as the scene is be````ing released by the system.
        // This occurs shortly after the scene enters the background, or when its session is discarded.
        // Release any resources associated with this scene that can be re-created the next time the scene connects.
        // The scene may re-connect later, as its session was not necessarily discarded (see `application:didDiscardSceneSessions` instead).
    }

    func sceneDidBecomeActive(_ scene: UIScene) {
        // Called when the scene has moved from an inactive state to an active state.
        // Use this method to restart any tasks that were paused (or not yet started) when the scene was inactive.
    }

    func sceneWillResignActive(_ scene: UIScene) {
        // Called when the scene will move from an active state to an inactive state.
        // This may occur due to temporary interruptions (ex. an incoming phone call).

    }

    func sceneWillEnterForeground(_ scene: UIScene) {
        // Called as the scene transitions from the background to the foreground.
        // Use this method to undo the changes made on entering the background.

        /*
         앱이 다시 Foreground로 진입할 때
         금융, 보안이 중요한 은행앱인 경우, 다시 인증하는 기능
         카톡 잠금 기능 설정시 잠금화면 띄워주는 기능
         유튭 프리미엄 아닌 사람들한테 결제하실?팝업 띄우기
         */
    }

    func sceneDidEnterBackground(_ scene: UIScene) {
        // Called as the scene transitions from the foreground to the background.
        // Use this method to save data, release shared resources, and store enough scene-specific state information
        // to restore the scene back to its current state.

        /*
         Foreground -> background로 진입할 때
         유투브 프리미엄 결제 여부에 따라
         결제한 사람은 계속 재생, 안한 사람은 재생 막아
         */
    }

}
iOS 버전 12로 낮추면 생기는 일..
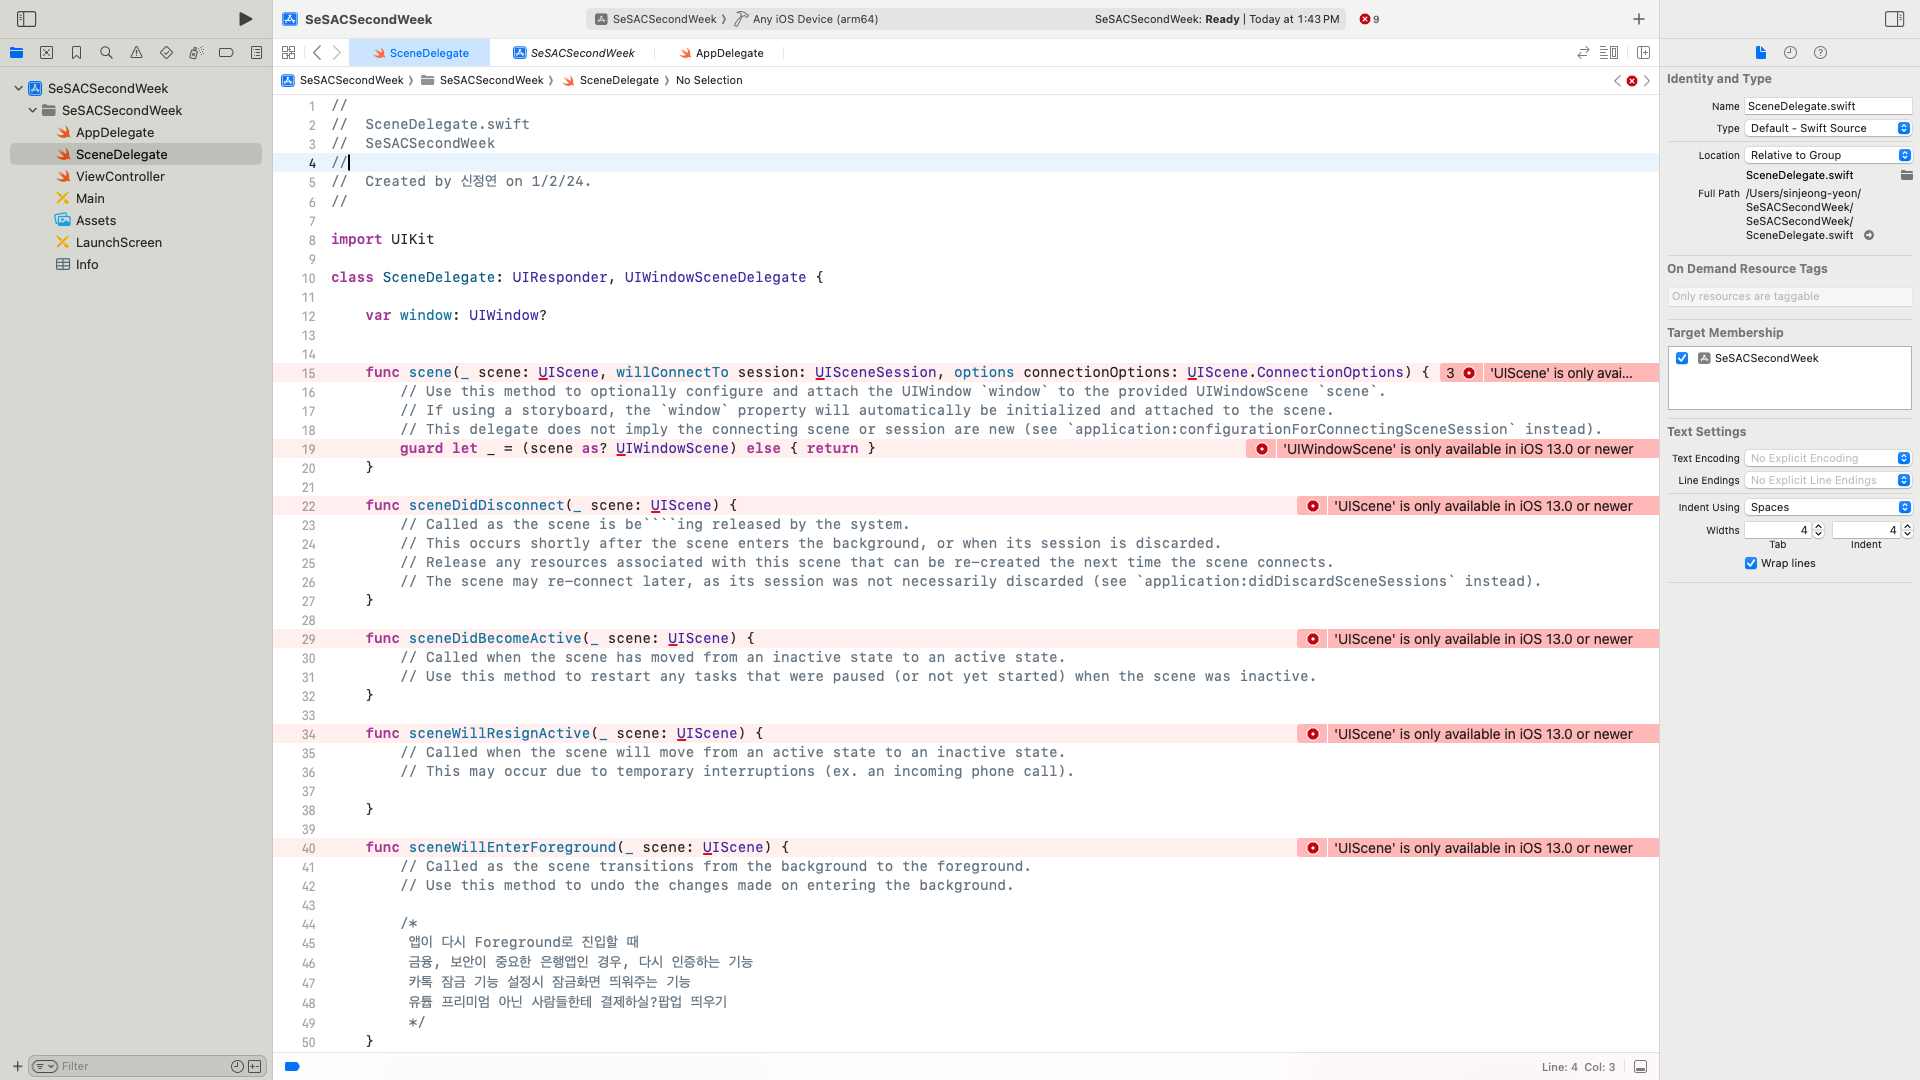
어떻게 대응하냐면, 아래 에러 내용처럼 available 써라~
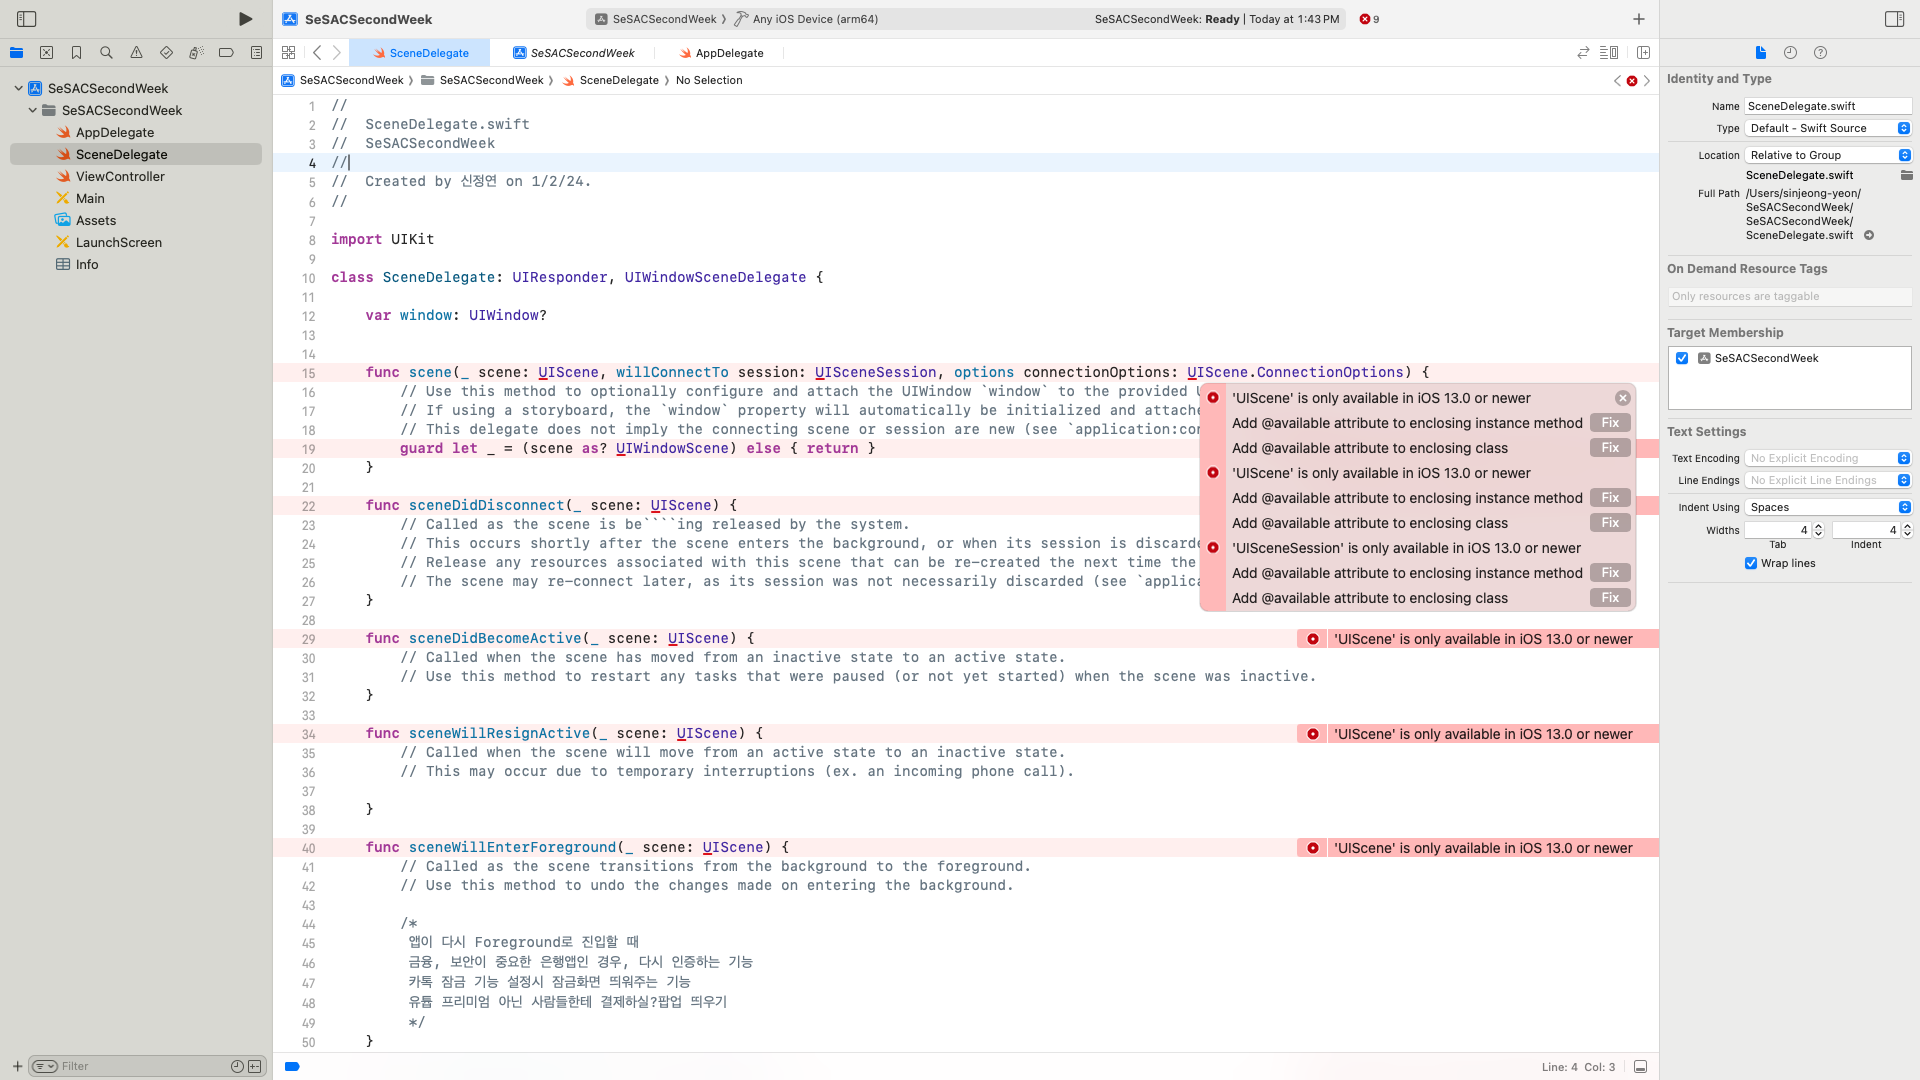
요렇게 하면 13버전 이상일때만 이 함수 써라~가 됨

요렇게 하면 한번에 되지~
🔑 @available
<심화 학습 키워드>
@available: 버전 몇 이상!
-
@unavailable
-
#available
🔑 UIWindow
// SceneDelegate.swift
var window: UIWindow?
viewController -> 아이폰 화면에 들어가서 entry point있는게 뜨잖아
근데 이 사이에 Window가 있어. 사실상 아이폰 화면에는 Window가 띄워지고, viewController는 Window로 들어가는거임
그래서 SceneDelegate에 UIWindow가 있는 이유임
스토리보드에서 내부적으로 코드를 짜서, Window에 띄우는 것임.
실질적으로 화면에 띄우는건 UIWindow!
👿 문제가 있을 수 있음
iOS13이상일 때에만 SceneDelegate 작동하게 하면
iOS12이하에는 UIWindow가 없는거임. 까만화면뜸.
AppDelegate에서 이 기능 구현해줘야됨.🚨
가끔 채용과제에 나옴.
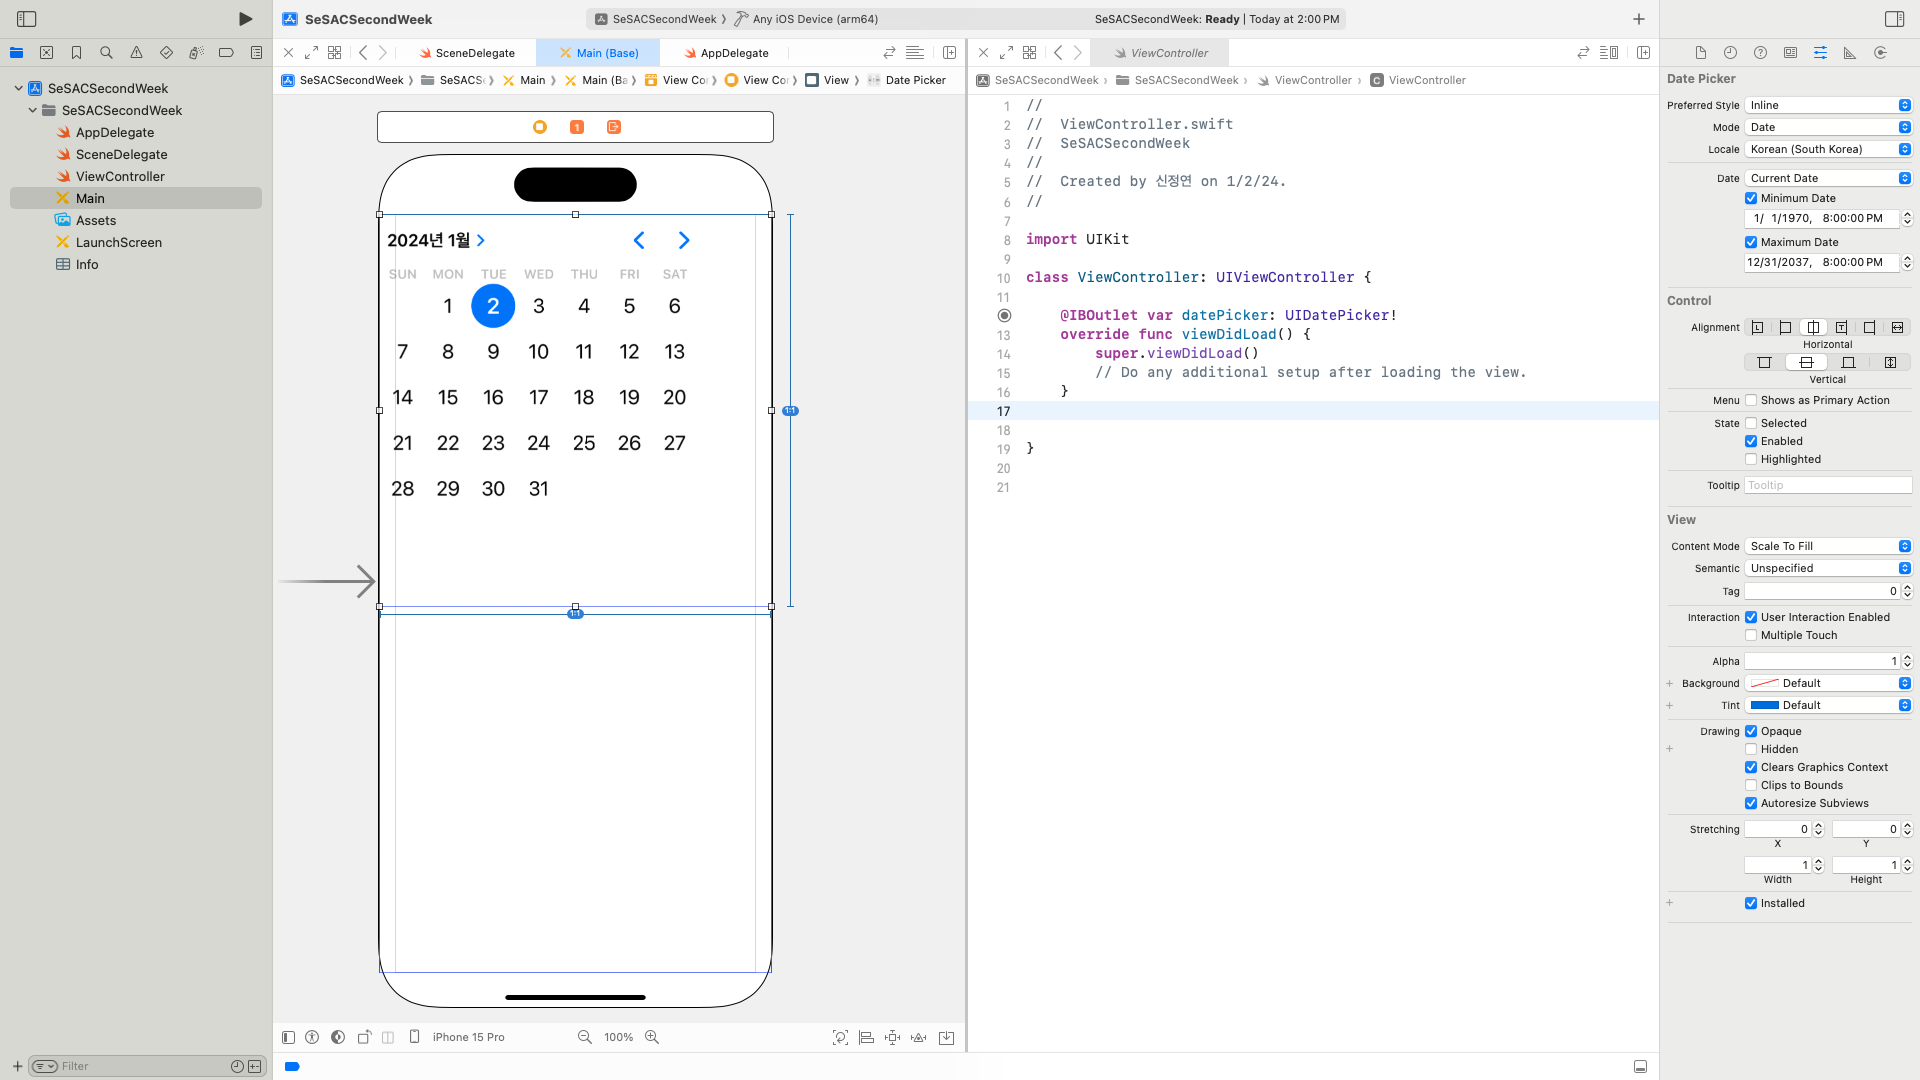
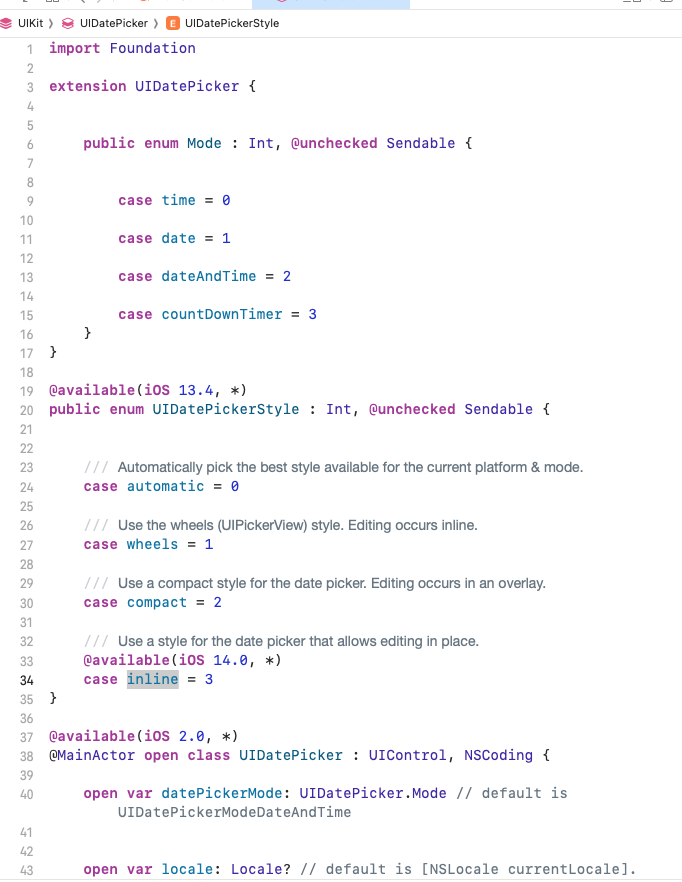
DatePicker
Fun Fact: DatePicker는 버전마다 다르다
- DatePicker의 역사,,
- 찍히는 날짜는 영국 표준시
2024-01-17 05:27:00 +0000
9시간 차이남. 한국 기준으로 바꿔보자
DateFormatter
yyyy MM dd hh mm ss
연도 월 일 시 분 초
// 영국 표준시 기준으로 출력
    // 1. 올바른 시간으로 조정
    // 2. 보기 편한 형태(format)로 변경
    // Dateformatter
    @IBAction func datePickerValueChanged(_ sender: UIDatePicker) {

        let format = DateFormatter()
        format.dateFormat = "yyyy년 MM월 dd일"//2024년 01월 18일
        format.dateFormat = "yyyy년 M월 d일"//2024년 1월 18일

        let result = format.string(from: datePicker.date)

        print(datePicker.date)
        print(result)
    }
format.dateFormat = "yyyy년 MM월 dd일 EEEE"//2024년 01월 18일 Thursday
format.dateFormat = "yyyy년 M월 d일 E hh:mm:ss"//2024년 1월 3일 Wed 02:41:00
💡 FunFact: YYYY년으로 쓰면 12/31이 내년으로 바뀜 → YYYY: 해외에서 쓰는 주 번호
- yyyy: 실제 연도
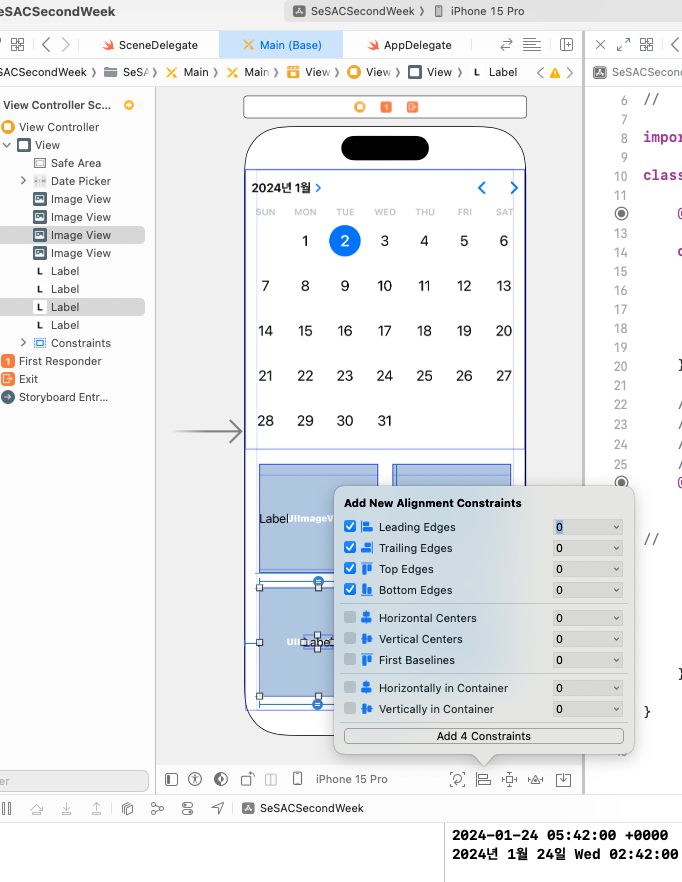
AutoLayout
-
Equal Width, Height: 컴포넌트 여러개 잡아야돼
-
두 컴포넌트 딱 겹치게 하고 싶으면
tag
- Int
- view에 달 수 있는 id값임
실습
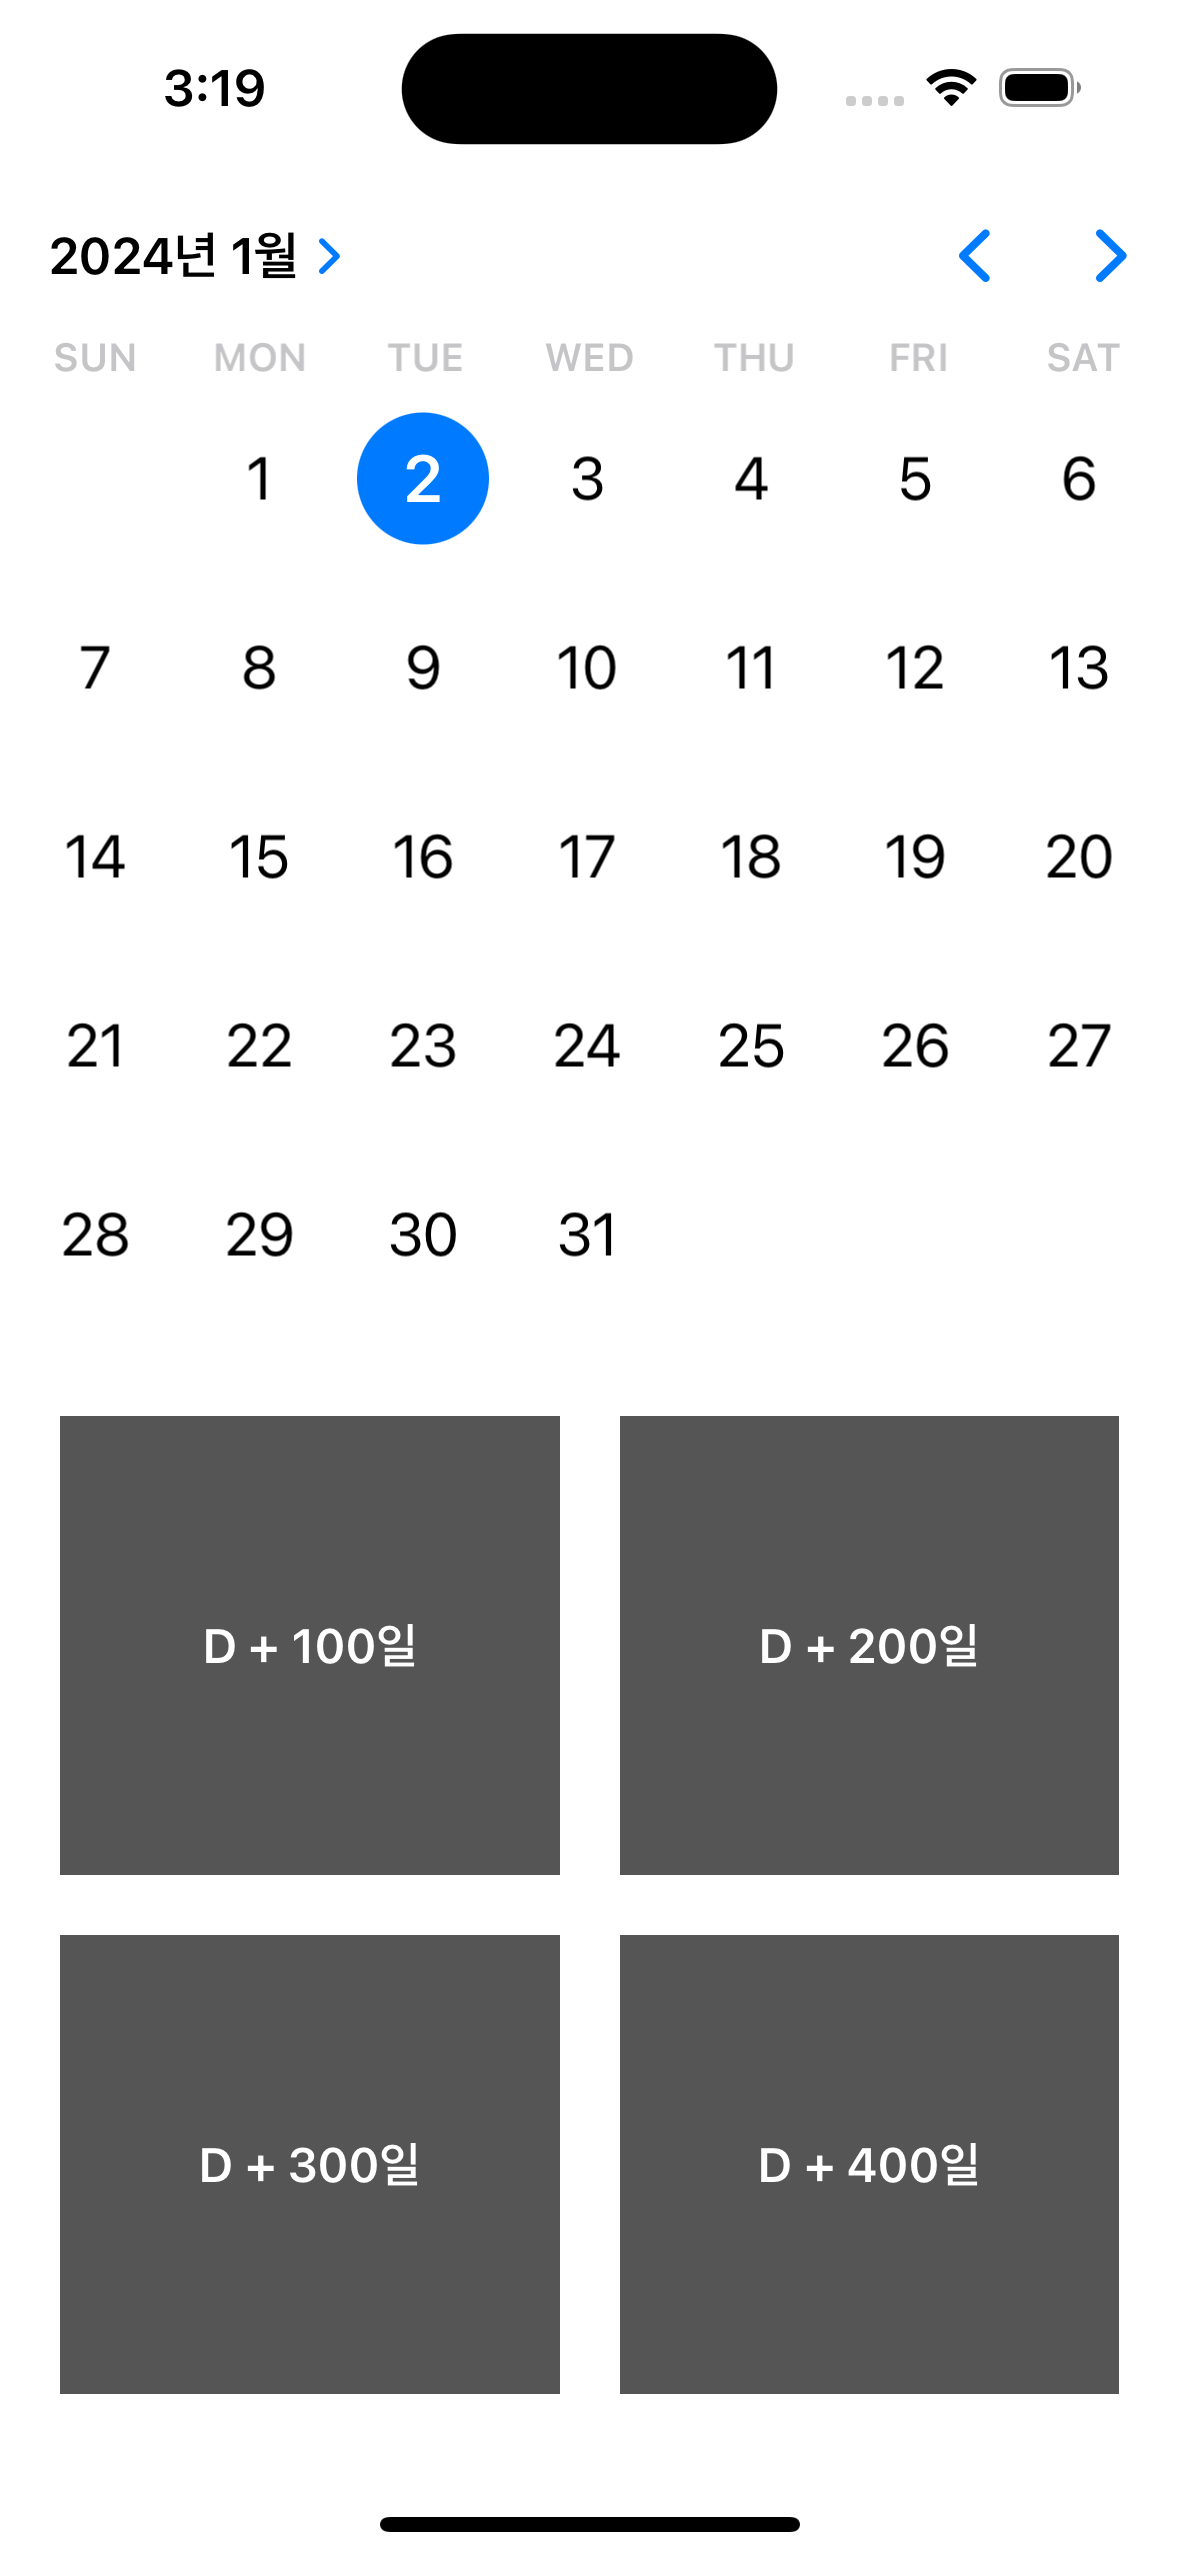
위 이미지에 각 일을 넣는 방법으로는
//  ============ 1. 하드코딩 =============
//        day100Label.text = "+100일"
//        day200Label.text = "+200일"
//        day300Label.text = "+300일"
//        day400Label.text = "+400일"

// ============= 2. 함수 =================
//        designDateLabel(day100Label, date: "100")
//        designDateLabel(day200Label, date: "200")
//        designDateLabel(day300Label, date: "300")
//        designDateLabel(day400Label, date: "400")

func designDateLabel(_ label: UILabel, date: String) {

        label.text = "D + \(date)일"
        label.textAlignment = .center
        label.textColor = .white
        label.font = .boldSystemFont(ofSize: 16)
        label.backgroundColor = .darkGray
    }

// ============== 3. 딕셔너리 ===============
        let dateDictionary : [Int : UILabel] = [100: day100Label,
                                              200: day200Label,
                                              300: day300Label,
                                              400: day400Label]

//        for item in dateDictionary {
//            designDateLabel(item.value, date: "\(item.key)")
//        }
//        for (key, value) in dateDictionary {
//            designDateLabel(value, date: "\(key)")
//        }

func designDateLabel(_ label: UILabel, date: String) {

        label.text = "D + \(date)일"
        label.textAlignment = .center
        label.textColor = .white
        label.font = .boldSystemFont(ofSize: 16)
        label.backgroundColor = .darkGray
    }

// ============= 4. 매개변수 여러개 넣는 함수 ============
dayLabel(day100Label, day200Label, day300Label, day400Label)

func dayLabel(_ labels: UILabel...) {
        for label in labels {
            label.text = "D + \(label.tag)일"
            label.textAlignment = .center
            label.textColor = .white
            label.font = .boldSystemFont(ofSize: 16)
            label.backgroundColor = .darkGray
        }
    }
🚨 딕셔너리는 순서 보장 안됨
return
// 스토리보드에서 IBAction 연결 안했어도 코드로 하깅
    func setNavigationItem() {

        navigationItem.title = setRandomTitle()

        navigationItem.rightBarButtonItem = UIBarButtonItem(
            title: "추가",
            style: .plain,
            target: self,
            action: #selector(rightBarButtonTapped)
            // object-c의 잔재임
        )
    }

    @objc func rightBarButtonTapped() {
        print("Tap!")
    }

    func setRandomTitle() -> String {
        let titleList = ["빵빵이의 기념일", "고래밥의 기념일", "햅피뉴이어", "메리크리스마스", "매리크리스마스 🎄"]
        let randomTitle = titleList.randomElement()
        return randomTitle ?? "no title"
    }
() -> Void: 반환값이 없는 함수

