Vuex
Vue의 상태관리 라이브러리. flux패턴과 리덕스에서 영감을 받았다고 한다.
키워드만 잘 숙지해보자
- state: 원본소스 역할(data)
- getters:
stor의state에 접근할때 사용함. 첫번째 전달인자로 상태를 받는다. (저장소 상태 기반하는 상태를 계산할때 메서드를 리턴해줄 수도있다) - mutations: 상태 변경하는 메서드. 인자를 받아서 계산해줄수도 있다.(이는 무조건 동기적이어야함. 리덕스의 리듀서와 일치하는 개념이다)
- commit: mutations를 사용하려면 무조건 commit으로 사용해야함.
- actions: 비동기처리를 할때 사용하는 메서드. mutations는 동기적, actions는 비동기처리라고 보면됨
- dispatch: action을 보낼때 사용하는...
잔말말고 예제로 보자
모듈 방식
Redux에서 산개해있는 리듀서들을 하나의 리듀서로 모으는 작업과 반대과정이지만, 어쨋든 여러 스토어를 결국 모듈화시켜 연결하여 사용하는 기법이다.
//count.js
export default {
	namespaced: true, //모듈로 사용할 것인지,
  	state(){
    	return{
        	count:1
        }
    },
  	getters:{
      	reversedCount(state){
    	return parseInt(state.toString().split("").reverse().join(""));
    }
    },
  	mutations:{
    	increaseCount(state) {
        	state.count += 1;
        },
      	decreaseCount(state) {
        	state.count -= 1;
        },
        updateCount(state, newCount){
    	state.count = newCount;
    	}
    },
  	actions:{
        //원래 context.commit에서 가져오지만, 구조분해할당 사용
  	async fetchCount({ commit }) {
    	const newCount = await fetch("...");
      	.then(res => res.json());
      	//mutations의 동작을 일으키기 위한 commit
      	commit('updateCount', newCount);
    	}
    }
}

//index.js
//여기서 사용할 모듈들을 합쳐준다
import { createStore } from 'vuex'

export default createStore ({
  state(){
	return{
    	msg:"hi~"
    }
  },
  getters:{
  },
  mutations:{
  },
  actions:{

  },
  modules:{
  	count
  }
})

//App.vue
<span>{{ storeCount }}</span>
<button @click="increaseCount">
  +
</button>
<button @click="decreaseCount">
  -
</button>

export default{
	...
  	computed:{
      	storeCount(){
          //state.네임스페이스.상태. 정확히 combine reducer에서 상태를 가져올때와 똑같음
          //count.js의 count상태
        	return this.$store.state.count.count
        },
      	//getter에서 선언한 메서드는 값이 새로 계산되어야함
        reversedCount() {
        	return this.$store.getters['count/reversedCount']
        }
    },
  	methods:{
    	increaseCount(){
        // "모듈이름/메소드"는 예약어다
         	return this.$store.commit('count/increaseCount')
        },
      	decreaseCount(){
        	return this.$store.commit('count/decreaseCount')
        },
      	fetchCount(){
        	this.$store.dispatch('count/fetchCount')
        }
    }
}
중요뽀인트는 이 두개다.
actions는 비동기처리,mutations는 동기적 처리.getter는 중복된 메서드를 store에서 처리후 읽기위한 것. 즉, 상태 자체를 변경시키지는 않음.
그에 비해mutations는 상태자체를 변경하는데 초점.
매핑기능
스토어에 이미 작성된걸 컴포넌트에서 또다시 작성하기가 너무 귀찮다..이걸 해결해주는 기능이 vuex에 내장된 mapState, mapGetters...이다.
import { mapState, mapGetters, mapMutations, mapACtions } from 'vuex'

export default{
	...
  	computed:{
      //모듈 이름, 상태 이렇게 적어주면 된다.
      ...mapState('count', ['count']),
      ...mapState(['msg']) //모듈없이 전역상태(index.js) 가져오기
    },
  	methods:{
	  ...mapMutations('count', [
        'increaseCount',
        'decreaseCount'
        ]),
      ...mapActions('count',['fetchCount'])
    }
}
와우 간단해졌구먼!
Vue Router
공식적으로 지원하는 기능이다.
//routes/index.js
import { createRouter, createWebHashHistory } from "vue-router";
import Home from "./Home";
import About from "./About";
import NotFound from "./NotFound";
import DocsId from "./DocsId";
import Docs from "./Docs";

export default createRouter({
  history: createWebHashHistory(),
  routes: [
    {
      path: "/",
      component: Home,
    },
    {
      path: "/about",
      component: About,
    },
    {
      //정규식도 사용 가능하다. 나머지 모든경로.
      path: "/:notFound(.*)",
      component: NotFound,
    },
    {
      path: "/documents",
      component: Docs,
      children: [{ path: ":id", component: DocsId }],
    },
  ],
});

//main.js
import * as Vue from "vue";
import App from "~/App";
import router from "~/routes"; //index.js 생략

const { createApp } = Vue;
const app = createApp(App);
app.use(router);
app.mount("#app");
//App.vue
<template>
<!-- 페이지 이동은 @click="$router.push('')" 로도 가능하다!-->
<RouterLink to="/">Home</RouterLink>
<RouterLink to="/about"> About</RouterLink>
<RouterView />
</template>
<script>
export default {
data() {
return {};
},
};
</script>
//Docs.vue
<template>
<h1>Docs.vue</h1>
<RouterView />
</template>
//DocsId.vue
<template>
<h1>DocsId</h1>
<h1>{{ $route.params.id }}</h1>
</template>
결과:
잘 된다!
참고로children옵션을 사용할 시,<RouterView />태그를 사용하여 렌더링 하면 부모컴포넌트 하위에 렌더링되고
아예 주소를path: "/documents:id",로 설정한다면
새로운 페이지가 렌더링된다.
라우터객체엔 여러 프로퍼티가있고 유용하게 쓸만한게 많다.
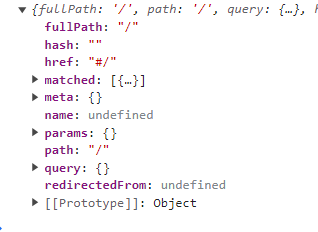
- query :
?로시작하는 쿼리스트링을 가져올 수 있다. - params : 경로 뒤에 붙은 파라미터를 가져올 수 있음
- name : 라우터에
name프로퍼티를 설정해주면 지정한 이름에 라우팅을 해줄수 있다. 또한query, params옵션에 따로 값을 부여해줄수 도 있음.
느낀점
오늘은 강의가 평소보다는 짧아서 듣기 편했다. 내일부터 다시 많아지던데...두려움..😨
전역스토어를 사용하는 방식이 특이해서 재밌었다.
또한 getter와 mutations가 비슷해보여서 헷갈렸는데, 잘 알게됨!

모르는 것을 모른다고 하기