오늘 미니 프로젝트는 쇼핑몰 장바구니 기능을 만드는 것이다.
요구사항<장바구니>
- 메인 화면에서 장바구니 버튼을 누른 후, 장바구니 페이지로 이동하면 상품이 담겨있어야 함.
- 장바구니 페이지에서 장바구니에 담긴 아이템의 개수를 변경할 수 있어야 함.
- 장바구니에서 상품 제거.
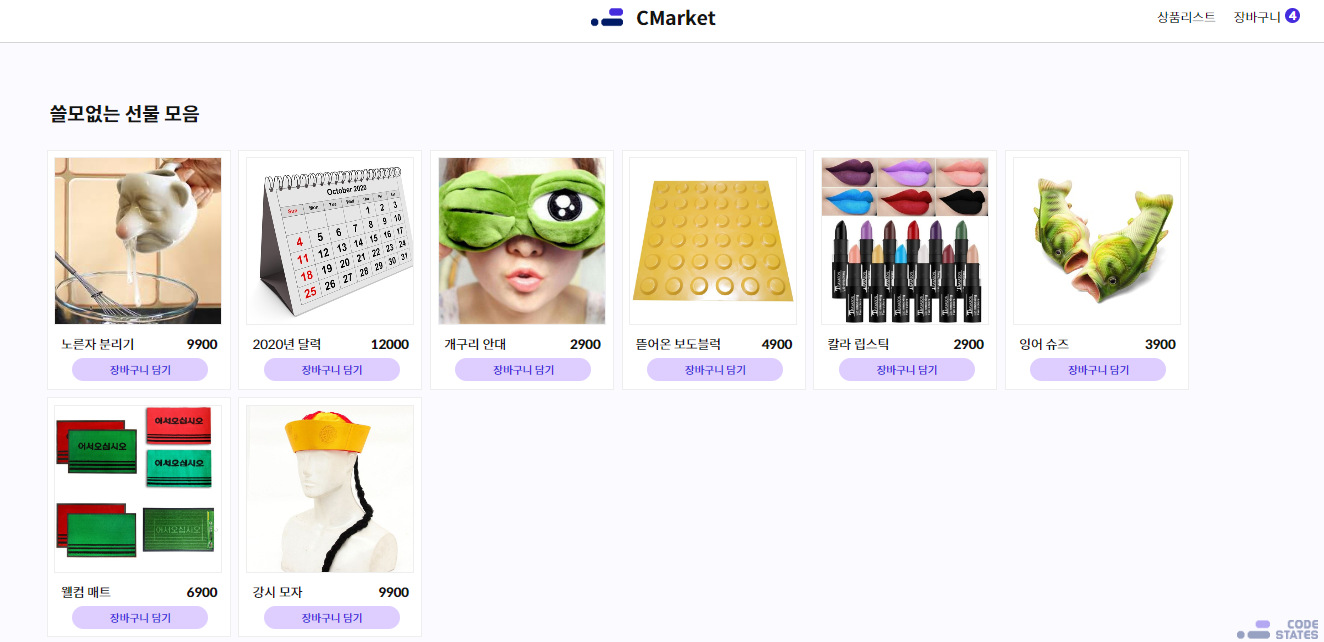
메인 화면의 모습이다.
상품을 각각 컴포넌트화 시켰고, 장바구니 담기 버튼을 누르면 장바구니에 담겨야한다.
1. 장바구니에 상품 넣기.
// itemListContainer.js
import React from "react";
import Item from "../components/Item";

function ItemListContainer({ items, itemInput }) {
  const handleClick = (e, item) => {
    itemInput(item);
  };
  return (
    <div id="item-list-container">
      <div id="item-list-body">
        <div id="item-list-title">쓸모없는 선물 모음</div>
        {items.map((item, idx) => (
          <Item item={item} key={idx} handleClick={handleClick} />
        ))}
      </div>
    </div>
  );
}

export default ItemListContainer;


// item.js
import React from "react";

export default function Item({ item, handleClick }) {
  return (
    <div key={item.id} className="item">
      <img className="item-img" src={item.img} alt={item.name}></img>
      <span className="item-name">{item.name}</span>
      <span className="item-price">{item.price}</span>
      <button className="item-button" onClick={(e) => handleClick(e, item)}>
        장바구니 담기
      </button>
    </div>
  );
}
상품을 보여주는 메인 화면(1)과 컴포넌트화 된 상품(2)다.
장바구니 담기 버튼 클릭 시 onClick 이벤트와 함께 handleClick 함수가 item 을 인자로 받고 실행된다.
itemlistContainer에 있는 handleClick 함수는 props로 받아온 itemInput에 item을 전달해준다.
// app.js
  const [cartItems, setCartItems] = useState([]);

  const itemInput = (item) => {
    const copy = cartItems;
    // 객체의 불변성을 위해 현재 카트에 담긴 상품의 배열을 복사해서 가져옴
    const filterarr = cartItems.filter((it) => {
      return it.id === item.id;
    })[0];
    // props로 받아온 item의 id와 같은 id의 상품을 가져옴
    // 같은게 있을경우 ==> quantity 1 증가
    // 같은게 없을경우 ==> 신규상품
    if (filterarr) {
      //중복이 있을경우, 카운트 증가시킴
      const sameindex = copy.findIndex((it) => it.id === filterarr.id);
      // 해당 상품이 몇 번째 인덱스에 있는지 추출
      copy[sameindex].quantity += 1;
      // 해당 인덱스에 있는 상품의 quantity를 1 증가시킴
      setCartItems(copy);
      // setState
    } else {
      // 중복이 없을 경우
      item.quantity = 1;
      setCartItems([...copy, item]);
    }
  };
이후 cartItems의 길이를 Nav에, cartItem를 ShoppingCart에 넣어준다.
<Nav itemlength={cartItems.length} />
...
<ShoppingCart cartItems={cartItems} setCartItems={setCartItems} items={items}/>
// ShoppingCart.js 에서 return문
return (
<div id="item-list-container">
<div id="item-list-body">
<div id="item-list-title">장바구니</div>
<span id="shopping-cart-select-all">
<input
type="checkbox"
checked={checkedItems.length === cartItems.length ? true : false}
onChange={(e) => handleAllCheck(e.target.checked)}
></input>
<label>전체선택</label>
</span>
<div id="shopping-cart-container">
{!cartItems.length ? ( // 길이가 0 == 아무것도 안 담겨있다.
<div id="item-list-text">장바구니에 아이템이 없습니다.</div>
) : (
<div id="cart-item-list">
{renderItems.map((item, idx) => {
const quantity = cartItems.filter((el) => el.id === item.id)[0]
.quantity;
return (
<CartItem
key={idx}
handleCheckChange={handleCheckChange}
handleQuantityChange={handleQuantityChange}
handleDelete={handleDelete}
item={item}
checkedItems={checkedItems}
quantity={quantity}
/>
);
})}
</div>
)}
<OrderSummary total={total.price} totalQty={total.quantity} />
</div>
</div>
</div>
);
받아온 cartItem의 길이를 통해 조건부 렌더링을 실행한다.
2. 장바구니 페이지에서 장바구니에 담긴 아이템의 개수를 변경할 수 있어야 함.
장바구니 페이지인 ShoppingCart.js에서 구현하면 된다.
현재 데이터 흐름은 root component인 App.js에서 모든 데이터를 받아서 각 하위 컴포넌트에 라우팅과 동시에 데이터를 전달해주는 흐름을 가지고 있다.
카트에 담긴 물품의 상태를 관리해주는 setCartItems를 App.js 에서 ShoppingCart.js로 전달 후 거기서 사용하면 될 것 같다.
우선, 수량 변경 함수를 구현하겠다.
  const handleQuantityChange = (getquantity, id) => {
    // 수량 변경 함수
    // 1.변경하는 제품의 id를 가져온다.
    // 2.배열을 복사해서 수량을 가져온다
    // 3.상태를 업데이트 시겨준다.
    let updatedcart = [...cartItems]; // 카트에 담긴 상품 배열 복사
    const sameIndex = cartItems.findIndex((it) => it.id === id);
    // onChange 이벤트가 발생했을 때 해당 컴포넌트의 id를 가져옴
    const sameItem = cartItems[sameIndex];
    // 해당 id의 인덱스와 같은 인덱스인 복사한 배열의 상품을 추출

    let updated = {
      ...sameItem,
      quantity: sameItem.quantity + getquantity,
    };
    updatedcart[sameIndex] = updated;
    setCartItems(updatedcart);
  };
// 위 상품의 quantity를 수정 후 App.js에서 가져온 setCartItems를 이용해 상태 변경

...
<CartItem handleQuantityChange={handleQuantityChange} />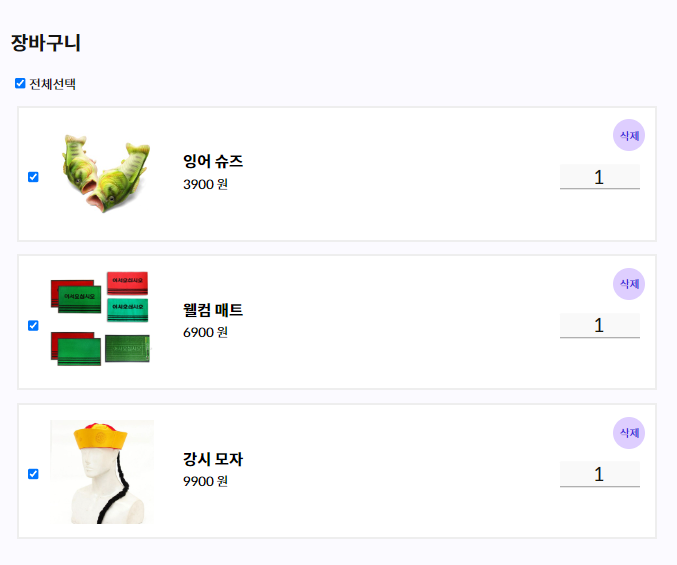
각각 CartItem에다가 handleQuantityChange 를 넣어준다.
3. 장바구니에서 상품 제거.
위에서 사용한 CartItem 컴포넌트를 이용하면 된다.
  const handleDelete = (id) => {
    setCheckedItems(checkedItems.filter((el) => el !== id)); // 체크 풀어주는 함수
    // 삭제 버튼 누르면 삭제되어야함
    // 삭제 하는 방법? = 장바구니 배열에서 해당 id와 다른 것들만 filter
    const filterarr = cartItems.filter((it) => {
      return it.id !== id;
    });
    setCartItems(filterarr);
  };


...
<CartItem handleDelete={handleDelete} />
프론트엔드 개발자 지망생입니다