Apache 소스코드 컴파일하여 설치
-
gcc 및 관련 패키지 파일 설치

-
webadm 유저 생성
useradd webadm
- /WEB/apache2 디렉토리에 apache 설치
특정 디렉토리를 지정하여 일반유저인 webadm으로 설치하는 실습
mkdir -p /WEB/apache2
Apache HTTP Server 설치를 위해 필요한 설치파일
-
apr
-
apr-util
-
pcre (Perl Compatible Regular Expressions)
-
httpd
wget을 통해서 얻거나 ftp를 통해 설치 파일을 이동하여 설치하는 방법으로 설치 파일을 준비한다. 뒤의 java와 tomcat도 구글링하면 찾을 수 있다.
WEB/apache2 디렉토리를 webadm의 소유로 바꿔준다.
chown -R webadm:webadm /WEB/apache2
준비한 패키지를 옮겨 압축을 풀어준다.
mv app, apr-util... /WEB/apache2
tar -xvf 패키지
pcre 패키지는 /WEB 디렉토리 밑에 디렉토리를 새로 생성하여 압축을 풀고, 압축을 푼 뒤 컴파일하여 설치한다.
# cd /WEB/apache2/pcre-8.4.5
#./configure --prefix=/WEB/apache2/pcre
#make
#make install
- Apache HTTP Server (httpd) 컴파일 설치
apr, apr-util 디렉토리를 httpd 디렉토리로 옮긴 후 컴파일 설치 진행
 #mv /usr/local/src/apr-1.7.0 /usr/local/src/httpd-2.4.53/srclib/apr
 #mv /usr/local/src/apr-util-1.6.1 /usr/local/src/httpd-2.4.53/srclib/apr-util`
 #cd /usr/local/src/httpd-2.4.53
#절대경로 지정
./configure --prefix=/원하는 설치경로 \
--enable-modules=all \
--enable-so \
--with-included-apr \
--with-pcre=/pcre설치경로/bin/pcre-config
#make
#make install
--enable-modules=all : 모든 모듈 컴파일
--endable-so : mod_so가 제공하는 DSO 기능 사용
--with-mpm-shared=all : MPM 모듈 세가지 event, prefork, worker를 다이나믹 모듈로 컴파일
- apache 2.4 부터 event 모듈 제공, 이전버전은 prefork, worker 2가지 모듈만 사용
- apache 2.4 부터 mpm 옵션을 주지 않을 경우, default는 event
정상설치 됐으면 아래의 경로로 아파치 실행
#/설치경로/bin/apachectl start
ServerName 오류 발생시 설치경로의 ./conf/httpd.conf에서 ServerName 주석처리를 해제한다.
내 경우에는 포트를 기본 포트인 80이 아니라 8085로 변경하였다. 그 외에도 vhost 사용 및 tomcat과의 연동을 위하여 httpd.conf에서 몇 개의 설정을 변경하였다.
- 변경점
- 포트
#Listen 12.34.56.78:80
Listen 8085
- tomcat연동을 위한 mod_jk 모듈 주석해제 후 설정파일 참조하도록 Included 구문 삽입
LoadModule jk_module modules/mod_jk.so
Include conf/mod_jk.conf
- User를 root이 아닌 webadm으로 생성하여 관리하고 설치함 이에 따른 설정파일 변경과 설치경로와 권한을 모두 webadm으로 변경함 -> httpd.conf의 설정 또한 webadm으로 변경
#User/Group: The name (or #number) of the user/group to run httpd as.
#It is usually good practice to create a dedicated user and group for
#running httpd, as with most system services.
User webadm
Group webadm
- Vhost 사용을 위하여 httpd.conf의 설정 중 vhost 사용을 주석해제하였다.
# Virtual hosts
Include conf/extra/httpd-vhosts.conf
Tomcat 컴파일 설치
apache에 구성된 Vhost를 톰캣과 연동하여 도메인으로 접속하는 실습
- Tomcat 설치
Vhost가 2대이니 Tomcat은 /WAS/tomcat과 /WAS/tomcat2에 설치한다.
Tomcat을 설치하기 전에 jsp파일을 위해 필수적으로 있어야 하는 java를 먼저 설치한다. 설치라고는 했지만, apache와는 다르게 tomcat과 java는 압축을 풀어서 실행만 하면 되는 간단(?)한 과정이다. 다만 /etc/profile에 환경변수를 넣어줘야 한다는 사실을 잊으면 안된다.
/etc/profile은 모든 설정에 적용되긴 때문에 하나하나 따로 java를 적용하고 싶다면 톰캣 같은 경우 tomcat 설치경로/bin/catalina.sh를 편집하여 아래의 구문을 추가시켜 주면 굳이 profile을 수정할 필요는 없다.
export JAVA_HOME="/WAS/java/openjdk-8u342-b07"
export PATH=$PATH:$JAVA_HOME/bin
자바 설치 참고 사이트 : https://so-easy-coding.tistory.com/3
vi /etc/profile
JAVA_HOME=/WAS/java/openjdk-8u342-b07
CATALINA_HOME=/WAS/tomcat
PATH=$PATH:$JAVA_HOME/bin:$CATALINA_HOME/bin
CLASSPATH=.:JAVA_HOME/lib/tools.jar:CATALINA_HOME/lib/jsp-api.jar:$CATALINA_HOME/lib/servlet-api.jar

export JAVA_HOME
export CATALINA_HOME
export PATH
export CLASSPATH
JAVA 환경변수 설정 후 source /etc/profile로 적용을 꼭 해줘야한다.
CATALINA에 대한 환경변수는 tomcat 설치시 필요한 환경변수이다.
설치후 java 디렉토리 밑의 bin 디렉토리로 이동하여 java -version으로 java가 제대로 설치되어있는지 확인한다.
설치를 위해서는 root권한이 필요하다. 나는 tomprod란 사용자를 생성하여 sudo권한으로 설치 후 소유권을 tomprod로 변경할 것이다.
chown -R tomprod:tomprod /WAS/
내가 원하는 설치경로인 /WAS/tomcat 디렉토리에 tar zxvf apache-tomcat-10.0.27.tar.gz명령어를 통해 압축을 풀어준다. 나는 /WAS/tomcat 디렉토리가 설치폴더이기 때문에 압축 풀어준 디렉토리의 모든 내용물을 tomcat에 넣어야한다.
이후 /WAS/tomcat/bin/startup.sh을 실행하여 tomcat 서비스를 실행한다. 확인은 본인 ip뒤에 port번호 8080을 붙이면 된다. 성공이라면 아래의 화면이 뜬다.
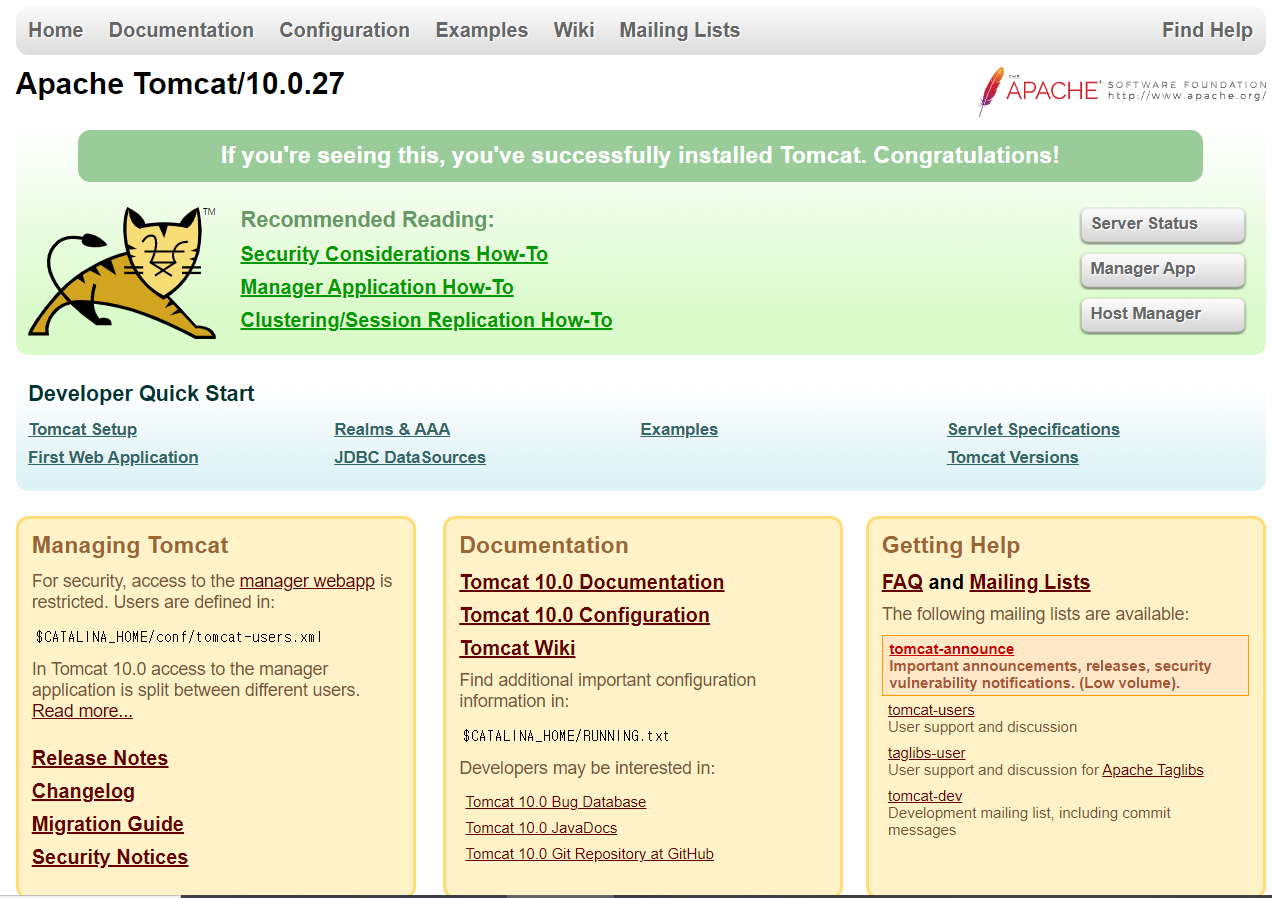
이제 apache와 tomcat을 연동하면 이번 실습은 끝이다!
Apache와 tomcat의 연동
apache와 tomcat을 연동하기 위해서는 mod_jk라는 connector가 필요하다. 다운은 공식홈페이지에서 받을 수 있다.
mod_jk를 설치하기 위해 gcc, gcc-c++, httpd-devel 세 가지 패키지가 필요하다.
# yum -y install gcc gcc-c++ httpd-devel
설치 후 다운받은 connector의 압축을 푼다.
tar zxvf tomcat-connectors-1.2.48-src.tar.gz
압축을 푼 디렉토리의 native 디렉토리에 들어가 configure하여 설치한다.
./configure --with-apxs=/WEB/apache2/bin/apxs(apache설치 디렉토리 아래의 bin디렉토리)``
make
make install
성공했다면 mod_jk.so라는 파일이 생성된다.
# ls /etc/httpd/modules/ | grep mod_jk
파일이 확인되었다면 연동을 위한 준비가 모두 끝났다.
vhost로 도메인 2개 구성하여 구동
apache 웹서버 1대에 tomcat을 2대 구동하기 위하여 vhost를 구성하여 가동하였다.
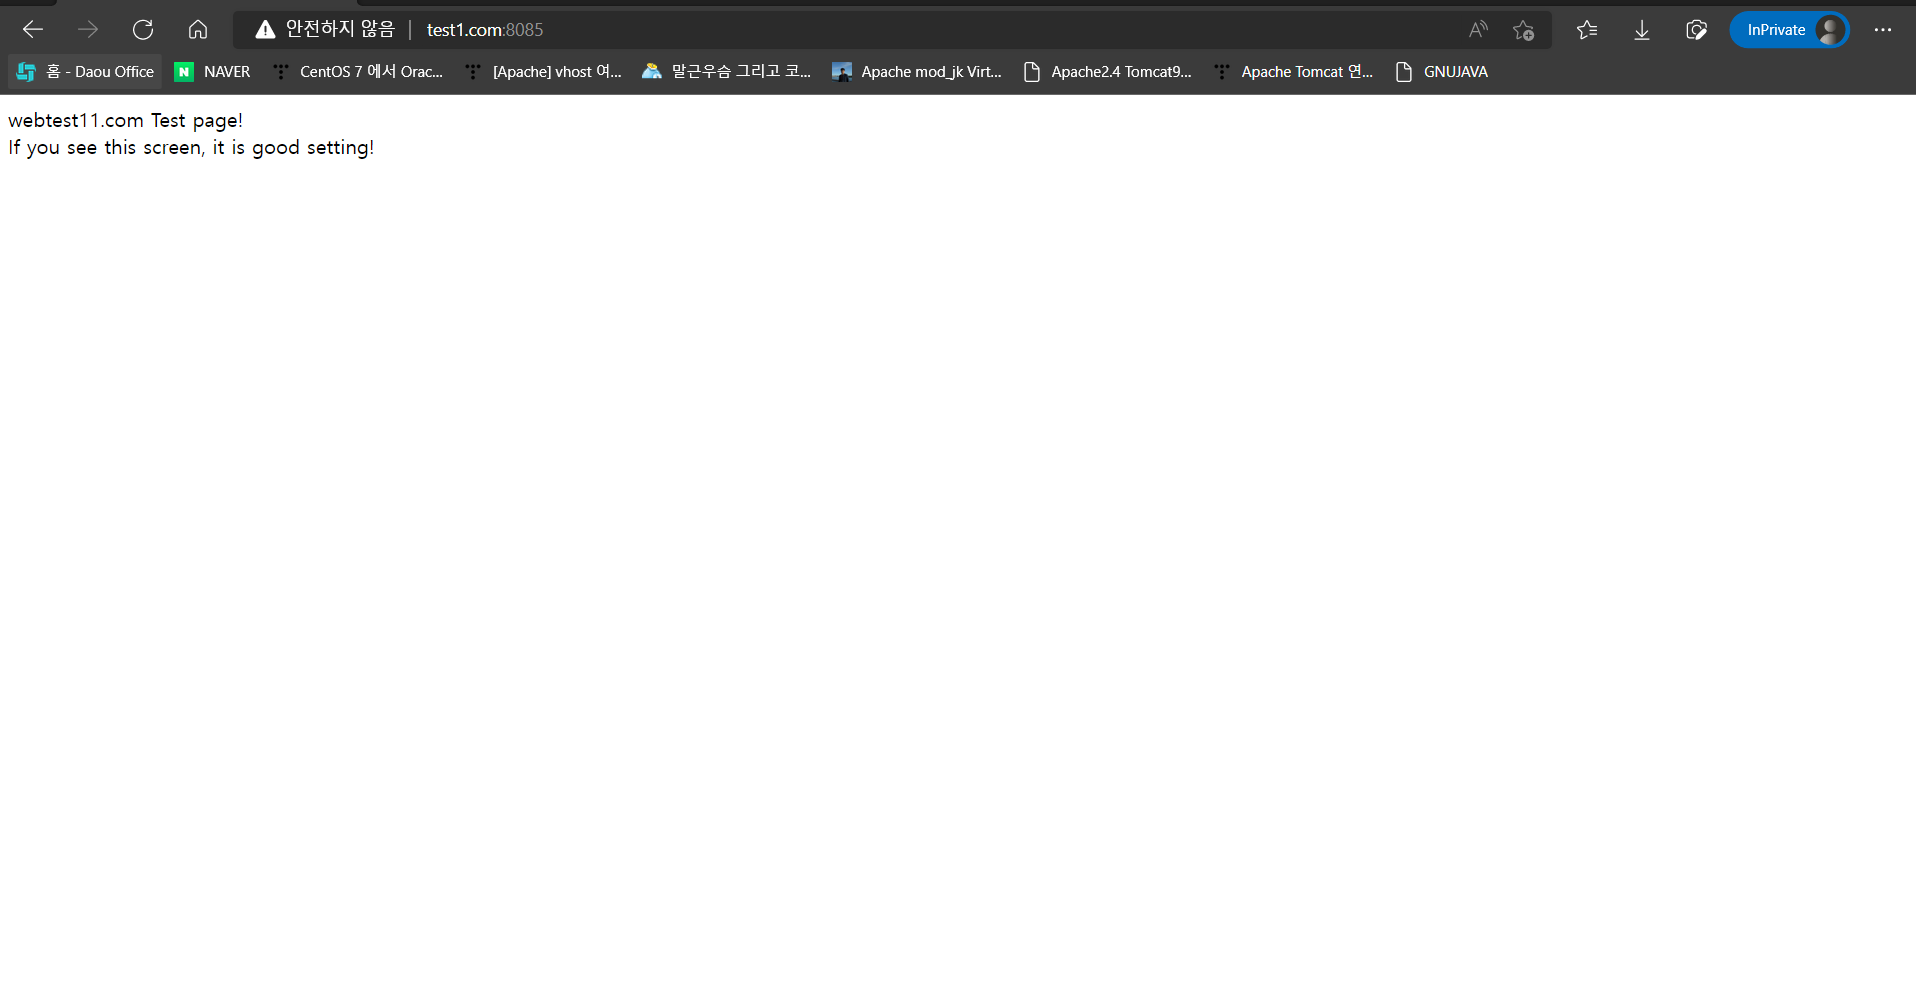
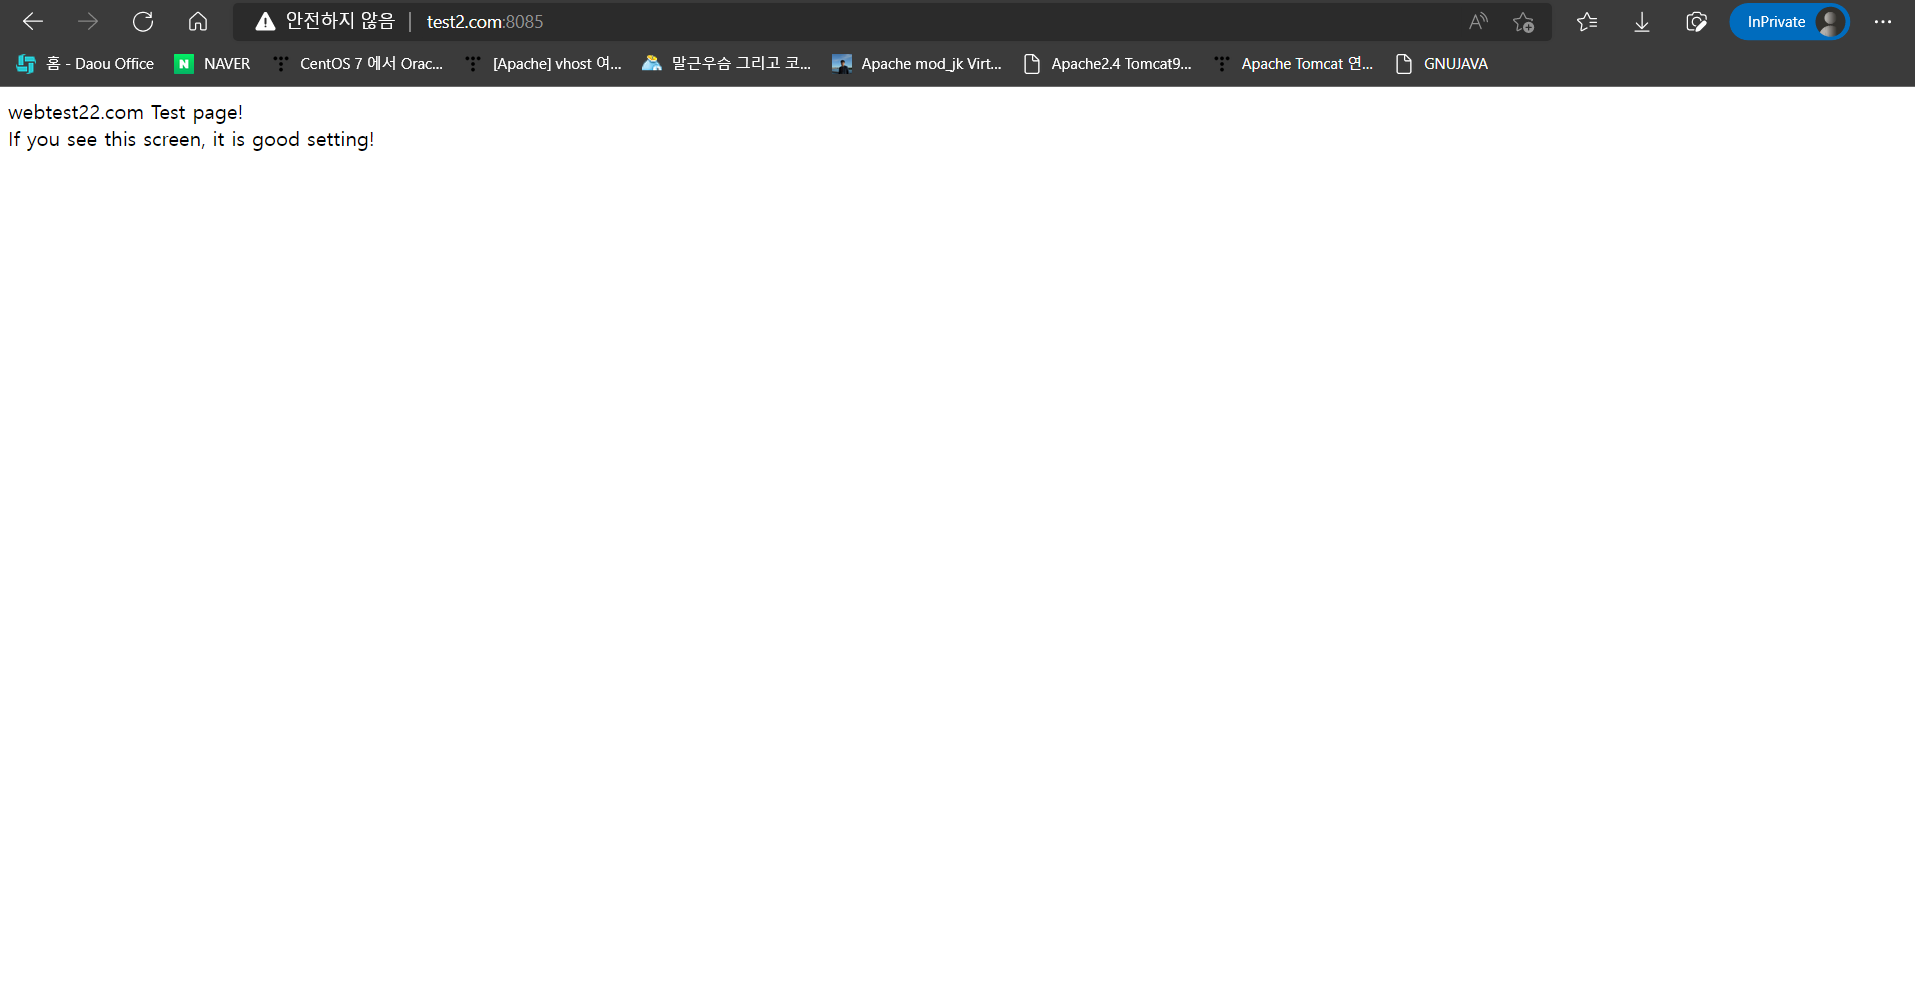
서비스 포트는 8085로 구성하였고, 도메인은 test1.com과 test2.com으로 구성하여 vhost에 설정
로그는 conf/extra/httpd-vhosts.conf의 설정을 이용하여 일별로 쌓이도록 설정.
내 httpd-vhosts.conf파일 설정 내용
Virtual Hosts
#Required modules: mod_log_config
#If you want to maintain multiple domains/hostnames on your
#machine you can setup VirtualHost containers for them. Most configurations
#use only name-based virtual hosts so the server doesn't need to worry about
#IP addresses. This is indicated by the asterisks in the directives below.
#Please see the documentation at
#URL:http://httpd.apache.org/docs/2.4/vhosts/
#for further details before you try to setup virtual hosts.
#You may use the command line option '-S' to verify your virtual host
#configuration.#VirtualHost example:
#Almost any Apache directive may go into a VirtualHost container.
#The first VirtualHost section is used for all requests that do not
#match a ServerName or ServerAlias in any block.<VirtualHost *:8085> #ServerAdmin webmaster@dummy-host.example.com DocumentRoot "/home/test" ServerName test1.com ServerAlias www.test1.com ErrorLog "|/WEB/apache2/bin/rotatelogs /WEB/apache2/logs/test1_error.%Y_%m_%d.log 86400" CustomLog "|/WEB/apache2/bin/rotatelogs /WEB/apache2/logs/test1_access.%Y_%m_%d.log 86400" combined JkMount /* tomcat1 . <Directory "/home/test"> Options FollowSymLinks AllowOverride None Require all granted </Directory> . </VirtualHost> . <VirtualHost *:8085> #ServerAdmin webmaster@dummy-host2.example.com DocumentRoot "/home/test2" ServerName test2.com ServerAlias www.test2.com ErrorLog "|/WEB/apache2/bin/rotatelogs /WEB/apache2/logs/test2_error.%Y_%m_%d 86400" CustomLog "|/WEB/apache2/bin/rotatelogs /WEB/apache2/logs/test2_access.%Y_%m_%d 86400" combined JkMount /* tomcat2 . <Directory "/home/test2"> Options FollowSymLinks AllowOverride None Require all granted </Directory> . </VirtualHost>
간단하게 설명하자면 8085 포트로 들어오는 Servername, Alias의 요청은 모두 tomcat1, tomcat2로 넘겨 WAS가 처리하겠다는 거다. 에러로그는 자동으로 일별로 access로그와 error로그를 받겠다는 스크립트를 설정하였고, Servername으로 접속시, 나오는 초기화면은 tomcat1은 /home/test로 tomcat2는 /home/test2의 index.jsp가 화면에 표시되게 하였다. JkMount /* tomcat이라는 구문이 apache를 통해 요청이 들어온 Servername의 도메인을 tomcat으로 넘겨준다.
이제 mod_jk와 workersproperties파일을 생성하여 아파치 설정 디렉토리 밑의 conf/ 디렉토리에 넣어준다. 내가 설정한 내용은 아래와 같다.
- mod_jk.conf
  <IfModule jk_module>
        JkWorkersFile /WEB/apache2/conf/workers.properties
        JkLogFile /WEB/apache2/logs/mod_jk.log
        JkLoglevel info
        JkLogStampFormat "[%a %b %d %H:%M:%S %Y]"
</IfModule>- workers.properties
worker.list=tomcat1,tomcat2

worker.tomcat1.type=ajp13
worker.tomcat1.host=172.27.241.201
worker.tomcat1.port=8009

worker.tomcat2.host=172.27.241.201
worker.tomcat2.port=8109
worker.tomcat2.type=ajp13
tomcat1은 8009포트를 tomcat2는 8109포트를 사용하는 것으로 설정하였다.
- server.xml(tomcat1, tomcat2)
내가 구성한 아키텍처는 apache 서버 하나에 tomcat을 2개 설치하여 연동시키는 것이므로(vhost를 통하여) 위의 공통된 설정 파일 이외에 각 톰캣의 server.xml의 설정을 따로 구성하였다.
<!--  Note:  A "Server" is not itself a "Container", so you may not
     define subcomponents such as "Valves" at this level.
     Documentation at /docs/config/server.html
  -->
<Server port="8005" shutdown="SHUTDOWN">
<Listener className="org.apache.catalina.startup.VersionLoggerListener"/>

<Service name="Catalina">

<Connector port="8080" protocol="HTTP/1.1" connectionTimeout="20000" redirectPort="8443"/>

<Connector protocol="AJP/1.3" address="0.0.0.0" port="8009" secretRequired="false" redirectPort="8443"/>

<Engine name="Catalina" defaultHost="localhost">

<Host name="localhost" appBase="/home/test" unpackWARs="true" autoDeploy="true" xmlValidation="false" xmlNamespaceAware="false">
<Context path="" docBase="." reloadable="true"/>

변경 부분만 발췌
tomcat2의 server.xml은 포트번호와 appBase 디렉토리, ServiceName만 변경하였다.
이제 tomcat 설치경로/bin/startup.sh로 tomcat 서비스를 기동한다.
[root@oracle ~]# /WAS/tomcat2/bin/startup.sh
Using CATALINA_BASE:   /WAS/tomcat2
Using CATALINA_HOME:   /WAS/tomcat2
Using CATALINA_TMPDIR: /WAS/tomcat2/temp
Using JRE_HOME:        /WAS/java/openjdk-8u342-b07
Using CLASSPATH:       /WAS/tomcat2/bin/bootstrap.jar:/WAS/tomcat2/bin/tomcat-juli.jar
Using CATALINA_OPTS:
Tomcat started.
[root@oracle ~]# /WAS/tomcat/bin/startup.sh
Using CATALINA_BASE: /WAS/tomcat
Using CATALINA_HOME: /WAS/tomcat
Using CATALINA_TMPDIR: /WAS/tomcat/temp
Using JRE_HOME: /WAS/java/openjdk-8u342-b07
Using CLASSPATH: /WAS/tomcat/bin/bootstrap.jar:/WAS/tomcat/bin/tomcat-juli.jar
Using CATALINA_OPTS:
Tomcat started.-
test1.com 페이지
-
test2.com 페이지
쉽다면 쉽고, 어렵다면 어려운 vhost를 통한 apache와 tomcat 서버 연동 끝!
참고 사이트 : https://foxydog.tistory.com/34
참고 사이트 : https://foxydog.tistory.com/30