1) 리눅스 설치
- V센터에서 서버 생성
- 메모리, 스토리지, 운영체제 등을 설정하여 기동.
- CD/DVD에 리눅스의 ISO 이미지 삽입하여 설치(계열사마다 사용하는 운영체제 상이)
- 언어 -> 영어, 소프트웨어(개인마다 차이 있으나 GNOME을 많이 사용), 네트워크 -> 배정받은 IP, 넷마스크, 게이트웨이, DNS를 수동으로 입력하여 네트워크 설정
- 보안 정책은 shutdown
- 디스크 선택하여 파티션 설정 -> /boot, swap(전체 용량의 30% 정도), /root를 기본으로 잡고 설정완료
- 설치
- 사용자 설정 : root -> 암호 설정 -> 일반 사용자 생성 -> 암호 설정
- 재부팅 -> putty 및 ssh 접근하여 작업
2) 디렉토리 생성 / 유저 / 그룹 생성
- 임의의 유저 lee 생성, 임의의 그룹 leejungbin 생성 -> useradd lee
- 유저 lee의 그룹을 leejungbin으로 변경 -> groupadd leejungbin -> usermod -G leejungbin lee
- lee의 홈 디렉터리 아래 test 디렉토리 생성 -> mkdir test /home/lee/test
3) LVM 생성
- 추가 디스크인 sdb(50G)를 이용하여 LVM(Logical Volume Manage) 설정
- fdisk -l로 파티션 확인
- fdisk /dev/sdb로 LVM 설정
 [root@oracle ~]# fdisk /dev/sdb
Welcome to fdisk (util-linux 2.23.2).

Changes will remain in memory only, until you decide to write them.
Be careful before using the write command.


Command (m for help): p

Disk /dev/sdb: 53.7 GB, 53687091200 bytes, 104857600 sectors
Units = sectors of 1 * 512 = 512 bytes
Sector size (logical/physical): 512 bytes / 512 bytes
I/O size (minimum/optimal): 512 bytes / 512 bytes
Disk label type: dos
Disk identifier: 0x33938037

   Device Boot      Start         End      Blocks   Id  System
/dev/sdb1            2048   104857599    52427776   8e  Linux LVM

Command (m for help): d
Selected partition 1
Partition 1 is deleted

Command (m for help): p

Disk /dev/sdb: 53.7 GB, 53687091200 bytes, 104857600 sectors
Units = sectors of 1 * 512 = 512 bytes
Sector size (logical/physical): 512 bytes / 512 bytes
I/O size (minimum/optimal): 512 bytes / 512 bytes
Disk label type: dos
Disk identifier: 0x33938037

   Device Boot      Start         End      Blocks   Id  System

Command (m for help): n
Partition type:
   p   primary (0 primary, 0 extended, 4 free)
   e   extended
Select (default p): p
Partition number (1-4, default 1):
First sector (2048-104857599, default 2048):
Using default value 2048
Last sector, +sectors or +size{K,M,G} (2048-104857599, default 104857599): 20 G
Value out of range.
Last sector, +sectors or +size{K,M,G} (2048-104857599, default 104857599): +30G
Partition 1 of type Linux and of size 30 GiB is set

Command (m for help): n
Partition type:
   p   primary (1 primary, 0 extended, 3 free)
   e   extended
Select (default p): +20G
Invalid partition type `+'

Command (m for help): n
Partition type:
   p   primary (1 primary, 0 extended, 3 free)
   e   extended
Select (default p): p
Partition number (2-4, default 2):
First sector (62916608-104857599, default 62916608):
Using default value 62916608
Last sector, +sectors or +size{K,M,G} (62916608-104857599, default 104857599): +20G
Value out of range.
Last sector, +sectors or +size{K,M,G} (62916608-104857599, default 104857599):
Using default value 104857599
Partition 2 of type Linux and of size 20 GiB is set

Command (m for help): t
Partition number (1,2, default 2): 1
Hex code (type L to list all codes): 8e
Changed type of partition 'Linux' to 'Linux LVM'

Command (m for help): t
Partition number (1,2, default 2): 2
Hex code (type L to list all codes): 8e
Changed type of partition 'Linux' to 'Linux LVM'

Command (m for help): w
The partition table has been altered!

Calling ioctl() to re-read partition table.
Syncing disks.

파티션을 2개로 나누어 pv, 볼륨 그룹, 논리 그룹 생성
pvcreate /dev/sdb1
pvcreate /dev/sdb2
vgcreate VG-01 /dev/sdb1 /dev/sdb2
lvcreate --size 50G --name LG-01 VG-01
lvcreate --extents 100%FREE --name LG-01 VG-01

파일시스템 포맷
mkfs.ext4 /dev/VG-01/LG-01
4) 오라클 DB 설치
Centos7, 19.3 - Enterprise Edition (also includes Standard Edition 2) , vnc
-
오라클 홈페이지에서 19c 버전의 DB 다운.
-
/etc/hosts에 반드시 호스트네임과 ip를 등록.
-
selinux permissive or disabled 설정
-
방화벽(사용 시) 포트 등록 및 해제
-
오라클 19c 사전 설정 rpm 다운받아 실행하여 설정
https://yum.oracle.com/repo/OracleLinux/OL7/latest/x86_64/getPackage/oracle-database-preinstall-19c-1.0-1.el7.x86_64.rpm
- 설정 뒤, 그룹과 유저 확인하여 오라클 db 유저와 그룹 추가되었는지 확인
cat /etc/group -> oinstall, dba, oper, backupdba, dgdba, kmdba, racdba 있는지 확인
cat /etc/passwd -> oracle 유저 있는지 확인
-
자동 설정이 제대로 되었는지 /etc/sysctl.conf과 /etc/security/limit.d/oracle-database-preinstall-19c.conf를 확인
-
오라클 계정 환경설정
오라클 소프트웨어 db설치 디렉토리로 이동, 다운받은 zip파일도 이동. 이후 디렉토리의 소유권을 oracle유저와 oinstall 그룹으로 변경. 오라클 유저로 전환하여 bash_profile에 계정 환경 설정. 다운받은 오라클 소프트웨어를 unzip한 뒤 설치 -
vnc 서버와 클라이언트를 설치하여 gui로 오라클 db 설치
이를 위해 vnc 서버를 설정하고 display를 연결한다.
순서
yum groupinstall "GNOME Desktop"
yum install -y tigervnc-server xorg-x11-fonts-Type1
cp/lib/systemd/system/vncserver@.service/etc/systemd/system/vncserver@:2.service -> 다운받은 tigervnc의 설정파일을 복사하여 사용
vi /etc/systemd/system/vncserver@:2.service -> 설정 파일 편집 41번 라인의 <USER>를 본인의 user명으로 변경 후 저장
su - oracle -> 유저로 변경
vncserver -> 명령어 실행하여 vnc 접속 암호 설정
systemctl daemon-reload
systemctl start vncserver@:2.service -> vnc 서비스 시작
systemctl enable vncserver@:2.service -> 시스템을 재시작해도 자동 실행되도록 등록
사용하는 vnc viewer에 ip와 포트번호 입력하여 실행
putty나 crt에서 ./runInstaller 실행
- 결과
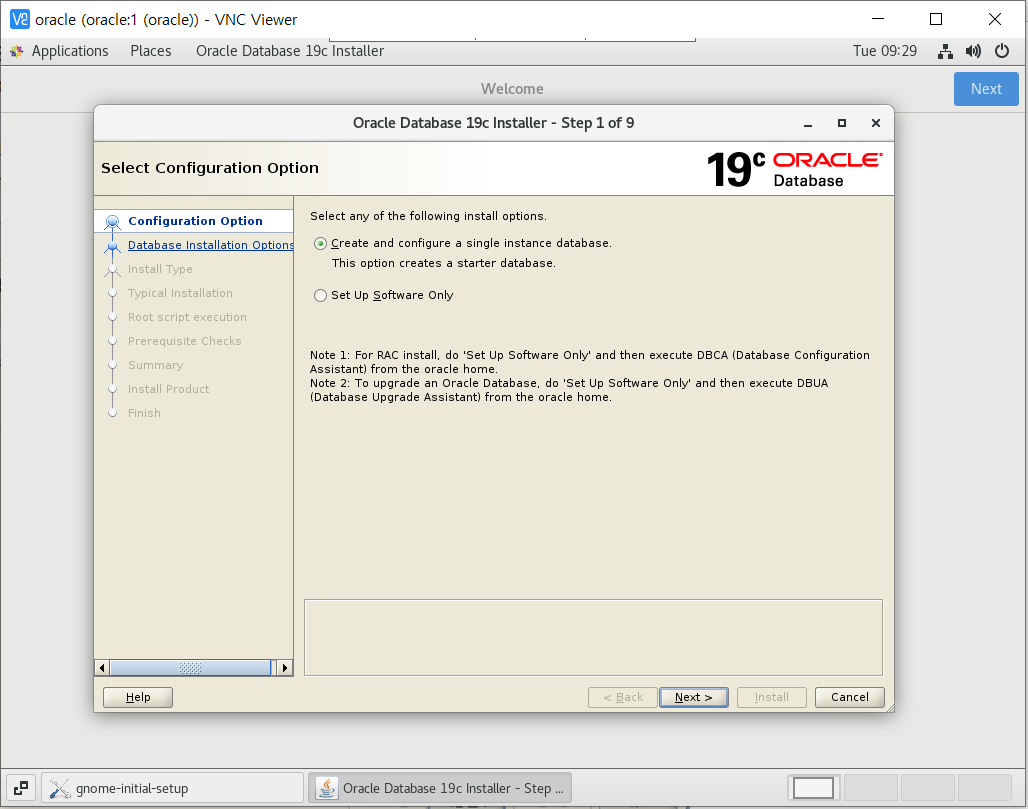
DB는 요구사항에 따라 설정하여 설치
5) DB Table 생성 및 Data 추가
- /home/oracle/oradata mkdir로 디렉토리 생성
- chmod 777로 권한 변경

- oracle 유저로 변경하여 sqlplus로 db 접속
- 관리자로 로그인하여 유저 생성하고 권한 부여
sqlplus '/as sysdba'
cretate user [id] identified by [password];
grant [권한] to [id];
grant connect, resource, dba to [id];
commit; - 테이블 스페이스 생성, 테이블 생성, 데이터 입력

6) 오라클 핫백업 스크립트 작성
- hot백업 자동 쉘스크립트를 만든 후 crontab에 등록하여 시행
스크립트, 로그 저장 경로 : /home/oracle/hot/script/
핫 백업 경로 : /home/oracle/hot/backup1
- 백업 알림 및 메인 백업 스크립트
#main_backup.sh
touch /home/oracle/hot/script/total.log
echo ""
echo "set begin backup mode--"
time sh /home/oracle/hot/script/begin_backup.sh >> /home/oracle/hot/script/total.log
echo ""
echo "end begin backup mode--"
echo ""
echo "start file copy.........."
time sh /home/oracle/hot/script/copy_backup.sh >> /home/oracle/hot/script/total.log
echo "end file copy~"
echo ""
echo "set end backup mode~~"
time sh /home/oracle/hot/script/end_backup.sh >> /home/oracle/hot/script/total.log
echo "complete hot backup~!"
- 백업 시작
#begin_backup.sh
sqlplus /nolog <<EOF1
conn / as sysdba
set head off
set feedback off
set time off
set timing off
set echo off
spool /tmp/online.tmp
select 'alter tablespace '||tablespace_name||' begin backup;' from dba_tablespaces where status='ONLINE' and contents!='TEMPORARY';
spool off
!cat /tmp/online.tmp | egrep -v spool | egrep -v SQL | egrep -v [2-4] > /home/oracle/hot/script/begin.sh
@/home/oracle/hot/script/begin.sh
!sh /home/oracle/hot/script/status.sh
exit
EOF1- 백업 복사
sqlplus /nolog << EOF3
conn / as sysdba
set head off
set time off
set timing off
set feedback off
set echo off
set line 200
col name for a100
spool /tmp/cp.tmp
select 'cp -av '||name||' /home/oracle/hot/backup1/' from v\$datafile;
spool off
spool /tmp/control.tmp
alter session set nls_date_format='YYYY-MM-DD-HH24-MI-SS';
select 'alter database backup controlfile to '||'''/home/oracle/hot/backup1/'||sysdate||'.ctl'';' from dual;
spool off
!cat /tmp/cp.tmp | egrep -v SQL > /home/oracle/hot/script/cp.sh
!cat /tmp/control.tmp | egrep -v SQL > /home/oracle/hot/script/control.sql
!sh /home/oracle/hot/script/cp.sh
@/home/oracle/hot/script/control.sql
exit
EOF3- 백업 종료
#end_backup.sh
sqlplus /nolog << EOF4
conn / as sysdba
set head off
set feedback off
set time off
set timing off
set echo off
spool /tmp/online.tmp
select 'alter tablespace '||tablespace_name||' end backup;' from dba_tablespaces where status='ONLINE' and contents!='TEMPORARY';
spool off
!cat /tmp/online.tmp | egrep -v spool | egrep -v SQL | egrep -v [2-4] > /home/oracle/hot/script/end.sh
@/home/oracle/hot/script/end.sh
!sh /home/oracle/hot/script/status.sh
exit
EOF4- 백업 후 상황 알림
#status.sh
sqlplus /nolog << EOF2
conn / as sysdba
set head on
set echo off
set feedback off
spool /tmp/status.tmp
set line 200
col name for a50
col status for a15
select a.file#,a.name,b.status,to_char(b.time,'YYYY-MM-DD:HH24:MI:SS') "Time" from v\$datafile a, v\$backup b where a.file#=b.file#;
spool off
exit
EOF2-
결과값
cat /home/oracle/hot/script/total.log -
cron에 등록하여 일별 시행
0 11 * * * /home/oracle/hot/script/main_backup.sh 1>/dev/null 2>/dev/null