TextBufferGeometry 와 Typeface 라는 포맷의 font 를 이용해서 3d text 효과를 구현해보자
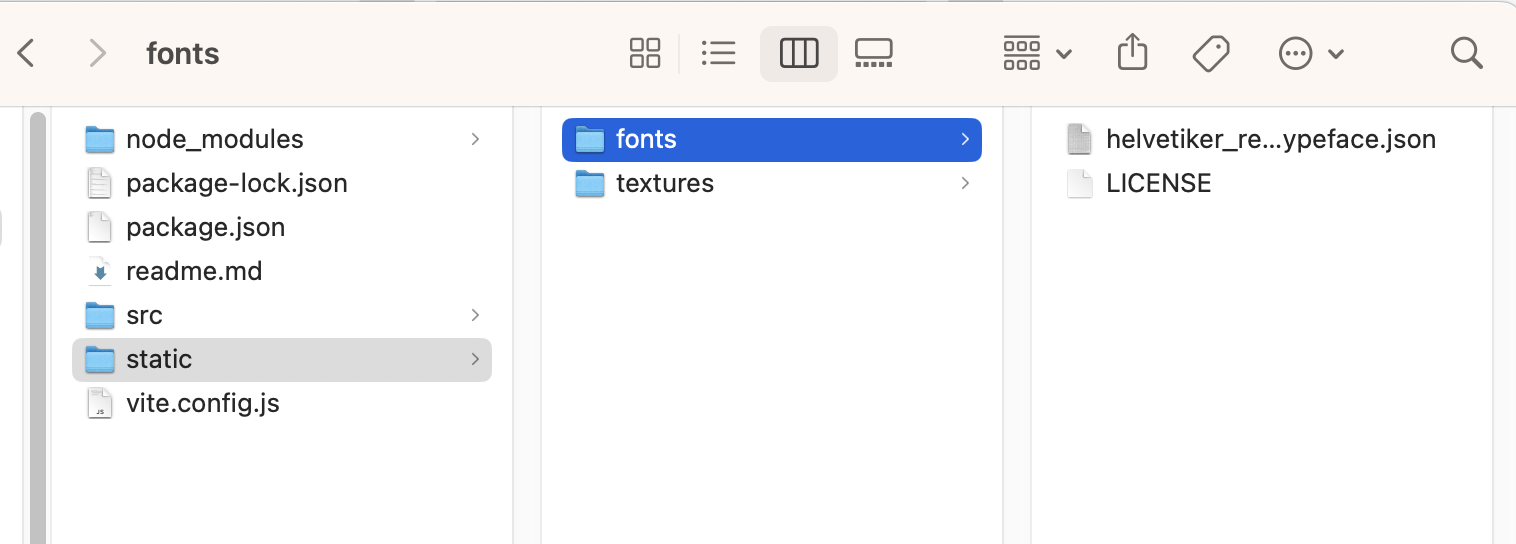
일딴 node_modules / THREE.js / examples / fonts 에 있는 예시파일을 편하게 static/fonts 폴더를 새로 생성해서 안에 예시파일을 넣어두자
TextGeometry
import { FontLoader } from "three/examples/jsm/loaders/FontLoader.js"; //three.js 133버전부터 이렇게 가져와야함
import { TextGeometry } from 'three/examples/jsm/geometries/TextGeometry.js' //three.js 133버전부터 이렇게 가져와야함
const fontLoader= new FontLoader()
fontLoader.load("/fonts/helvetiker_regular.typeface.json", (font) => {// 폰트가 로드될때 실행되는 콜백함수
console.log("font loaded");
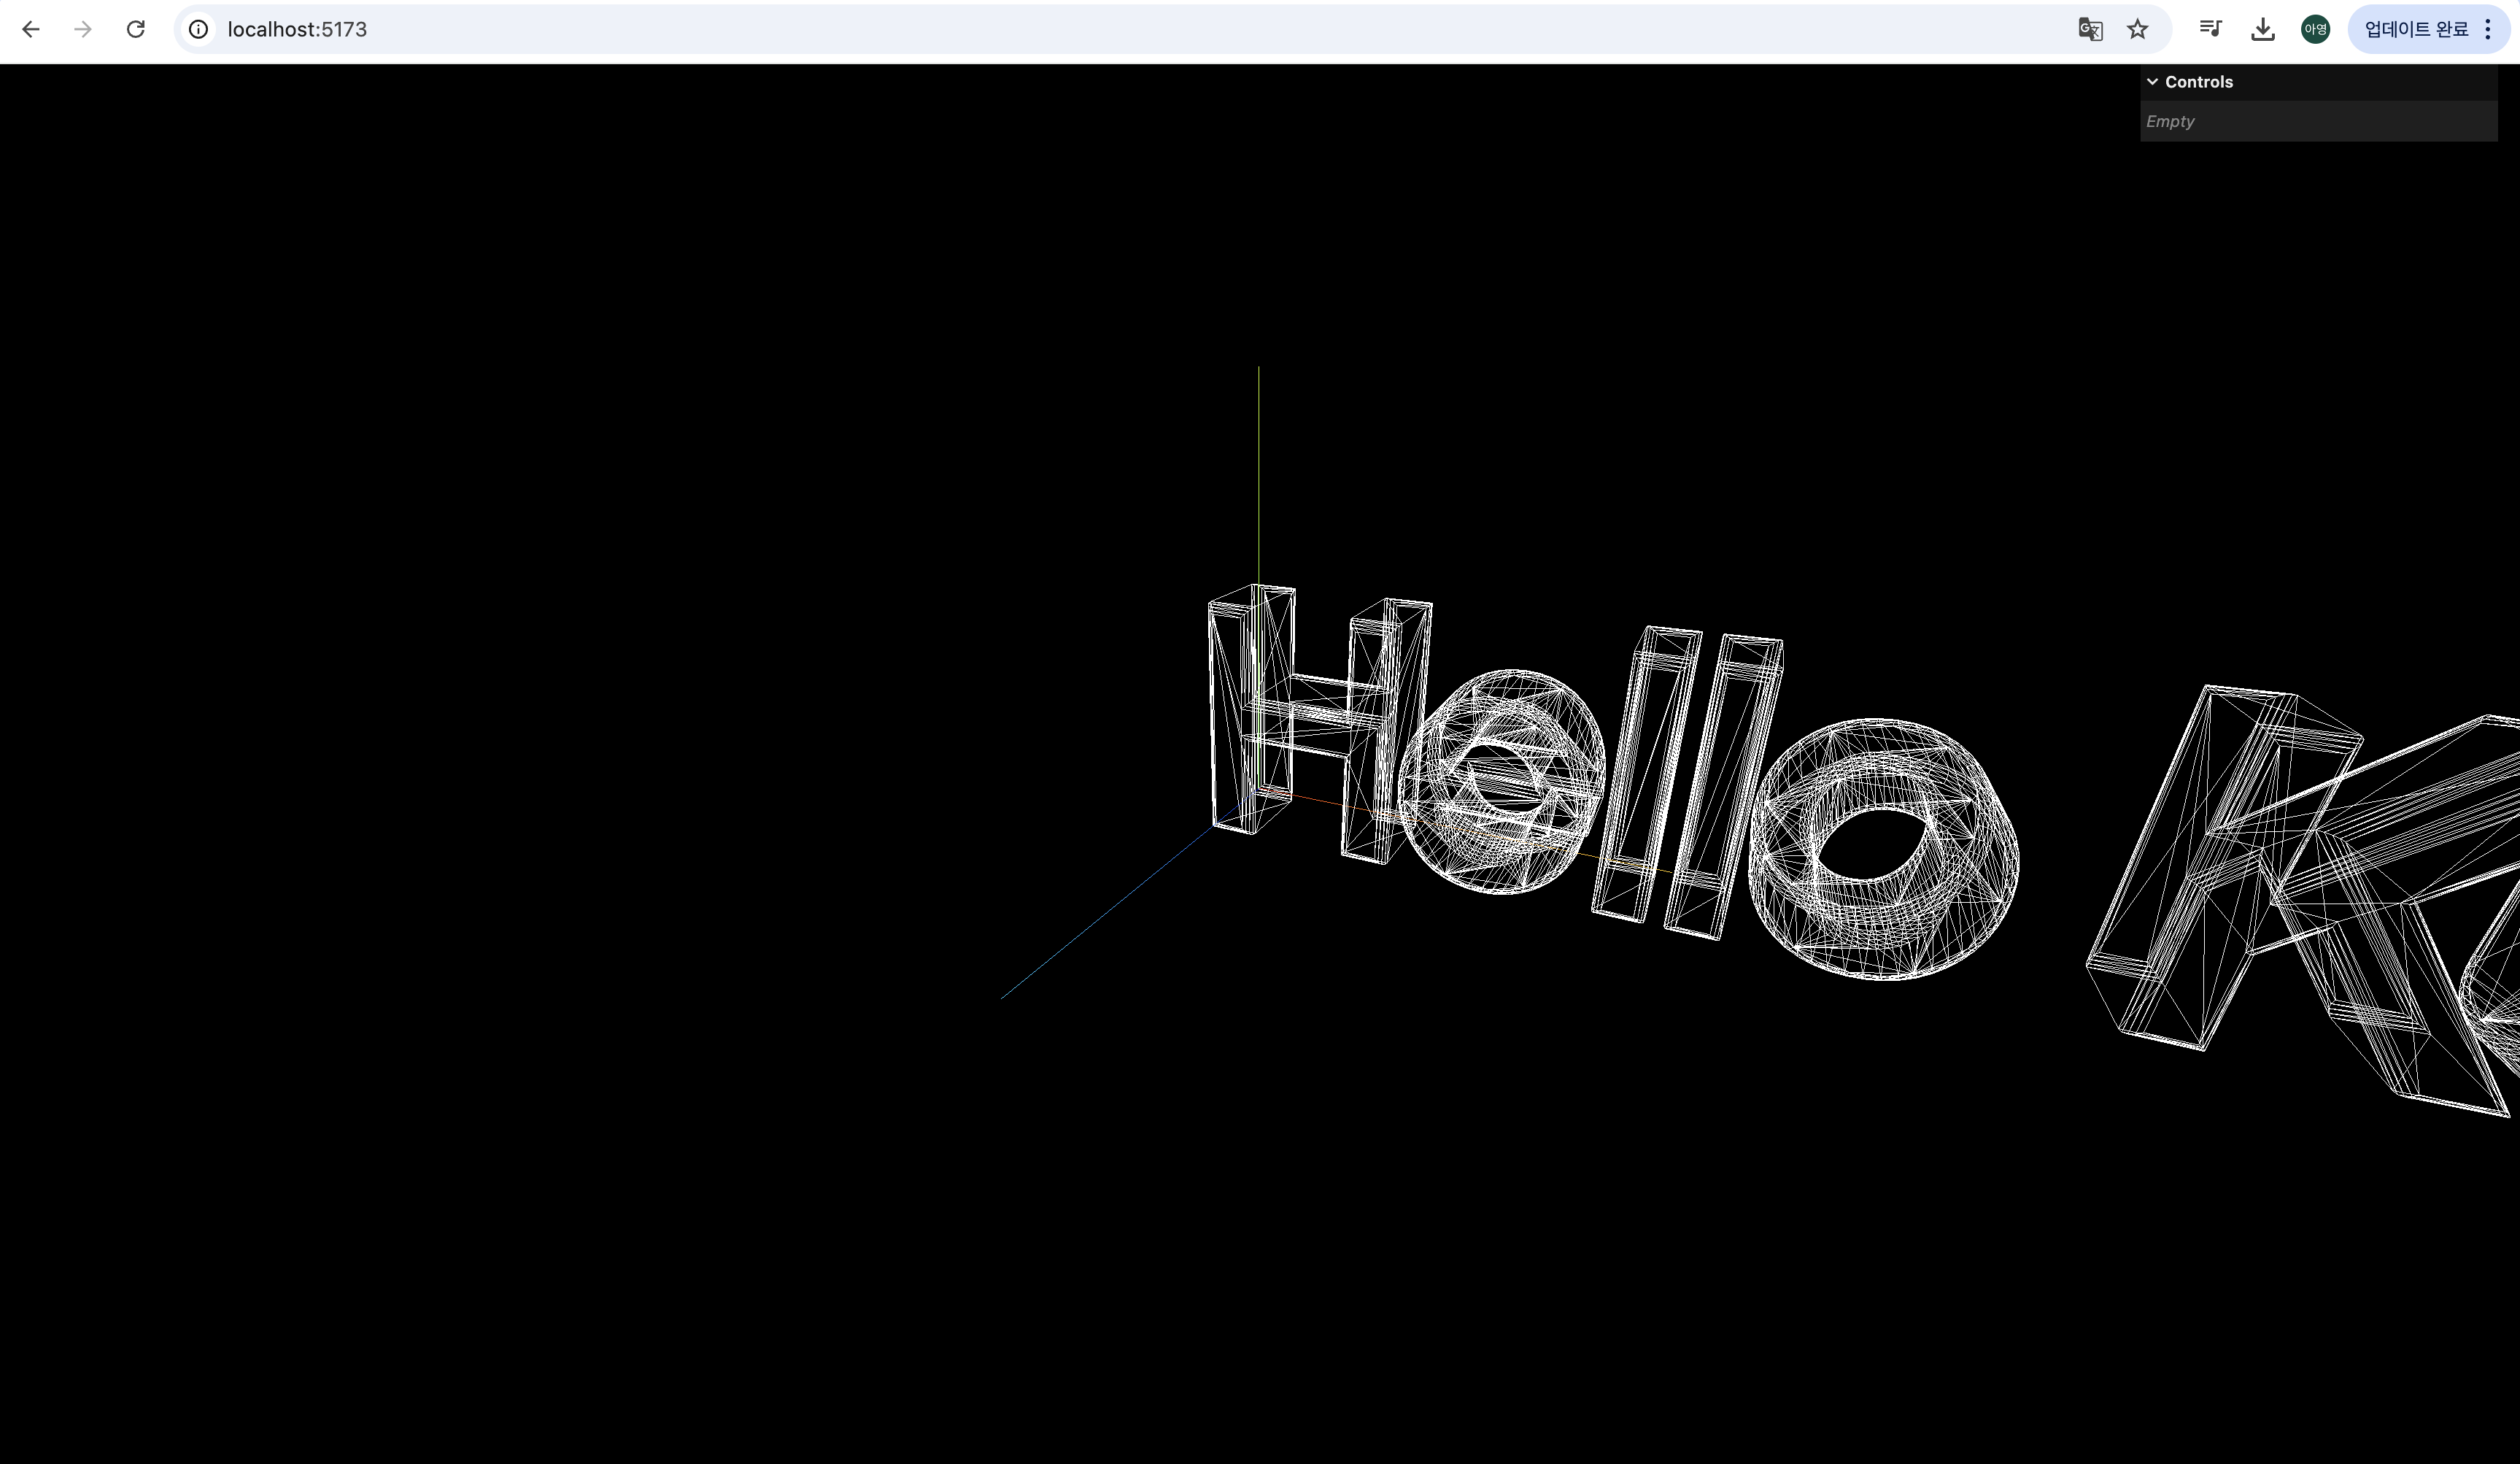
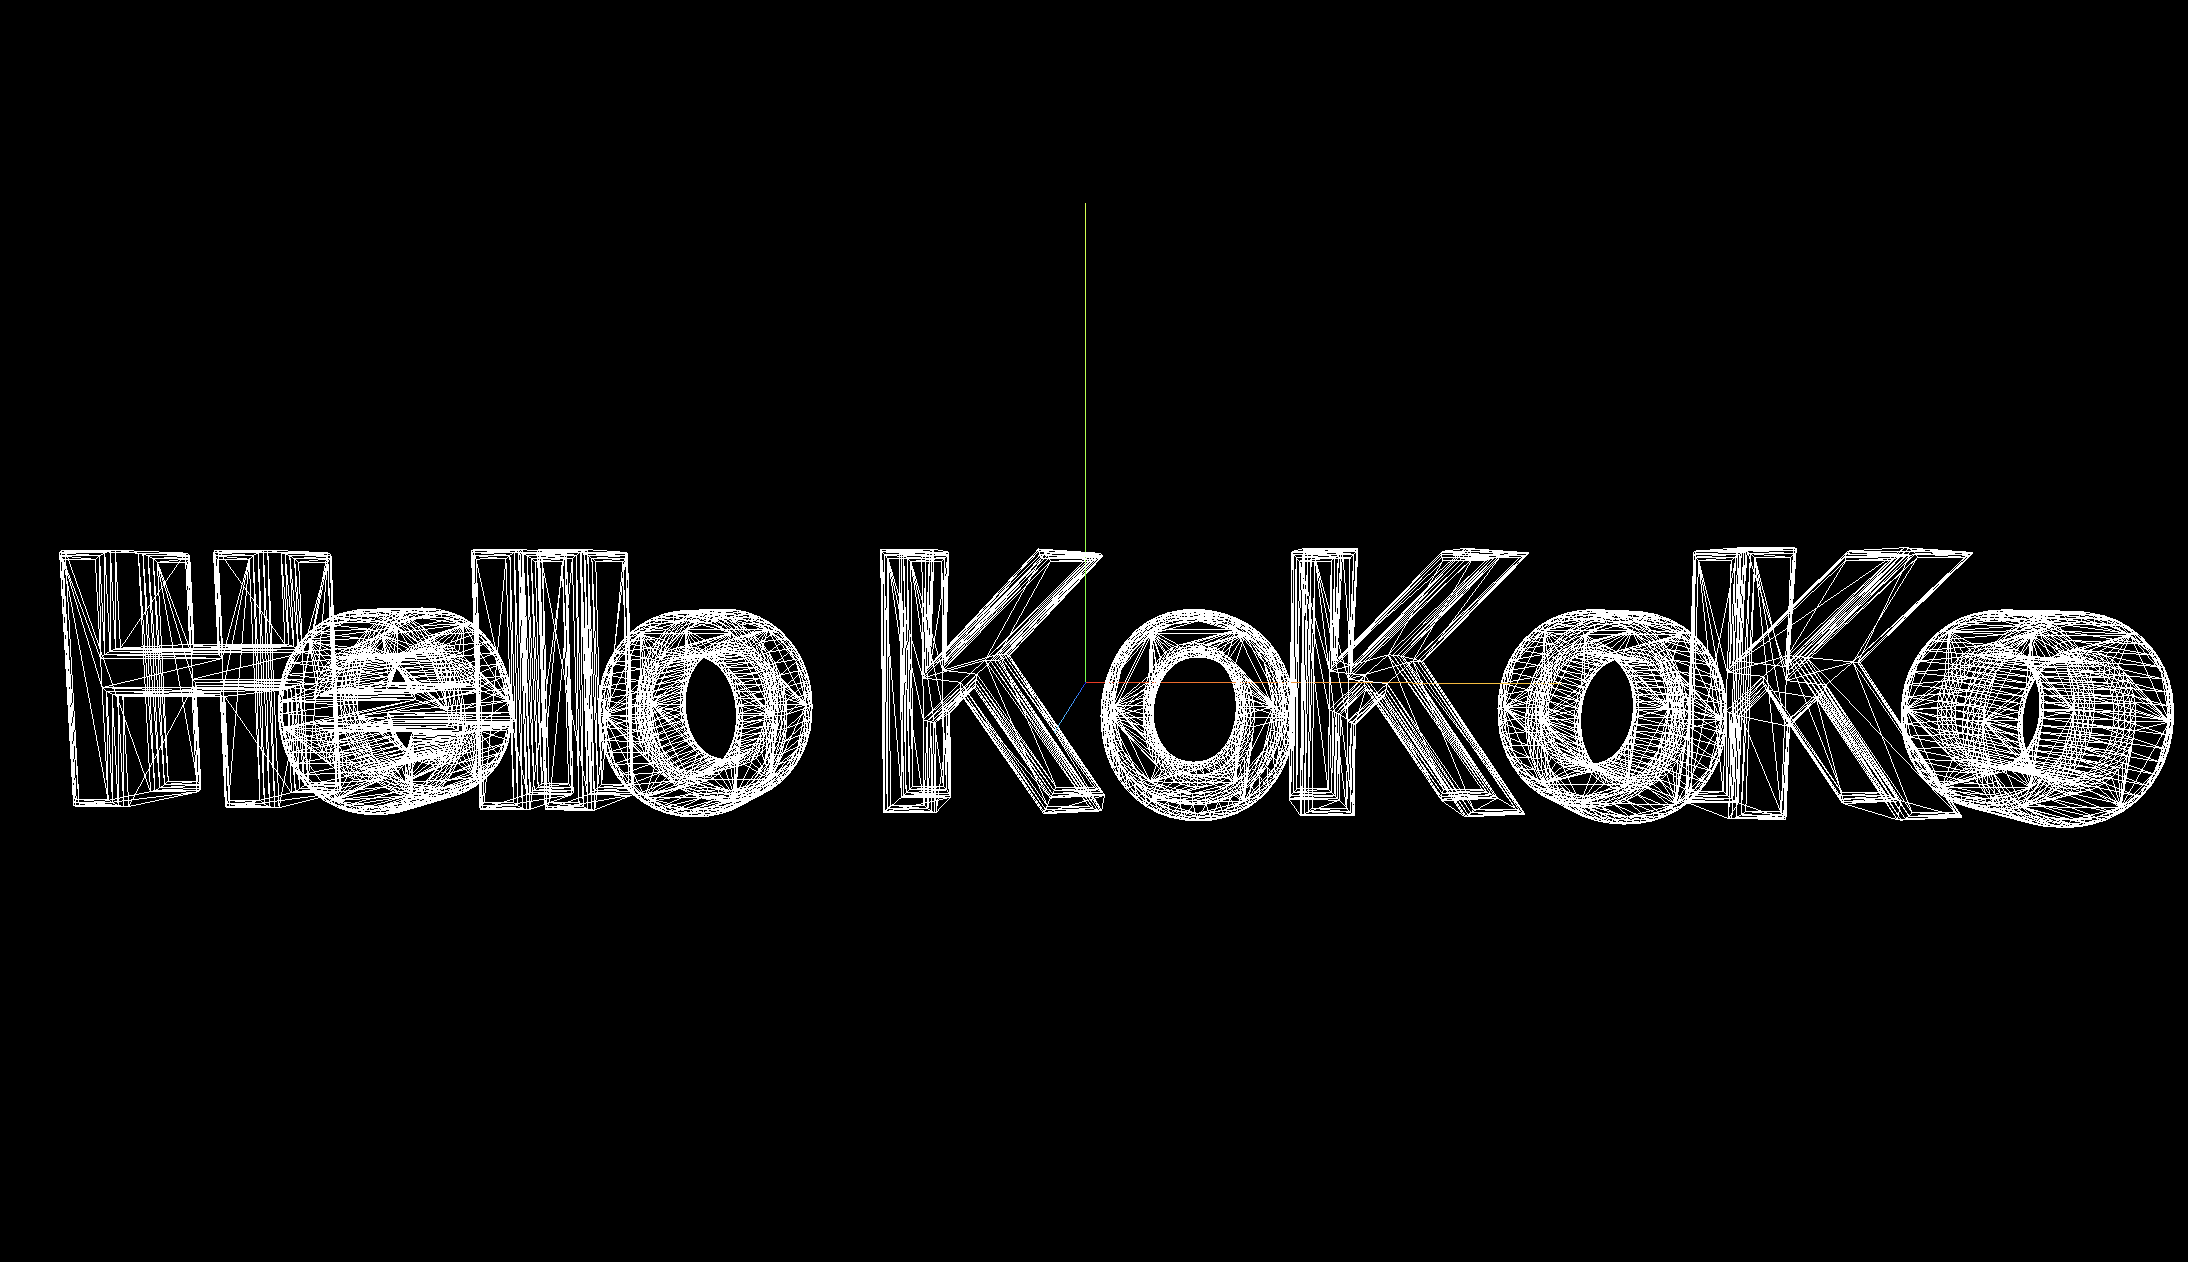
const textGeometry = new TextGeometry("Hello kokoko", {
font: font,
size: 0.5,
depth: 0.2, //height
curveSegments: 5, // 숫자가 높으면 퍼포먼스에 좋지않다.
bevelEnabled: true,
bevelThickness: 0.03,
bevelSize: 0.02,
bevelOffset: 0,
bevelSegments: 4, // 숫자가 높으면 퍼포먼스에 좋지않다.
});
const textMaterial = new THREE.MeshBasicMaterial({
wireframe: true, //textMaterial.wireframe=true 와 같다
});
const mesh = new THREE.Mesh(textGeometry, textMaterial);
scene.add(mesh);
});

텍스트 가운데 위치시키기
// AxesHelper
const axesHelper = new THREE.AxesHelper();
scene.add(axesHelper);
axesHelper로 중점이 어딘지 표시해보면, 텍스트가 중점부터 위치하는것을 알 수 있다.
텍스트를 가운데에 딱 위치시키고싶다면 두가지방법이있다.
사실 가장 빠르고 쉬운 방법은
textGeometry.center();인데, 공식문서를 보면

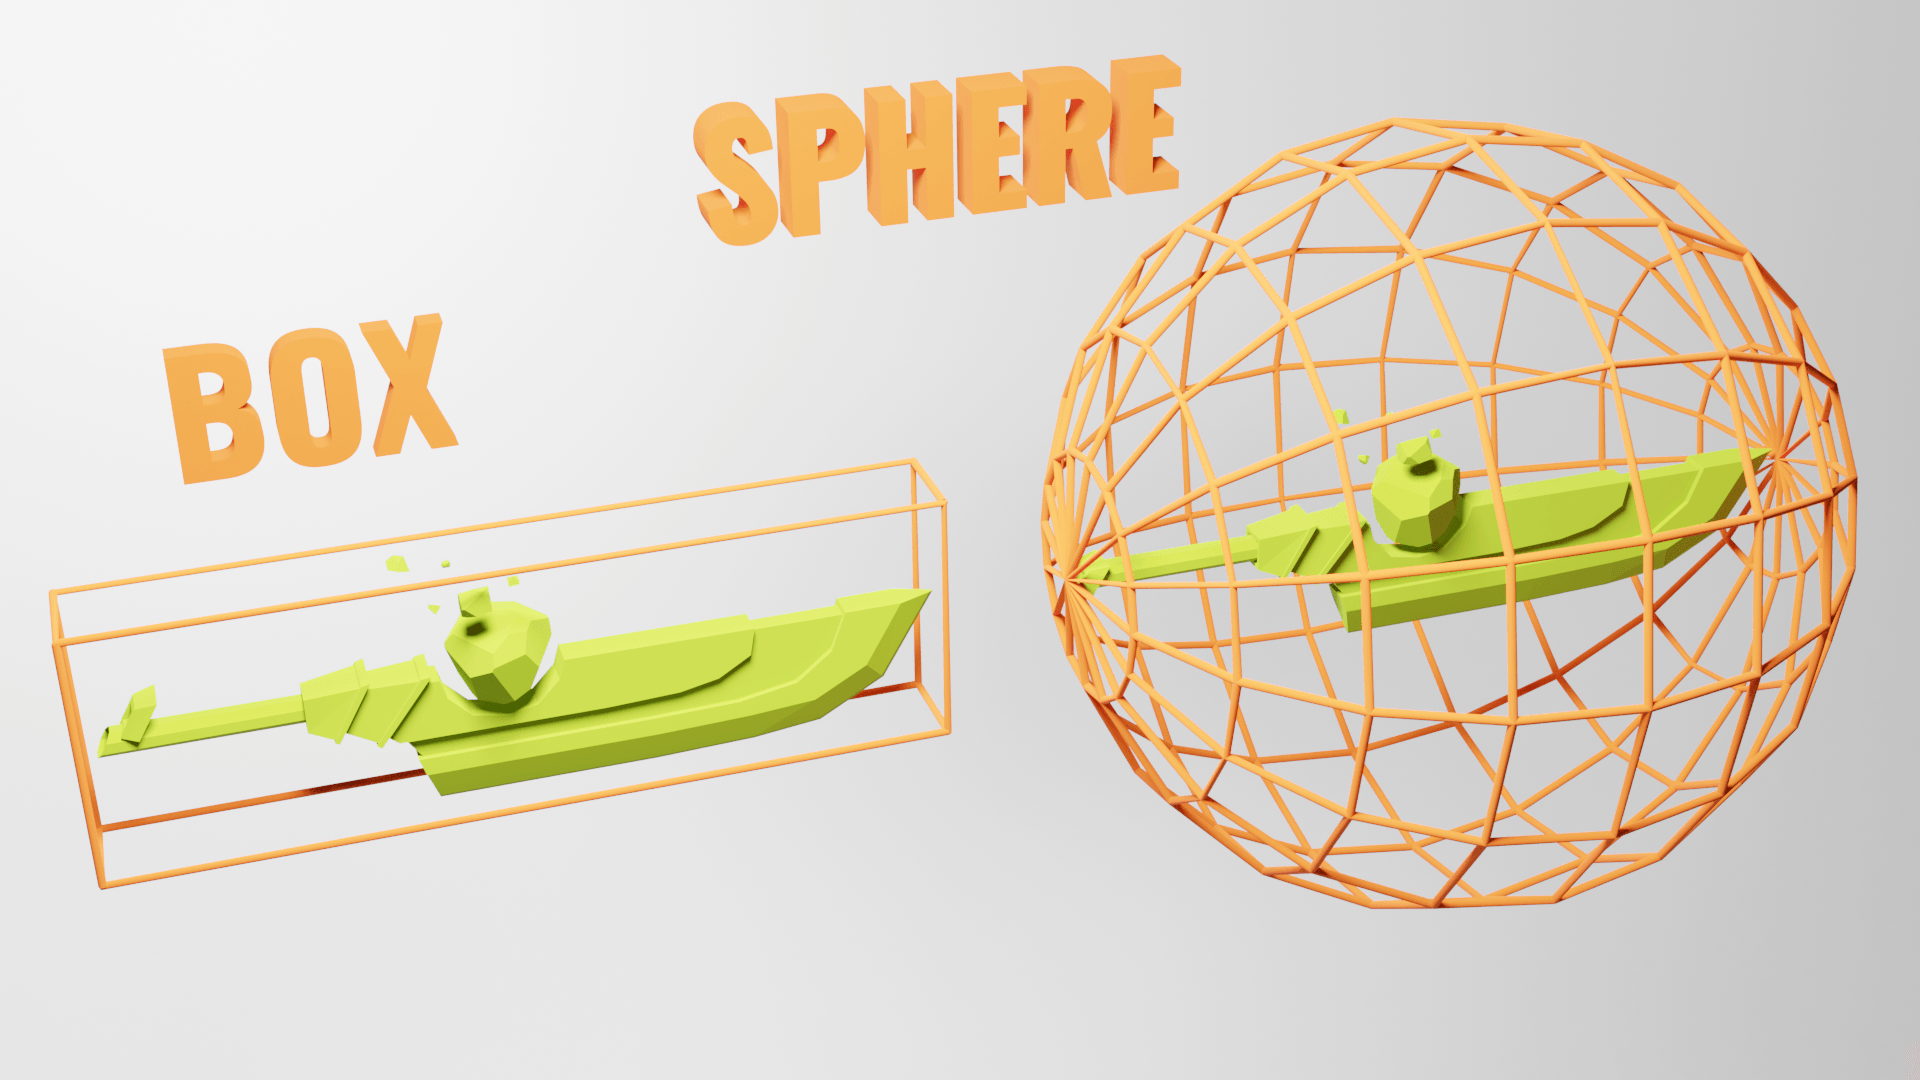
bounding box 가 무엇일까?
Bounding
조금 복잡한 방법 - Bounding 이용하기
The bounding is the information associated with the geometry that tells what space is taken by that geometry. It can be a box or a sphere.
이 바운딩이라는 것이 오브젝트가 screen에 있는지 없는지(렌더안되게) Three.js가 더 쉽게 계산하도록 돕는다고한다. 이를 frustum culling 이라고 함.
어떤것을 그릴 지 말지 결정하는 과정..?인듯.
출처: Three.js journey 강의
Three.js에서는 default 로 sphere bounding 을 사용한다
우린 Box bounding을 이용해서 텍스트를 센터로 옮겨보자
const fontLoader = new FontLoader();
fontLoader.load("/fonts/helvetiker_regular.typeface.json", (font) => {
const textGeometry = new TextGeometry("Hello Kurong", {
font: font,
size: 0.5,
...
});
👩💻✨textGeometry.computeBoundingBox();
👩💻✨console.log(textGeometry.boundingBox);
...
});

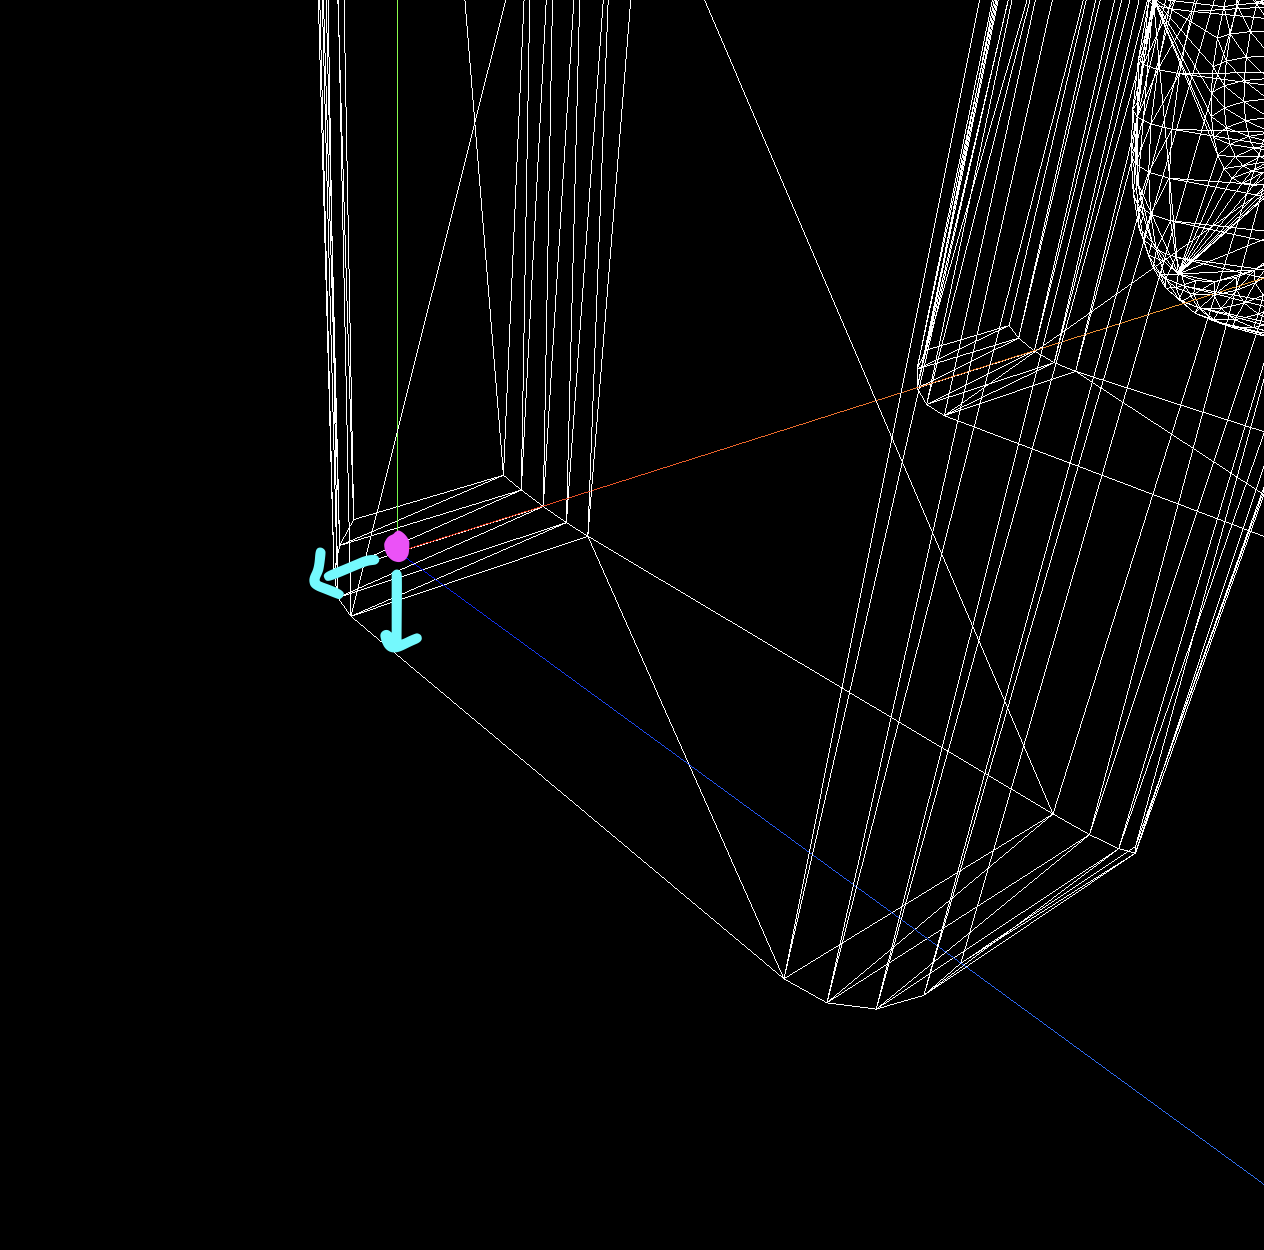
bevel로 인해 팽창되어서 센터 핑크 점보다 -쪽으로 밀려진걸 확인할수있다. 그래서 min 값이 마이너스인것이다.
mesh 를 움직이기보다, geometry를 움직일것이다.
이 겉에 투명 네모 박스가 boundingBox 니까 총길이를 구해서 0.5 곱해주면 센터 포인트 가운데로감.
translate 메소드 ( 모든 버텍스를 움직임 )를 사용하자
textGeometry.computeBoundingBox(); //textGeometry.boundingBox 접근가능

  textGeometry.translate( // x,y,z
    -(textGeometry.boundingBox.max.x - 0.02) * 0.5, // Subtract bevel size
    -(textGeometry.boundingBox.max.y - 0.02) * 0.5, // Subtract bevel size
    -(textGeometry.boundingBox.max.z - 0.03) * 0.5 // Subtract bevel thickness
  );
가운데 위치 완료!!
MeshMatcapMaterial
wireframe 말고 MeshMatcapMaterial로 적용해보자 (복습기념!)
🌟🌟 map 으로 사용되거나 matcapTexture을 사용할 시 colorSpace를 SRGBColorSpace로 꼭 적용해야 색상이 잘 먹힌다 🌟🌟
/**
* Textures
*/
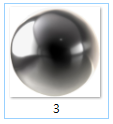
const textureLoader = new THREE.TextureLoader()
const matcapTexture = textureLoader.load('textures/matcaps/3.png')
🧙♂️ matcapTexture.colorSpace = THREE.SRGBColorSpace
// Textures used as map and matcap are supposed to be encoded in sRGB
// map 으로 사용되거나 matcapTexture을 사용할 시 colorSpace를 SRGBColorSpace로 적용해야 색상이 잘 먹힌다
/**
* Fonts
*/
const fontLoader = new FontLoader();
fontLoader.load('/fonts/helvetiker_regular.typeface.json', font => {
// Material
🧙♂️ const material = new THREE.MeshMatcapMaterial({ matcap: matcapTexture })
// Text
const textGeometry = new TextGeometry('Hello Three.js', {
font: font,
size: 0.5,
...
})
textGeometry.center()
const text = new THREE.Mesh(textGeometry, material)
scene.add(text)
}
})

우왕 멋지다
이제 도너츠를 추가해보자
fontLoader.load('/fonts/helvetiker_regular.typeface.json', font => {

  ....

  scene.add(text)

  //Donuts
  const donutGeometry = new THREE.TorusGeometry(0.3, 0.2, 32, 64)

  for (let i = 0; i < 100; i++) {
    const donut = new THREE.Mesh(donutGeometry, material)
    donut.position.x = (Math.random() - 0.5) * 10 // Math.random() 0보다 크거나 1보다 작은 ,
    donut.position.y = (Math.random() - 0.5) * 10
    donut.position.z = (Math.random() - 0.5) * 10
    donut.rotation.x = Math.random() * Math.PI
    donut.rotation.y = Math.random() * Math.PI

    const scale = Math.random()
    donut.scale.set(scale, scale, scale) // 밑에 3줄과 동일
    // donut.scale.x=scale
    // donut.scale.y=scale
    // donut.scale.x=scale

    scene.add(donut)
  }

  }
})
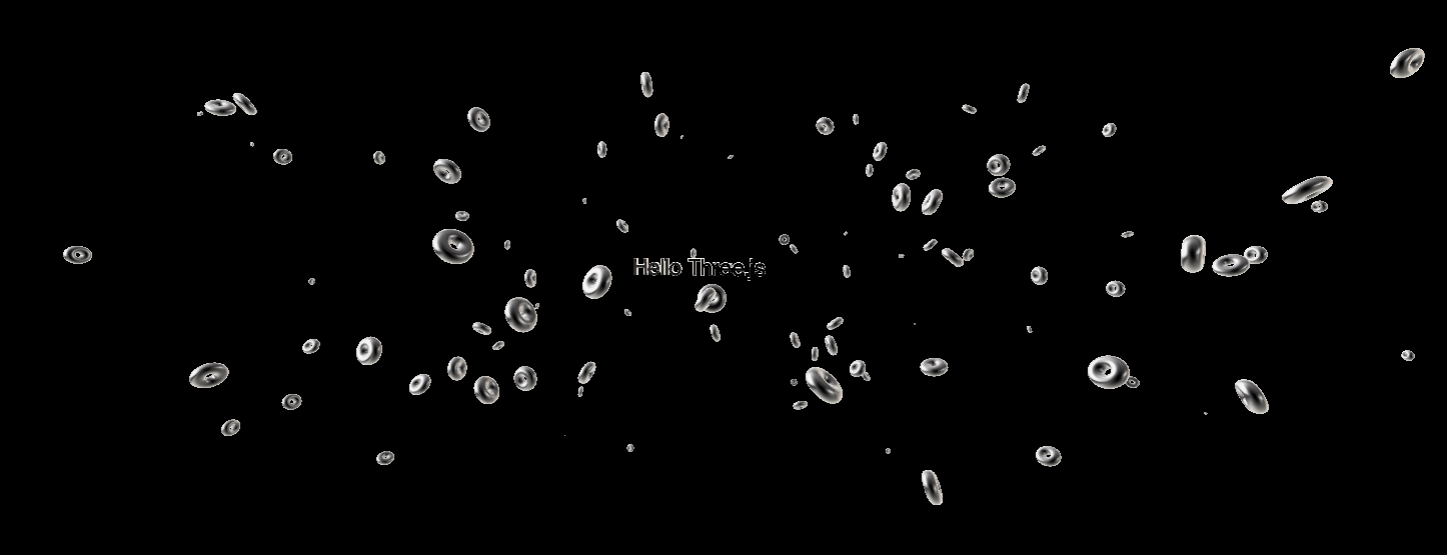
👆 donut.position.x = (Math.random() - 0.5) * 30 일때는 범위가 x축으로 더 길어지구 👆
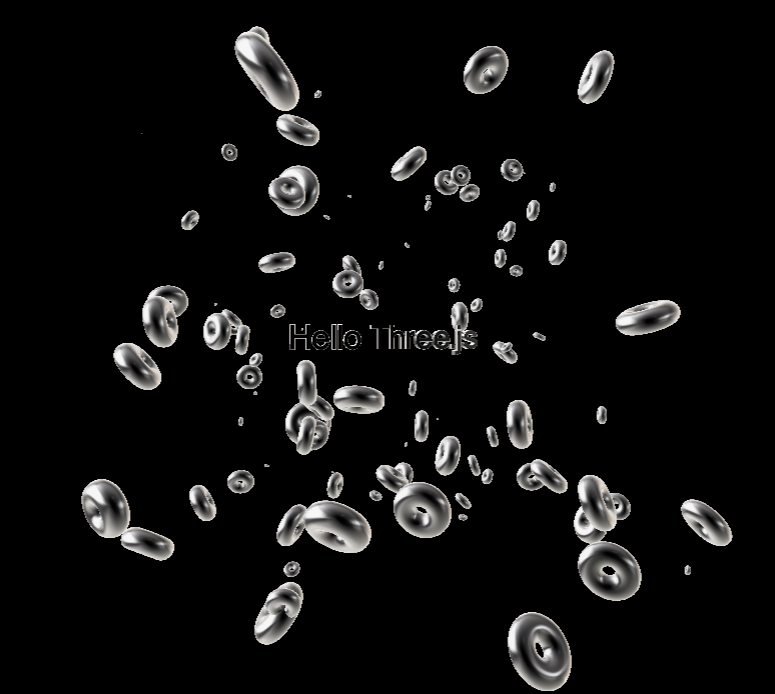
👆 donut.position.x = (Math.random() - 0.5) * 10 일때는 x 범위가 -5 부터 5까지 총 10x10 정육면체 안에서만 생성되는것처럼 ! 👆