
Roles
Roles let you automatically load related vars, files, tasks, handlers, and other Ansible artifacts based on a known file structure. After you group your content into roles, you can easily reuse them and share them with other users.
다른 사용자가 만든 playbook을 불러와서 사용하는 기능이다. 어느정도 공인된 playbook을 사용하면 보안설정이나 기본세팅이 잘되어있다.
변수 세팅 등을 통해 커스터마이징도 가능하다. 그럼 바로 실습을 통해 알아보자.
Role 생성하기
$ ansible-galaxy role init my-role

롤을 생성하게되면 directory 구조로 만들어지는데, 기본 구조는 아래와 같다.
| 하위디렉터리 | 기능 |
|---|---|
| default | 이 디렉터리의 main.yml 파일에는 롤이 사용될 때 덮어쓸 수 있는 롤 변수의 기본값이 포함되어 있습니다. 이러한 변수는 우선순위가 낮으며 플레이에서 변경할 수 있습니다. |
| files | 이 디렉터리에는 롤 작업에서 참조한 정적 파일이 있습니다. |
| handlers | 이 디렉터리의 main.yml 파일에는 롤의 핸들러 정의가 포함되어 있습니다. |
| meta | 이 디렉터리의 main.yml 파일에는 작성자, 라이센스, 플랫폼 및 옵션, 롤 종속성을 포함한 롤에 대한 정보가 들어 있습니다. |
| tasks | 이 디렉터리의 main.yml 파일에는 롤의 작업 정의가 포함되어 있습니다. |
| templates | 이 디렉터리에는 롤 작업에서 참조할 Jinja2 템플릿이 있습니다. |
| tests | 이 디렉터리에는 롤을 테스트하는 데 사용할 수 있는 인벤토리와 test.yml 플레이북이 포함될 수 있습니다. |
| vars | 이 디렉터리의 main.yml 파일은 롤의 변수 값을 정의합니다. 종종 이러한 변수는 롤 내에서 내부 목적으로 사용됩니다.또한 우선순위가 높으며, 플레이북에서 사용될 때 변경되지 않습니다. |
main task 생성
아래 스크립트 대로 role에 들어갈 파일들을 작성해준다. 만들어질 role을 httpd를 설치하고 서비스 하는 내용이다.
$ vi ~/my-ansible/my-role/tasks/main.yml
---
# tasks file for my-role

- name: install service {{ service_title }}
  ansible.builtin.apt:
    name: "{{ item }}"
    state: latest
  loop: "{{ httpd_packages }}"
  when: ansible_facts.distribution in supported_distros

- name: copy conf file
  ansible.builtin.copy:
    src: "{{ src_file_path }}"
    dest: "{{ dest_file_path }}"
  notify:
    - restart service


 $ vi ~/my-ansible/my-role/files/index.html
 echo "Hello! Ansible"

 $ vi ~/my-ansible/my-role/handlers/main.yml
 ---
# handlers file for my-role

- name: restart service
  ansible.builtin.service:
    name: "{{ service_name }}"
    state: restarted

$ echo 'service_title: "Apache Web Server"' >> defaults/main.yml

# vi my-ansible/my-role/vars/main.yml
---
# vars file for my-role

service_name: apache2
src_file_path: ../files/index.html
dest_file_path: /var/www/html
httpd_packages:
  - apache2
  - apache2-doc

supported_distros:
  - Ubuntu
만든 Role을 실행하기 위해서는 playbook이 필요하다. 결국 playbook을 통해 role을 실행하는 거다. my-role 디렉토리의 한단계 위에서 playbook을 만들어준다.
$ vi role-example.yml
---
- hosts: tnode1

  tasks:
    - name: Print start play
      ansible.builtin.debug:
        msg: "Let's start role play"

    - name: Install Service by role
      ansible.builtin.import_role:
        name: my-role

도전과제! role로 postgresql 설치하기
아래 github의 role을 활용해서 postgresql을 설치할 수 있다.
https://github.com/geerlingguy/ansible-role-postgresql
git clone https://github.com/geerlingguy/ansible-role-postgresql.git

$ vi postgre.yml
---
- hosts: tnode1

  tasks:
    - name: Print start play
      ansible.builtin.debug:
        msg: "Let's start role play"

    - name: Install Service by role
      ansible.builtin.import_role:
        name: ansible-role-postgresql

$ ansible-playbook postgre.yml --flush-cache
현재 세팅대로 playbook을 실행하면 에러가 나는데, fact 관련된 에러인 것 같다. ansible.cfg 파일의 fact 설정을 바꿔준다.
[defaults]
inventory = ./inventory
remote_user = ubuntu
ask_pass = false
# inject_facts_as_vars = false
# gathering = smart
# fact_caching = jsonfile
# fact_caching_connection = myfacts
설치가 완료되었다! 간단히 tnode1에 접속해서 확인해보자.
$ sudo systemctl status postgresql
postgres로 계정 변환
$  sudo -i -u postgres
$  psql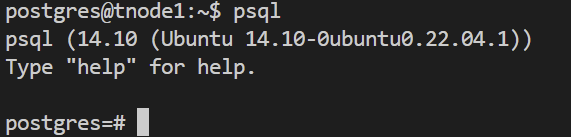
k8s의 helm 차트와 느낌이 좀 비슷하기도 하다. 간단히 설치도 가능하고, 변수 값도 바꿔가면서 커스터마이징이 가능한게 편하게 사용할 수 있을 것 같다.