1. 신규 앱 생성 / 등록
python manage.py startapp 앱이름
settings.py에 app 추가!
2. 모델 생성
- 수정일자 : auto_now=True 사용
auto_now=True 는 django model 이 save 될 때마다 현재날짜(date.today()) 로 갱신된다.
주로 최종수정일자 field option 으로 주로 사용된다.
- 생성일자 : auto_now_add=True 사용
auto_now_add=True 는 django model 이 최초 저장했을때만 현재날짜(date.today()) 를 저장한다.
class Article(models.Model):
title = models.CharField(max_length=100)
content = models.TextField()
created_at = models.DateTimeField(auto_now_add=True)
updated_at = models.DateField(auto_now=True)
user = models.ForeignKey(User, on_delete=models.CASCADE)
# on_delete는 삭제했을때 어떻게 할건지!! CASCADE는 삭제할 때 다 없애겠다.
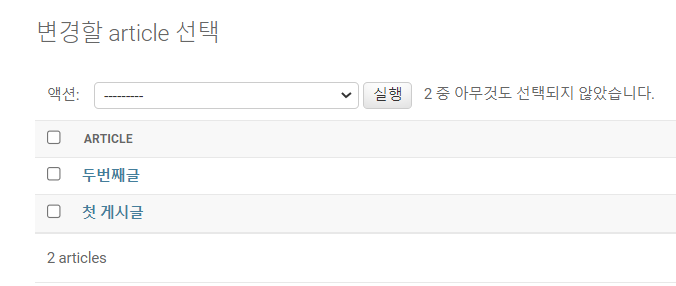
def __str__(self): # admin 페이지 tweet앱에서 article object말고 게시글 이름이 뜨게 한다.
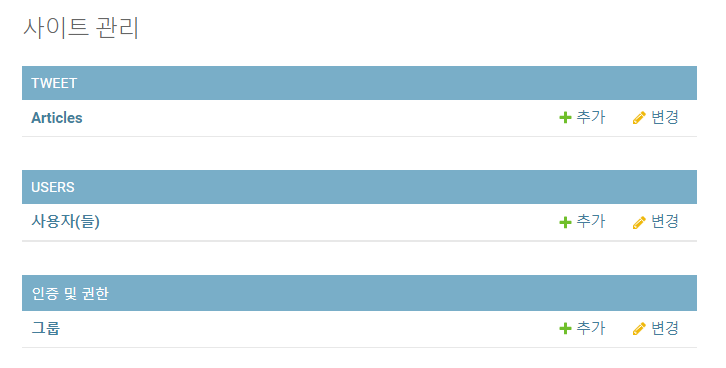
return str(self.title)3. 어드민 페이지 확인
4. 모델 어드민에 등록
from django.contrib import admin
from tweet.models import Article

admin.site.register(Article)
5. migration!
python manage.py makemigrations
python manage.py migrate
6. 어드민 페이지에서 테스트
- str 설정 전

- str 설정 후
from django.db import models
from users.models import User

class Article(models.Model):
    title = models.CharField(max_length=100)
    content = models.TextField()
    created_at = models.DateTimeField(auto_now_add=True)
    updated_at = models.DateField(auto_now=True)
    user = models.ForeignKey(User, on_delete=models.CASCADE)
    # on_delete는 삭제했을때 어떻게 할건지!! CASCADE는 삭제할 때 다 없애겠다.

    def __str__(self):  # admin 페이지 tweet앱에서 article object말고 게시글 이름이 뜨게 한다.
        return str(self.title)
7. R : 전체 리스트 페이지 만들기
- urls.py
from django.urls import path
from tweet import views

app_name = 'tweet'

urlpatterns = [
    path('', views.index, name='index'),
    path('create_article/', views.create_article, name='create_article'),
    path('<int:article_id>/', views.article_detail, name='article_detail'),
    path('<int:article_id>/update_article/', views.update_article, name='update_article'),
    path('<int:article_id>/delete_article/', views.delete_article, name='delete_article'),
]
- template
<!DOCTYPE html>
<html lang="en">
<head>
    <meta charset="UTF-8">
    <meta http-equiv="X-UA-Compatible" content="IE=edge">
    <meta name="viewport" content="width=device-width, initial-scale=1.0">
    <title>인덱스 페이지</title>
</head>
<body>
    <h1>모든 게시글</h1>
    {% for article in articles %}
        <div>
            <a href="{% url 'tweet:article_detail' article.id %} ">
                <h3>{{ article.title }}</h3>
            </a>
            <!-- <a href="{% url 'tweet:article_detail' article.pk %} "><h3>{{ article.title }}</h3></a> 도 가능!(다른값을 pk로 지정해주지 않는다면
                ) -->
        </div>
    {% endfor %}
</body>
</html><a href="{% url 'tweet:article_detail' article.id %} "> 위의 url은 urls.py에 int 변수를 지정해주었기 때문에 이렇게 작성해주어야 한다!
- views.py
from django.http import HttpResponse
from django.shortcuts import render, redirect
from tweet.models import Article
from django.shortcuts import get_object_or_404

# Create your views here.

def index(request):
    articles = Article.objects.all().order_by('-created_at')
    context={
        'articles':articles
    }
    # for article in articles:
    #     print(article)
    #     print(article.content)
    #     print(article.user) -> 값이 username이 나오는 이유는 대표값이 username이기 때문! __str__로 대표값을 지정해주면 그 값으로 나온다!
    #     print(article.user.last_login)
    # user를 users앱에서 foreign key로 가져왔기 때문에 user값와 user.last_login값 등을 가져올 수 있다.
    return render(request, 'index.html', context)
페이지네이션 관련 자료 : https://docs.djangoproject.com/en/4.1/topics/pagination/
8. C : 게시글 작성페이지 만들기
- template
<!DOCTYPE html>
<html lang="en">
<head>
    <meta charset="UTF-8">
    <meta http-equiv="X-UA-Compatible" content="IE=edge">
    <meta name="viewport" content="width=device-width, initial-scale=1.0">
    <title>게시글 작성 페이지</title>
</head>
<body>
    <h1>게시글 작성 페이지 입니다!</h1>
    <form action="{% url 'tweet:create_article' %}" method="POST">
        {% csrf_token %}
        <div>
            <input type="text" name="title" placeholder="title">
        </div>
        <div>
            <textarea name="content" id="content" cols="30" rows="10" placeholder="content"></textarea>
        </div>
        <!-- 여기서 name은 key값이라고 생각하자 -->
        <input type="submit">
    </form>
</body>
</html>
- views.py
def create_article(request):
    if request.method == 'GET':
        return render(request, 'create_article.html')
    elif request.method == 'POST':
        title = request.POST.get('title')
        content = request.POST.get('content')
        user = request.user
        Article.objects.create(title=title, content=content, user=user)
        # 26, 27번째줄을 한번에 작성하면 Article.objects.create(title=title, content=content, user=request.user) 이다.

        return redirect('tweet:index')
9. R : 게시글 상세페이지 만들기
- template
<!DOCTYPE html>
<html lang="en">
<head>
    <meta charset="UTF-8">
    <meta http-equiv="X-UA-Compatible" content="IE=edge">
    <meta name="viewport" content="width=device-width, initial-scale=1.0">
    <title>Article detail</title>
</head>
<body>
    <h1>{{ article.title }}</h1>
    <p>{{ article.content }}</p>
    <p>{{ article.created_at }}</p>
    <p>{{ article.user }}</p>

    {% if article.user == request.user %}
    <a href="{% url 'tweet:update_article' article.id %}">
        <button>수정버튼</button>
    </a>
    <form action="{% url 'tweet:delete_article' article.id %}" method="POST">
        {% csrf_token %}
        <button type="submit">삭제버튼</button>
    </form>
    {% endif %}
</body>
</html>
- views.py
def article_detail(request, article_id):
    article = get_object_or_404(Article, id=article_id)
    context = {
        'article': article
    }
    # html에서 context안에 들어있는 데이터를 이용할 수 있다.
    return render(request, 'article_detail.html', context)
10. get object or 404
from django.shortcuts import get_object_or_404이상한 아이디를 주소창에 쳤을 때 이상한 오류창이 아니라 404창이 뜨게한다!
shortcuts 관련 자료 : https://docs.djangoproject.com/en/4.1/topics/http/shortcuts/
11. U : 게시글 수정 페이지 만들기
- template
<!DOCTYPE html>
<html lang="en">
<head>
    <meta charset="UTF-8">
    <meta http-equiv="X-UA-Compatible" content="IE=edge">
    <meta name="viewport" content="width=device-width, initial-scale=1.0">
    <title>게시글 수정 페이지</title>
</head>
<body>
    <h1>게시글 수정 페이지 입니다!</h1>
    <form action="{% url 'tweet:update_article' article.id %}" method="POST">
        {% csrf_token %}
        <div>
            <input type="text" name="title" placeholder="title" value='{{ article.title }}'>
        </div>
        <div>
            <textarea name="content" id="content" cols="30" rows="10" placeholder="content">
                {{ article.content }}
            </textarea>
        </div>
        <!-- 여기서 name은 key값이라고 생각하자 -->

        <input type="submit">
    </form>
</body>
</html>
- views.py
def update_article(request, article_id):
    article = Article.objects.get(id=article_id)
    if request.user != article.user:
        return HttpResponse("권한이 없습니다.")
    if request.method == 'GET':
        context = {
        'article': article
        }
        return render(request, 'update_article.html', context)
    elif request.method == 'POST':
        article.title = request.POST.get('title')
        article.content = request.POST.get('content')
        # title = request.POST.get('title')
        # content = request.POST.get('content')
        # article.title = title
        # article.content = content
        # 50, 51번줄과 결과가 같다.
        article.save()
        return redirect('tweet:article_detail', article_id)
12. D : 게시글 삭제
- template
<!DOCTYPE html>
<html lang="en">
<head>
    <meta charset="UTF-8">
    <meta http-equiv="X-UA-Compatible" content="IE=edge">
    <meta name="viewport" content="width=device-width, initial-scale=1.0">
    <title>Article detail</title>
</head>
<body>
    <h1>{{ article.title }}</h1>
    <p>{{ article.content }}</p>
    <p>{{ article.created_at }}</p>
    <p>{{ article.user }}</p>

    {% if article.user == request.user %}
    <a href="{% url 'tweet:update_article' article.id %}">
        <button>수정버튼</button>
    </a>
    <form action="{% url 'tweet:delete_article' article.id %}" method="POST">
        {% csrf_token %}
        <button type="submit">삭제버튼</button>
    </form>
    {% endif %}
</body>
</html>
- views.py
def delete_article(request, article_id):
    if request.method == 'POST':
        article = Article.objects.get(id=article_id)
        if request.user != article.user: # 로그인한 유저와 글 작성자가 같지 않을 경우
            return HttpResponse("권한이 없습니다.")
        article.delete()
        return redirect('tweet:index')
submit은 form태그에 action과 method를 쓰겠다는 뜻이다.
13. R : 프로필에 내가 작성한 글 보이게 하기 (fk)
- template
<!DOCTYPE html>
<html lang="en">
<head>
    <meta charset="UTF-8">
    <meta http-equiv="X-UA-Compatible" content="IE=edge">
    <meta name="viewport" content="width=device-width, initial-scale=1.0">
    <title>프로필페이지</title>
</head>
<body>

    <div>{{ user }}님의 페이지이고 마지막 로그인은 {{ user.last_login }} </div>
    <div>지금 로그인한 유저는 {{ request.user }}</div>

    <h2>작성한 글</h2>
    <div>
        {% for article in user.article_set.all %} # 해당하는 user가 작성한 모든 글을 불러오겠다!
            <div>
                {{ article.title }}
            </div>
            <div>
                {{ article.content }}
            </div>
        {% endfor%}
    </div>

    {% if user == request.user %} # 유저가 요청된(로그인된) 유저일 경우
    <div>내 프로필 페이지</div>
    <button>프로필 편집</button>
    {% endif %}
</body>
</html>
- views.py
def profile(request, username):
    # user = User.objects.get(username=username) 이것 대신 아래 404를 사용하면 이상한 아이디를 주소창에 쳤을 때 이상한 오류창이 아니라 404창이 뜬다.
    # 예쁜 404창을 만드려면 debug를 false로 해주자!
    user = get_object_or_404(User, username=username)
    # for article in user.article_set.all():
        # 유저가 작성한 모든 글을 불러올 때
        # print(article)
    context = {
        'user': user
    }
    # html에서 context안에 들어있는 데이터를 이용할 수 있다.
    return render(request, 'profile.html', context)
- foreign key 벨류값 가져오기(django foreign key)
user.article_set.all(): => 유저가 작성한 모든 글을 불러올 때
django many to one 자료 : https://docs.djangoproject.com/en/4.1/topics/db/examples/many_to_one/
14. 로그아웃 기능
로그아웃 기능 관련 자료 : https://docs.djangoproject.com/en/4.1/topics/auth/default/