https://makingrobot.tistory.com/76
1. Nvidia jeton xavier nx 다운
ssd에 flash
nvidia jetson xavier nx
1) nvidia jetson xavier nx 리커버리모드 진입
FC Rec - Gnd 점프선
nvidia 보드와 노트북 연결하고 lsusb로 잘 연결되었는지 확인
2) nvidia jetson xavier nx 디바이스 선택
jetpack 4.6.4, deepstream 설치
3) I accept the terms and conditions of the license agreements
4) download & install
5) nvidia jetson nx os flash
- ssd로 로드(NVME)
- username , password = nvidia
6) install to target board
nvidia 보드 부팅될때까지 기다리고, 로그인 하고 나서, install
nvidia default ip를 노트북에서 ifconfig 명령어를 통해 확인
7) install 완료 후 recovery mode에서 나간 다음 다시 부팅
8) 원하는 세팅 진행
2. Vesc 이용
1) Desktop에 Vesc 설치
2) Powering the Vesc
배터리와 모터 드리아버 연결
NVIDIA JETSON XAVIER는 켤 필요 없음
안되면 참조하기
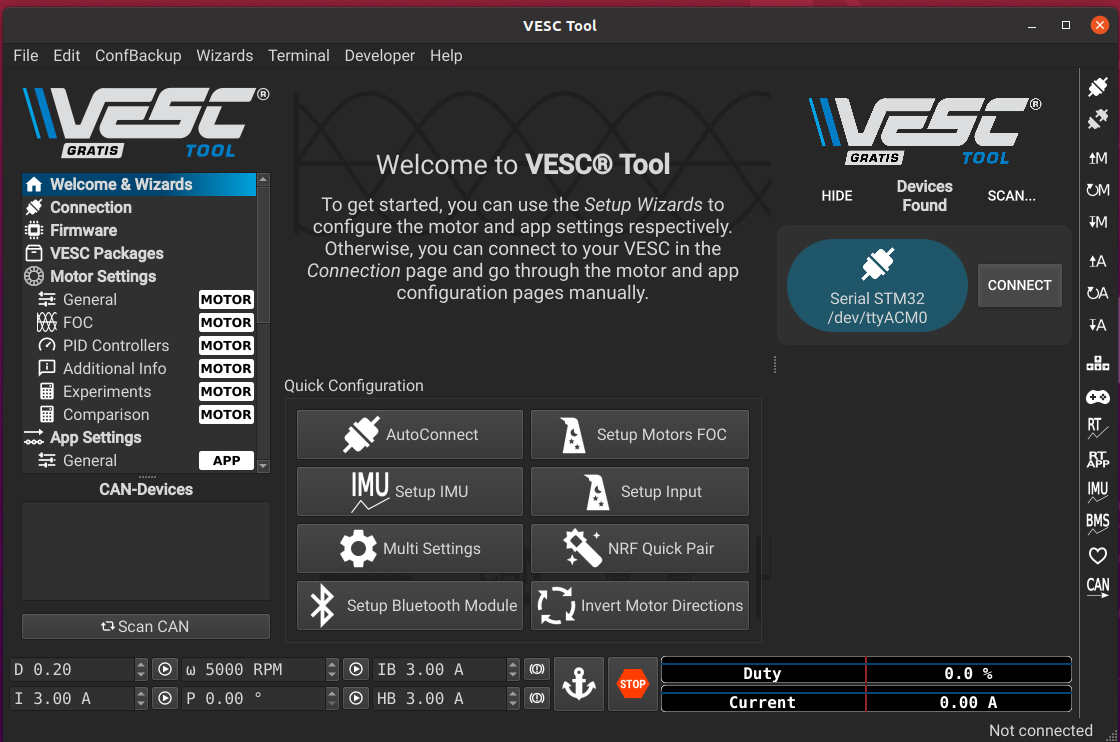
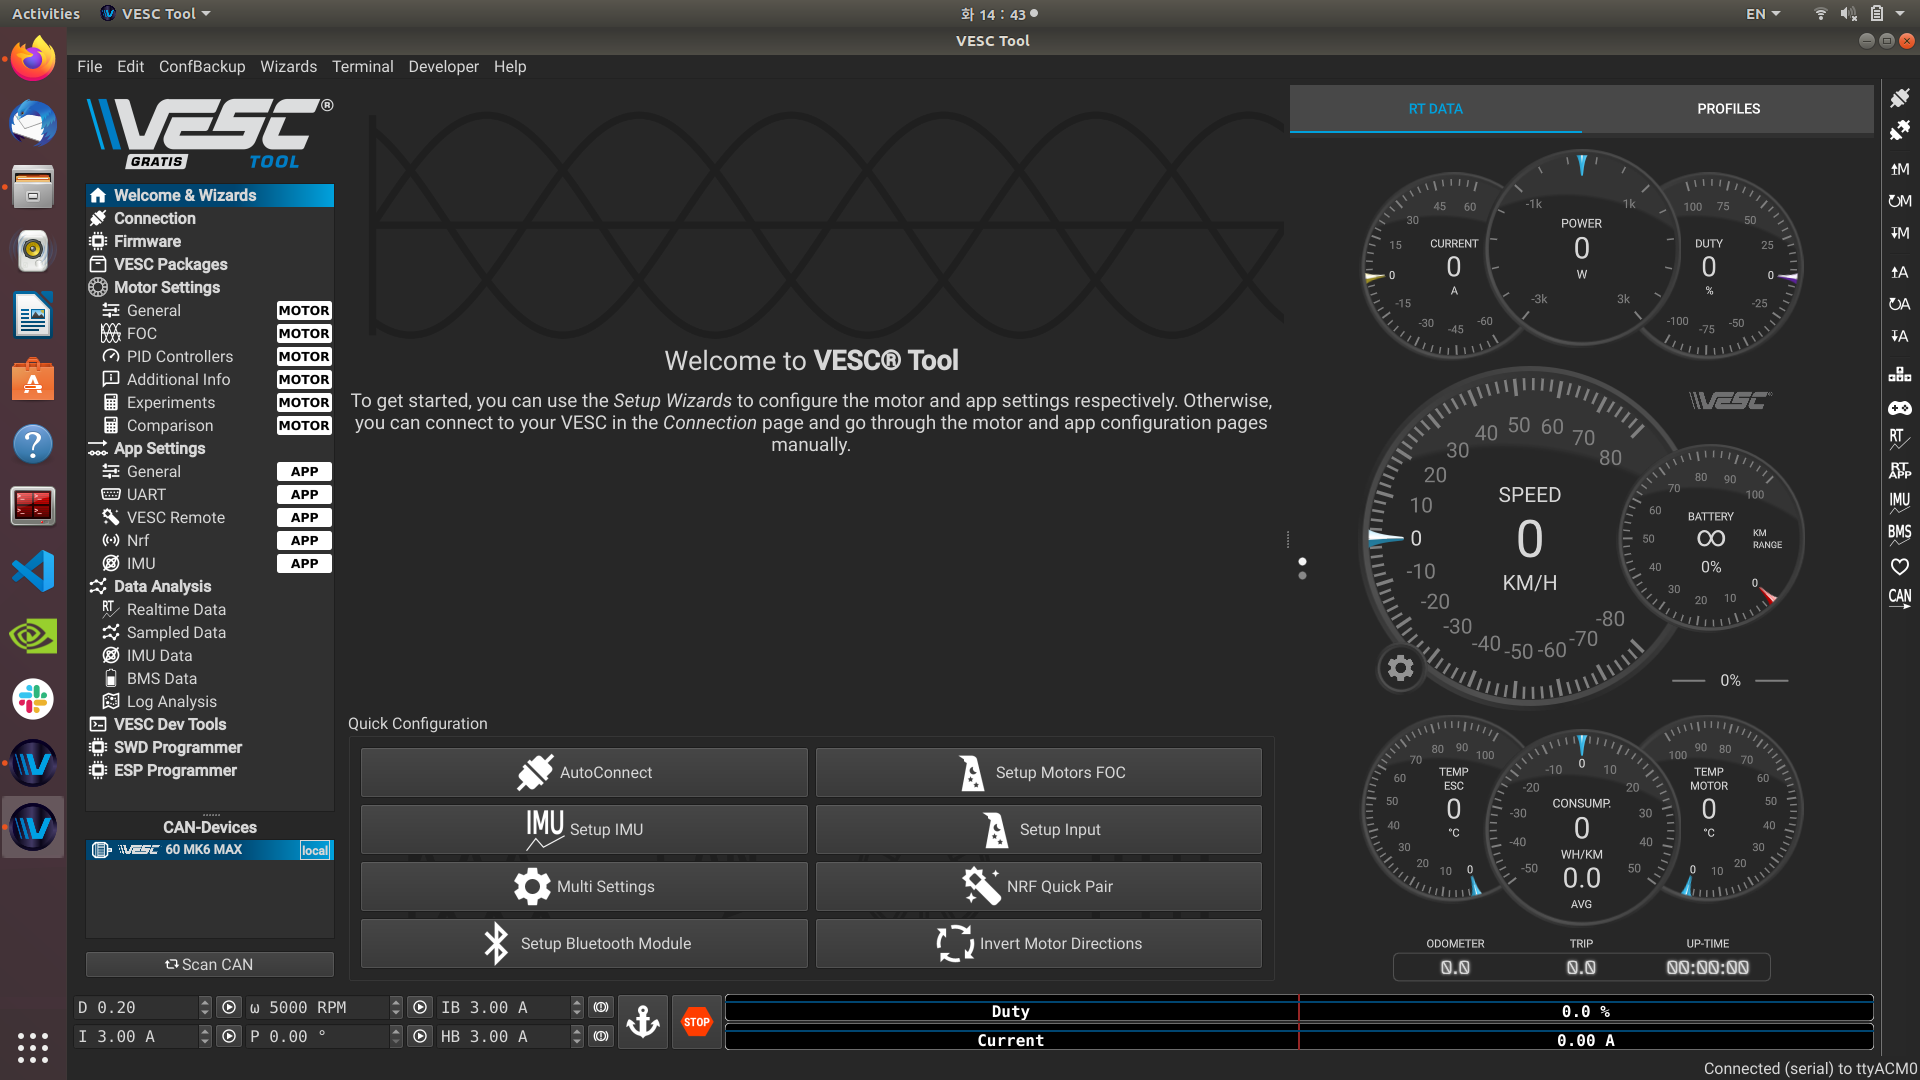
3) Vesc와 Laptop 연결
-connect 버튼 누르기

-우측에 dashboard 생성(RT DATA, PROFILES)
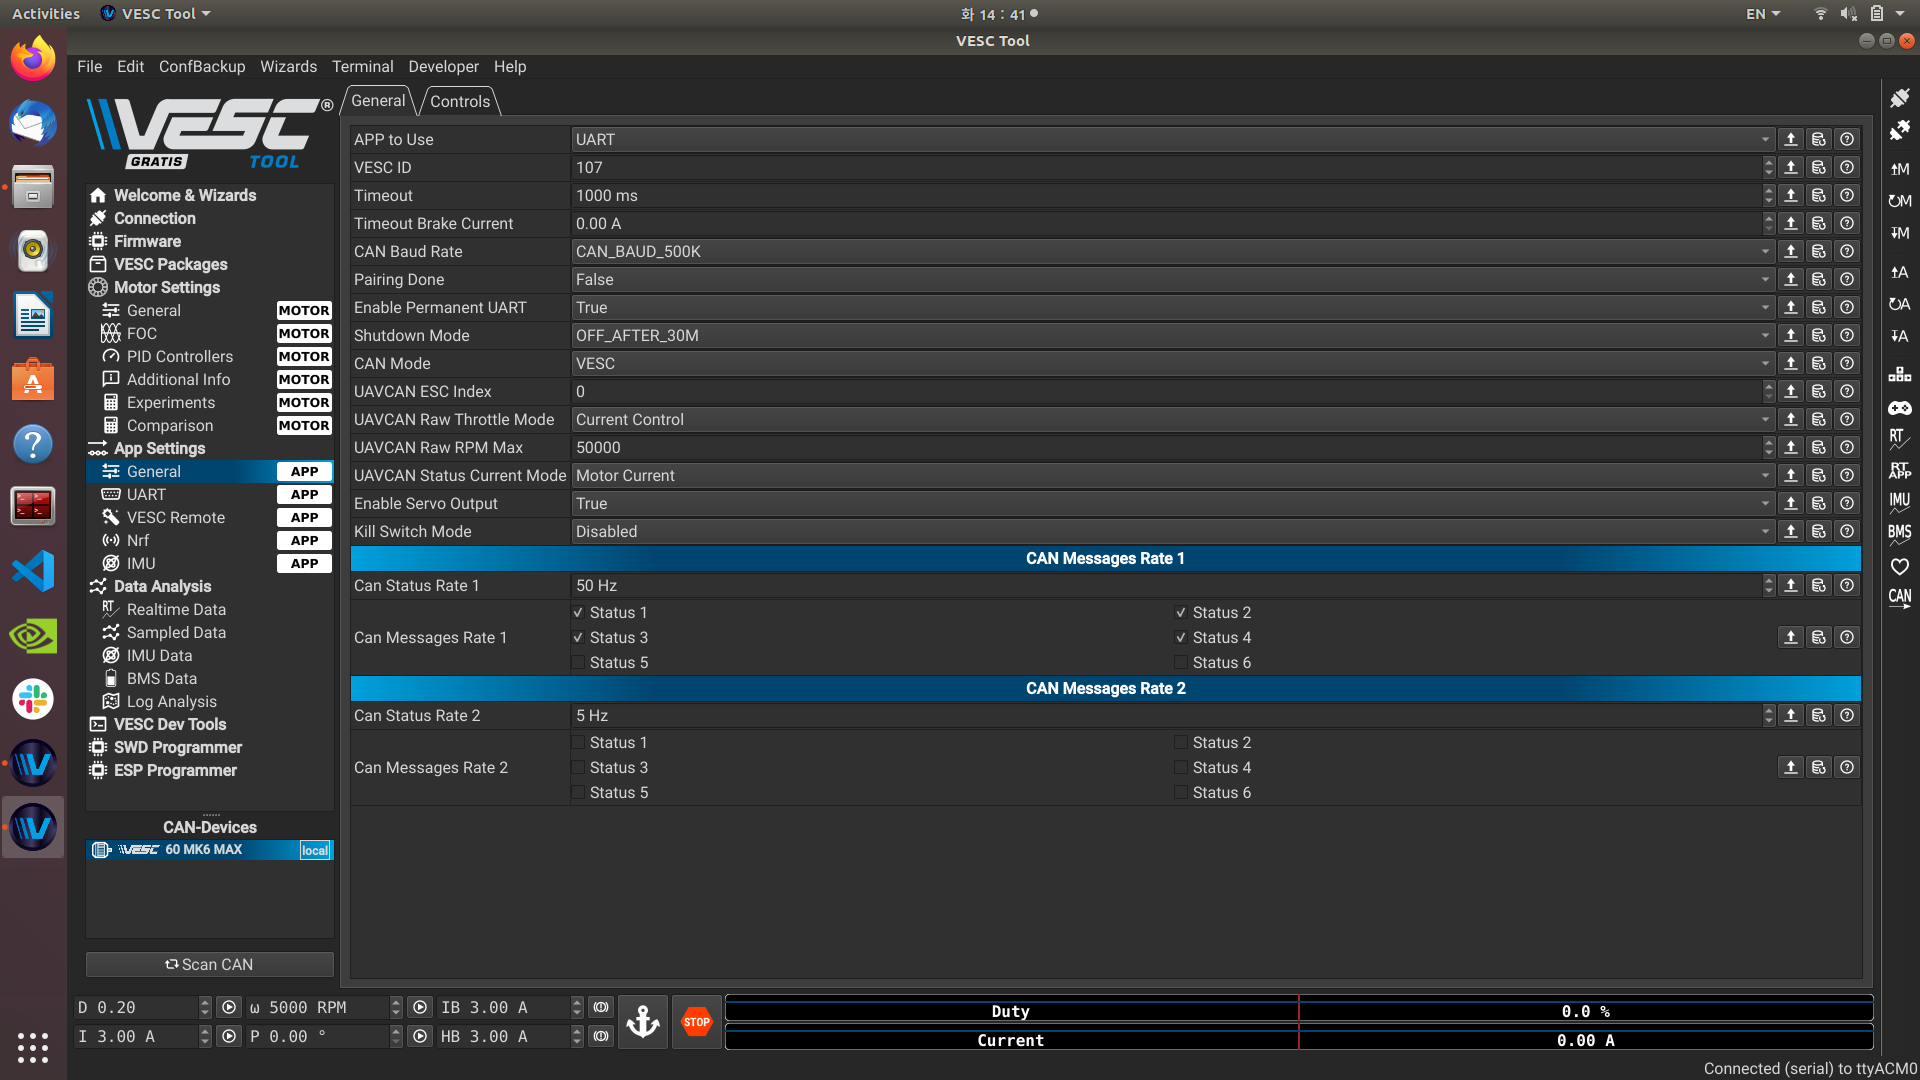
-enable servo output
app setting - general
enable servo output을 true로 변경 !!!!!!
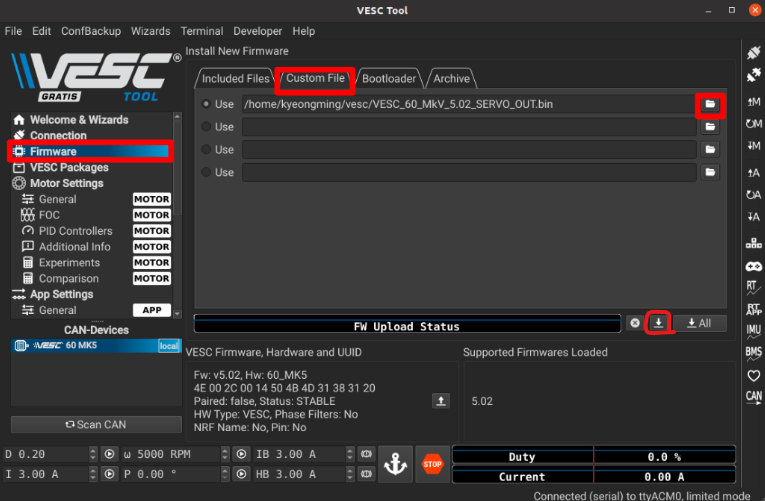
-Firmware -> custom File에서 servo_out.bin 파일 선택-> FW upload status 옆에 다운로드처럼 생긴 아이콘 클릭!!
-file -> load motor configuation XML
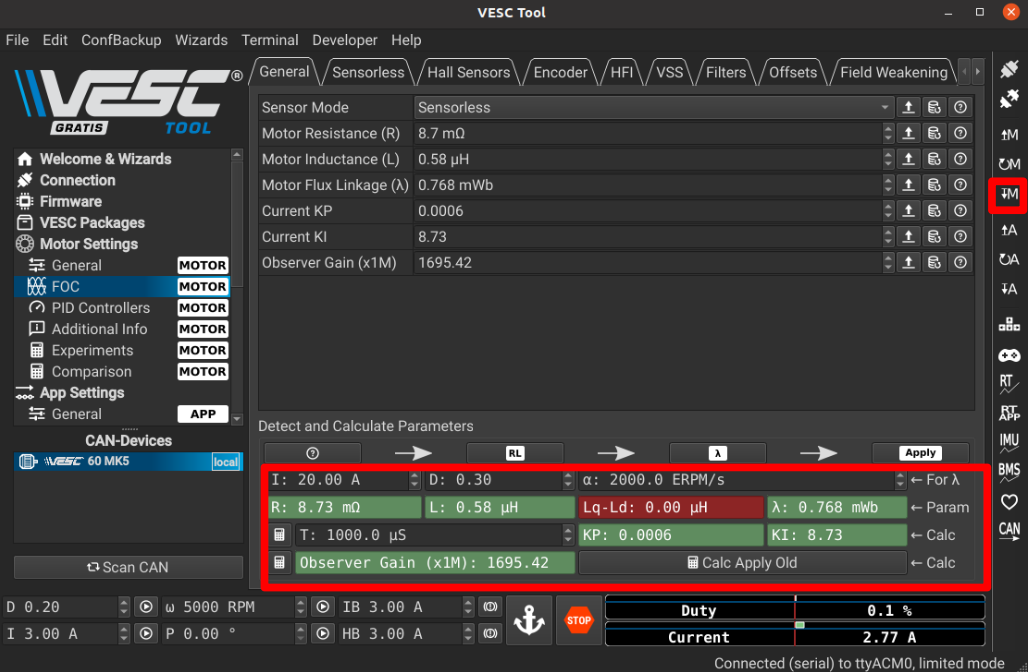
FOC로 들어감
-우측 M아래 화살표 클릭(write motor configuration)
-Foc -> general -> RL,mwb 설정
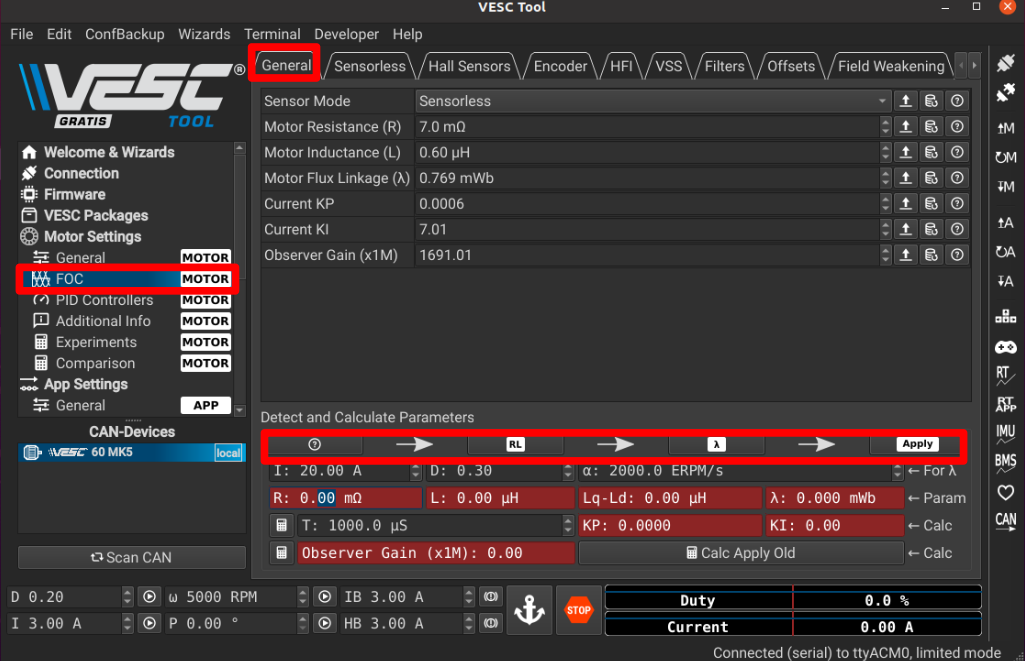
- 값 setting 후 M아래 화살표 클릭
3. Nvidia Jetson, 노트북 세팅
F1_tenth_setup 파일 참조
1) Ros noetic install
2) 작업 공간 만들고 깃 클론
mkdir -p f1tenth_ws/src
cd f1tenth_ws/src
git clone http://github.com/Kwally1209/F1tenth_bootcamp.git
3) package install
sudo apt-get install python-pip
sudo apt-get install ros-noetic-driver-base
sudo apt-get install ros-noetic-urg-node
sudo apt-get install ros-noetic-map-server
sudo apt-get install ros-noetic-joy
4) f1tenth_ws 위치에서 catkin_build 실행
cd ..
catkin_build
5) 노트북과 nvidia jetson 보드 bashrc 수정
gedit ~/.bashrc
아래 내용 첨가
C언어
alias vesc='sudo mkdir /dev/sensors && sudo ln -s /dev/ttyACM0 /dev/sensors/vesc && sudo chmod 777 /dev/ttyACM0 && source ~/f1tenth_ws/devel/setup.bash && roslaunch racecar teleop.launch'
alias lidar='rosrun urg_node urg_node _ip_address:=192.168.0.10'
alias sb='source ~/.bashrc'
alias vb='vim ~/.bashrc'
alias hector='source ~/hector/devel/setup.bash && roslaunch hector_mapping mapping_default.launch'
alias mapsave='rosrun map_server map_saver -f map_data'
alias parScle='source /home/hmclab/parScle/devel/setup.bash && roslaunch parScle_filter localize.launch'
alias joy='rosrun joy joy_node _autorepeat_rate:=20.0'
source ~/f1tenth_ws/devel/setup.bash
source ~/.bashrc
4. 노트북/PC 연결하는 법
gedit ~/.bashrc
아래 내용 수정
Nvidia board
MASTER_IP 부분 입력 - Nvidia board의 IP 사용
export ROS_MASTER_URI=http://MASTER_IP:11311
export ROS_IP=MASTER_IP
export ROS_HOSTNAME=$ROS_IP
노트북 및 PC
MASTER_IP 부분 입력 - Nvidia board의 IP 사용
LOCAL_IP는 노트북 및 PC의 IP
export ROS_MASTER_URI=http://MASTER_IP:11311
export ROS_IP=LOCAL_IP
export ROS_HOSTNAME=$ROS_IP
source ~/.bashrc
4. Nvidia 보드에서 lidar, vesc 실행하는 법
- nvidia board에서 roscore 실행 후 vesc, lidar 명령어 실행
이때, joy_teleop.py를 실행모드로 변환
cd ~/f1tenth_ws/src/F1tenth_bootcamp/racecar/racecar/scripts
chmod +x joy_teleop.py
ls                ##실행모드인지 확인
joy_teleop.py code 수정
279번 줄 ,e -> as e
284번 줄 iteritems -> items
5.Lidar용 ethernet 설정
lidar 연동
ethernet 설정
이름 Hokuyo
IP4 address 설정
address 192.168.0.15
netmask 255.255.255.0
gateway 192.168.0.1
6. Lidar data rviz에서 받기
rosrun rviz rviz
rviz setting
-요약-
1. add topic - laser
2. Global option의 Fixed Frame을 /laser로
3. laser Scan의 topic을 /scan으로
7. 조이스틱 차량제어 reference
차량에서 joy 명령어 실행
F1tenth-Build -> Driving the car -> 6번
링크
parameter 설정 jstest-gtk
f510
alias drve='roslaunch joy joy.launch'vesc - lidar - drive
8. how to know drive condition
1) using python code
topic
/vesc/odom
tell what's the robot's pose(position + orientation), twist(linear, angular velocity)
/vesc/ackermann_cmd
tell what's the input velocity, accleration, angular velocity, steering angle, jerk(rate of variation of acceleration)
2) using joystick
9. Visual Studio Code
arm64.deb으로 download 받기
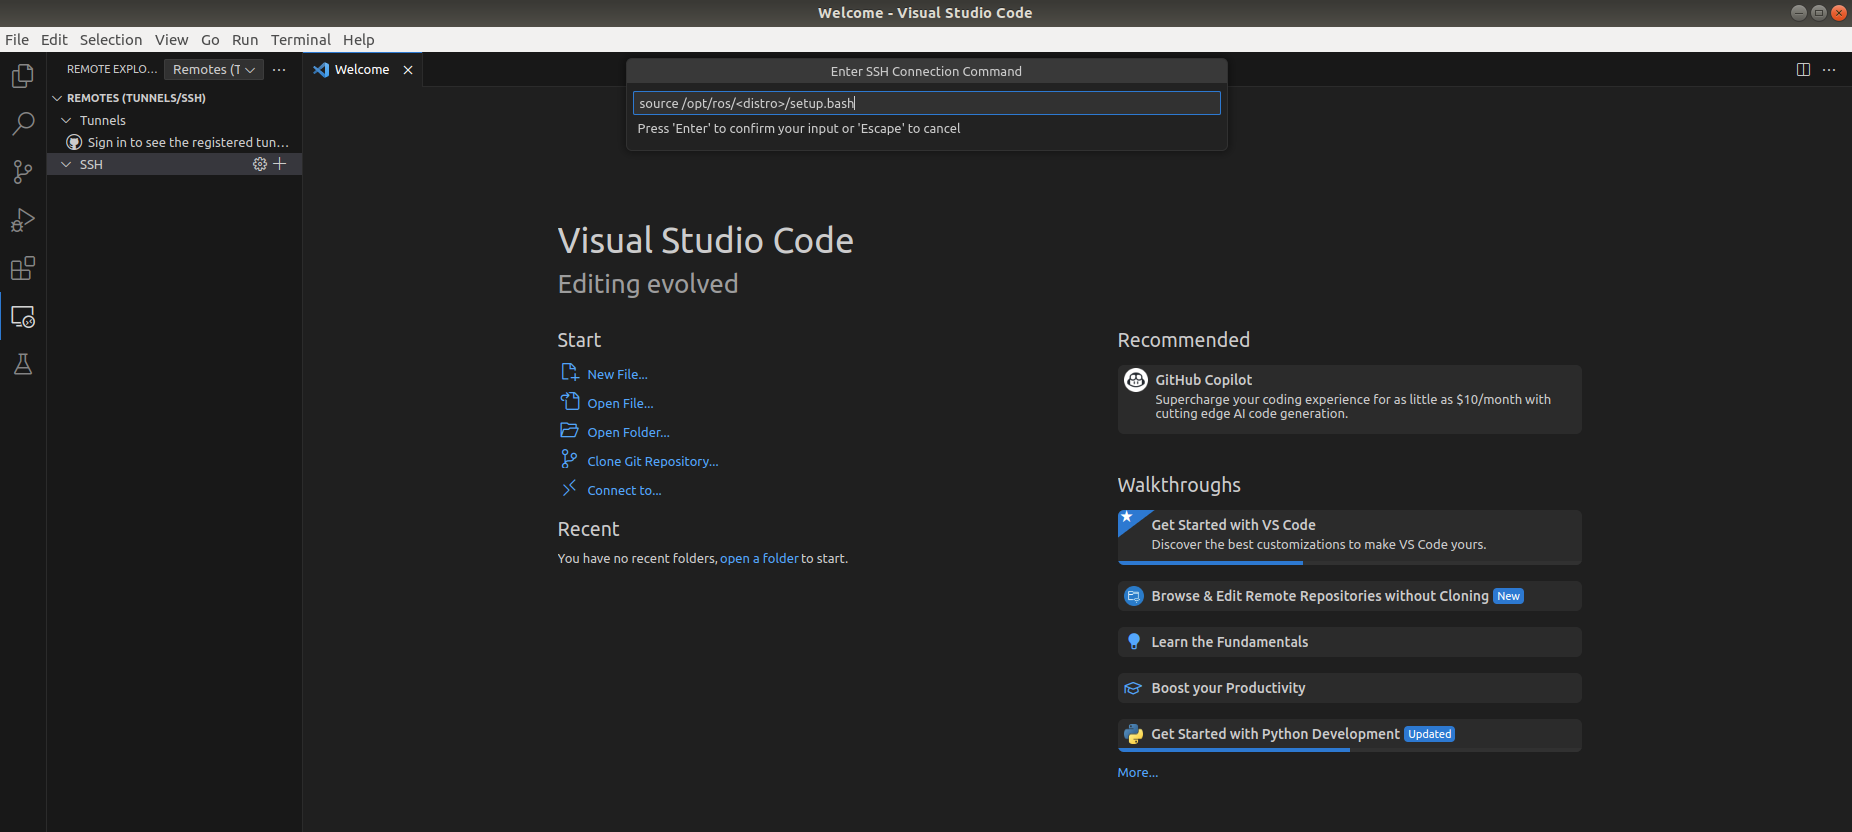
nvidia 보드의 코드 원격으로 수정
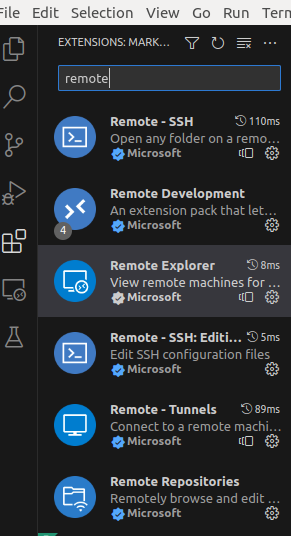
여기서, 해당 아이콘 누르고 검색창에 ssh nvidia@192.168.1.147 입력하여, 연결함.
내 이름 홈 디렉토리로 연결하기
f1 눌러서 remote ssh : connect to host 설정
그리고 원하는 호스트 설정
보드 비번입력
차량 id : follower1
pw : follower1
nvidia 코어 활성화
nvidia jetson xavier nx use all cpu coresudo nvpmodel -m 2 sudo jetson_clocks
10. Nvidia용 Anaconda
repo anaconda archive 들어가기
repo
-> Anaconda3-2021.04-Linux_aarch64python 3.8 version 가상환경 만들고
## library 설치
pip insatll pyyaml
pip install rospkg
pip install numpy==1.21.4
pip install pycryptodomex
pip install gnupg