유튜브 유니티 미로찾기 게임 만들기를 공부하며 기록한다.
사운드 효과
 Bensound 사이트에서 그냥 사용해도 문제가 없는 음원을 선택하여 다운받는다.
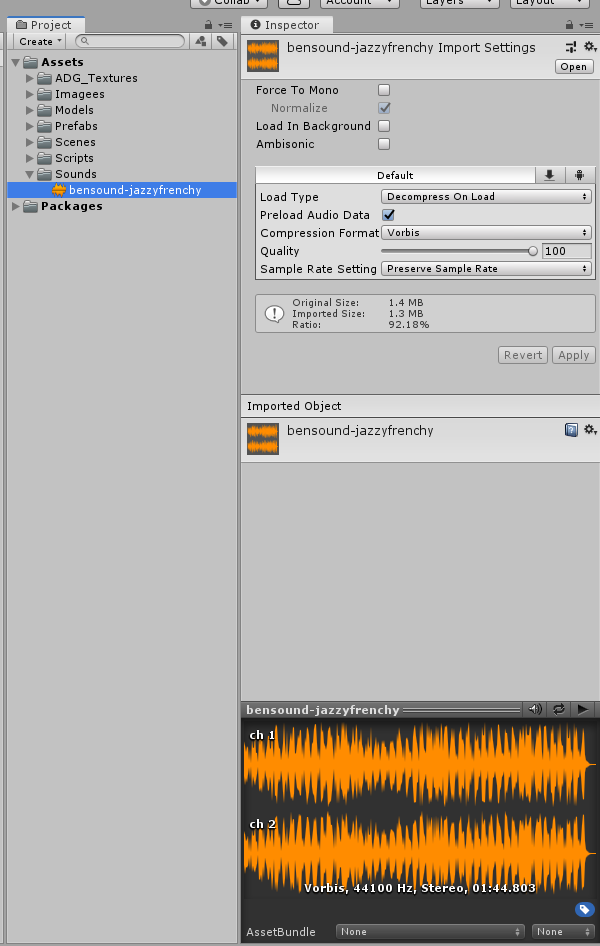 Project창에 Assets 폴더 안에 Sounds 폴더를 만들고 음원 파일을 넣는다.
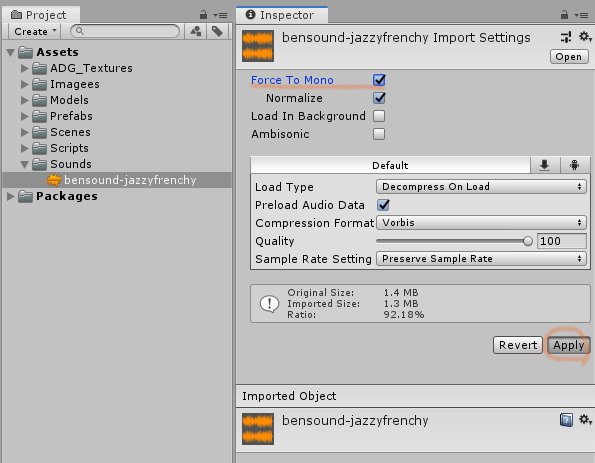 Force To Mono를 클릭하고, Apply를 눌러서 용량을 줄인다. 추가로 Quality를 조절할 수 있다. 그 외에도 안드로이드에서는 Override for Android를 클릭하고 Quality를 조절한 후 Apply하여 용량을 줄일 수도 있다.
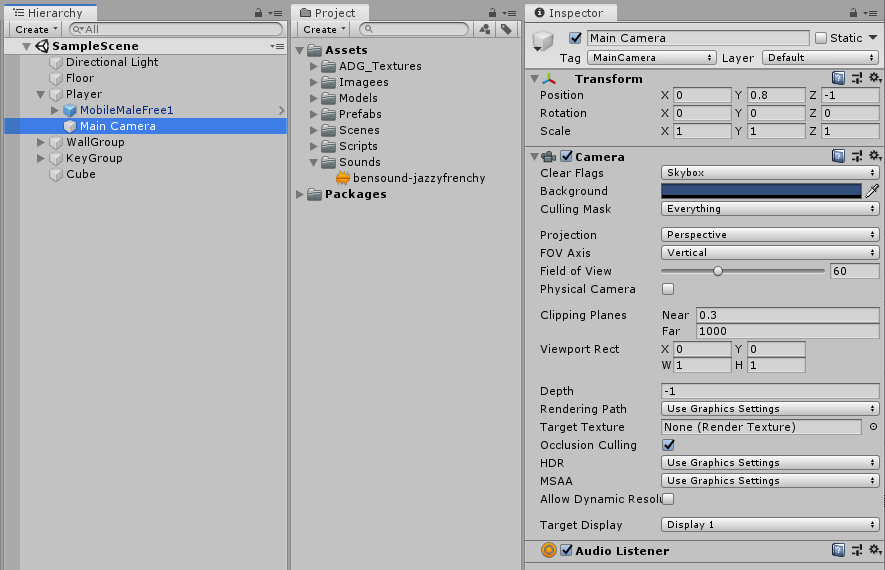 Player에게 있는 Main Camera의 Audio Listener 컴포넌트가 소리를 듣는 역할을 한다. 그래서 카메라에서 멀어지면 소리가 작게 들리는 효과가 난다.
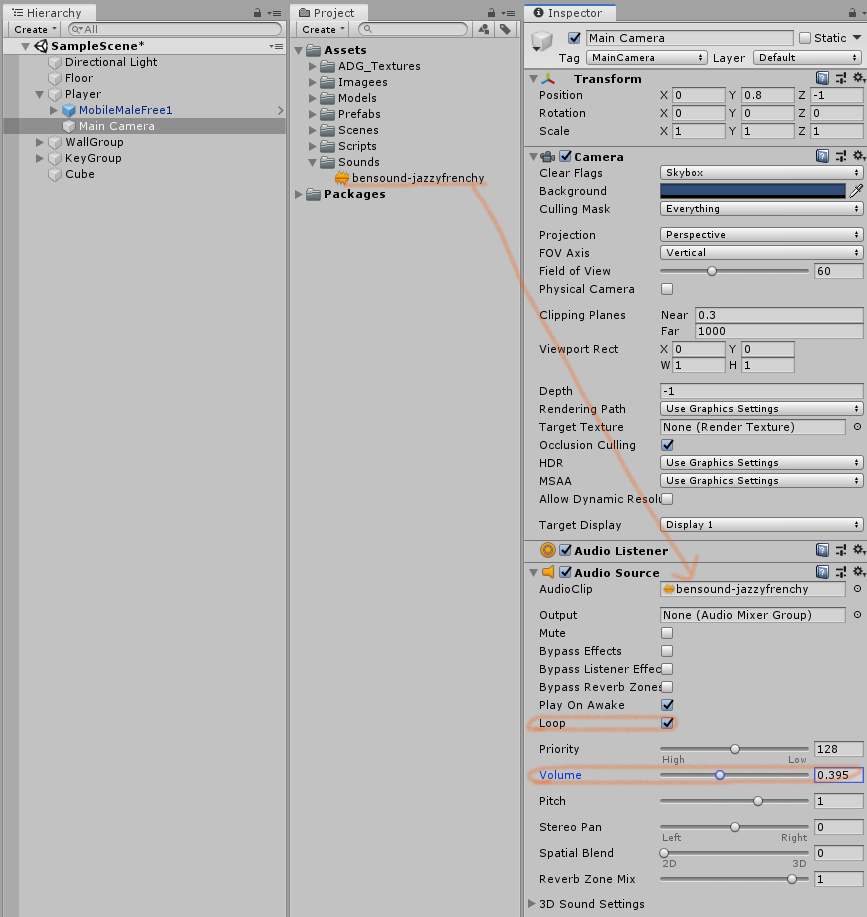 Audio Source 컴포넌트를 추가해서 소리를 낼 수 있고, Audio Clip을 추가해야 한다. Loop를 체크해서 사운드를 반복할 수 있고, Volume 속성(기본 1)을 조정할 수 있다.
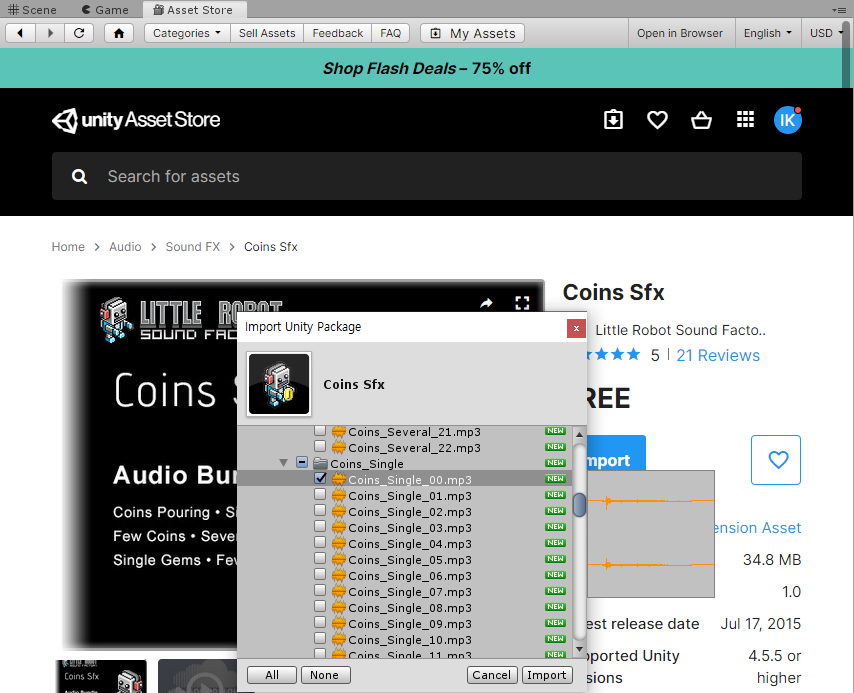 에셋스토어에서 무료 효과음을 다운받은 뒤에 Import한다. 프로젝트에 추가되면 Sounds 폴더에 옮겨 넣어 준다.
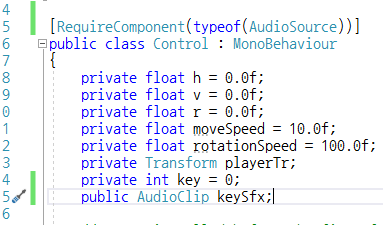 스크립트에 열쇠와 캐릭터가 부딫히면 소리가 나도록 코드를 추가해야한다. 가장 먼저
 [RequireComponent(typeof(AudioSource))]와 keySfx 변수를 선언해준다.
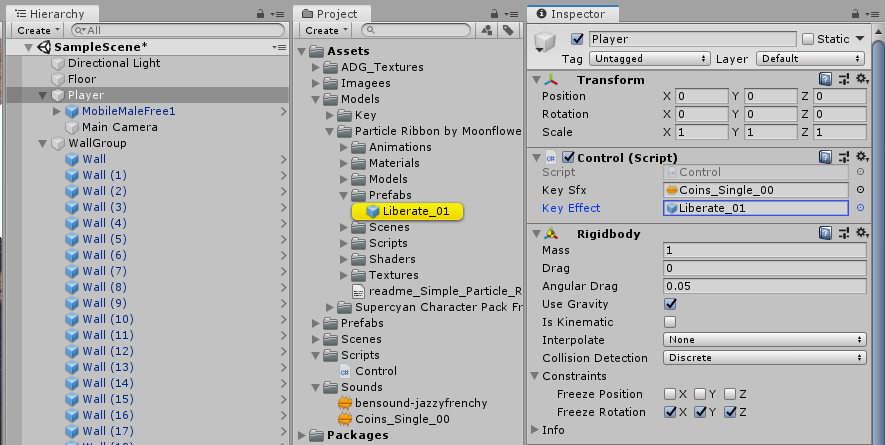
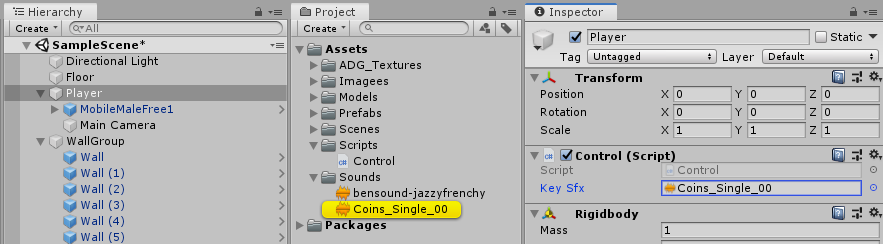 Player에 Key Sfx에 효과음 파일을 드래그앤드랍하여 연결해 준다.
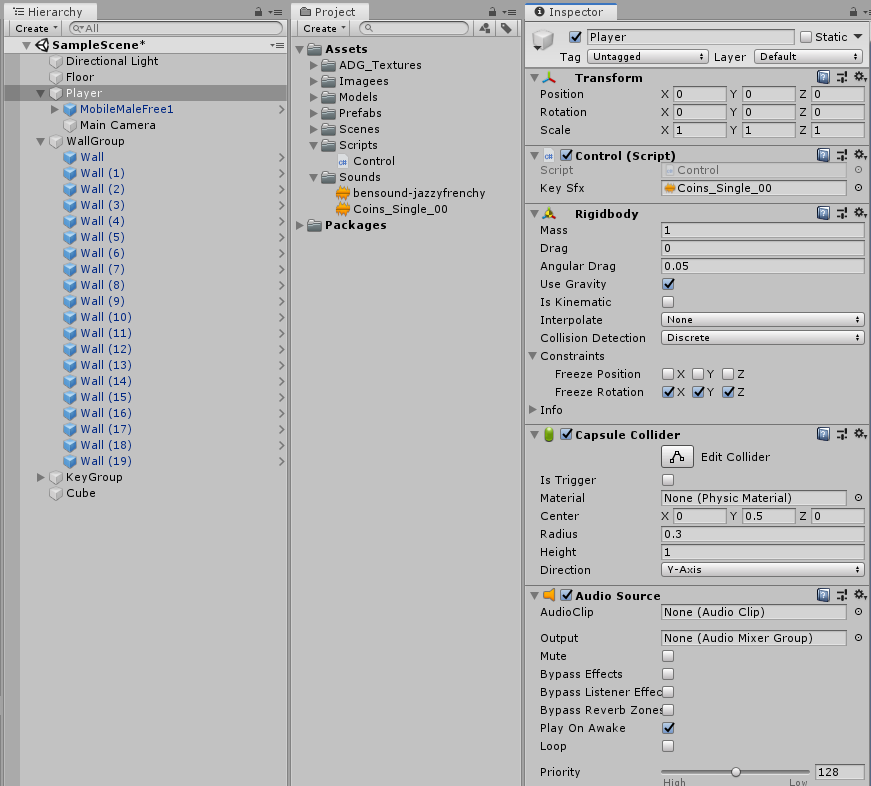 Player에 Audio Source 컴포넌트를 추가한다. 그러나 AudioClip에 파일을 넣지는 않는다.
using System.Collections;
using System.Collections.Generic;
using UnityEngine;

[RequireComponent(typeof(AudioSource))]
public class Control : MonoBehaviour
{
    private float h = 0.0f;
    private float v = 0.0f;
    private float r = 0.0f;
    private float moveSpeed = 10.0f;
    private float rotationSpeed = 100.0f;
    private Transform playerTr;
    private int key = 0;
    public AudioClip keySfx;
    private AudioSource audioSource;

    // Start is called before the first frame update
    void Start()
    {
        playerTr = GetComponent<Transform>();
        audioSource = GetComponent<AudioSource>();
    }

    // Update is called once per frame
    void Update()
    {
        h = Input.GetAxis("Horizontal");
        v = Input.GetAxis("Vertical");
        r = Input.GetAxis("Mouse X");
        //Debug.Log("H:" + h.ToString() + "V:" + v.ToString());
        playerTr.Translate(new Vector3(h, 0, v) * moveSpeed * Time.deltaTime);
        playerTr.Rotate(new Vector3(0, r, 0) * rotationSpeed * Time.deltaTime);
    }

    private void OnCollisionEnter(Collision collision)
    {
        if (collision.gameObject.tag == "KEY")
        {
            Destroy(collision.gameObject);
            key += 1;
            Debug.Log("Key : " + key.ToString());
            audioSource.PlayOneShot(keySfx, 1.0f);
        }

        if (collision.gameObject.tag == "BOX")
        {
            if (key < 3)
            {
                Debug.Log("3개의 열쇠를 찾아오세요!");
            }
            else
            {
                Debug.Log("탈출 성공!");
            }
        }
    }
}
private AudioSource audioSource;로 AudioSoucre를 정의해주고, Start() 함수 안에 audioSource = GetComponent<AudioSource>();를 추가한다. 열쇠와 닿으면 소리가 날 수 있도록 audioSource.PlayOneShot(keySfx, 1.0f);를 작성한다.
Particle 추가
에셋스토어에서 particle이라고 검색해서 원하는 효과를 다운받는다.
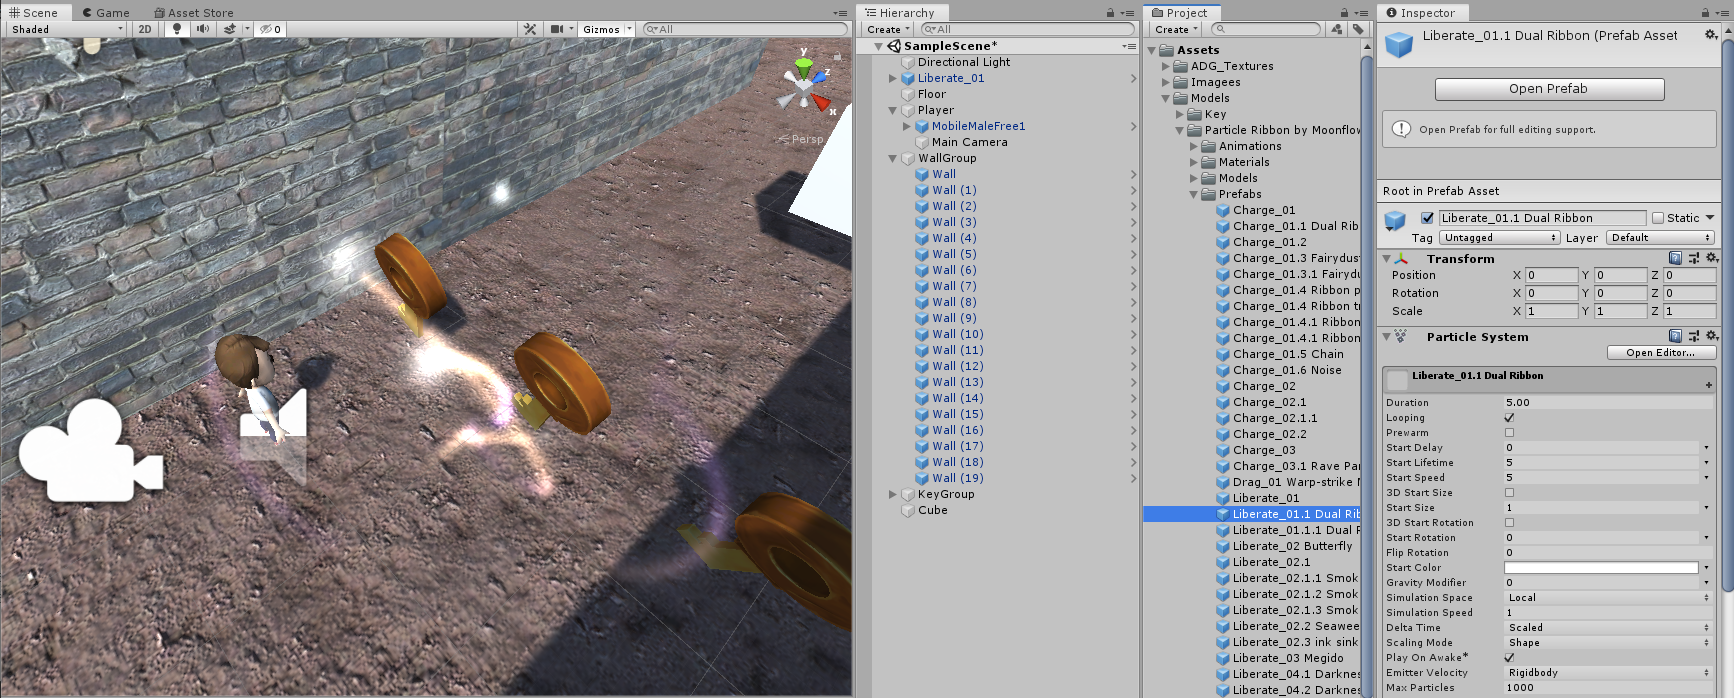 Import해서 Models 폴더 안에 넣어준 후 Prefabs에 있는 효과 하나를 Scene으로 넣어서 확인해볼 수 있다. 사용하지 않는 나머지 효과들은 삭제해도 된다.
 스크립트에
스크립트에 public GameObject keyEffect;를 추가하고 효과 프리팹을 Key Effect에 넣어준다.
using System.Collections;
using System.Collections.Generic;
using UnityEngine;

[RequireComponent(typeof(AudioSource))]
public class Control : MonoBehaviour
{
    private float h = 0.0f;
    private float v = 0.0f;
    private float r = 0.0f;
    private float moveSpeed = 10.0f;
    private float rotationSpeed = 100.0f;
    private Transform playerTr;
    private int key = 0;
    public AudioClip keySfx;
    private AudioSource audioSource;
    public GameObject keyEffect;

    // Start is called before the first frame update
    void Start()
    {
        playerTr = GetComponent<Transform>();
        audioSource = GetComponent<AudioSource>();
    }

    // Update is called once per frame
    void Update()
    {
        h = Input.GetAxis("Horizontal");
        v = Input.GetAxis("Vertical");
        r = Input.GetAxis("Mouse X");
        //Debug.Log("H:" + h.ToString() + "V:" + v.ToString());
        playerTr.Translate(new Vector3(h, 0, v) * moveSpeed * Time.deltaTime);
        playerTr.Rotate(new Vector3(0, r, 0) * rotationSpeed * Time.deltaTime);
    }

    private void OnCollisionEnter(Collision collision)
    {
        if (collision.gameObject.tag == "KEY")
        {
            Vector3 keyPosition = collision.gameObject.GetComponent<Transform>().position;
            GameObject Effect = Instantiate(keyEffect, keyPosition, Quaternion.identity);
            Destroy(Effect, 2.0f); //효과를 2초간 보여준 후 삭제
            Destroy(collision.gameObject);
            key += 1;
            Debug.Log("Key : " + key.ToString());
            audioSource.PlayOneShot(keySfx, 1.0f);
        }

        if (collision.gameObject.tag == "BOX")
        {
            if (key < 3)
            {
                Debug.Log("3개의 열쇠를 찾아오세요!");
            }
            else
            {
                Debug.Log("탈출 성공!");
            }
        }
    }
}
열쇠의 위치에 효과를 보여주기 위해서 Vector3 keyPosition = collision.gameObject.GetComponent<Transform>().position;로 위치를 변수에 담는다. 효과를 보여주기 위해서 Instantiate를 해줘야 하는데 GameObject Effect = Instantiate(keyEffect, keyPosition, Quaternion.identity); 로 변수에 담아서 Destroy(Effect, 2.0f);를 통해 2초간 실행이 된 뒤 효과가 사라질 수 있도록 구현한다.
스카이박스
스카이박스 적용
에셋 스토에 skybox를 검색하여 원하는 에셋을 다운받는다. Import한 후에 Images 폴더에 옮겨 담는다.
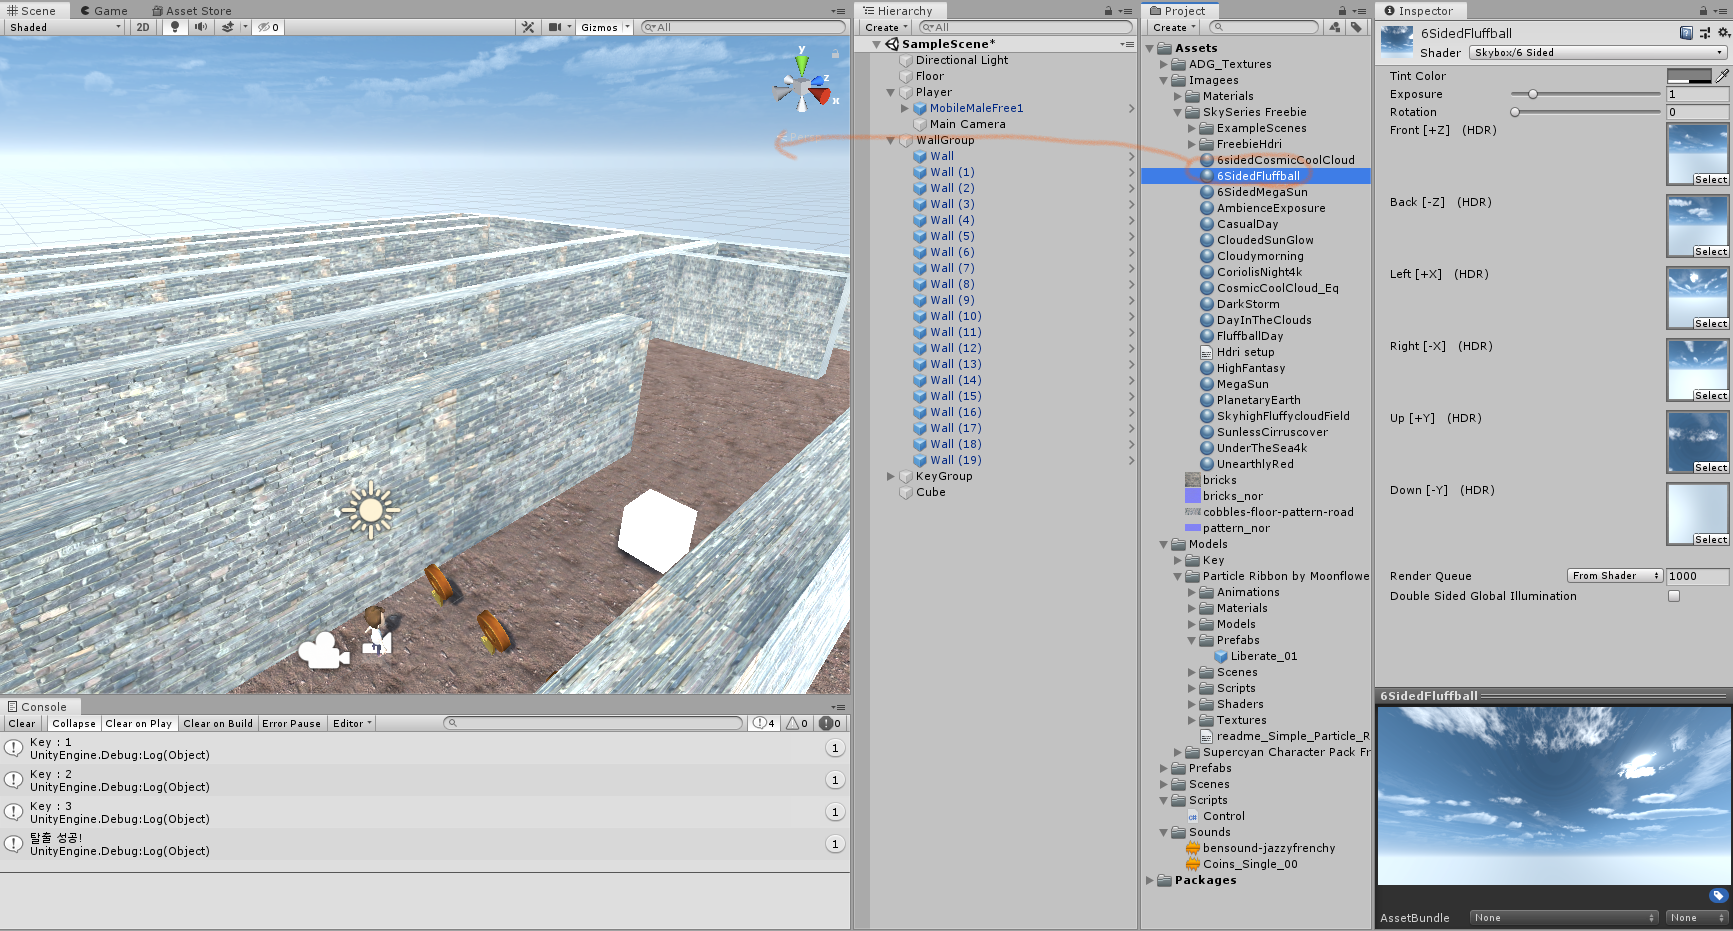 원래의 하늘은 밋밋하지만 머테리얼 하나를 드래그앤드랍하여 적용할 수 있다.
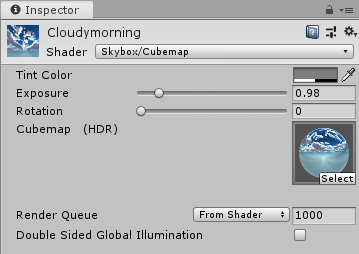 +) Shader의 skybox는 육면체 방식, cubemap은 360카메라 2개가 하나의 원을 담는 방식
조명
Directional Light를 제거하면 어둡게 만들 수 있다.
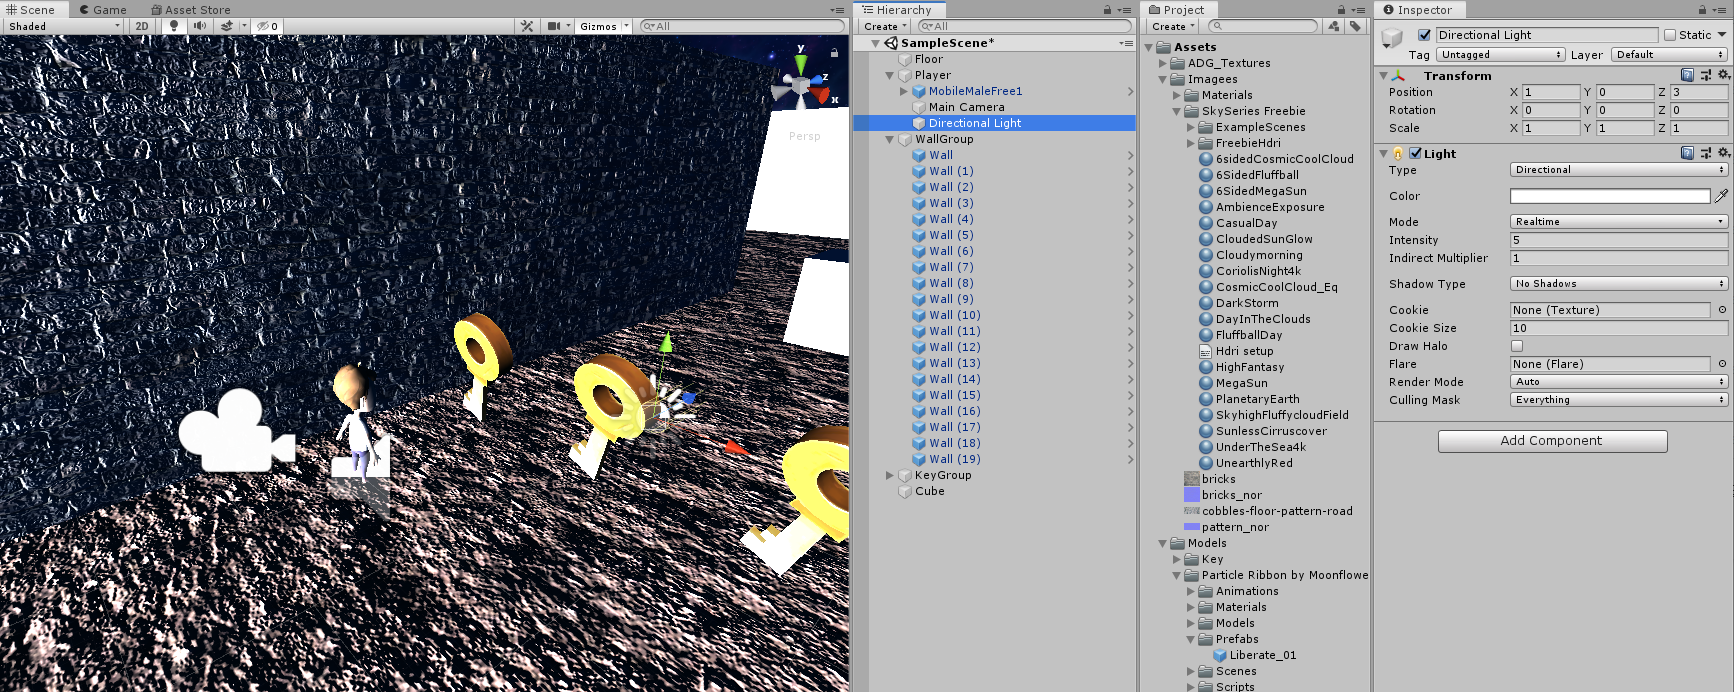 하늘을 어두운 에셋으로 변경해주고, Player에 Light의 Point Light를 생성하고 Transform의 Position X값을 1, Z값을 3, , Light의 Intensity 값을 5로 수정한다.
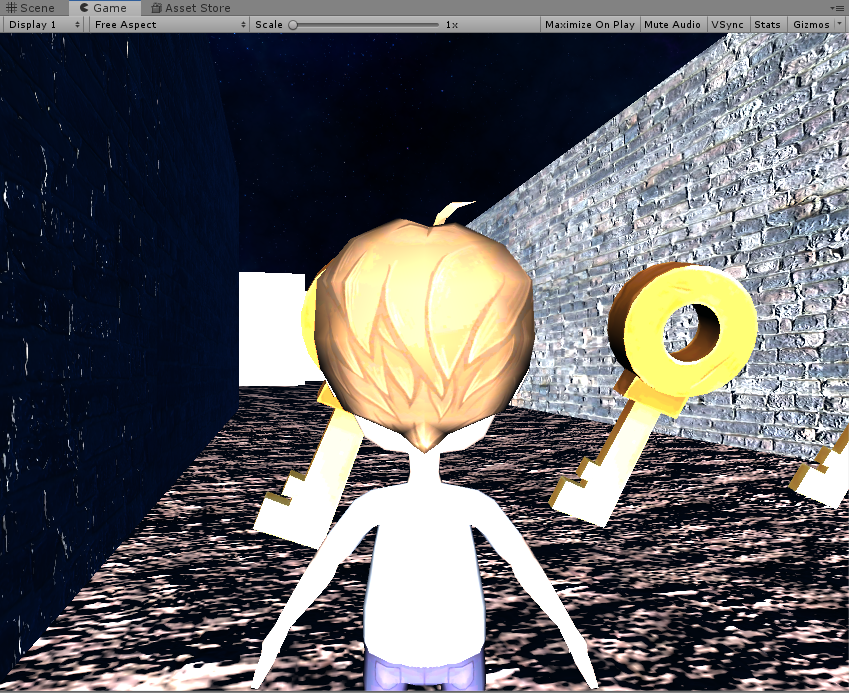 실행해보면 Player에게 밝기나 나타나는 것을 확인할 수 있다.
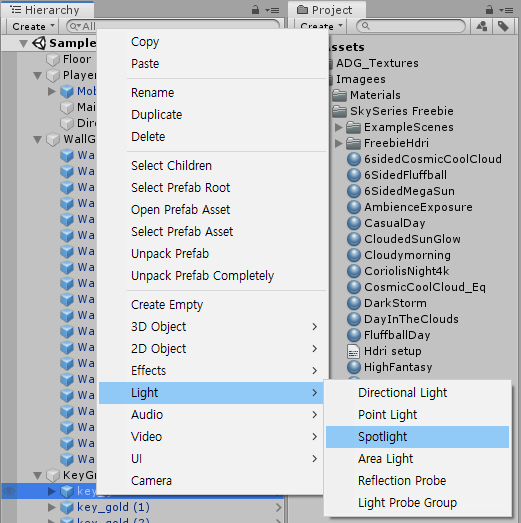 또한, 열쇠에 Light의 Spotlight를 추가한다.
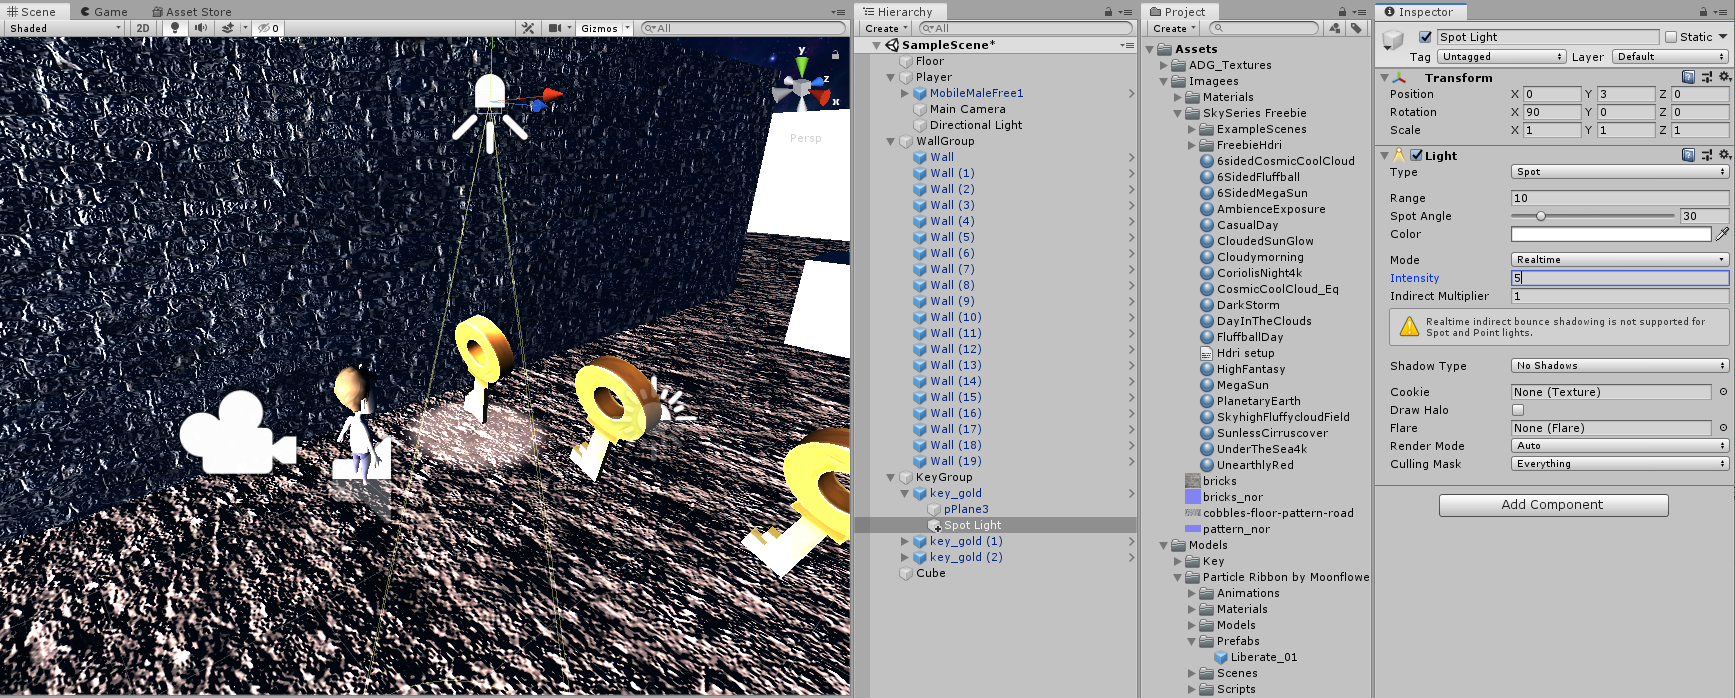 Transform의 Position Y값을 3, Rotation의 X값을 90, Intensity를 5로 설정한다. 다른 열쇠들에도 동일하게 정보를 수정한다.
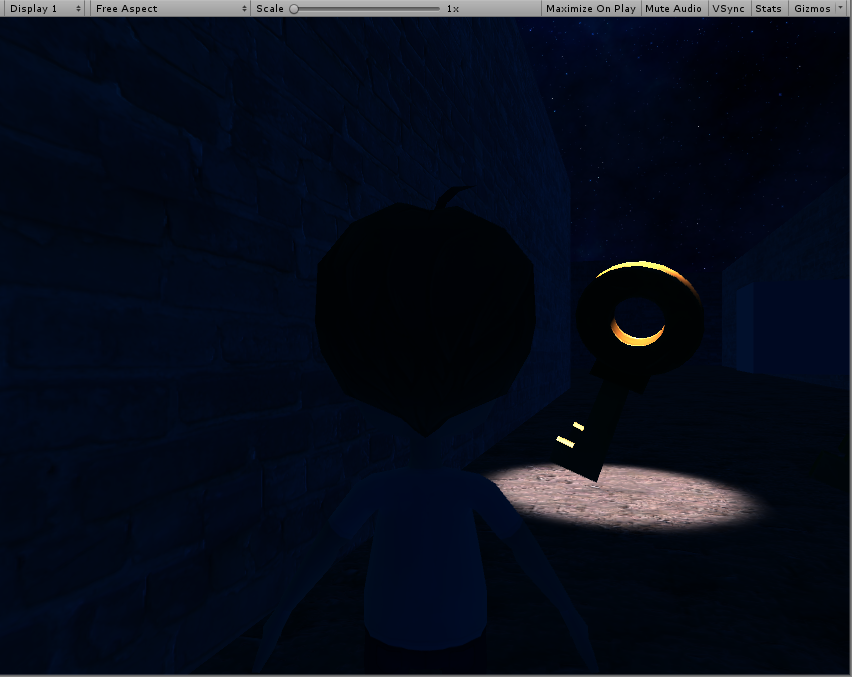 Player의 Directional Light를 끄고 실행해보면 열쇠 자체에 빛이 나는 것을 확인할 수 있다.