Week 1
페이지별 구성과 디렉토리 구조 구성하기
- 주차별로 관리하기 위해
github에서 수행하기 때문에 organization에서week-1의 브랜치를 생성했다. - https://store.kakao.com 사이트에 접속하여 필요한 페이지가 무엇이 있는지 찾았다.
- README.me로 이 부분을 사용하기 위해 마크다운을 이용하여 작성하였다.
1. 필수 페이지
- 메인 페이지
- 제품 세부 사항 페이지
- 검색 결과 페이지
- 장바구니 페이지
- 주문 페이지
- 결제 페이지
- 카테고리 별 상품 페이지
- 리뷰 페이지
- 문의 페이지
2. 페이지별 구성
- 메인 페이지
- 핵심 기능: 전면 배너, 상품 사진과 상품 명/가격, 로고 등을 보여줍니다.
- 기능 상세 설명: 상품, 배너, 로그인 버튼 등 클릭 시 적절히 해당 페이지로 이동시켜줍니다.
- 인터페이스 요구사항: 찜하기, 공유하기 등 로그인이 필요한 경우 로그인 페이지로 넘어가야 하고
상품 명이 길 경우 핵심적인 내용만 보여줍니다.
- 제품 세부 사항 페이지
- 핵심 기능 : 전체 상품 명과 가격, 할인 정보, 배달료 정보와 전체 상품 설명을
보여줍니다. - 기능 상세 설명: 옵션 설정, 구매 수량 변경 시 보여지는 주문 금액이 변경되고,
구매하기 버튼 클릭 시 장바구니 페이지로 이동합니다. - 인터페이스 요구사항: 택일 옵션 사항에 대해 중복 선택이 불가능하게 만들고, 불가한 것을 알림합니다.
- 검색 결과 페이지
- 핵심 기능: 사용자가 검색한 단어와 관련된 상품의 목록을 보여줍니다.
- 기능 상세 설명: 해당 키워드와 연관한 키워드를 보여주고, 상품을 보여주는 순서를 가격, 상품 유형 등의 옵션을 통해
정렬하여 보여줄 수 있도록 합니다. - 인터페이스 요구사항: 상품 찜하기 버튼 클릭 시 비로그인 회원인 경우 로그인 페이지로 이동합니다.
- 장바구니 페이지
- 핵심 기능: 장바구니에 담긴 모든 상품의 금액을 모두 합하여 보여줍니다.
- 기능 상세 설명: 상품의 수량을 변경할 수 있고, 전체 금액과 해당되는 할인 금액을 표시하고 실제 결제 금액을 보여줍니다.
- 인터페이스 요구사항: 주문하기 버튼 클릭 시 주문 페이지로 이동합니다.
- 주문 페이지
- 핵심 기능: 배송지 정보, 상품 주문 정보, 결제 방법 등을 보여줍니다.
- 기능 상세 설명: 배송지/요청사항 설정, 포인트 사용, 현금 영수증 발급신청 등의 기능을 합니다.
- 인터페이스 요구사항: 결제하기 버튼 클릭 시 결제 페이지로 이동합니다.
- 결제 페이지
- 핵심 기능: 결제를 진행합니다.
- 기능 상세 설명: 결제 방법에 따른 결제를 진행합니다.
- 인터페이스 요구사항: 결제가 정상적으로 이루어질 경우/ 실패했을 경우를 나누어 적절한 알림을 보냅니다.
- 카테고리 별 상품 페이지
- 핵심 기능: 상품의 카테고리 별로 상품을 보여줍니다.
- 기능 상세 설명: 각각의 카테고리에 맞는 상품으로 분류하여 랭킹/가격 순으로 정렬된
상품을 보여줍니다. - 인터페이스 요구사항: 카테고리 변경 시 보여지는 상품들을 변경하고, 상품 클릭 시
제품 세부 사항 페이지로 이동합니다.
- 리뷰 페이지
- 핵심 기능: 상품 구매자의 후기를 보여주고 작성할 수 있습니다.
- 기능 상세 설명: 구매 후기의 평점, 옵션, 배송 만족도, 사진을 보여줍니다.
- 인터페이스 요구사항: 리뷰 작성하기 버튼 클릭 시 평점, 사진 등을 올리는 팝업으로 이동합니다.
- 문의 페이지
- 핵심 기능: 상품과 관련된 문의를 보여주고 작성할 수 있습니다.
- 기능 상세 설명: 문의에 대한 답변 여부와 문의 제목을 보여줍니다.
- 인터페이스 요구사항: 토글을 클릭 시 전체 문의 내용을 볼 수 있고,
작성하기 버튼 클릭시 작성 팝업으로 이동합니다.
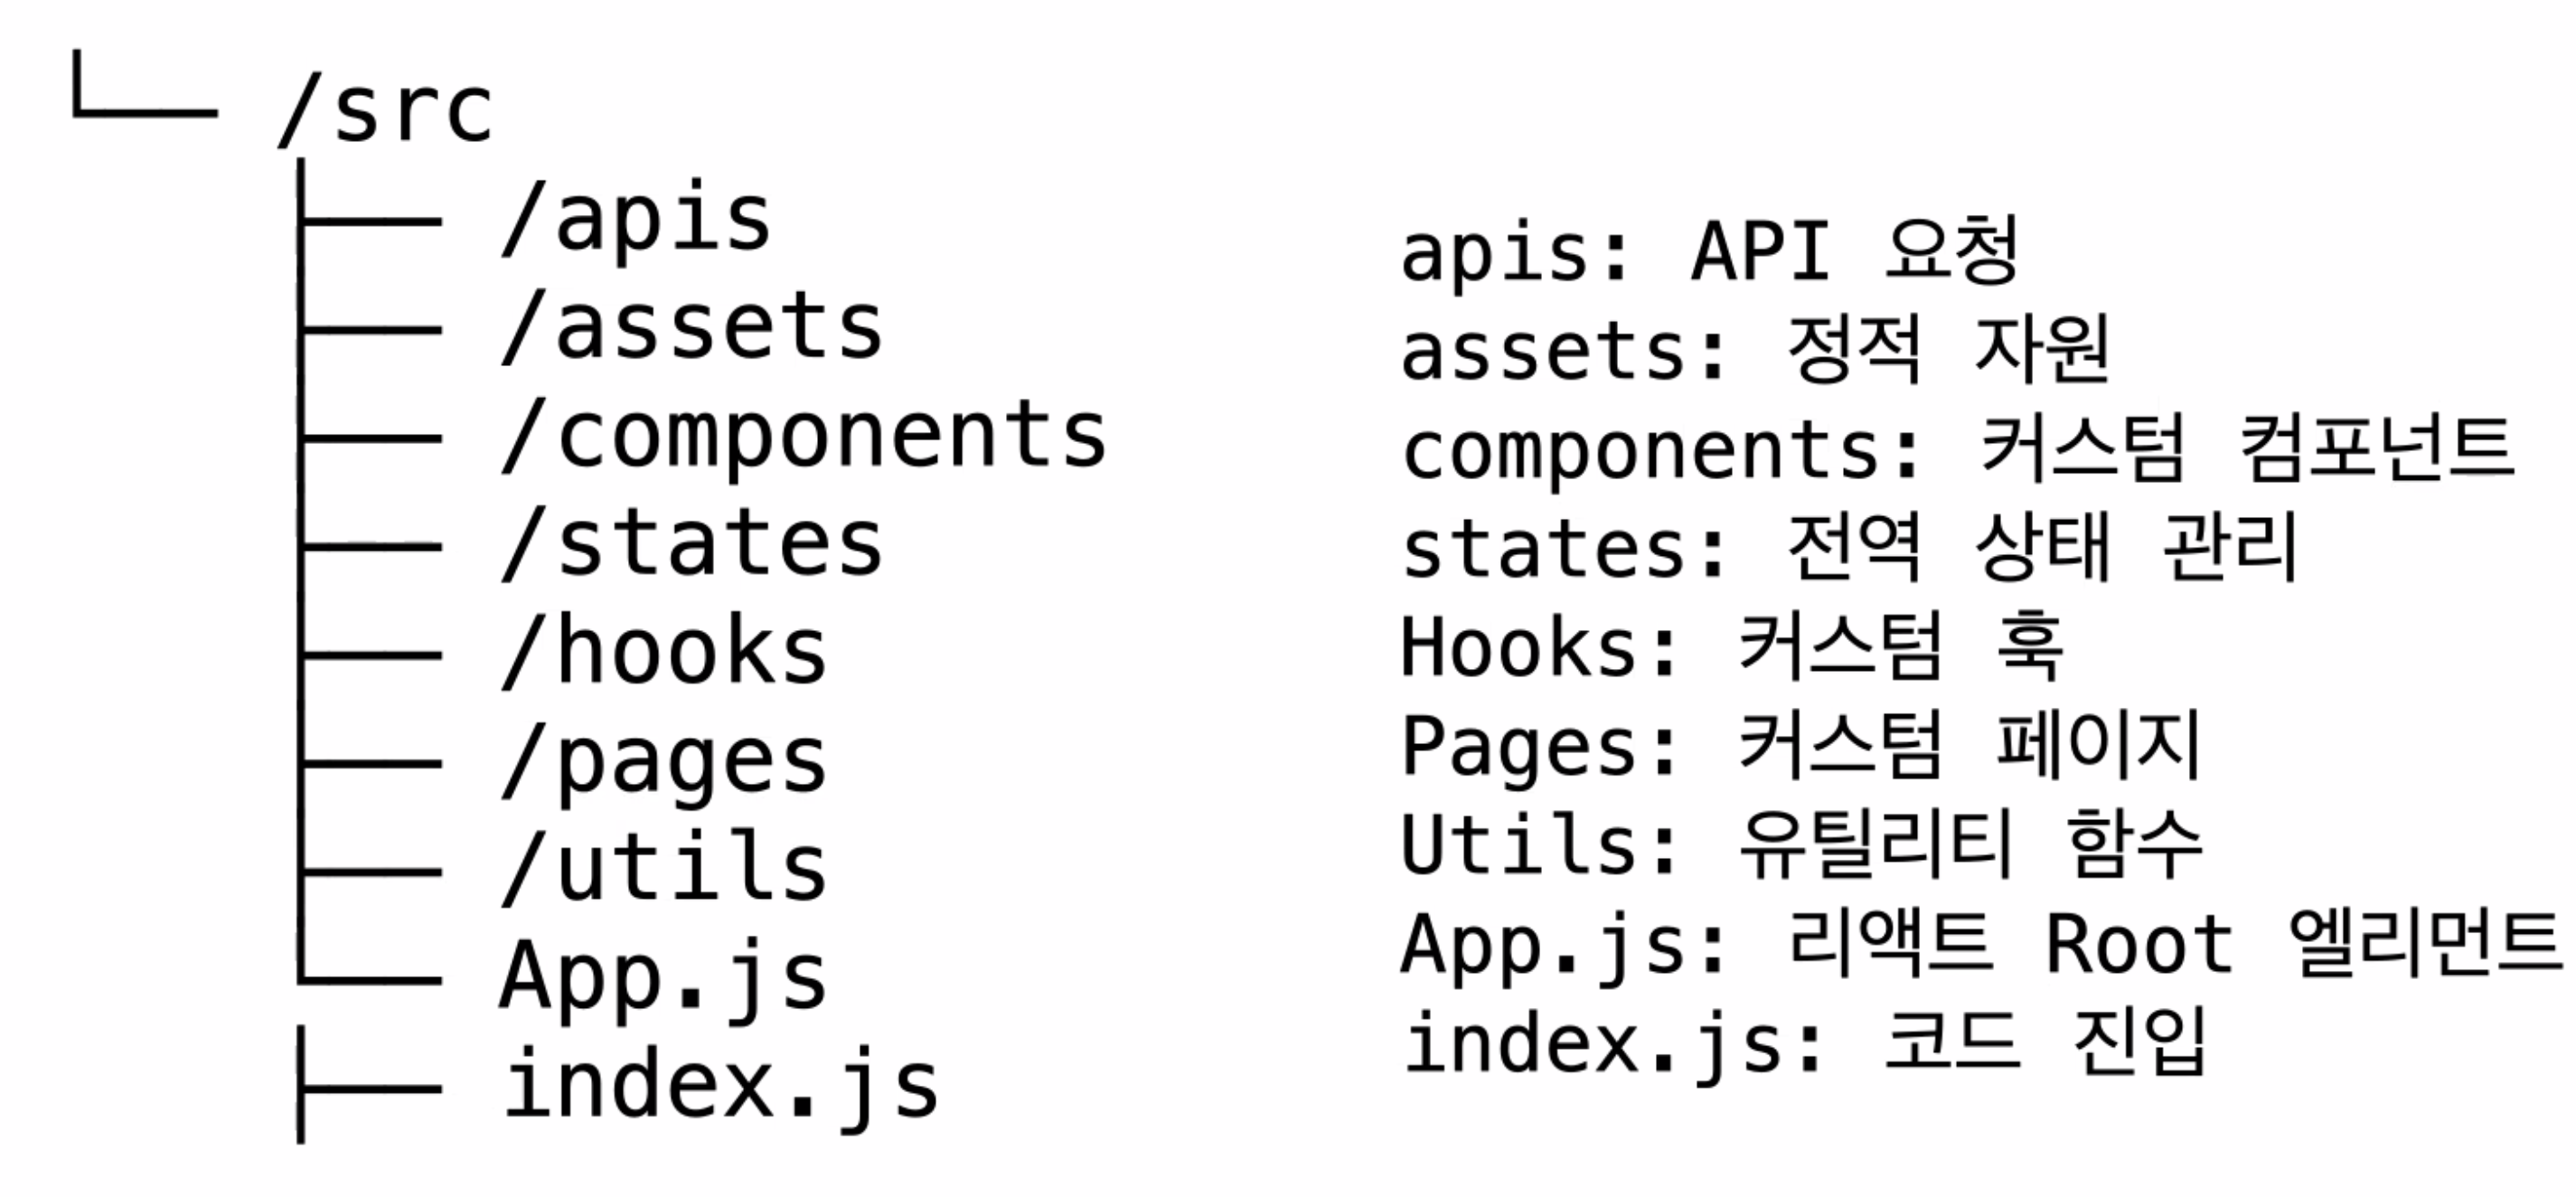
3. 디렉토리 구성(안)
- /src
- componets
- hooks
- routes
- styles
- pages
- utils
- public
- node_modules
- dto
개념적으로 부족한 상태에서 무엇이 필요할지 생각하다보니 조금 산만하고 많아진 것 같다. 나중에 다시 다듬을 필요가 있을 것 같다.
- 과제 2
Radio.jsx만들기
import React , {useState} from 'react';

function Radio(){
    const [nowSelect, setNowSelect] = useState(null);

    const onSelect = (e) => {
        console.log(e.target.name);
        setNowSelect(e.target.value);
    }
    return (
        <div>
            <h1>{nowSelect}</h1>
            <label>
                <input type="radio" onChange={onSelect} name="radioGroup" value='1'/> 1번
            </label>
            <label>
                <input type="radio" onChange={onSelect} name="radioGroup" value='2'/> 2번
            </label>
        </div>
    )
}

export default Radio;useRef를 이용하여 상태를 관리하는Radio컴포넌트를 만들었다.- 과제 2
Checklist.jsx만들기
import React, { useRef } from 'react';

const Checklist = () => {
  const checkRef = useRef([]); //checklist 상태를 담을 배열로 초기화

  const handleCheckboxChange = (index) => {
    const setChecklist = [...checkRef.current];
    setChecklist[index] = !setChecklist[index]; //true false 전환
    checkRef.current = setChecklist;
  };

  const handleSubmit = () => { //prevent 사용시 e 파라미터로 받기
    //e.preventDefault(); //나중에 원하는 사용을 위해 주석 처리.
    console.log('Checklist:', checkRef.current); //현재는 확인만을 위해 출력만 담당.
  };

  return (
    <form onSubmit={handleSubmit}>
      <label>
        <input
          type="checkbox"
          checked={checkRef.current[0]} //true fales 전환값 적용
          onChange={() => handleCheckboxChange(0)}
        />
        Option 1
      </label>
      <label>
        <input
          type="checkbox"
          checked={checkRef.current[1]}
          onChange={() => handleCheckboxChange(1)}
        />
        Option 2
      </label>
      <label>
        <input
          type="checkbox"
          checked={checkRef.current[2]}
          onChange={() => handleCheckboxChange(2)}
        />
        Option 3
      </label>
      <button type="submit">Submit</button>
    </form>
  );
};

export default Checklist;- useRef를
.current가 아닌[value, setFuntion]꼴로 쓰고 싶었는데 자꾸 오류가 났다. - 과제 2
Toggle.jsx구현
import React, { useRef } from 'react';

const Toggle = () => {
  const toggleRef = useRef(false);

  const handleToggle = () => {
    toggleRef.current = !toggleRef.current; //true, false 반전
    console.log(toggleRef.current);
  };

  return (
    <div>
        <h1>{toggleRef.current}</h1>
      <button onClick={handleToggle}>
        Button
      </button>
    </div>
  );
};

export default Toggle;-
마찬가지로
.current사용하기 싫어서 난리쳤지만 결국 포기하고 사용해버렸다. -
Carousel만들기-
버튼을 눌렀을 때 슬라이드가 넘어가는 UI
import React, { useState } from 'react';

const Carousel = () => {
  const [currentIndex, setCurrentIndex] = useState(0);
  const images = ['1.jpg', '2.jpg', '3.jpg'];
  const handlePrevious = () => {
    setCurrentIndex((prevIndex) => (prevIndex === 0 ? images.length - 1 : prevIndex - 1));
  }; //3항 연산자를 통해 0이 될 경우 마지막 사진으로 넘기는 방식

  const handleNext = () => {
    setCurrentIndex((prevIndex) => (prevIndex === images.length - 1 ? 0 : prevIndex + 1));
  };

  return (
    <div className="carousel">
      <div className="carousel-images">
        <img src={images[currentIndex]} alt={`Image ${currentIndex + 1}`} />
      </div>
      <button onClick={handlePrevious}>Prev</button>
      <button onClick={handleNext}>Next</button>
    </div>
  );
};

export default Carousel;
-
-
Toast만들기-
토스트라는 걸 처음 들어봤는데 뭔가 익숙한.. 버튼 클릭 시 올라왔다가 사라지는 UI를 만들면 된다고 알려주셨다.
import React, { useRef } from 'react'; const Toast = () => { const toastRef = useRef(null); const showToast = () => { if (toastRef.current) { toastRef.current.style.display = 'block'; setTimeout(() => { toastRef.current.style.display = 'none'; }, 1000); } }; return ( <div> <button onClick={showToast}>회원가입 하기</button> <div ref={toastRef} style={{ display: 'none' }}> 회원가입 완료 ! </div> </div> ); }; export default Toast; -
여기서 중요한건 버튼을 클릭했을 경우에만
div가 보여야하기에 기본적으로display를none으로 설정 후 클릭 시 마다 ref를 통해 display 값을 변경시켜주는 것이다.
-
-
breadcrumb만들기-
개인적으로 처음 들어본 형태의 UI여서 당황했다.
-
실제로 제일 못만든 것 같은 UI이기도 하고 너무 조잡하게 만든 것 같다.
import React from 'react';

const Breadcrumb = () => {
  const items = [{text:"hi"}, {text:"bye"}];
  return (
    <nav>
      <ol className="breadcrumb">
        {items.map((item, index) => (
          <li key={index} className={`breadcrumb-item${index === items.length - 1 ? ' active' : ''}`}>
            {index === items.length - 1 ? (
              <span>{item.text}</span>
            ) : (
              <a href={item.text}>{item.text}</a>
            )}
          </li>
        ))}
      </ol>
    </nav>
  );
};
export default Breadcrumb;
-
-
이걸 모두 실행할
App.js만들기

Hello World !