Redux
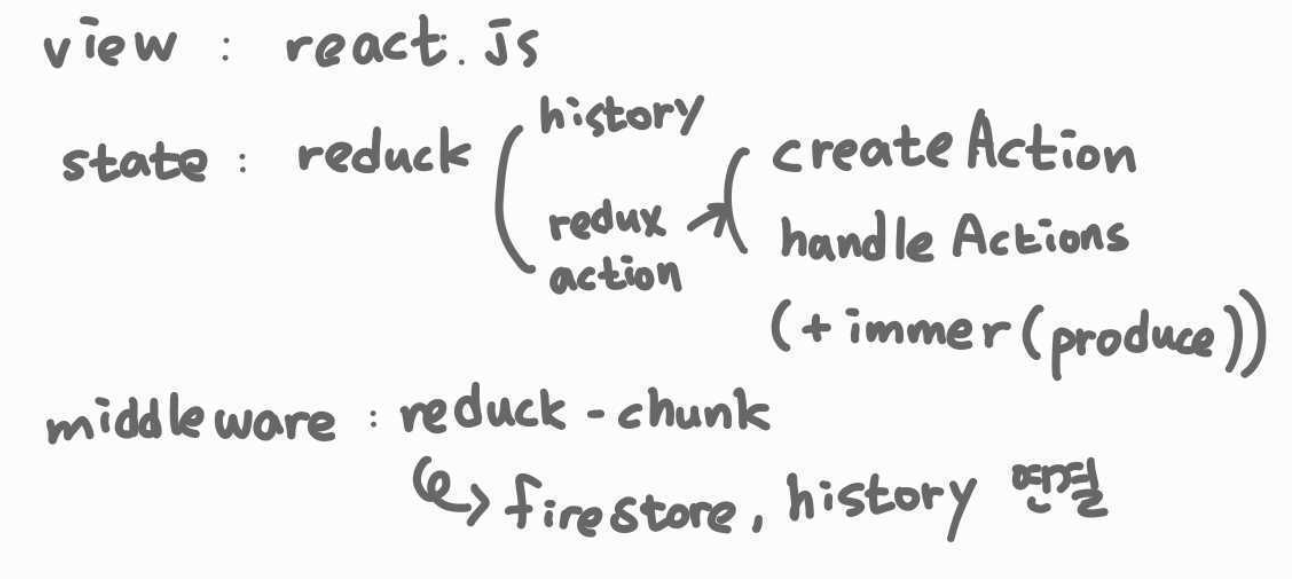
그림 출처:https://cheri.tistory.com/171?category=954795
-
CreacteAction / HandleAction
리덕스를 편리하게 사용할 수 있도록 도와준다.
https://juhi.tistory.com/24
비동기 관련
- promise
후속처리 메서드 : then 주로 성공시 사용, catch 실패시 사용 - async, await: promise를 편리하게 사용하게 해준다.
함수 앞에 async를 사용하면 항상 promise로 반환한다.
await은 async 동작이 끝날 때에 실행되고, await 안에서만 사용 가능하다.
예시)
async function myFunc(){
	let promise = new Promise((resolve, reject) => {
		setTimeout(() => resolve("완료!"), 1000);
	});

    console.log(promise);

	let result = await promise; // 여기서 기다리자!하고 신호를 줍니다.

    console.log(promise);

	console.log(result); // then(후처리 함수)를 쓰지 않았는데도, 1초 후에 완료!가 콘솔에 찍힐거예요.
}
리덕스 값을 History로 넘기기
configStore 에 history를 넣어주어서 이것을 계속 사용할 것이다.
// 7. history객체가 만들어진 것이다.
export const history = createBrowserHistory();

// 2. 리듀서를 넣어준다.
// combineReducers를 사용해서 우리가 만든 User 리듀서를 넣어준다.
const rootReducer = combineReducers({
  user: User,
  post: Post,
  image: Image,
  comment: Comment,
  // 8. 리덕스에 history를 이제 넣어줄 것이다. 우리가 만든 history와 우리의 라우터가 연결이되는 것이다. 그리고 이것의 우리의 스토어에 저장이되는 것이다.
  router: connectRouter(history),
});

// 3. 미들웨어
// []배열안에 우리가 사용할 내가 사용할 미들웨어를 넣어준다.
// thunk안에 내장되어있는 withExtraArgument(다른 인수를 더 넘겨준다는 뜻)를 사용해 history를 넘겨준다.
const middlewares = [thunk.withExtraArgument({ history: history })];
그리고 Index.js에서

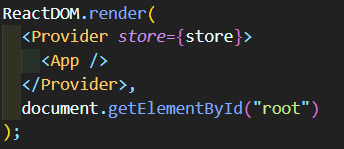
위와 같이 import 후 APP 을 사이에 넣어준다.
다음으로는
App.js 에서

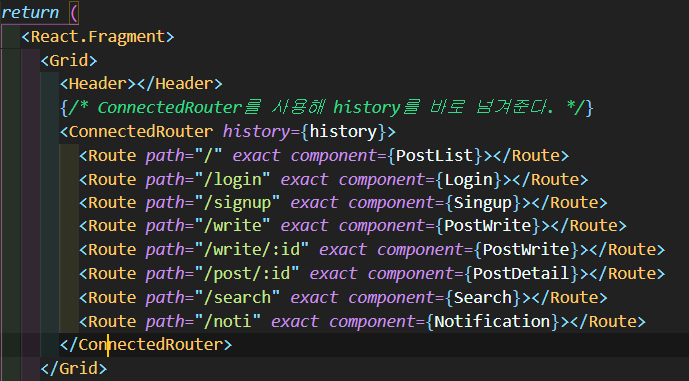
위와 같이 history를 넘겨준다.

FE DEVELOPER