
DAG 코드
Airflow 공식 홈페이지에 나와 있는 샘플 DAG 코드는 다음과 같다.
from datetime import datetime, timedelta
from textwrap import dedent

# The DAG object; we'll need this to instantiate a DAG
from airflow import DAG

# Operators; we need this to operate!
from airflow.operators.bash import BashOperator
with DAG(
'tutorial',
# These args will get passed on to each operator
# You can override them on a per-task basis during operator initialization
default_args={
    'depends_on_past': False,
    'email': ['airflow@example.com'],
    'email_on_failure': False,
    'email_on_retry': False,
    'retries': 1,
    'retry_delay': timedelta(minutes=5),
    # 'queue': 'bash_queue',
    # 'pool': 'backfill',
    # 'priority_weight': 10,
    # 'end_date': datetime(2016, 1, 1),
    # 'wait_for_downstream': False,
    # 'sla': timedelta(hours=2),
    # 'execution_timeout': timedelta(seconds=300),
    # 'on_failure_callback': some_function,
    # 'on_success_callback': some_other_function,
    # 'on_retry_callback': another_function,
    # 'sla_miss_callback': yet_another_function,
    # 'trigger_rule': 'all_success'
},
description='A simple tutorial DAG',
schedule_interval=timedelta(days=1),
start_date=datetime(2021, 1, 1),
catchup=False,
tags=['example'],
) as dag:
# t1, t2 and t3 are examples of tasks created by instantiating operators
t1 = BashOperator(
task_id='print_date',
bash_command='date',
)
t2 = BashOperator(
task_id='sleep',
depends_on_past=False,
bash_command='sleep 5',
retries=3,
)
t1.doc_md = dedent(
"""\
#### Task Documentation
You can document your task using the attributes `doc_md` (markdown),
`doc` (plain text), `doc_rst`, `doc_json`, `doc_yaml` which gets
rendered in the UI's Task Instance Details page.

"""
)
dag.doc_md = __doc__ # providing that you have a docstring at the beginning of the DAG
dag.doc_md = """
This is a documentation placed anywhere
""" # otherwise, type it like this
templated_command = dedent(
"""
{% for i in range(5) %}
echo "{{ ds }}"
echo "{{ macros.ds_add(ds, 7)}}"
{% endfor %}
"""
)
t3 = BashOperator(
task_id='templated',
depends_on_past=False,
bash_command=templated_command,
)
t1 >> [t2, t3]DAG 파이프라인 셋팅하기
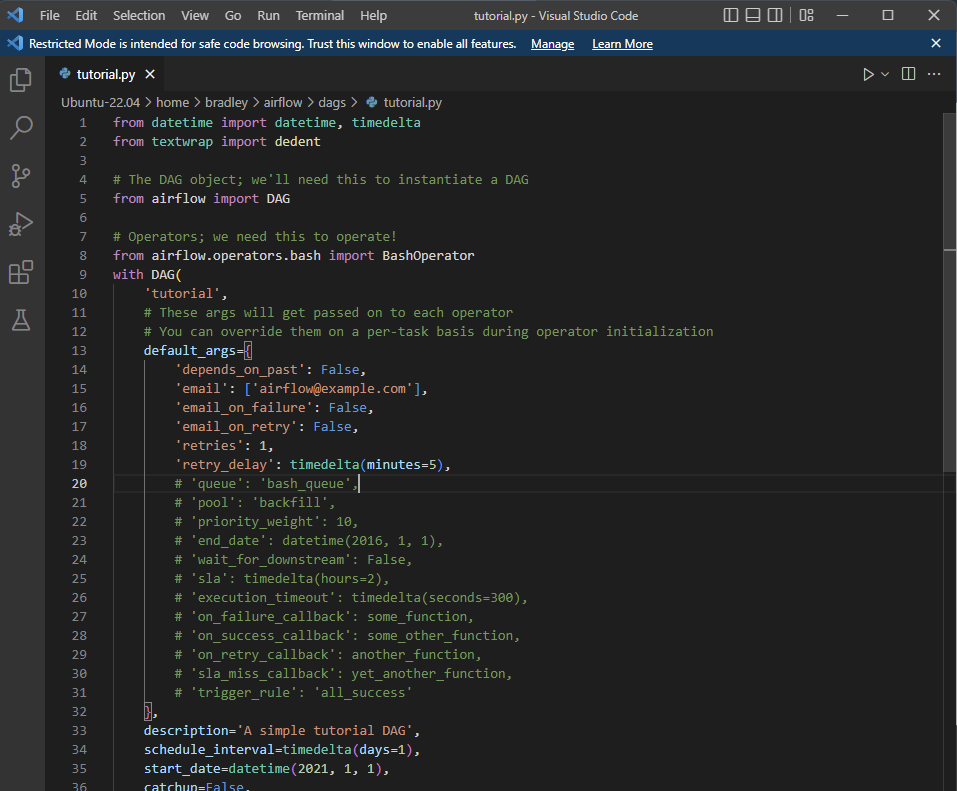
코드를 ~/airflow/dags/ 디렉토리에 tutorial.py로 저장한다.

이 때 code [파일명].py 명령을 이용하면 VSC (Visual Studio Code) 편집기 창이 활성화되어 코드를 작성할 수 있으며, 파일을 저장한 뒤 VSC를 닫으면 된다.

작성한 DAG (python 파일)를 반영해주기 위해서 ~/airflow 디렉토리로 이동하여 스케줄러를 실행시킨다.
./airflow.sh sceduler
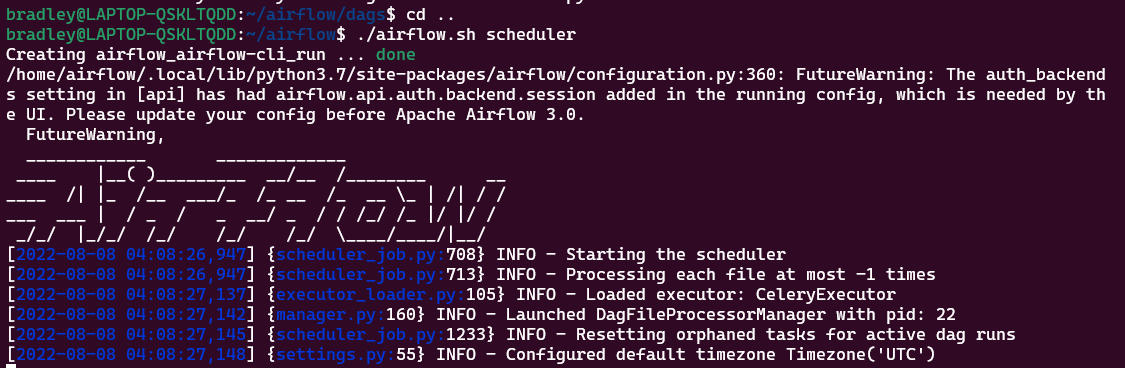
http://localhost:8080 Airflow 웹페이지에서 DAGs 페이지를 새로고침하면 방금 작성한 DAG가 리스트 되는 것을 볼 수 있다.
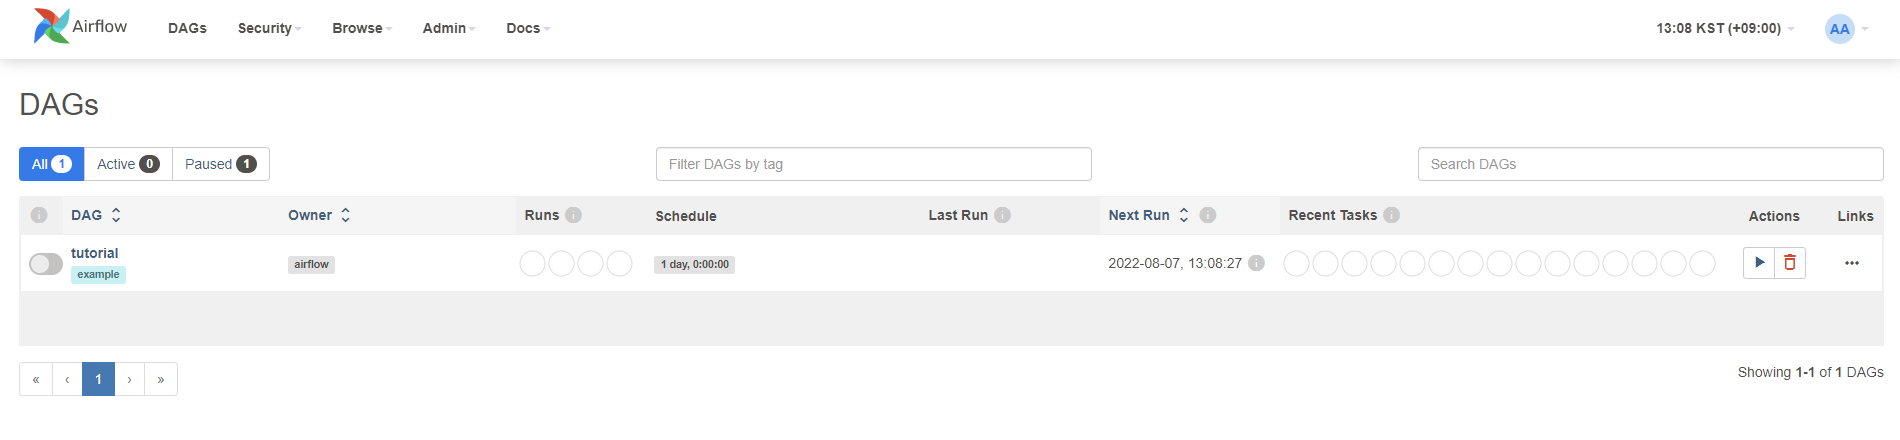
tutorial 이라는 간단한 파이프라인을 하나 만들었다.
Airflow의 Pipeline은 Airflow DAG 객체를 정의하는 이런 Python Script이다.
코드 설명
모듈 불러오기
from datetime import datetime, timedelta
from textwrap import dedent
# The DAG object; we'll need this to instantiate a DAG
from airflow import DAG
# Operators; we need this to operate!
from airflow.operators.bash import BashOperator
datetime : 스케줄러 시간, 간격 등을 설정하기 위해 필요한 모듈
textwrap.dedent : 텍스트의 모든 줄에서 같은 선행 공백을 제거한다.
airflow.DAG : DAG 객체를 정의한다.
BashOperator : Bash 스크립트, 명령어, 명령 집합을 실행한다.
Default Args
default_args를 통해 각 task의 constructor(생성자)에 default 인수값을 전달할 수 있다.
이는 목적에 맞춰 인수셋을 전달할 수 있다. 예를 들면 개발환경과 프로덕션 환경에서는 다른 셋팅을 한다.
# These args will get passed on to each operator
# You can override them on a per-task basis during operator initialization
default_args={
'depends_on_past': False,
'email': ['airflow@example.com'],
'email_on_failure': False,
'email_on_retry': False,
'retries': 1,
'retry_delay': timedelta(minutes=5),
# 'queue': 'bash_queue',
# 'pool': 'backfill',
# 'priority_weight': 10,
# 'end_date': datetime(2016, 1, 1),
# 'wait_for_downstream': False,
# 'sla': timedelta(hours=2),
# 'execution_timeout': timedelta(seconds=300),
# 'on_failure_callback': some_function,
# 'on_success_callback': some_other_function,
# 'on_retry_callback': another_function,
# 'sla_miss_callback': yet_another_function,
# 'trigger_rule': 'all_success'
},DAG 초기화
DAG() 문을 통해 DAG를 초기화 할 수 있다.
with DAG(
'tutorial',
# These args will get passed on to each operator
# You can override them on a per-task basis during operator initialization
default_args={
'depends_on_past': False,
'email': ['airflow@example.com'],
'email_on_failure': False,
'email_on_retry': False,
'retries': 1,
'retry_delay': timedelta(minutes=5),
# 'queue': 'bash_queue',
# 'pool': 'backfill',
# 'priority_weight': 10,
# 'end_date': datetime(2016, 1, 1),
# 'wait_for_downstream': False,
# 'sla': timedelta(hours=2),
# 'execution_timeout': timedelta(seconds=300),
# 'on_failure_callback': some_function,
# 'on_success_callback': some_other_function,
# 'on_retry_callback': another_function,
# 'sla_miss_callback': yet_another_function,
# 'trigger_rule': 'all_success'
},
description='A simple tutorial DAG',
schedule_interval=timedelta(days=1),
start_date=datetime(2021, 1, 1),
catchup=False,
tags=['example'],
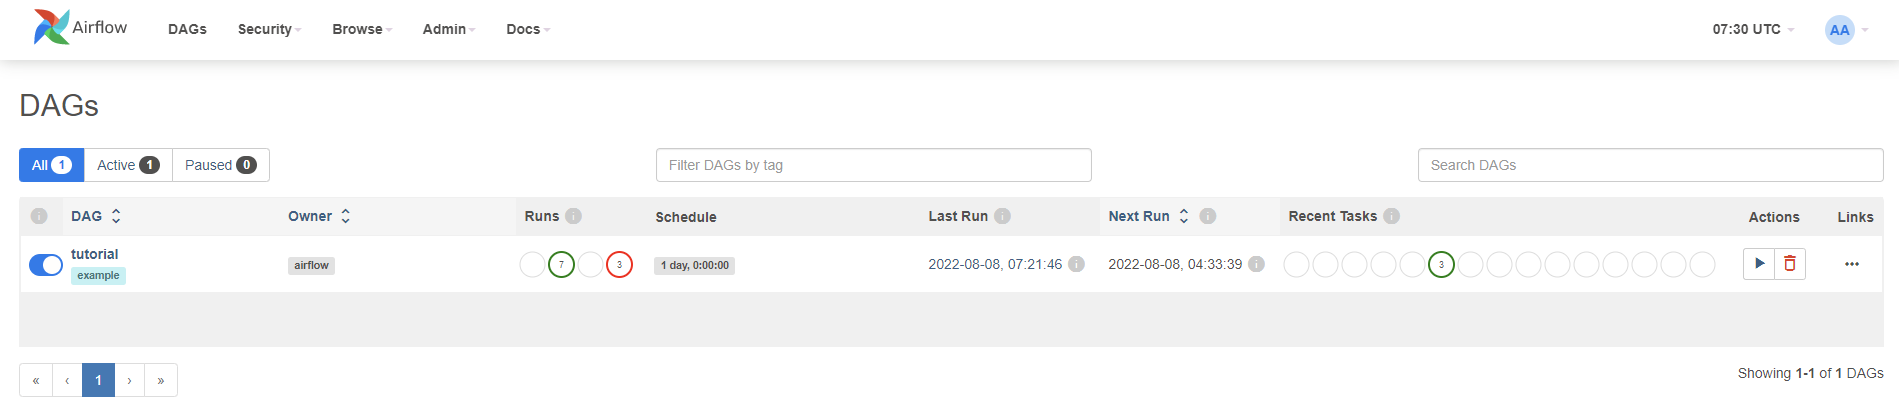
) as dag:Airflow 웹페이지에 나타난 DAG와 Python Script의 DAG 정의를 비교하면 좀 더 파악이 쉽다.
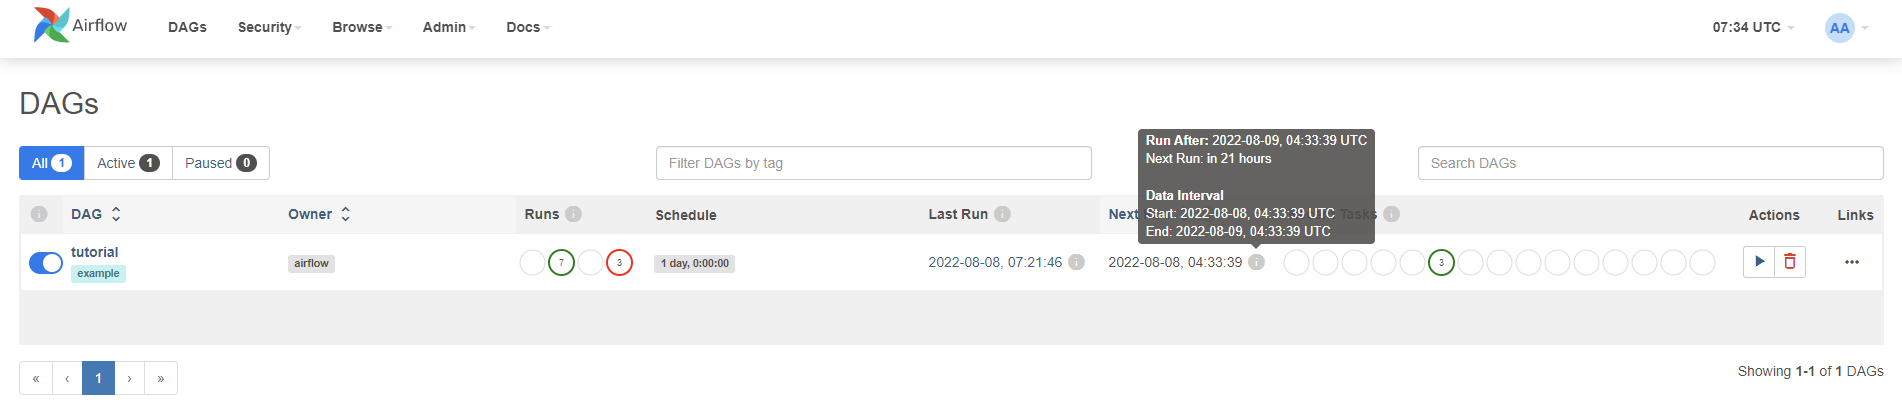
-
dag_id: 해당 DAG의 ID. 예시에서는 인수 키워드가 생략되었고, 이 DAG의 ID는tutorial이다. -
이 DAG는
example이라는 태그가 할당되어있다. -
이 DAG는 7번 성공하고, 3번 실패했다.
-
이 DAG는 2021-01-01부터 스케줄링이 시작된 DAG이고, 1일 간격으로 실행된다.
-
UTC 기준으로 2022-08-08 07:21:46에 마지막으로 실행되었다.
-
다음 실행은 2022-08-09 00:00:00 이어야 될 것 같은데 좀 이상하다. 마우스 오버하면 좀 더 자세한 내용을 볼 수 있다.
-
최근 실행에서는 Task 3개가 성공했다.
Tasks
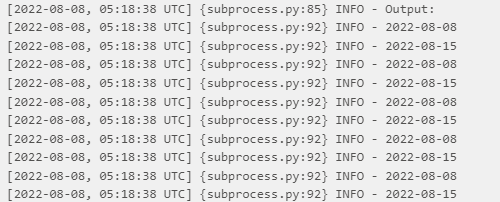
DAG에 정의하는 Task들이다. Task는 Operator로부터 초기화 된 객체이다. 예시는 Operator 중 Bash 명령을 실행하는 Task이다.
t1 = BashOperator(
    task_id='print_date',
    bash_command='date',
)

t2 = BashOperator(
    task_id='sleep',
    depends_on_past=False,
    bash_command='sleep 5',
    retries=3,
)

t3 = BashOperator(
    task_id='templated',
    depends_on_past=False,
    bash_command=templated_command,
)t1의 ID는print_date이며, Bash Command 중dateCommand를 실행한다.t2의 ID는sleep이며, 5초간 sleep 상태에 들어간다.t3의 ID는templated이며,templated_command에 정의된 명령을 실행한다. (아래에서 살펴봄)
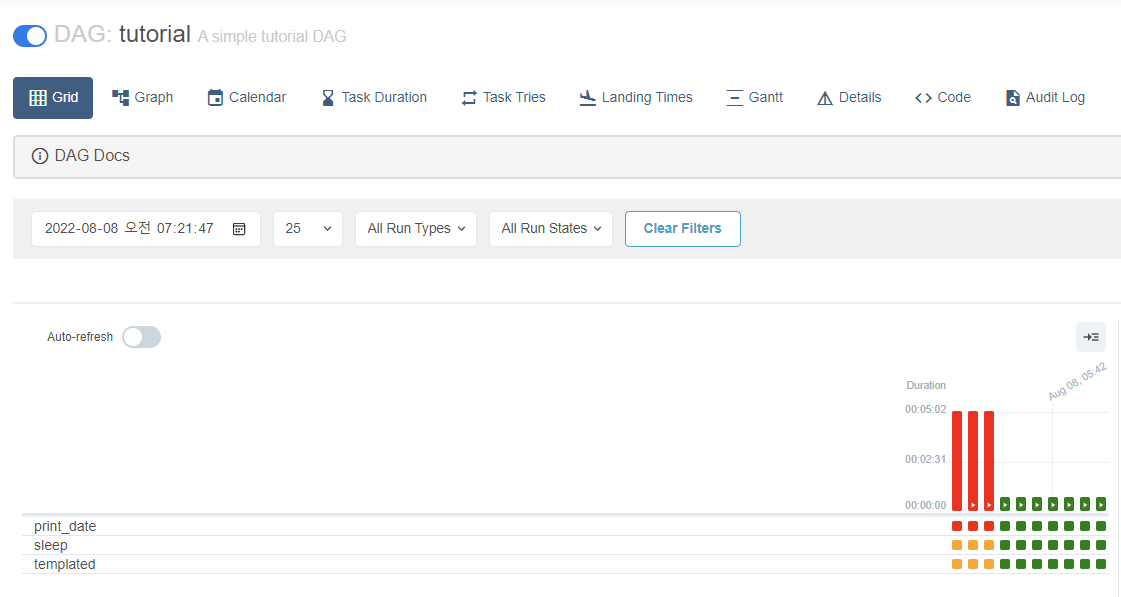
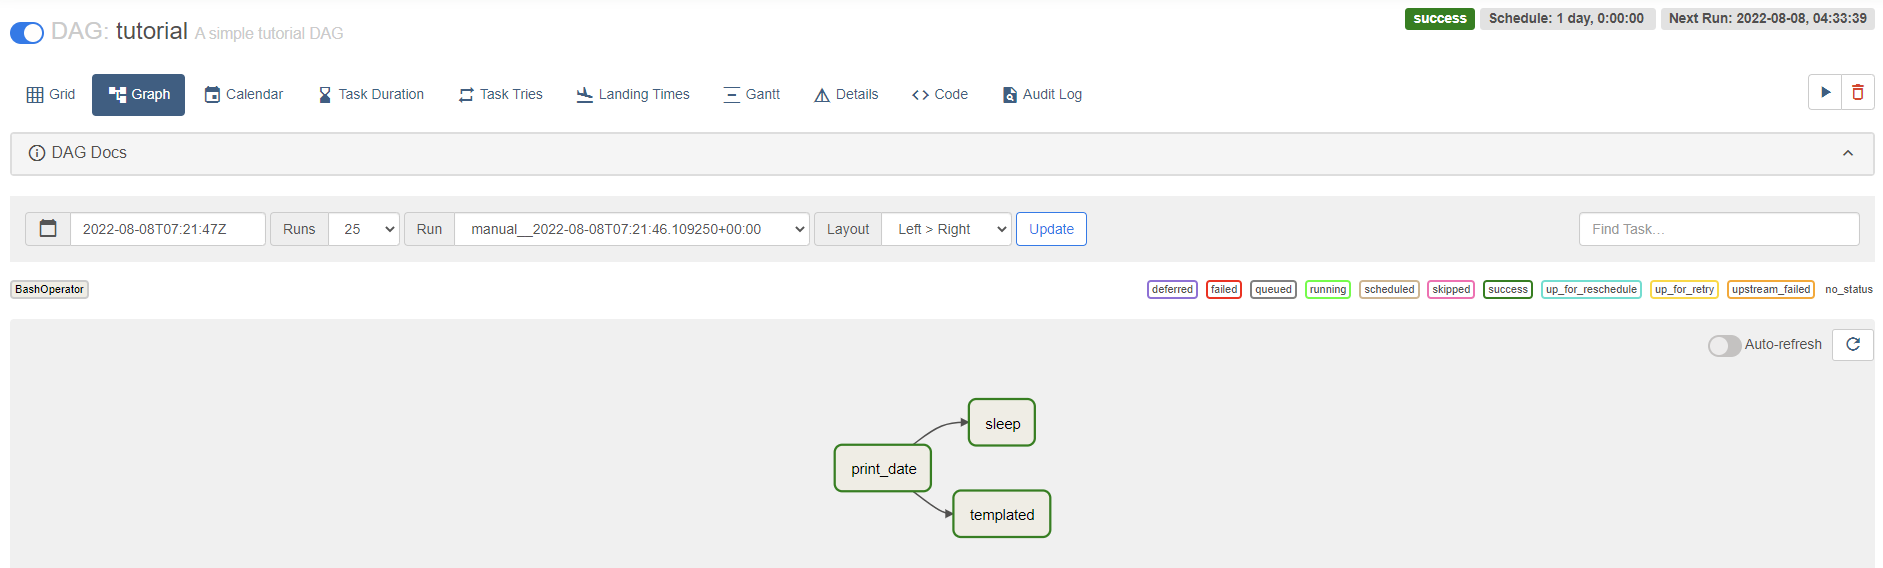
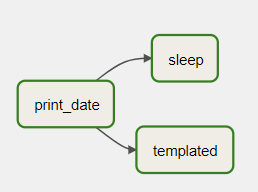
웹페이지에서 보면 각 Task들이 다음과 같이 보인다.
[Grid 뷰]
[Graph 뷰]
- 코드를 보면 인수는 특정 연산자의 인수와 모든 연산자에 공통적으로 적용되는 인수로 조합을 이룰 수 있다.
bash_command의 경우BashOperator에 한정된 인수이다.retries는BaseOperator로부터 상속받는 모든 연산자에서 공통적으로 쓸 수 있는 인수이다. bash_command에[파일명].sh와 같이 Shell Script를 불러와 실행시킬 수도 있으며 파일 위치는 파이프라인 파일(.py)이 위치한 디렉토리로부터 상대경로이다.
Jinja 템플릿
Airflow는 Jinja 템플릿을 지원한다. Jinja는 Python을 위한 템플릿 언어이다.
Jinja 템플릿 기능을 이용해 내장 매개변수와 매크로를 지원한다.
Jinja
https://jinja.palletsprojects.com/en/2.11.x/
templated_command = dedent(
    """
{% for i in range(5) %}
    echo "{{ ds }}"
    echo "{{ macros.ds_add(ds, 7)}}"
{% endfor %}
"""
)
해당 구문은 date stamp ( {{ ds }} )를 출력한 뒤, 7일을 더한 stamp를 출력한다.
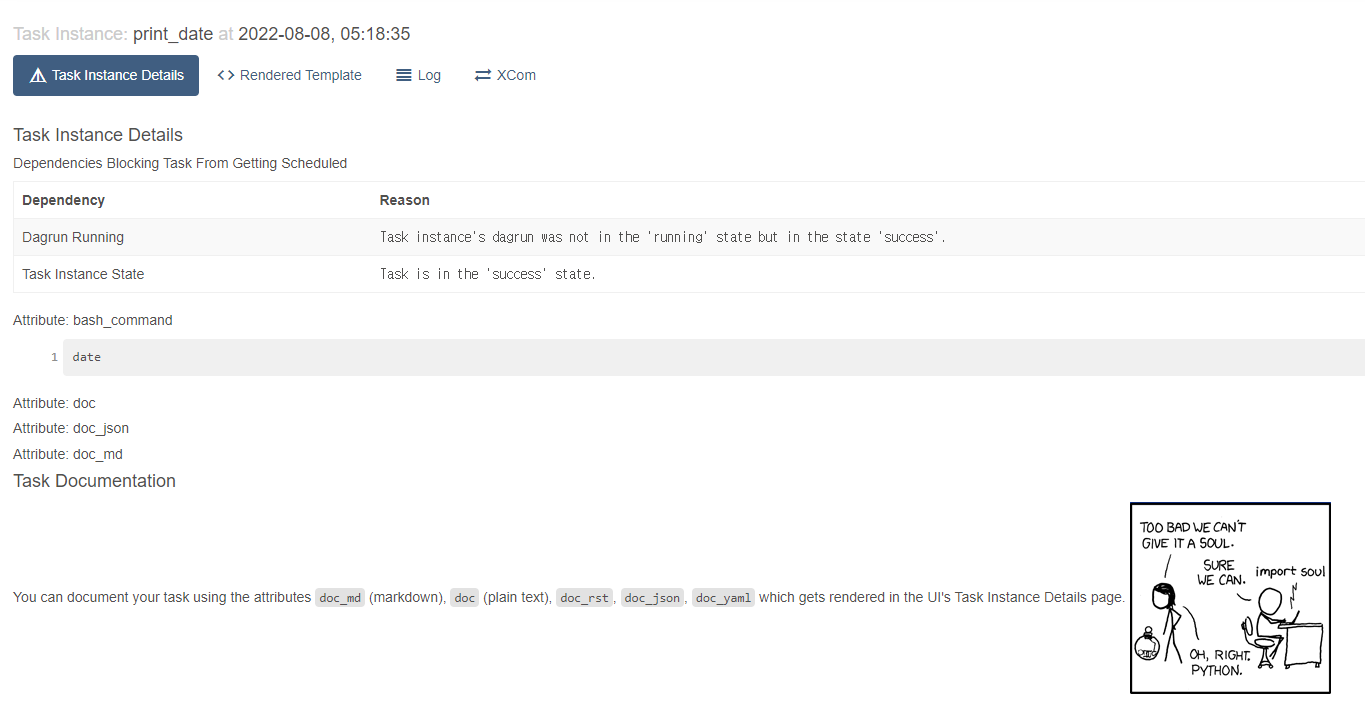
DAG와 Tasks에 대한 문서 추가하기
DAG에 대한 문서, 각 Task에 대한 문서를 추가할 수 있다. 단 DAG는 Markdown만 지원한다. Task는 plain text, markdown, reStructeredText, json, yaml을 지원한다.
t1.doc_md = dedent(
"""\
#### Task Documentation
You can document your task using the attributes `doc_md` (markdown),
`doc` (plain text), `doc_rst`, `doc_json`, `doc_yaml` which gets
rendered in the UI's Task Instance Details page.

"""
)
dag.doc_md = __doc__ # providing that you have a docstring at the beginning of the DAG
dag.doc_md = """
This is a documentation placed anywhere
""" # otherwise, type it like thisTask 객체.doc_md: 해당 Task에 대한 문서를 정의한다.DAG 객체.doc_md: DAG에 대한 문서를 정의한다.
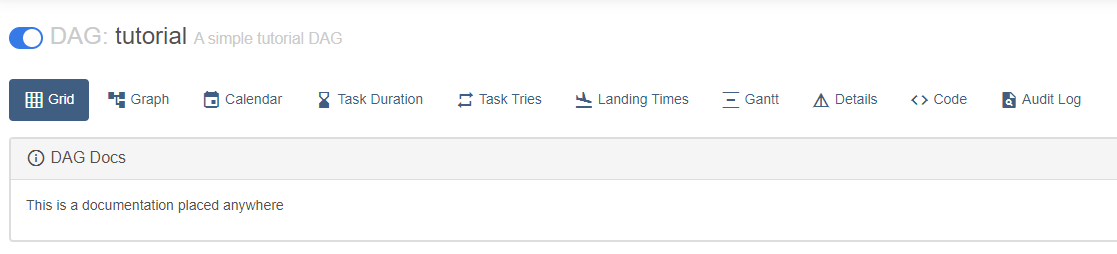
웹페이지에서 해당 DAG로 이동하면 DAG Docs가 나타난 것을 확인할 수 있다.
t1 Task의 Detail에 들어가면 Task Docs가 나타난 것도 확인할 수 있다.
종속성 설정
위에 정의한 Tasks의 종속성, 쉽게 말하면 순서를 정해야 한다.
코드와 같이 종속성을 설정하는 방법은 여러가지를 제공한다.
t1.set_downstream(t2)

# This means that t2 will depend on t1
# running successfully to run.
# It is equivalent to:
t2.set_upstream(t1)

# The bit shift operator can also be
# used to chain operations:
t1 >> t2

# And the upstream dependency with the
# bit shift operator:
t2 << t1

# Chaining multiple dependencies becomes
# concise with the bit shift operator:
t1 >> t2 >> t3

# A list of tasks can also be set as
# dependencies. These operations
# all have the same effect:
t1.set_downstream([t2, t3])
t1 >> [t2, t3]
[t2, t3] << t1
이 중 예시에서는 t1 >> [t2, t3]를 이용하여 종속성을 나타내었다. 이 뜻은 t1 Task가 마무리 된 뒤에 t2, t3를 병렬로 실행한다는 뜻이다.
그림을 보면 t1에서 t2와 t3로 화살표가 뻗어 나가는 것을 볼 수 있다.
요약
예시 파이프라인은 다음과 같이 동작한다.
-
파이프라인(DAG)은 3개의 Tasks를 가지며, 각각
print_date,sleep,templatedTask이다. -
print_date는 날짜를 출력한다.

-
sleep은 5초간 sleep 상태에 들어간다. -
templated는 date stamp와 7일을 더한 stamp를 5번 출력한다.
-
print_date가 실행을 마친 후,sleep과templated가 병렬로 실행된다.
Script 테스트
작성한 Python Script가 오류없이 작성되었는지 테스트 해보기 위해서 다음 명령을 실행한다.
python3 [파일명].py
정상적으로 작성되었으면 에러없이 프롬프트가 넘어간다.


처음 사용해보는데 많은 도움 되었습니다 감사합니다!!! 에어플로우 시리즈 잘 보겠습니다