📌 참고
◼ HomeController.java
@Controller
public class HomeController {

	private static final Logger logger = LoggerFactory.getLogger(HomeController.class);

	/**
	 * Simply selects the home view to render by returning its name.
	 */
	@RequestMapping(value = "/", method = RequestMethod.GET)
	public String home(Locale locale, Model model) {
		logger.info("Welcome home! The client locale is {}.", locale);

		Date date = new Date();
		DateFormat dateFormat = DateFormat.getDateTimeInstance(DateFormat.LONG, DateFormat.LONG, locale);

		String formattedDate = dateFormat.format(date);

		model.addAttribute("serverTime", formattedDate );

		return "home";
	}
}
◼ home.jsp
<%@ taglib uri="http://java.sun.com/jsp/jstl/core" prefix="c" %>
<%@ page session="false" %>
<html>
<head>
	<title>Home</title>
</head>
<body>
<h1>
	Hello world!
</h1>

<P>  The time on the server is ${serverTime}. </P>
</body>
</html>
👀 Request Mapping
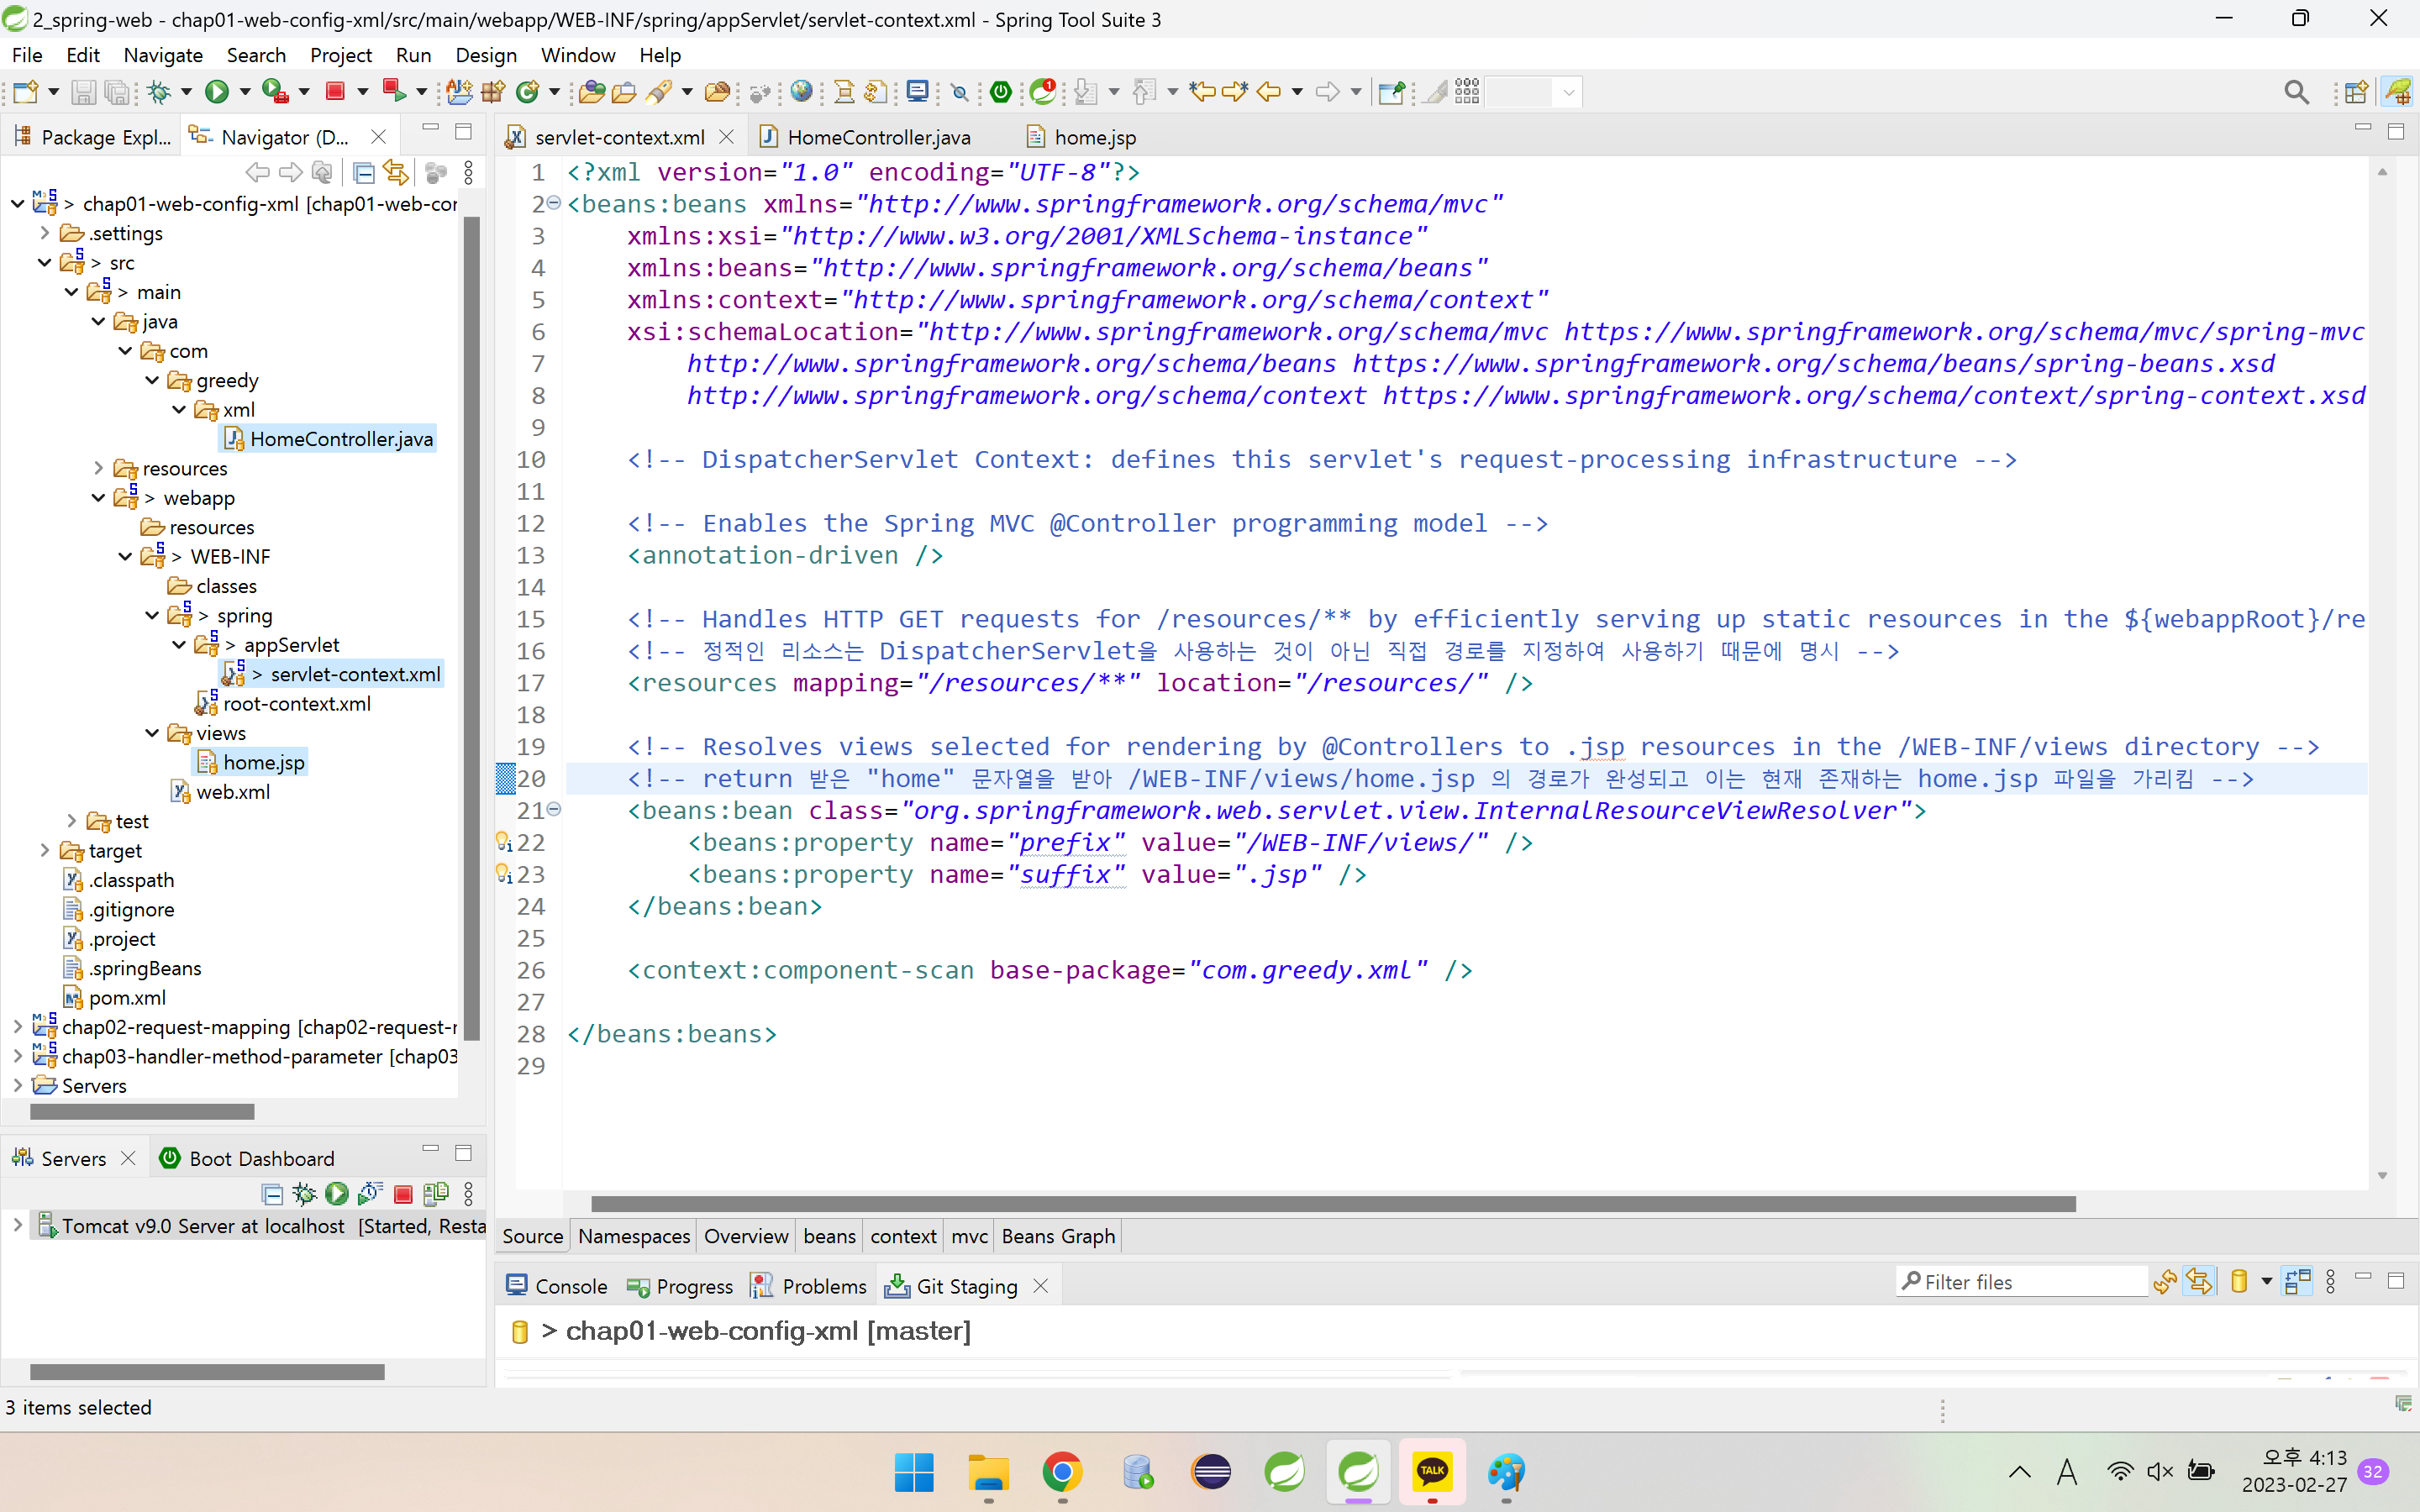
👉 webapp/WEB-INF/views/
◼ main.jsp
<%@ page language="java" contentType="text/html; charset=UTF-8"
    pageEncoding="UTF-8"%>
<!DOCTYPE html>
<html>
<head>
<meta charset="UTF-8">
<title>Spring MVC Mapping 테스트</title>
<Style>
h2 { background-color : lightgray; }

</Style>
</head>
<body>
	<h1 align='center'>Spring MVC Mapping 테스트</h1>

	<h2>1. 메소드에 요청 매핑하기</h2>
	<h3>GET : /menu/regist</h3>
	<button onclick='location.href="${pageContext.servletContext.contextPath}/menu/regist"'>GET 메뉴 등록 요청</button>

	<h3>POST : /menu/regist</h3>
	<form action="${pageContext.servletContext.contextPath}/menu/regist" method="POST">
		<button type='submit'>POST 메뉴 등록 요청</button>
	</form>

	<h3>GET : /menu/modify</h3>
	<button onclick='location.href="${pageContext.servletContext.contextPath}/menu/modify"'>GET 메뉴 수정 요청</button>

	<h3>POST : /menu/modify</h3>
	<form action="${pageContext.servletContext.contextPath}/menu/modify" method="POST">
		<button type='submit'>POST 메뉴 수정 요청</button>
	</form>

	<h3>GET : /menu/delete</h3>
	<button onclick='location.href="${pageContext.servletContext.contextPath}/menu/delete"'>GET 메뉴 삭제 요청</button>

	<h3>POST : /menu/delete</h3>
	<form action="${pageContext.servletContext.contextPath}/menu/delete" method="POST">
		<button type='submit'>POST 메뉴 삭제 요청</button>
	</form>

	<h2>2. 클래스에 요청 매핑하기</h2>

	<h3>GET : /order/regist</h3>
	<button onclick='location.href="${pageContext.servletContext.contextPath}/order/regist"'>GET 주문 등록 요청</button>

	<h3>POST : /order/modify</h3>
	<form action="${pageContext.servletContext.contextPath}/order/modify" method="POST">
		<button type='submit'>POST 주문 수정 요청</button>
	</form>

	<h3>POST : /order/delete</h3>
	<form action="${pageContext.servletContext.contextPath}/order/delete" method="POST">
		<button type='submit'>POST 주문 삭제 요청</button>
	</form>

	<h3>GET : /order/detail/{orderNo}</h3>
	<button onclick='location.href="${pageContext.servletContext.contextPath}/order/detail/970129"'>GET 주문 상세보기 요청</button>
	<!-- 970129번 주문 상세보기 요청중 -->

</body>
</html>
◼ mappingResult.jsp
<%@ page language="java" contentType="text/html; charset=UTF-8"
pageEncoding="UTF-8"%>
<!DOCTYPE html>
<html>
<head>
<meta charset="UTF-8">
<title>Insert title here</title>
</head>
<body>
<h1 align='center'>${ message }</h1>
</body>
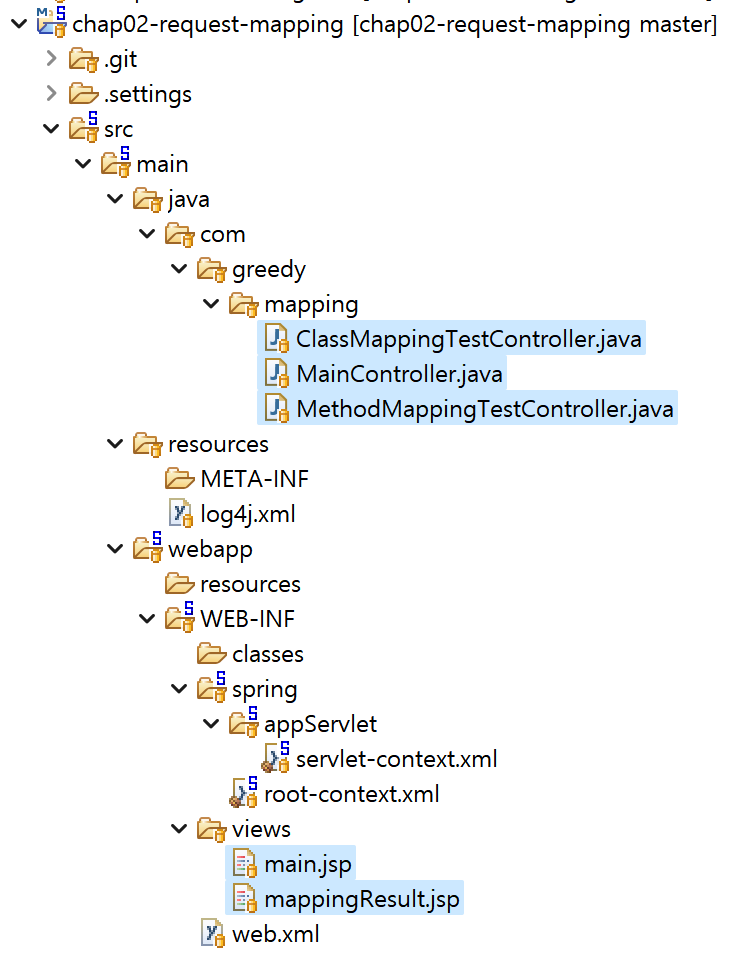
</html>👉 java/com/greedy/mapping/
◼ MainController.java
@RequestMapping()
@Controller
public class MainController {

	@RequestMapping("/") /* 어떠한 요청과 연결시킬 것인지 입력 */
	public String main() {

		return "main";
	}
}
◼ MethodMappingTestController.java
addAttribute()
/* DispatcherServlet은 웹 요청을 받으면 @Controller가 달린 컨트롤러 클래스에 처리를 위임
 * 그 과정은 컨트롤러 클래스의 핸들러 메소드에 선언 된 다양한 @RequestMapping 설정 내용에 따름 */
@Controller
public class MethodMappingTestController {

	/* RequestMapping 설정에 method 방식을 지정하지 않으면 get/post 요청을 둘 다 처리 */
	@RequestMapping("/menu/regist")
	public String registMenu(Model model) { /* Model : 필요한 동적인 데이터들을 담아서 가져가는 역할 */

		model.addAttribute("message", "메뉴 등록용 핸들러 메소드 호출! (GET/POST) ");

		return "mappingResult"; /* 포워딩 할 화면 반환 */
		/* [ views의 main.jsp에 코드 작성 ] */
		/* [ views에 mappingResult.jsp 파일 생성 ] */

	}

	/* POST 방식으로 정의 된 메소드가 없을 경우, 호출하게되면 405 - 허용하지 않는 메소드라는 오류 발생 */
	/* 어노테이션에 지정할 속성이 여러 개라면 ,(콤마)를 붙여 입력 */
	@RequestMapping(value="/menu/modify", method=RequestMethod.GET) /* GET 방식 명시 */
	public String modifyMenu(Model model) {

		model.addAttribute("message", "GET 방식의 메뉴 수정용 핸들러 메소드 호출 :)");

		return "mappingResult";
		/* [ views의 main.jsp에 코드 작성 ] */
	}

	/* 요청 메소드별 전용 어노테이션 (since 4.3)
	 * 핸들러 메소드를 보다 간결하게 작성 가능
	 * 요청 메소드			어노테이션
	 * GET				@GetMapping
	 * POST				@PostMapping
	 * */
	@GetMapping("/menu/delete") /* value 값만 작성 */
	public String getDeleteMenu(Model model) {

		model.addAttribute("message", "GET 방식의 메뉴 삭제용 핸들러 메소드 호출 ~!");

		return "mappingResult";
		/* [ views의 main.jsp에 코드 작성 ] */

	}

	@PostMapping("/menu/delete")
	public String postDeleteMenu(Model model) {

		model.addAttribute("message", "POST 방식의 메뉴 삭제용 핸들러 메소드 호출 ~!");

		return "mappingResult";
		/* [ views의 main.jsp에 코드 작성 ] */

	}
}
◼ ClassMappingTestController.java
@GetMapping()
/* 클래스 레벨에 @RequestMapping 어노테이션 사용 가능
 * 클래스 레벨에 URL 공통 부분을 이용해서 설정하면 매번 핸들러 메소드 URL에 중복되는 내용을 작성하지 않아도 됨 */
@Controller
@RequestMapping("/order/*") /* 모든 order 하위에 있는 것들을 의미 */
public class ClassMappingTestController {

	@GetMapping("/regist")
	public String resistOrder(Model model) {

		model.addAttribute("message", "GET 방식의 주문 등록용 핸들러 메소드 호출 ^^");

		return "mappingResult";
	}

	/* 여러 개의 패턴을 매핑할 수도 있음 */
	@RequestMapping(value= {"/modify", "/delete"}, method=RequestMethod.POST)
	public String oidufyAndDelete(Model model) {

		model.addAttribute("message", "POST 방식의 주문 정보 수정과 주문 정보 삭제 공통 처리용 핸들러 메소드 호출^^");

		return "mappingResult";
	}

	/* PathVariable로 전달되는 값은 반드시 매개변수와이름이 동일해야 하며 동일하지 않을 경우 @PathVariable("이름")을 설정 해줘야 함
	 * 핸들러 메소드에서 요청 객체를 들춰서 전달 된 값을 꺼내 볼 필요 없이 url 경로에 위치한 값을 value로 인식하는 방식으로
	 * REST 형 웹 서비스를 설계할 때 유용 */
	@GetMapping("/detail/{orderNo}")
	public String selectOrderDetail(@PathVariable("orderNo") int orderNo, Model model) {
	/* '{orderNo}'와 'int orderNo' 부분의 이름들이 같다면 '@PathVariable("orderNo")'에서 '("orderNo")'를 생략해도 됨(현재 생략 가능) */

		/* parsing 불가능한 PathVariable이 전달 되면 400 - 잘못 된 요청 에러가 발생
		 * (int orderNo는 int이므로 int가 아닌 값이 매개변수로 전달되면 에러) */
		model.addAttribute("message", orderNo + "번 주문 상세 내용 조회용 핸들러 메소드 호출!");

		return "mappingResult";
	}

	/* @RequestMapping에 아무런 url 작성 X */
	/* 클래스에 설정 된 매핑 설정과 일치하면서 다른 요청 처리에 대한 핸들러 메소드가 준비되지 않았다면 해당 메소드를 요청 (default 메소드) */
	@RequestMapping
	public String otherRequest(Model model) {

		model.addAttribute("message", "order 요청이긴 하지만 다른 기능은 아직 준비되지 않음");

		return "mappingResult";
	}
}
👀 Handler Method Parameter
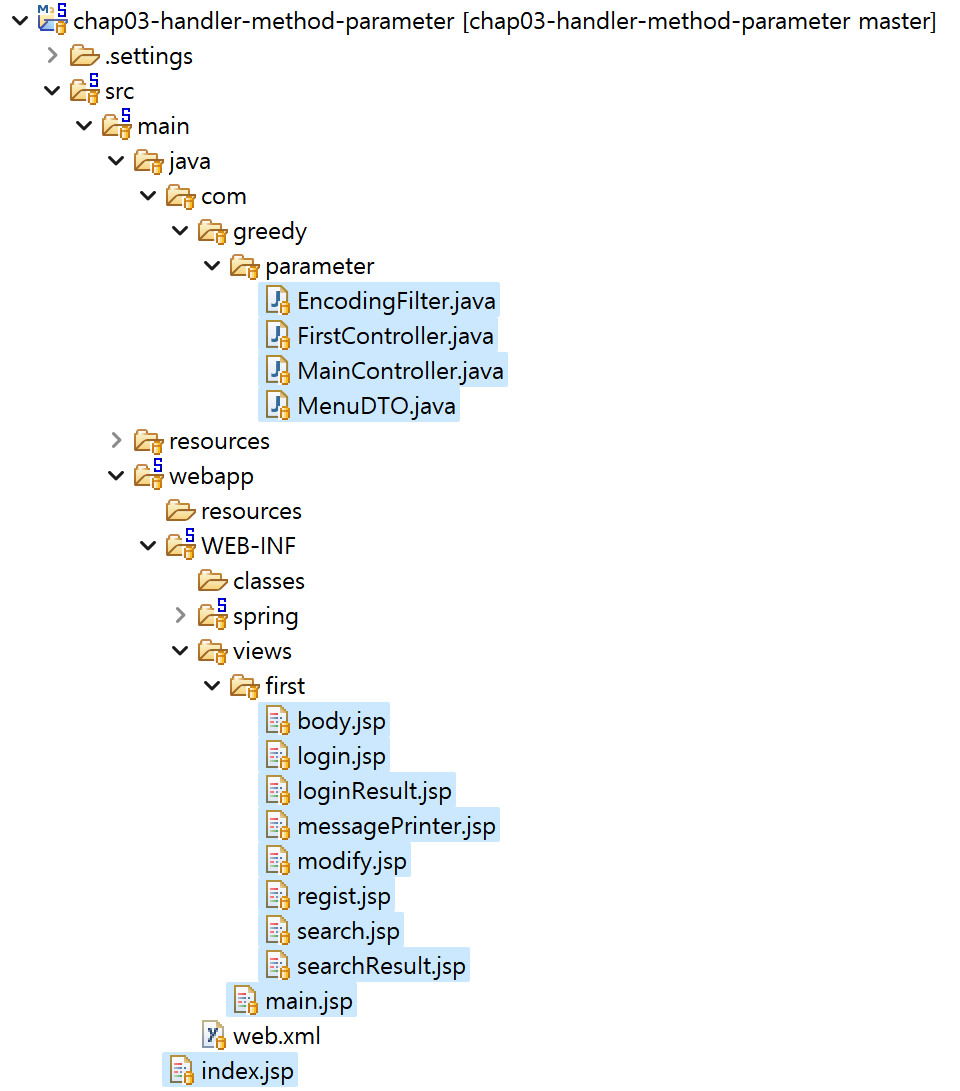
👉 HttpServletRequest로 요청 파라미터 전달 받기
◼ index.jsp
<jsp:forward page="main"/> <!-- MainController에 main 요청 -->◼ MainController.java
void
@Controller
public class MainController {


	@RequestMapping("/main") /* index.jsp에서 forward 요청한 것 전달 받음 */
	public void showMain() {

		/* return 타입을 void로 하는 경우 viewResolver는 요청 주소 자체를 view name으로 해석하게 됨
		 * ('/WEB-INF/views/main.jsp'를 의미) */
	}
}
◼ main.jsp
<h3>1. HtpServletRequest로 요청 파라미터 전달 받기</h3>
<button onclick='location.href="${pageContext.servletContext.contextPath}/first/regist"'>파라미터 전달하기</button>
◼ regist.jsp
<h1>신규 메뉴 등록하기</h1>
<form action='regist' method='post'> <!-- /(슬래시)를 붙이지 않으면 상대 경로 -->
	등록할 메뉴 이름 : <input type='text' name='name'><br>
	등록할 메뉴 가격 : <input type='text' name='price'><br>
	등록할 메뉴 카테고리 :
	<select name="categoryCode">
		<option value="1">식사</option>
		<option value="2">음료</option>
		<option value="3">디저트</option>
	</select> <br><br>
	<input type="submit">
</form>
◼ FirstController.java
@Controller
@RequestMapping("/first/*")
@SessionAttributes("id")
public class FirstController {

	@GetMapping("/regist")
	public void regist() {
		/* 반환값이 void이므로 이 메소드의 경로는 '/WEB-INF/views/first/regist.jsp'를 의미 */
	}

	/* 핸들러 메소드에 파라미터로 특정 몇 가지 타입을 선언하게 되면 핸들러 메소드 호출 시 인자로 값을 전달 */

	/* 1. HttpServletRequest를 매개변수로 선언하여 파라미터로 전달 받은 값 꺼내기
	 * 	  핸들러 메소드 매개변수로 HttpServletResponse도 사용 가능
	 * 	  상위 타입인 ServletRequest, ServletResponse도 사용 가능 */
	@PostMapping("/regist")
	public String registMenu(HttpServletRequest request, HttpServletResponse response, Model model) {

		String name = request.getParameter("name");
		int price = Integer.parseInt(request.getParameter("price"));
		int categoryCode = Integer.parseInt(request.getParameter("categoryCode"));

		String message = name + "을(를) 신규 메뉴 목록의 " + categoryCode + "번 카테고리에 " + price + "원으로 등록하였습니다 :)";;
		model.addAttribute("message", message);

		return "first/messagePrinter"; /* [ messagePrinter.jsp 파일을 views/first 하위에 생성 ] */

		/* POST 방식은 인코딩이 필요하므로 EncodingFilter 클래스를 생성하여 Filter 코드를 작성 */
	}
}
◼ messagePrinter.jsp
<h1 align='center'>${ message }</h1>◼ EncodingFilter.java
chain
@Component
@WebFilter("/*")
public class EncodingFilter implements Filter { /* DispatcherServlet보다 먼저 Filter를 거쳐감 */

	@Override
	public void doFilter(ServletRequest request, ServletResponse response, FilterChain chain)
			throws IOException, ServletException {

		/* POST방식일 경우 UTF-8로 인코딩 */
		HttpServletRequest hrequest = (HttpServletRequest) request;
		if("POST".equals(hrequest.getMethod())) {
			hrequest.setCharacterEncoding("UTF-8");
		}

		/* Filter 작업이 끝난 후, 이어진 Filter or Servlet으로 다시 연결 */
		chain.doFilter(hrequest, response);

	}
}
👉 @RequestParam 이용하여 요청 파라미터 전달 받기 🔥중요🔥
◼ index.jsp
/* 동일 */◼ MainController.java
/* 동일 */◼ main.jsp
<h3>2. @RequestParam 이용하여 요청 파라미터 전달 받기</h3> <!-- 주로 사용 -->
<button onclick='location.href="${pageContext.servletContext.contextPath}/first/modify"'>@RequestParam 이용하기</button>
◼ modify.jsp
<h1>메뉴 수정하기</h1>

<form action="modify" method="post">
	수정할 메뉴의 이름 : <input type="text" name="name"><br>
	수정할 메뉴의 가격 : <input type="number" name="modifyPrice"><br><br>
	<button type="submit">수정하기</button>
</form>

<form action="modifyAll" method="post">
	수정할 메뉴의 이름 : <input type="text" name="modifyName"><br>
	수정할 메뉴의 가격 : <input type="number" name="modifyPrice"><br><br>
	<button type="submit">수정하기</button>
</form>
◼ FirstController.java
@RequestParam
@Controller
@RequestMapping("/first/*")
@SessionAttributes("id")
public class FirstController {

	@GetMapping("modify")
	public void modify() {
		/* 반환값이 void이므로 이 메소드의 경로는 '/WEB-INF/views/first/modify.jsp'를 의미 */
	}

	/* 2. @RequestParam으로 값 꺼내기
	 * 요청 파라미터를 매핑하여 호출 시 값을 넣어주는 어노테이션으로 @PathVariable처럼 변수 앞에 작성
	 * form name 속성 값과 매개변수의 이름이 다른 경우에는 @RequestParam("name")을 설정
	 * 또한 어노테이션은 생략 가능하지만 명시적으로 작성하는 것이 의미 파악에 쉬우며 그 외의 설정을 작성할 경우에도 어노테이션이 필요
	 *
	 * 전달하는 form의 name 속성이 일치하는 것이 없는 경우 400 - 잘못 된 요청 에러가 발생하는데
	 * required 속성을 false로 설정하면 해당 name 값이 존재하지 않아도 null로 처리하며 에러가 발생하지 않음
	 * (기본 값이 true이기 때문에 설정하지 않으면 에러가 발생)
	 *
	 * 값을 입력하지 않고 넘겼을 때 modifyPrice=""와 같이 빈 문자열이 넘어오게 되면, parsing 관련 에러가 발생할 수 있음(400 - 잘못 된 요청)
	 * 값이 넘어오지 않는 경우 defaultValue를 이용해 기본 값 설정 가능
	 * */
	@PostMapping("modify")
	public String modifyMenuPrice(@RequestParam(required=false) String modifyName,
								  @RequestParam(defaultValue="999999") int modifyPrice, Model model) {

		String message = modifyName + " 메뉴의 가격을 " + modifyPrice + " 원으로 변경했습니다 :)";
		model.addAttribute("message", message);

		return "first/messagePrinter";
	}

	/* 파라미터가 여러 개인 경우 Map으로 한 번에 처리 가능. 이 때 Map은 form의 name 속성. */
	@PostMapping("modifyAll")
	public String modifyMenu(@RequestParam Map<String, String> parameters, Model model) { /* Model : DispatcherServlet을 호출할 때 넘겨주는 데이터를 담음 */

		/* Map에서 value 꺼내기 */
		String modifyName = parameters.get("modifyName");
		int modifyPrice = Integer.parseInt(parameters.get("modifyPrice"));

		String message = "메뉴의 이름을 " + modifyName + "(으)로, 가격을 " + modifyPrice + "원 으로 변경 완료 :)";
		model.addAttribute("message", message);

		return "first/messagePrinter";
	}
}
◼ messagePrinter.jsp
/* 동일 */◼ EncodingFilter.java
/* 동일 */👉 @ModelAttribute를 이용하여 파라미터 전달 받기 🔥중요🔥
◼ index.jsp
/* 동일 */◼ MainController.java
/* 동일 */◼ main.jsp
<h3>3. @ModelAttribute를 이용하여 파라미터 전달 받기</h3> <!-- 주로 사용 -->
<button onclick='location.href="${pageContext.servletContext.contextPath}/first/search"'>@ModelAttribute 이용하기</button>
◼ search.jsp
<h1 align='center'>@ModelAttribute 사용하여 파라미터 값 전달 받기</h1>

<form action='search' method='post'>
	등록할 메뉴 이름 : <input type='text' name='name'><br>
	등록할 메뉴 가격 : <input type='number' name='price'><br>
	등록할 메뉴 카테고리 :
	<select name="categoryCode">
		<option value="1">식사</option>
		<option value="2">음료</option>
		<option value="3">디저트</option>
	</select> <br><br>
	검색할 판매 상태 : <input type="text" name="orderableStatus"><br>
	<input type="submit">
</form>
◼ modelDTO.java
public class MenuDTO {

	private String name;
	private int price;
	private int categoryCode;
	private String orderableStatus;

    /* 기본 DTO 셋팅 */
}
◼ FirstController.java
@ModelAttribute
@Controller
@RequestMapping("/first/*")
@SessionAttributes("id")
public class FirstController {

	@GetMapping("search")
	public void search() {

	}

	/* 3. @ModelAttribute를 이용하는 방법
	 * DTO와 같은 모델을 커맨드 객체로 전달받을 수 있음 .
	 * 커맨드 객체를 생성하여 매개변수로 전달해 준 뒤 해당 인스턴스를 Model에 담음.
	 * 경우에 따라서 form에 입력한 값을 다음 화면으로 바로 전달해야 하는 경우가 발생하는데 이 때 유용하게 사용할 수 있음.
	 * @ModelAttribute("모델에 담을 key값")을 지정할 수 있으며 지정하지 않으면 타입의 앞 글자를 소문자로 네이밍한 규칙을 따름.
	 * 어노테이션 생략 가능하지만 명시적으로 작성하는 것이 알아보기에 좋음. */
	@PostMapping("search")
	public String searchMenu(@ModelAttribute("menu") MenuDTO menu) { /* 원하는 데이터 타입(MenuDTO)을 지정하면 DispatcherServlet이 가공해서 반환해줌 */
										/* 여기서 menu라는 이름을 따로 입력하지 않으면 menuDTO라는 이름으로 모델에 저장될 것 */

		System.out.println(menu);

		return "first/searchResult";
		/* first/search와 Mapping한 뒤, first/searchResult를 리턴하기 때문에
		 * search뷰에서 입력하면 searchResult뷰를 결과로 보여주는 것 */
	}

}
◼ searchResult.jsp
<h1 align='center'>Model에 담긴 커맨드 객체의 정보 출력</h1>
<h3>메뉴의 이름 : ${ menu.name }</h3>
<h3>메뉴의 가격 : ${ menu.price }</h3>
<h3>메뉴의 카테고리 : ${ menu.categoryCode }</h3>
<h3>메뉴의 판매상태 : ${ menu.orderableStatus }</h3>
◼ EncodingFilter.java
/* 동일 */👉 HttpSession 이용하기
◼ index.jsp
/* 동일 */◼ MainController.java
/* 동일 */◼ main.jsp
<h3>4-1, 4-2. HttpSession 이용하기</h3>
<button onclick='location.href="${pageContext.servletContext.contextPath}/first/login"'>Session에 정보 담기</button>
◼ login.jsp
<h1 align='center'>session 이용하기</h1>

<h3>HttpSession을 매개변수로 선언하기</h3>
<form action="login1" method="post">
	ID : <input type='text' name='id'> <br>
	PWD : <input type="password" name="pwd"> <br><br>
	<input type='submit' value='로그인 !'>
</form>

<h3>@SessionAttribute 사용하기</h3>
<form action="login2" method="post">
	ID : <input type='text' name='id'> <br>
	PWD : <input type="password" name="pwd"> <br><br>
	<input type='submit' value='로그인 !'>
</form>
◼ FirstController.java
HttpSession @SessionAttributes
@Controller
@RequestMapping("/first/*")
@SessionAttributes("id")
public class FirstController {

	@GetMapping("login")
	public void login() {

	}

	/* 4-1. HttpSession 매개변수 선언
	 * 핸들러 메소드 호출 시 session 객체를 넣어서 호출
	 *
	 * 직접적으로 HttpServletRequest, HttpServletResponse를 사용하지 않고 HttpSession 객체 사용 가능 */
	@PostMapping("login1")
	public String sessionTest1(@RequestParam String id, HttpSession session) { /* 필요한 객체를 선언하면 DispatcherServlet이 전달 해줌 */

		/* set */
		session.setAttribute("id", id);

		return "first/loginResult";
	}

	@GetMapping("logout1")
	public String logout1(HttpSession session) {

		/* Session 객체를 만료(무효화)하여 저장 된 값이 모두 사라짐 */
		session.invalidate();

		return "first/loginResult";
		/* 로그인된 상태에서 로그아웃 버튼을 클릭할 시, 세션이 만료되어 hyonie라는 id가 더이상 화면에 표시되지 않음 */
	}

	/* 4-2. @SessionAttributes를 이용하여 session에 값 담기
	 * 클래스 레벨에 @SessionAttributes 어노테이션을 이용하여 세션에 값을 담은 key 값을 설정해두면
	 * Model에 해당 key 값이 추가되는 경우 session 영역에 자동으로 등록 */
	/* (HttpSession대신 스프링에서 제공하는 @SessionAttributes 활용) */
	@PostMapping("login2")
	public String sessionTest2(@RequestParam String id, Model model) {

		/* model에 id가 추가되는 경우 session 영역에 자동으로 등록
		 * (model에 등록했지만 session 영역에 등록) */
		model.addAttribute("id", id);

		/* 기존 로그아웃[1] 버튼을 눌러도 세션이 만료되지 않아 id가 그대로 화면에 남아있음 */

		return "first/loginResult";
	}

	/* @SessionAttributed로 등록 된 값은 session의 상태를 관리하는 SessionStatue의
	 * setCoplete 메소드를 호출해야 사용이 만료 됨 */
	@GetMapping("logout2")
	public String logoutTest2(SessionStatus sessionStatus) {

		/* 로그아웃[1]로는 세션이 만료되지 않았으나 로그아웃[2]를 누르면 데이터가 제거된 것을 확인 가능 */
		sessionStatus.setComplete();

		return "first/loginResult";
	}
}
◼ loginResult.jsp
<h1 align='center'>Session에 담긴 값 확인</h1>
<h3 align='right'>${ sessionScope.id }님 환영해용! :D</h3>

<div align="right">
	<button onclick="location.href='logout1'">로그아웃[1]</button>
	<button onclick="location.href='logout2'">로그아웃[2]</button>
</div>
◼ EncodingFilter.java
/* 동일 */👉 @RequestBody를 이용하여 파라미터 전달 받기
◼ index.jsp
/* 동일 */◼ MainController.java
/* 동일 */◼ main.jsp
<h3>5. @RequestBody를 이용하여 파라미터 전달 받기</h3>
<button onclick='location.href="${pageContext.servletContext.contextPath}/first/body"'>@RequestBody 이용하기</button>
◼ body.jsp
<h1 align='center'>@RequestBody 사용하여 파라미터 값 전달 받기</h1>

<form action='body' method='post'>
	등록할 메뉴 이름 : <input type='text' name='name'><br>
	등록할 메뉴 가격 : <input type='number' name='price'><br>
	등록할 메뉴 카테고리 :
	<select name="categoryCode">
		<option value="1">식사</option>
		<option value="2">음료</option>
		<option value="3">디저트</option>
	</select> <br><br>
	판매 상태 : <input type="text" name="orderableStatus"><br>
	<input type="submit">
</form>
◼ FirstController.java
@RequestBody
@Controller
@RequestMapping("/first/*")
@SessionAttributes("id")
public class FirstController {

	@GetMapping("body")
	public void body() {

	}

	/* 5. @RequestBody 이용하기
	 * HTTP 요청 본문 자체를 모델로 변환시켜주는 어노테이션으로 출력해보면 쿼리 스트링 형태의 문자열이 전송 됨
	 * JSON으로 전달하는 경우 Jackson 컨버터로 자동 파싱하여 사용할 수 있어 주로 Rest API 구현시 많이 사용 */
	@PostMapping("body")
	public String bodyTest(@RequestBody String body,
						   @RequestHeader("content-type") String contentType,
						   @CookieValue("JSESSIONID") String sessionId) {

		System.out.println(body);
		// name=%ED%81%AC%EB%A6%BC%EC%B9%98%EC%A6%88%EB%96%A1&price=6000&categoryCode=3&orderableStatus=Y
		System.out.println(contentType);
		// application/x-www-form-urlencoded (form url encoded형태)
		System.out.println(sessionId);
		// 1390514498E422A7F89A1837FD6D4D15


		return "first/bodyResult";
        /* first에 bodyResult를 생성하지 않았으니 404 오류 화면 뜰 것 */
	}
}
◼ EncodingFilter.java
/* 동일 */
👀 View Resolver
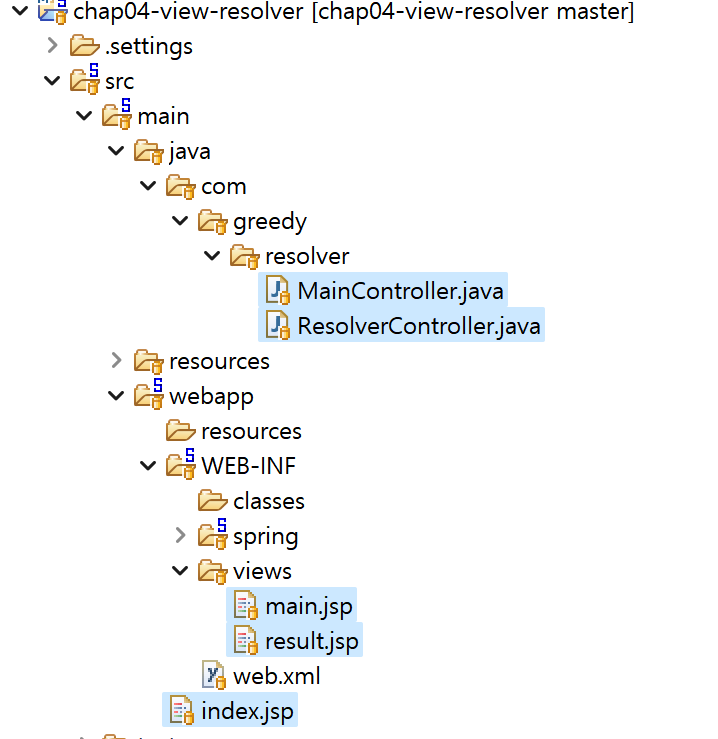
👉 문자열로 뷰 이름 반환하기
◼ index.jsp
<jsp:forward page="main"/> <!-- MainController에 main 요청 -->◼ MainController.java
@Controller
public class MainController {

	@RequestMapping("/main")
	public void main() {

	}
}
◼ main.jsp
<h3>문자열로 뷰 이름 반환하기</h3>
<button onclick="location.href='string'">문자열로 뷰 이름 반환</button>
◼ ResolverController.java
@Controller
public class ResolverController {

    @GetMapping("/string")
	public String stringReturning(Model model) {

		model.addAttribute("message", "문자열로 뷰 이름 반환!");

		/* forward 방식 (문자열을 result.jsp로 보냄) */
		return "result";
		// url은 http://localhost:8001/resolver/string 이고,
		// 화면에 문자열로 뷰 이름 반환! 출력
	}
}
◼ result.jsp
<h1 align='center'>${ requestScope.message }</h1>👉 문자열로 redirect하기
◼ index.jsp
/* 동일 */◼ MainController.java
/* 동일 */◼ main.jsp
<h3>문자열로 redirect하기</h3>
<button onclick="location.href='string-redirect'">문자열로 redirect</button>

<script>
	/* decodeURIComponent는 전역에서 사용 가능 */
	const message = decodeURIComponent('${ param.message }').replaceAll("+", " ");
	if(message) {
		alert(message);
	}
</script>
◼ ResolverController.java
@Controller
public class ResolverController {

	@GetMapping("/string-redirect")
	public String stringRedirect(Model model) throws UnsupportedEncodingException {

		/* redirect시 기본 데이터 타입을 model에 추가하면 url의 parameter가 됨 */
		model.addAttribute("message", URLEncoder.encode("문자열로 redirect 🤩", "UTF-8"));

		/* redirect 방식
		 * 접두사로 'redirect:'을 하면 redirect 처리가 되며 main을 다시 요청하도록 함 */
		return "redirect:main";
		// url은 http://localhost:8001/resolver/main?message=%3F%3F%3F%3F+redirect+%5E%3F%5E
	}
}
👉 문자열로 redirect 하면서 flashAttrbute 추가하기
◼ index.jsp
/* 동일 */◼ MainController.java
/* 동일 */◼ main.jsp
<h3>문자열로 redirect 하면서 flashAttrbute 추가하기</h3>
<button onclick="location.href='string-redirect-attr'">문자열로 redirect하면서 flash</button>

<script>
	const flashMessage = '${ requestScope.flashMessage }';
	if(flashMessage) {
		alert(flashMessage);
	}
</script>
◼ ResolverController.java
addFlashAttribute()
@Controller
public class ResolverController {

	@GetMapping("/string-redirect-attr")
	public String stringRedirectFlashAttribute(RedirectAttributes rttr) {

		/* RedirectAttributes에 addFlashAttribute를 하면 redirect를 했을 경우에도 requestScope에서 값을 꺼내 쓸 수 있음 (requestScope에 있는 값을 공유 데이터처럼 사용 가능)
		 * 원리는 세션에 임시로 값을 담고 소멸시키는 방식이므로 세션에 동일한 키 값이 존재하면 덮어쓰기 할 수 있음에 유의 */
		rttr.addFlashAttribute("flashMessage", "redirect attr 사용하여 redirect 성공 🤩");

		return "redirect:main";
	}
}
👉 ModelAndView로 뷰 이름 지정해서 반환하기
◼ index.jsp
/* 동일 */◼ MainController.java
/* 동일 */◼ main.jsp
<h3>ModelAndView로 뷰 이름 지정해서 반환하기</h3>
<button onclick="location.href='modelandview'">ModelAndView로 뷰 이름 지정해서 반환</button>
◼ ResolverController.java
addObject() setViewName()
@Controller
public class ResolverController {

	@GetMapping("/modelandview")
	public ModelAndView modelAndView(ModelAndView mv) { /* ModelAndView : 스프링에서 제공하는 반환 타입 */

		/* 모델과 뷰를 합친 개념
		 * 핸들러 어댑터가 핸들러 메소드를 호출하고 반환 받은 문자열을 ModelAndView로 만들어 DispatcherServlet에 반환하는데
		 * 이 때 문자열을 반환해도 되지만 ModelAndView를 미리 만들어서 반환할 수도 있음 */
		mv.addObject("message", "ModelAndView를 이용한 모델과 뷰 반환 🎃");
		mv.setViewName("result");

		return mv;
	}
}
👉 ModelAndView로 redirect하기
◼ index.jsp
/* 동일 */◼ MainController.java
/* 동일 */◼ main.jsp
<h3>ModelAndView로 redirect하기</h3>
<button onclick="location.href='modelandview-redirect'">ModelAndView로 redirect</button>
◼ ResolverController.java
@Controller
public class ResolverController {

	@GetMapping("/modelandview-redirect")
	public ModelAndView modelAndViewRedirect(ModelAndView mv) throws UnsupportedEncodingException {

		mv.addObject("message", URLEncoder.encode("ModelAndView를 이용한 redirect 🤖", "UTF-8"));
		mv.setViewName("redirect:main");

		return mv;
        /* main.jsp로 redirect했기 때문에, main.jsp에 message를
        alert창으로 띄우는 자바스크립트 코드로 인해 alert 창으로 출력 */
	}
}
👉 ModelAndView로 redirect하면서 flashAttribute 추가하기
◼ index.jsp
/* 동일 */◼ MainController.java
/* 동일 */◼ main.jsp
<h3>ModelAndView로 redirect하면서 flashAttribute 추가하기</h3>
<button onclick="location.href='modelandview-redirect-attr'">ModelAndView로 redirect하면서 flashAttribute 추가</button>
◼ ResolverController.java
@Controller
public class ResolverController {

	@GetMapping("/modelandview-redirect-attr")
	public ModelAndView modelAndViewRedirectFlashAttribute(ModelAndView mv, RedirectAttributes rttr) {

		rttr.addFlashAttribute("flashMessage", "ModelAndView를 이용한 redirect에 flash attribute 담기 🤖");
		mv.setViewName("redirect:main");

		return mv;
        /* main.jsp로 redirect했기 때문에, main.jsp에 flashMessage를
        alert창으로 띄우는 자바스크립트 코드로 인해 alert 창으로 출력 */
	}
}
👀 Exception Handler
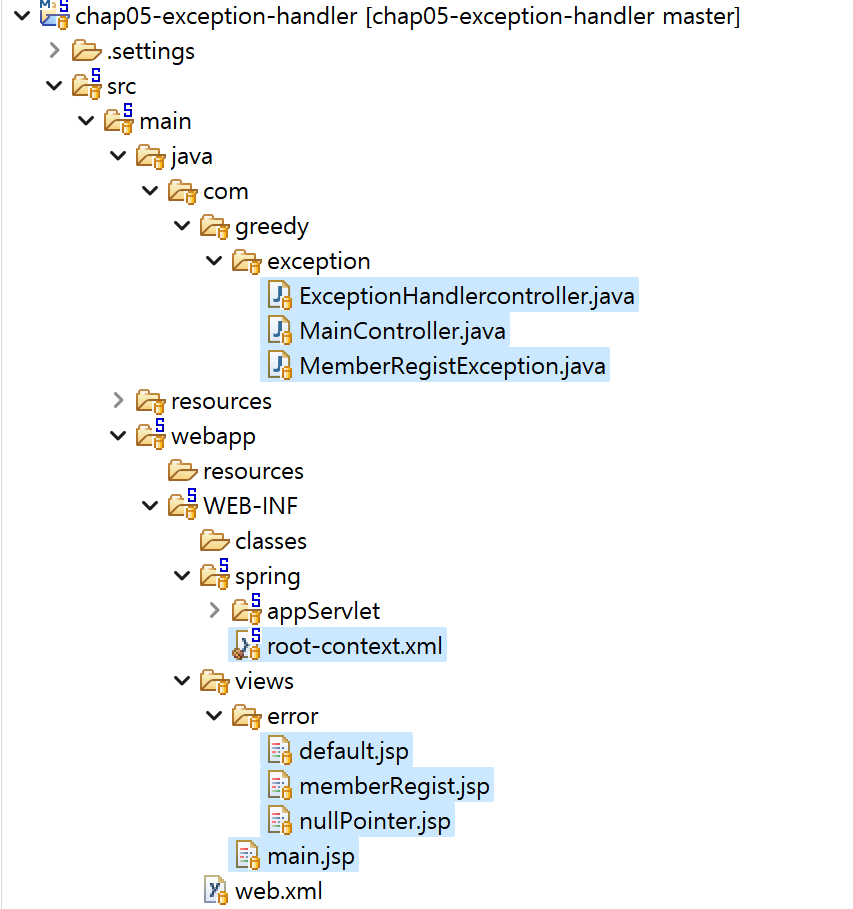
👉 사전 root-context.xml 및 views(jsp) 설정
◼ root-context.xml
<?xml version="1.0" encoding="UTF-8"?>
<beans xmlns="http://www.springframework.org/schema/beans"
	xmlns:xsi="http://www.w3.org/2001/XMLSchema-instance"
	xsi:schemaLocation="http://www.springframework.org/schema/beans https://www.springframework.org/schema/beans/spring-beans.xsd">

	<!-- Root Context: defines shared resources visible to all other web components -->

	<bean class="org.springframework.web.servlet.handler.SimpleMappingExceptionResolver">
		<!-- property를 사용한다는 것은 setter 메소드를 사용(설정)한다는 의미 -->
		<property name="exceptionMappings">
			<props>
			<!--
				key : 예외 클래스명 작성 (풀 클래스명 or 클래스명만 둘 다 작성 가능)
				value : 경로 작성 (view resolver가 해석 시 InternalResourceViewResolver를 이용하기 때문에
				prefix/suffix 고려해서 경로 작성)
			 -->
				<prop key="java.lang.NullPointerException">error/nullPointer</prop> <!-- error/nullPointer로 이 오류의 뷰를 지정할 것임 -->
				<prop key="MemberRegistException">error/memberRegist</prop>
			</props>
		</property>
		<!-- 등록 되지 않은 에러에 대한 기본 페이지 설정 -->
		<property name="defaultErrorView" value="error/default"/>
	</bean>

</beans>
◼ default.jsp
<h1 align='center'>알 수 없는 에러가 발생했습니다 ..🤯</h1>◼ nullPointer.jsp
<h1 align='center'>👻 NullPointerException 발생!! 👻</h1>◼ MemberRegistException.java
public class MemberRegistException extends Exception {

	public MemberRegistException(String msg) {
		super(msg);
	}
}
◼ memberRegist.jsp
<h1 align='center'>${ requestScope.exception.message }</h1>👉 SimpleMappingExceptionResolver를 이용한 방식(전역)
◼ MainController.java
@Controller
public class MainController {

	/* ip:port/exception이나 main으로 요청이 오면 main.jsp로 forwarding */
	@RequestMapping("/")
	public String defaultLocation() {

		return "main";
	}

	@RequestMapping("/main")
	public void main() {

	}
}
◼ main.jsp
<h3>SimpleMappingExceptionResolver를 이용한 방식(전역)</h3> <!-- 모든 클래스에서 사용 -->
<button onclick="location.href='simple-null'">NullPointerException 테스트</button>
<button onclick="location.href='simple-user'">사용자 정의 Exception 테스트</button>
◼ ExceptionHandlercontroller.java
@Controller
public class ExceptionHandlercontroller {

	@GetMapping("/simple-null")
	public String simpleNullPointerExceptionTest() {

		/* default 에러 뷰를 확인하기 위해 에러를 발생시키는 구문 */
		/* 지정한 exception이 아니므로, default 에러 뷰로 연결되어 '알 수 없는 에러가 발생했습니다 ..🤯'이 화면에 출력 */
		System.out.println(10 / 0);


		/* 의도적으로 NullPointerException 발생시키기 */
		String str = null;
		System.out.println(str.charAt(0));

		return "main";
} @GetMapping("/simple-user")
public String simpleUserExceptionTest() throws MemberRegistException {
boolean check = true;
if(check) {
throw new MemberRegistException("당신은 우리 To-Gather의 회원이 될 자격이 없습니다! 😤"); /* [ MemberResigtException 생성 ] */
}
return "main";
}
}👉 @ExceptionHandler 어노테이션을 이용한 방식(클래스별)
◼ MainController.java
/* 동일 */◼ main.jsp
<h3>@ExceptionHandler 어노테이션을 이용한 방식(클래스별)</h3> <!-- SimpleMappingExceptionResolver보다 우선순위가 높음 (같은 클래스 내에서만) -->
<button onclick="location.href='annotation-null'">NullPointerException 테스트</button>
<button onclick<="location.href='annotation-user'">사용자 정의 Exception 테스트</button>
◼ ExceptionHandlercontroller.java
@Controller
public class ExceptionHandlercontroller {

    @GetMapping("/annotation-null")
	public String annotationNullPointerExceptionTest() {

		String str = null;
		System.out.println(str.charAt(0));

		return "main";
	}

	@ExceptionHandler(NullPointerException.class) /* : 이 클래스 내부에서 NullPointerException가 발생되면 이 메소드를 호출 */
	public String nullPointerExceptionHandler(NullPointerException exception) {

		System.out.println("@ExceptionHandler 메소드 호출!");	// 브라우저에서 버튼 클릭 시, 콘솔에 @ExceptionHandler 메소드 호출! 출력
		System.out.println(exception.getMessage());			// 브라우저에서 버튼 클릭 시, 콘솔에 null 출력

		return "error/nullPointer";
} @GetMapping("annotation-user")
public String annotationUserExceptionTest() throws MemberRegistException {
boolean check = true;
if(check) {
throw new MemberRegistException("당신은 우리 To-Gather의 회원이 될 자격이 없습니다! 😤");
}
return "main";
}
@ExceptionHandler(MemberRegistException.class)
public String userExceptionHandler(MemberRegistException exception, Model model) {
System.out.println("@ExceptionHandler 메소드 호출!");
System.out.println(exception.getMessage());
/* 브라우저에서 클릭 시, 정상적으로 구동은 되지만 화면에 아무것도 출력되지 않음
* 위에서 SimpleMappingExceptionResolver 테스트를 진행하기 위해 memberRegist.jsp에
* '${ requestScope.exception.message }'라고 입력했었는데,
* 이 메소드에서는 requestScope에 exception이 존재하지 않았기 때문에 화면이 출력되지 않았던 것.
* 따라서, Model에 exception 객체를 담아주면 '${ requestScope.exception.message }'를 이용하여
* '당신은 우리 To-Gather의 회원이 될 자격이 없습니다! 😤' 출력문이 정상으로 화면에 나타남 */
model.addAttribute("exception", exception);
return "error/memberRegist";
}
}
👀 Interceptor
💁♀️ 인터셉터는 웹 요청을 가로채 전처리/후처리를 할 수 있음
핸들러 인터셉터는 특정 요청 url에만 적용 되도록 매핑할 수 있다는 점이 필터와 유사
하지만 스프링 웹 어플리케이션 컨텍스트에 구성하기 때문에 컨테이너의 기능을 자유롭게 활용할 수 있으며, 그 내부에 선언 된 모든 빈을 참조할 수 있다는 점이 필터와 다름
👉 사전 interceptor 설정
◼ servlet-context.xml
<?xml version="1.0" encoding="UTF-8"?>
<beans:beans xmlns="http://www.springframework.org/schema/mvc"
	xmlns:xsi="http://www.w3.org/2001/XMLSchema-instance"
	xmlns:beans="http://www.springframework.org/schema/beans"
	xmlns:context="http://www.springframework.org/schema/context"
	xsi:schemaLocation="http://www.springframework.org/schema/mvc https://www.springframework.org/schema/mvc/spring-mvc.xsd
		http://www.springframework.org/schema/beans https://www.springframework.org/schema/beans/spring-beans.xsd
		http://www.springframework.org/schema/context https://www.springframework.org/schema/context/spring-context.xsd">

	<!-- DispatcherServlet Context: defines this servlet's request-processing infrastructure -->

	<!-- Enables the Spring MVC @Controller programming model -->
	<annotation-driven />

	<!-- Handles HTTP GET requests for /resources/** by efficiently serving up static resources in the ${webappRoot}/resources directory -->
	<resources mapping="/resources/**" location="/resources/" />

	<!-- Resolves views selected for rendering by @Controllers to .jsp resources in the /WEB-INF/views directory -->
	<beans:bean class="org.springframework.web.servlet.view.InternalResourceViewResolver">
		<beans:property name="prefix" value="/WEB-INF/views/" />
		<beans:property name="suffix" value=".jsp" />
	</beans:bean>

	<context:component-scan base-package="com.greedy.interceptor" />

	<!-- 인터셉터 설정 -->
	<interceptors>
		<interceptor>
			<mapping path="/stopwatch"/>
			<beans:bean id="stopwatchInterceptor" class="com.greedy.interceptor.StopWatchInterceptor"/>
		</interceptor>
	</interceptors>
</beans:beans>
👉 Interceptor
◼ MainController.java
@Controller
public class MainController {

	@RequestMapping("/")
	public String defaultLocation() {

		return "main";
	}

	@RequestMapping("/main")
	public void main() {} /* [ views 하위에 main.jsp 생성 ] */

}
◼ main.jsp
<h3>핸들러 인터셉터를 이용한 요청 처리 시간 확인하기</h3>
<button onclick="location.href='stopwatch'">수행 시간 확인하기</button>
◼ interceptorTestController.jsp
@Controller
public class interceptorTestController {

	@GetMapping("/stopwatch")
	public String handlerMethod() throws InterruptedException {

		System.out.println("===== 핸들러 메소드 호출 =====");
		Thread.sleep(1000);

		return "result";
	}
}
◼ result.jsp
<h1 align='center'>메소드 호출 수행 시간 : ${ interval } (ms)</h1>◼ MenuService.java
@Service
public class MenuService {

	public void method() {
		System.out.println("MenuService의 method 호출!");
	}
}
◼ StopWatchInterceptor.java
@Autowired
/* 핸들러 인터셉터 구현
 * default 메소드 이전에는 인터페이스에 정의 된 모든 메소드를 오버라이딩 해야하는 책임을 가지기 때문에
 * HandlerInterceptorAdapter를 이용하여 부담을 줄여서 사용하였으나,
 * default 메소드가 인터페이스에서 사용 가능하게 된 이후부터는 인터페이스만 구현하여 필요한 메소드만 오버라이딩해서 사용할 수 있음 */
public class StopWatchInterceptor implements HandlerInterceptor {

	/* MenuServic라는 bean 객체로부터 의존성을 주입 받는 코드 */
	private final MenuService menuService;

	@Autowired
	public StopWatchInterceptor(MenuService menuService) {
		this.menuService = menuService;
	}


	/* 전처리 메소드 */
	@Override
	public boolean preHandle(HttpServletRequest request, HttpServletResponse response, Object handler)
			throws Exception {

		System.out.println("preHandle 호출!");

		long startTime = System.currentTimeMillis();

		request.setAttribute("startTime", startTime);

		/* true를 리턴하면 핸들러 메소드를 이어서 호출하고 false를 리턴하면 핸들러 메소드를 호출하지 않음 */
		return true;
	}

	/* 후처리 메소드 */
	@Override
	public void postHandle(HttpServletRequest request, HttpServletResponse response, Object handler,
			ModelAndView modelAndView) throws Exception {

		System.out.println("postHandle 호출!");

		long startTime = (long) request.getAttribute("startTime");
		long endTime = System.currentTimeMillis();
		request.removeAttribute("startTime");

		/* modelAndView에 interval이라는 이름으로 계산된 시간을 담음 */
		modelAndView.addObject("interval", endTime - startTime);

	}

	/* 가장 마지막에 호출되는 메소드로 오류 상황에도 호출 */
	@Override
	public void afterCompletion(HttpServletRequest request, HttpServletResponse response, Object handler, Exception ex)
			throws Exception {

		System.out.println("afterCompletion 호출!");

		/* 인터셉터는 스프링 웹 컨테이너 내부에 존재하므로 스프링 컨테이너 빈을 주입 받아 사용할 수 있음 */
		menuService.method();

	}
}
💻 Mini Console
preHandle 호출!
===== 핸들러 메소드 호출 =====
postHandle 호출!
afterCompletion 호출!
MenuService의 method 호출!
👀 File Upload
👉 사전 File Upload에 사용 될 bean 등록
◼ servlet.context.xml
<?xml version="1.0" encoding="UTF-8"?>
<beans:beans xmlns="http://www.springframework.org/schema/mvc"
	xmlns:xsi="http://www.w3.org/2001/XMLSchema-instance"
	xmlns:beans="http://www.springframework.org/schema/beans"
	xmlns:context="http://www.springframework.org/schema/context"
	xsi:schemaLocation="http://www.springframework.org/schema/mvc https://www.springframework.org/schema/mvc/spring-mvc.xsd
		http://www.springframework.org/schema/beans https://www.springframework.org/schema/beans/spring-beans.xsd
		http://www.springframework.org/schema/context https://www.springframework.org/schema/context/spring-context.xsd">

	<!-- DispatcherServlet Context: defines this servlet's request-processing infrastructure -->

	<!-- Enables the Spring MVC @Controller programming model -->
	<annotation-driven />

	<!-- Handles HTTP GET requests for /resources/** by efficiently serving up static resources in the ${webappRoot}/resources directory -->
	<resources mapping="/resources/**" location="/resources/" />

	<!-- Resolves views selected for rendering by @Controllers to .jsp resources in the /WEB-INF/views directory -->
	<beans:bean class="org.springframework.web.servlet.view.InternalResourceViewResolver">
		<beans:property name="prefix" value="/WEB-INF/views/" />
		<beans:property name="suffix" value=".jsp" />
	</beans:bean>

	<context:component-scan base-package="com.greedy.file" />

	<!-- 파일 업로드에 사용될 bean 등록 -->
	<beans:bean id="multipartResolver" class="org.springframework.web.multipart.commons.CommonsMultipartResolver">
		<beans:property name="maxUploadSize" value="10000000"/> <!-- 업로드 사이즈 제한두는 조건 -->
	</beans:bean>
</beans:beans>
👉 사전 File Upload에 사용 될 dependency 등록
◼ pom.xml
<!-- 파일 업로드 관련 추가 -->
<!-- https://mvnrepository.com/artifact/commons-io/commons-io -->
<dependency>
  	<groupId>commons-io</groupId>
	<artifactId>commons-io</artifactId>
	<version>2.11.0</version>
</dependency>

<!-- https://mvnrepository.com/artifact/commons-fileupload/commons-fileupload -->
<dependency>
	 <groupId>commons-fileupload</groupId>
	<artifactId>commons-fileupload</artifactId>
	<version>1.5</version>
</dependency>
👉 Single File Upload
◼ MainController.java
@Controller
public class MainController {

	@RequestMapping("/")
	public String defaultLocation() {

		return "main";
	}

	@RequestMapping("/main")
	public void main() {} /* [ views 하위에 main.jsp 생성 ] */
}
◼ main.jsp
<h3>single file upload</h3>
<form action="single-file" method="post" enctype="multipart/form-data"> <!-- encoding type을 이 밈타입으로 설정하겠다는 의미 (반드시 설정해야 파일 업로드 기능 사용 가능) -->
	파일 : <input type="file" name="singleFile"> <br>
	파일 설명 : <input type="text" name="singleFileDescription"> <br>
	<input type="submit">
</form>
◼ fileUploadController.java
MultipartFile mkdir() substring lastIndexOf() randomUUID() transferTo
@Controller
@PropertySource("classpath:config/common.properties")
public class fileUploadController {

	@Value("${file.path}") /* common.properties 파일에서의 키 값인 file.path을 이용하여 value 가져옴 */
	private String filePath;

	/* 하나의 파일을 가져오는 메소드 */
	@PostMapping("/single-file")
	public String singleFileUpload(@RequestParam MultipartFile singleFile, /* MultipartFile로 파일 업로드 기능 사용 / singleFile : main.jsp에서 기입했던 name 속성과 일치하는 이름을 작성 */
								   @RequestParam String singleFileDescription,
								   Model model) {

		/* 파일 업로드 관련 라이브러리 추가 - pom.xml 의존성 추가
		 * 1. commons-io
		 * 2. commons-fileupload
		 *
		 * CommonsMultipartResolver - servlet-context.xml에 bean 등록
		 *
		 * multipart로 전송 된 요청에 대한 인코딩 처리를 해주어야 하는데 일반 인코딩 필터보다 구현하기 어려우므로
		 * 스프링에서 제공하는 인코딩 필터를 사용해서 설정 web-xml 추가
		 * */

		System.out.println(singleFile);	// org.springframework.web.multipart.commons.CommonsMultipartFile@228da009
		System.out.println(singleFile.getOriginalFilename());	// free-icon-google-docs-2991112.png
		System.out.println(singleFileDescription);	// 효연이 사진
		System.out.println(filePath); // D:/dev/10_spring/2_spring-web/chap07-file-upload/src/main/webapp/resources/uploadFiles

		/* 파일을 저장할 경로가 있는지 확인하여 없으면 생성하는 구문 */
		File mkdir = new File(filePath);
		if(!mkdir.exists()) mkdir.mkdir(); /* mkdir : make directory */

		/* 파일명을 고유한 값으로 변경하는 처리 - 원본 파일명 사용시 중복되면 겹쳐쓰기 될 가능성이 있기 때문 (경로 및 파일명이 완전히 동일한 파일이 또 넘어올 가능성 염두) */
		String originalFileName = singleFile.getOriginalFilename(); /* 확장자를 확인하기 위해 OriginalFileName이 필요하긴 함 */
		String ext = originalFileName.substring(originalFileName.lastIndexOf(".")); /* substring : 어떤 위치에서부터 잘라내기 / lastIndexOf(".") : 맨 끝의 .의 위치를 의미 */
		String savedName = UUID.randomUUID().toString() + ext; /* randomUUID() : 랜덤한 유니크한 식별자를 만들어줌 (중복 될 가능성이 거의 없음) */

		/* 실제 파일명과 다른 파일명 생성됨 */
		System.out.println("savedName : " + savedName); // savedName : 5a0ba9e1-926a-4ccd-936e-8d20a8813e66.png

		/* 위 파일명으로 저장 (IO는 exception 핸들 해야함)*/
		try {
			singleFile.transferTo(new File(filePath + "/" + savedName)); /* transferTo : 어떤 특정 경로로 옮길 것인지와 함께 작성 */
			model.addAttribute("message", "파일 업로드가 정상적으로 완료 되었습니다! 🥳");
		} catch (IllegalStateException | IOException e) {
			e.printStackTrace();
		}

		return "result";
	}
}
◼ result.jsp
<h1 align="center">${ message }</h1>👉 Multi File Upload
◼ MainController.java
/* 동일 */◼ main.jsp
multiple
<h3>multi file upload</h3>
<form action="multi-file" method="post" enctype="multipart/form-data"> <!-- encoding type을 이 밈타입으로 설정하겠다는 의미 -->
	파일 : <input type="file" name="multiFiles" multiple> <br> <!-- multiple : 파일의 다중선택이 되게 설정하는 역할 -->
	파일 설명 : <input type="text" name="multiFileDescription"> <br>
	<input type="submit">
</form>
◼ fileUploadController.java
@Controller
@PropertySource("classpath:config/common.properties")
public class fileUploadController {

	/* 여러 개의 파일을 가져오는 메소드 */
	@PostMapping("multi-file")
	public String multiFileUpload(@RequestParam List<MultipartFile> multiFiles, /* 웹에서 첨부한 파일들이 List에 저장될 것 */
								  @RequestParam String multiFileDescription
								  , Model model) {

		System.out.println("multiFiles : " + multiFiles);
		System.out.println("multiFileDescription : " + multiFileDescription);

		/* 파일을 저장할 경로가 있는지 확인하여 없으면 생성하는 구문 */
		File mkdir = new File(filePath);
		if(!mkdir.exists()) mkdir.mkdir();

		/* 파일과 관련된 정보를 추출하여 보관하고 추후에는 DB에 insert할 때 전달 */
		List<Map<String, String>> files = new ArrayList<>();

		/* List이므로 for문 사용 */
		for(MultipartFile file : multiFiles) {

			/* 파일명 변경 처리 */
			String originalFileName = file.getOriginalFilename(); /* file : 반복문의 변수 */
			String ext = originalFileName.substring(originalFileName.lastIndexOf("."));
			String savedName = UUID.randomUUID().toString() + ext;

			/* 1개의 파일에 대한 정보를 Map에 보관 */
			Map<String, String> fileInfo = new HashMap<>();
			fileInfo.put("orginalFileName", originalFileName);
			fileInfo.put("savedName", savedName);
			fileInfo.put("filePath", filePath);

			/* 여러 개의 파일 정보를 보관하는 List에 Map 추가 */
			files.add(fileInfo);
		}

		try {
			/* 파일들을 저장하기 위한 for문 사용 */
			for(int i = 0; i < multiFiles.size(); i++) {
				/* 여러 개의 파일이기 때문에 savedName만 입력하면 안되고, files를 통해 인덱스별로 savedName을 가져와야함 */
				multiFiles.get(i).transferTo(new File(filePath + "/" + files.get(i).get("savedName")));
			}

			model.addAttribute("message", "여러 개의 파일 업로드가 완료되었습니다! 🤩");
		} catch (IllegalStateException | IOException e) {
			/* 업로드 실패 시 이전에 저장된 파일을 삭제하는 구문을 catch 블럭에 작성 (서버에 저장할 필요가 없기 때문) */
			for(Map<String, String> fileInfo : files) {
				new File(filePath + "/" + fileInfo.get("savedName")).delete(); /* delete() : 물리적으로 파일 제거 */
			}

			model.addAttribute("message", "다중 파일 업로드에 실패했습니다 💀");
		}

		return "result";
	}
}
◼ result.jsp
/* 동일 */
👀 AJAX
👉 사전 File Upload에 사용 될 dependency 등록
◼ pom.xml
<!-- jackson-databind 추가 (json과 java를 서로의 객체로 바꿔주는 역할) -->
<!-- https://mvnrepository.com/artifact/com.fasterxml.jackson.core/jackson-databind -->
<dependency>
	<groupId>com.fasterxml.jackson.core</groupId>
	<artifactId>jackson-databind</artifactId>
	<version>2.14.2</version>
</dependency>
👉 문자열 데이터 요청과 응답
◼ MainController.java
@Controller
public class MainController {

	@RequestMapping("/")
	public String defaultLocation() {

		return "main";
	}

	@RequestMapping("/main")
	public void main() {} /* [ views 하위에 main.jsp 생성 ] */

}
◼ main.jsp
<h3>1. 문자열 데이터 요청과 응답</h3>
<button onclick="location.href='${pageContext.servletContext.contextPath}/simple-string'">문자열 데이터 요청과 응답</button>
◼ SimpleStringController.java
@ResponseBody
@Controller
public class SimpleStringController {

	@GetMapping("/simple-string")
	public String showSimpleString() {

		return "ajax/1_simple-string";
	}
/* @ResponseBody : view 페이지를 반환하는 것이 아닌, 반환 값을 클라이언트에게 그대로 반환하고자 할 때 사용하는 어노테이션
* 위치는 메소드 레벨, 반환 값 레벨 모두 가능
* 한글 값 인코딩 문제는 Mapping 어노테이션의 설정을 추가하여 해결
* */
@ResponseBody
@GetMapping(value="/xmlhttprequest/simple-string", produces="text/html; charset=UTF-8")
public String xmlhttprequestTest(@RequestParam String keyword) { /* simple-string.jsp에서 보낸 keyword를 파라미터로 작성 */
System.out.println(keyword);
String responseText = "서버로 전달 된 문자열은 '" + keyword + "'입니다 😻";
return responseText;
} @ResponseBody
@GetMapping(value="/jquery/simple-string", produces="text/html; charset=UTF-8")
public String jqueryTest(@RequestParam String keyword) {
System.out.println(keyword);
String responseText = "서버로 전달 된 문자열은 '" + keyword + "'입니다 😻";
return responseText;
} @ResponseBody
@GetMapping(value="/fetch/simple-string", produces="text/html; charset=UTF-8")
public String fetchTest(@RequestParam String keyword) {
System.out.println(keyword);
String responseText = "서버로 전달 된 문자열은 '" + keyword + "'입니다 😻";
return responseText;
} @ResponseBody
@GetMapping(value="/axios/simple-string", produces="text/html; charset=UTF-8")
public String axiosTest(@RequestParam String keyword) {
System.out.println(keyword);
String responseText = "서버로 전달 된 문자열은 '" + keyword + "'입니다 😻";
return responseText;
}
}◼ 1_simple-string.jsp
<h1>simple string 서버 전송 테스트</h1>

전달 값 : <input type="text" name="keyword" id="param"> <br>
응답 값 : <p id="result"></p>

<button onclick="sendXmlHttpRequest();">XMLHttpRequest로 전송</button>
<button onclick="sendJquery();">jQuery로 전송</button>
<button onclick="sendFetch();">fetch로 전송</button>
<button onclick="sendAxios();">axios로 전송</button><h1>1. XMLHttpRequest</h1>
<ul>
<li>XMLHttpRequest 객체를 이용해서 비동기 요청을 처리할 수 있음</li>
<li>하지만 일반적으로 XMLHttpRequest를 직접 이용하기 보다는 Ajax 기능이 내장되어있는 라이브러리를 사용하는 편</li>
</ul>
&&<script>
function sendXmlHttpRequest() {
const httpRequest = new XMLHttpRequest();
const serverAddress = '${pageContext.servletContext.contextPath}/xmlhttprequest/simple-string';
/* onreadystatechange : 서버의 응답 상태가 변화하면 호출되는 이벤트 */
httpRequest.onreadystatechange = function(){
/* [ httpRequest.readyState ]
0 : request가 초기화 되지 않음
1 : 서버와의 연결이 성사 됨
2 : 서버가 request를 받음
3 : request 요청을 처리하는 중
4 : request에 대한 처리가 끝났으며 응답할 준비가 완료 됨(DONE)
*/
/* 서버의 응답 준비가 완료 되면 수행할 코드 */
if(httpRequest.readyState === XMLHttpRequest.DONE) {
if(httpRequest.status === 200) { /* status : 상태 코드를 의미 */
/* 응답 상태 성공인 경우 */
document.querySelector("#result").innerText = httpRequest.responseText;
} else {
/* 응답 상태 실패인 경우 */
document.querySelector("#result").innerText = "요청 응답에 실패했습니다 🥶";
}
}
};
/* 통신을 보내는 코드 작성 */
const keyword = document.querySelector("#param").value; /* 입력 양식에 있는 값을 가져옴 */
/* open 메소드 전달 인자 : 요청 방식, 요청 url, 비동기 여부(default : true) */
httpRequest.open('GET', serverAddress + "?keyword=" + keyword);
httpRequest.send(); /* 실질적으로 통신을 보냄 */
}
</script><h1>2. jQuery</h1>
<ul>
<li>2006년에 등장한 자바스크립트 라이브러리로 이전까지 다루기 번거롭던 DOM을 쉽게 제어할 수 있게 해주었고, 크로스 브라우징 이슈에도 많은 도움을 줌</li>
<li>한 때는 높은 점유율을 보였으나 웹 표준 API의 확장, 가장 돔을 사용하는 라이브러리의 등장으로 오늘날에는 점유율이 점차 줄어들고 있음</li>
<li>jQuery에서 제공하는 ajax 메소드를 사용하면 통신에 필요한 설정을 간편하게 객체로 전달할 수 있고, 크로스 브라우징 이슈도 손쉽게 해결 가능</li>
</ul>
<script>
function sendJquery() {
const keyword = document.querySelector("#param").value;
$.ajax({
url : '${pageContext.servletContext.contextPath}/jquery/simple-string',
data : { keyword }, /* keyword 라는 객체 입력. 원래는 { keyword : keyword }이지만 단축해서 작성 */
method : 'GET',
success : function(data, status, xhr) {
/* 응답 상태 성공인 경우 */
console.log(data, status, xhr);
document.querySelector("#result").innerText = data;
},
error : function(xhr, status) {
/* 응답 상태 실패인 경우 */
console.log(xhr, status);
document.querySelector("#result").innerText = "요청 응답에 실패했습니다 😱";
}
});
}
</script>.then()
<h1>3. fetch</h1>
<ul>
	<li>Promise 기반(콜백 함수를 첨부하는 방식)으로 만들어진 기능으로 ES6부터 Javascript 내장 라이브러리가 되어 별도의 라이브러리 추가가 필요하지는 않음</li>
	<li>대부분의 모던 웹 브라우저에서는 사용 가능하지만 구 버전 브라우저에서는 동작하지 않는 문제가 있을 수 있음</li>
</ul>

<script>
	function sendFetch() {

		const keyword = document.querySelector("#param").value;
		/* 요청 주소를 첫 번째 인자로 전달 */
		fetch('${pageContext.servletContext.contextPath}/fetch/simple-string?keyword='+keyword)
			.then(res => res.text()) /* then() : 비동기 통신 후, 응답이 돌아오고 나서 실행할 것을 괄호 안에 함수(response 객체) 작성 */
			.then(text => document.querySelector("#result").innerText = text); /* res.text()의 반환값이 text에 들어감 */
	}
</script><h1>4. axios</h1>
<ul>
<li>Promise 기반으로 만들어진 기능으로 응답 데이터를 다루기 쉽게(JSON 데이터 자동 변환)되어 있음</li>
<li></li>
</ul>
<script>
function sendAxios() {
const keyword = document.querySelector("#param").value;
axios('${pageContext.servletContext.contextPath}/axios/simple-string?keyword='+keyword)
.then(res => document.querySelector("#result").innerText = res.data);
/* axios를 사용하면 fetch를 사용할 때 사용했던 '.then(res => res.text())' 생략 가능 */
}
</script>
👉 JSON 데이터 요청과 응답
◼ MainController.java
/* 동일 */◼ main.jsp
<h3>2. JSON 데이터 요청과 응답</h3>
<button onclick="location.href='${pageContext.servletContext.contextPath}/json-data'">JSON 데이터 요청과 응답</button>
◼ UserDTO.java
@JsonFormat
public class UserDTO {

	private String id;
	private String nickname;
	private int age;
	private String email;
	@JsonFormat(pattern = "yyyy-MM-dd") /* @JsonFormat 어노테이션으로 인해 출력된 Date가 ms가 아닌 지정한 패턴으로 출력될 것 */
	private Date registDate;

    /* 기본 DTO 셋팅 */
}
◼ JsonDataController.java
@Controller
public class JsonDataController {

	private final List<UserDTO> userList;

	public JsonDataController () {
		userList = new ArrayList<>();
		userList.add(new UserDTO("1", "신짱구", 5, "zzang123@gmail.com", new Date()));
		userList.add(new UserDTO("2", "신짱아", 2, "zzang456@gmail.com", new Date()));
		userList.add(new UserDTO("3", "흰둥이", 5, "doong123@gmail.com", new Date()));
	}

	@GetMapping("/json-data")
	public String showJsonData() {

		return "ajax/2_json-data";
	}
/* @RequestBody
* 요청 바디에 담긴 데이터를 java 객체에 매핑할 때 사용하는 어노테이션
*
* 1. String 형태로 받기
* requestBody : {"nickname":"효니","age":"26","email":"cho970129@gmail.com","registDate":"2023-03-15"}
*
* 2. Map<String, String> 형태로 받기 - jackson databind 라이브러리 추가
* requestBody : {nickname=효니, age=26, email=cho970129@gmail.com, registDate=2023-03-15}
*
* 3. UserDTO 형태로 받기
* requestBody : UserDTO [id=null, nickname=효니, age=26, email=cho970129@gmail.com, registDate=Thu Mar 16 09:00:00 KST 2023]
*
* 4. 여러 명일 경우, List<UserDTO> 형태로 받기
* requestBody : [UserDTO [id=null, nickname=효니, age=26, email=cho970129@gmail.com, registDate=Thu Mar 16 09:00:00 KST 2023],
* UserDTO [id=null, nickname=효니, age=26, email=cho970129@gmail.com, registDate=Thu Mar 16 09:00:00 KST 2023],
* UserDTO [id=null, nickname=효니, age=26, email=cho970129@gmail.com, registDate=Thu Mar 16 09:00:00 KST 2023]]
* */
@PostMapping("/jquery/json")
public @ResponseBody String jqueryJsonTest(@RequestBody List<UserDTO> requestBody) {
System.out.println("requestBody : " + requestBody);
/* 이 문자열 자체가 응답 데이터인 것을 @ResponseBody 어노테이션으로 표시 */
return "success";
} @PostMapping("/fetch/json")
public @ResponseBody String fetchJsonTest(@RequestBody List<UserDTO> requestBody) {
System.out.println("requestBody : " + requestBody);
// requestBody : [UserDTO [id=null, nickname=조이, age=27, email=cho970129@gmail.com, registDate=Thu Mar 02 09:00:00 KST 2023],
// UserDTO [id=null, nickname=조이, age=27, email=cho970129@gmail.com, registDate=Thu Mar 02 09:00:00 KST 2023],
// UserDTO [id=null, nickname=조이, age=27, email=cho970129@gmail.com, registDate=Thu Mar 02 09:00:00 KST 2023]]
return "success";
} /* jackson databind 라이브러리 의존성이 있을 경우 응답 시 java 객체를 JSON 형식으로 자동 변환해줌 */
@GetMapping("/jquery/json")
public @ResponseBody List<UserDTO> jqueryJsonTest() {
/* java의 List 형태로 입력했으나, javaScript 형태로 브라우저 콘솔에 출력됨 */
/* UserDTO의 필드에 선언된 @JsonFormat 어노테이션으로 인해 출력된 Date가 ms가 아닌 지정한 날짜 패턴으로 출력 */
return userList;
} @GetMapping("/fetch/json")
public @ResponseBody List<UserDTO> fetchJsonTest() {
return userList;
}
}◼ 2_json-data
JSON.stringify() async & await
<h1>JSON 데이터 서버 전송 테스트</h1>

<h3>회원 정보 입력</h3>
<table>
	<tr>
		<td>닉네임</td>
		<td><input type="text" name="nickname" id="nickname"></td>
	</tr>
	<tr>
		<td>나이</td>
		<td><input type="number" name="age" id="age"></td>
	</tr>
	<tr>
		<td>이메일</td>
		<td><input type="email" name="email" id="email"></td>
	</tr>
	<tr>
		<td>가입일</td>
		<td><input type="date" name="registDate" id="registDate"></td>
	</tr>
</table>

<button onclick="sendJquery();">jQuery로 전송</button>
<button onclick="sendFetch();">fetch로 전송</button>

<script>
	/* jQuery */
	function sendJquery() {

		const nickname = document.querySelector("#nickname").value;
		const age = document.querySelector("#age").value;
		const email = document.querySelector("#email").value;
		const registDate = document.querySelector("#registDate").value;

		/* 값들을 객체로 만들기 */
		const userInfo = { nickname, age, email, registDate };
		/* user data를 1명 전송하는 경우 */
		// const json = JSON.stringify(userInfo);
		/* user data를 여러명 전송하는 경우 */
		const userInfoList = [ userInfo, userInfo, userInfo ];
		const json = JSON.stringify(userInfoList);

		/* 확인용 */
		console.log('userInfo : ' + userInfo);			// userInfo : [object Object]
		console.log('userInfoList : ' + userInfoList);	// userInfoList : [object Object],[object Object],[object Object]
		console.log('json : ' + json);
		// [{"nickname":"조이","age":"26","email":"cho970129@gmail.com","registDate":"2023-03-08"},{"nickname":"조이","age":"26","email":"cho970129@gmail.com","registDate":"2023-03-08"},{"nickname":"조이","age":"26","email":"cho970129@gmail.com","registDate":"2023-03-08"}]

		/* 함수 사전 정의 */
		const onError = xhr => console.log(xhr);		/* xhr 객체만 출력 */
		const onSuccesss = data => console.log(data); 	/* 응답 데이터만 출력 */

		$.ajax({
			url : '${pageContext.servletContext.contextPath}/jquery/json',
			method : 'POST',
			data : json, /* data : 전송하고자 하는 데이터를 입력 / 원래는 { key : value, key : value, ...} 형식으로 작성했으나, 여기서는 JSON 형태로 작성 */
			contentType : 'application/json; charset=UTF-8',
			error : onError,
			success : onSuccesss
		});

	}

	/* fetch */
	/* async를 붙인 function 안에서 await(통신을 기다림) 키워드를 사용할 수 있음 (.then() 대신 사용 가능한 방법)*/
	async function sendFetch() {

		const nickname = document.querySelector("#nickname").value;
		const age = document.querySelector("#age").value;
		const email = document.querySelector("#email").value;
		const registDate = document.querySelector("#registDate").value;

		/* 값들을 객체로 만들기 */
		const userInfo = { nickname, age, email, registDate };
		/* user data를 1명 전송하는 경우 */
		// const json = JSON.stringify(userInfo);
		/* user data를 여러명 전송하는 경우 */
		const userInfoList = [ userInfo, userInfo, userInfo ];
		const json = JSON.stringify(userInfoList);

		const response = await fetch('${pageContext.servletContext.contextPath}/fetch/json', {
			method : 'POST',
			headers : { /* 헤더에 설정할 수 있는 속성 입력 */
				'Content-Type' : 'application/json; charset=UTF-8'
			},
			body : json
		});

		const result = await response.text(); /* response 객체의 text를 뽑아냄 */
		console.log(result);
	}
</script>
map() join()
<h1>JSON 데이터 서버 응답 테스트</h1>

<h3>테이블로 회원 정보 불러오기</h3>
<table class="userInfo"></table>

<button onclick="receiveJquery()">jQuery로 전송 후 응답 처리</button>
<button onclick="receiveFetch()">fetch로 전송 후 응답 처리</button>

<script>

	function createTrString(user) {
		/* 1명의 유저정보 받았을 때, 그것을 td에 채워 원하는 문자열로 만듬*/
		/* 처음에 값이 출력되지 않는 이유는 서버가 ${}를 EL 문법으로 잘못 해석하여 값을 읽어오지 못 하는 것 */
		/* 템플리 리터럴(``) 내의 달러 기호가 EL로 해석된 상태로 서버에서 처리되어 빈 값으로 리턴되는 문제 발생
		기본적으로는 js 파일을 JSP 에서 분리해서 별도의 파일로 작성하는 것이 좋으나, 여기에서는 간단하게 역슬래시를 붙여
		EL으로의 해석을 막고 템플릿 리터럴 내의 변수 표기로 인식할 수 있게 함 */
		return `
		<tr>
			<td>아이디 : \${user.id}</td>
			<td>닉네임 : \${user.nickname}</td>
			<td>나이 : \${user.age}</td>
			<td>이메일 : \${user.email}</td>
			<td>가입일 : \${user.registDate}</td>
		</tr>
		`;
	}


	function receiveJquery() {

		$.ajax({
			url : '${pageContext.servletContext.contextPath}/jquery/json',
			method : 'GET',
			error : xhr => console.log(xhr),
			success : responseJson => { /* 성공하면 성공 응답 데이터 출력 */
				const table = document.querySelector(".userInfo");
				table.innerHTML = responseJson.map(item => createTrString(item)).join('');
				/* 위에 선언한 createTrString 함수를 호출 / 자바스크립트에서의 map은 값들을 배열로 가져옴 / join은 그 배열을 문자열로 병합 */
			}
		});
	}

	async function receiveFetch() {

		const response = await fetch('${pageContext.servletContext.contextPath}/fetch/json');
		const responseJson = await response.json();
		const table = document.querySelector(".userInfo");
		table.innerHTML = responseJson.map(item => createTrString(item)).join('');
	}

</script>

Tiny little habits make me