
📌 초기 Setting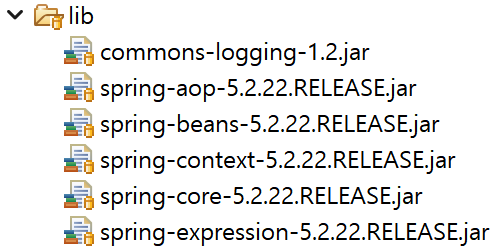
- lib 폴더에 .jar 파일들 삽입 후 Classpath에 추가
👀 Bean factory
💁♀️ Bean factory란,
스프링 컨테이너의 최상위 컨테이너이며 ApplicationContext와 함께 스프링 컨테이너라고 함
- Bean의 생성과 설정, 관리 등의 역할을 맡음
👉 XML config
◼ MemberDTO.java
public class MemberDTO {

	private int sequence;
	private String id;
	private String pwd;
	private String name;

    /* 기본 생성자, 모든 매개변수가 있는 생성자 */

    /* getter & setter */

    /* toString */
}
◼ spring-context.xml
📌 Ref.
Spring Bean Configuration File 생성 방법
생성할 폴더 우클릭 > New > Spring Bean Configuration File
<?xml version="1.0" encoding="UTF-8"?>
<beans xmlns="http://www.springframework.org/schema/beans"
	xmlns:xsi="http://www.w3.org/2001/XMLSchema-instance"
	xsi:schemaLocation="http://www.springframework.org/schema/beans http://www.springframework.org/schema/beans/spring-beans.xsd">

	<!-- MemberDTO를 bean으로 등록 (파일의 설정 정보 등록) -->
	<bean id="member" class="com.greedy.section01.xmlconfig.MemberDTO">
		<!-- DTO 생성자의 인자를 아래의 여러 방식대로 작성 가능 -->
		<constructor-arg index="0" value="1"/>
		<constructor-arg name="id" value="user01"/>
		<constructor-arg index="2"><value>pass01</value></constructor-arg>
		<constructor-arg name="name"><value>치즈</value></constructor-arg>

	</bean>
</beans>
◼ Application.java
/* MemberDTO(POJO) 클래스와 spring-context(Configuration) XML 설정 정보를 이용해서
* Bean을 등록하고 생성하는 예제 */
/* ApplicationContext의 하위 구현체인 GenericXmlApplitionContext는
* XML 설정 메타 정보를 읽어와서 BeanFactory를 동작시킴 */
ApplicationContext context /* 부모 타입 */
	= new GenericXmlApplicationContext("com/greedy/section01/xmlconfig/spring-context.xml"); /* 구현체인 자식 타입 */

	/* 1. bean의 id를 이용해서 bean을 가져오는 방법
	* id를 이용하는 경우 bean의 타입 유추가 불가능해서 Object로 반환하므로 다운 캐스팅 필요 */
//	MemberDTO member = (MemberDTO) context.getBean("member"); /* id 값 입력 */

	/* 2. bean의 클래스 메타 정보를 전달하여 가져오는 방법 */
//	MemberDTO member = context.getBean(MemberDTO.class);

	/* 3. bean의 id와 클래스 메타 정보를 전달하여 가져오는 방법 */
	MemberDTO member = context.getBean("member", MemberDTO.class);

	System.out.println(member); // MemberDTO [sequence=1, id=user01, pwd=pass01, name=치즈] 출력
👉 Java config
◼ ContextConfiguration.java
/* 이 클래스가 설정 메타 정보를 가지고 있다는 의미의 어노테이션
 * 컨테이너를 생성할 시 해당 어노테이션이 달린 클래스를 먼저 인식하여 컨테이너를 설정 */
@Configuration
public class ContextConfiguration {

	/* bean을 등록하기 위해서는 메소드 위에 @Bean 어노테이션을 작성
	 * 이름을 별도로 지정하지 않으면 메소드 이름을 bean의 id로 자동 인식
	 * @Bean("myName") or @Bean(name="myName")의 형식으로 bean의 id를 설정  */
	@Bean(name="member")
	public MemberDTO getMember() {

		return new MemberDTO(1, "user01", "pass01", "효연");
	}
}
◼ Application.java
/* AnnotationConfigApplicationContext 라고 하는 어노테이션 설정 정보를 읽어서 컨테이너 설정을 하는
* 구현체를 이용. 인자로 @Configuration 어노테이션이 달린 설정 클래스의 메타 정보를 전달 */
ApplicationContext context
	= new AnnotationConfigApplicationContext(ContextConfiguration.class);

MemberDTO member = context.getBean("member", MemberDTO.class);

System.out.println(member);
👀 Component scan
💁♀️ Component scan이란,
base-package로 설정 된 하위 경로에 특정 어노테이션을 가지고 있는 클래스를 bean으로 등록하는 기능
@Component 어노테이션이 작성 된 클래스를 인식하여 bean으로 등록하게 되며 특수 목적에 따라 세부 기능을 제공하는@Controller,@Service,@Repository,@Configuration등을 인식
🙋 핵심 포인트 요약
- MemberDAO를 상속 받은 MemberDAOImpl 클래스를 사용하면,
- 인터페이스에 기재 된 기능에 대한 오버라이딩이 강제화
- MamberDAO 인터페이스를 다른 클래스에서 이용하게 되면 MemberDAOImpl이라는 구현체를 직접 사용하지 않기 때문에 서로의 클래스 간의 결합이 느슨해짐 (결합도 낮춤)
@Component
- 스프링 컨테이너가 스캐닝 기능을 이용하여 해당 클래스를 bean으로 등록할 수 있는 어노테이션을 설정
- value 속성을 이용하면 bean id를 설정할 수 있고 생략하면 class 앞 글자를 소문자로 하여 bean id를 생성
- ex)
@Component(value="memberDAO")
👉 Java config
◼ ContextConfiguration1.java
@Configuration @ComponentScan
/* 베이스 패키지에 등록 되지 않은 패키지는 스캔에서 제외하고 등록 된 패키지 내의 @Component 탐색
 * 등록하지 않으면 현 설정 클래스가 존재하는 패키지가 자동으로 베이스 패키지가 됨
 * (등록하지 않았을 경우, javaconfig가 아닌 config 폴더를 베이스 패키지로 인식) */
@Configuration
@ComponentScan(basePackages="com.greedy.section01.javaconfig")
public class ContextConfiguration1 {

}
◼ ContextConfiguration2.java
excludeFilter
/* excludeFilter로 스캐닝에서 제외할 타입을 기술하면 해당 타입은 스캐닝에서 제외 */
@Configuration
@ComponentScan(basePackages="com.greedy.section01.javaconfig",
			excludeFilters= {
					@ComponentScan.Filter(
							/* 1. 타입으로 설정 */
							type=FilterType.ASSIGNABLE_TYPE,
							classes= {MemberDAO.class} // MemberDAO를 제외했기 때문에 Bean을 찾지 못 하는 오류
							/* 2. 어노테이션 종류로 설정 */
							type=FilterType.ANNOTATION,
							classes= {org.springframework.stereotype.Component.class} // 같은 오류
							/* 3. 표현식으로 설정 */
							type=FilterType.REGEX,
							pattern= {"com.greedy.section01.*"}
					)
			})
public class ContextConfiguration2 {

}
◼ ContextConfiguration3.java
includeFilters
/* useDefaultFilters를 false로 하면 모든 어노테이션을 스캔하지 않는데
 * 이 때 스캔할 대상 클래스만 따로 지정 가능 */
@Configuration
@ComponentScan(basePackages="com.greedy.section01.javaconfig",
			   useDefaultFilters=false,
			   includeFilters= {
					   @ComponentScan.Filter(
							   /* excludeFilters에서 설정하는 방식과 동일 */
							   type=FilterType.ASSIGNABLE_TYPE,
							   classes= {MemberDAO.class}
				       )
			   })
public class ContextConfiguration3 {

}
👉 XML config
◼ spring-context1.xml
<?xml version="1.0" encoding="UTF-8"?>
<beans xmlns="http://www.springframework.org/schema/beans"
	xmlns:xsi="http://www.w3.org/2001/XMLSchema-instance"
	xmlns:context="http://www.springframework.org/schema/context"
	xsi:schemaLocation="http://www.springframework.org/schema/beans http://www.springframework.org/schema/beans/spring-beans.xsd
		http://www.springframework.org/schema/context http://www.springframework.org/schema/context/spring-context-4.3.xsd">

	<context:component-scan base-package="com.greedy.section02.xmlconfig"/>

</beans>
◼ spring-context2.xml
<?xml version="1.0" encoding="UTF-8"?>
<beans xmlns="http://www.springframework.org/schema/beans"
	xmlns:xsi="http://www.w3.org/2001/XMLSchema-instance"
	xmlns:context="http://www.springframework.org/schema/context"
	xsi:schemaLocation="http://www.springframework.org/schema/beans http://www.springframework.org/schema/beans/spring-beans.xsd
		http://www.springframework.org/schema/context http://www.springframework.org/schema/context/spring-context-4.3.xsd">

	<context:component-scan base-package="com.greedy.section02.xmlconfig">
		<context:exclude-filter type="assignable" expression="com.greedy.section02.xmlconfig.MemberDAO"/>
		<!-- No bean named 'memberDAO' available 오류 -->

	</context:component-scan>

</beans>
👀 Dependency injection (DI)
💁♀️ 의존성 주입(Dependency injection)이란,
인터페이스를 사이에 둬서 클래스 레벨에서는 의존관계가 고정되지 않도록 하고 런타임 시에 관계를 동적으로 주입하여 유연성을 확보하고 결합도를 낮출 수 있게 하는 것
👉 Java config
◼ ContextConfiguration.java
@Configuration
public class ContextConfiguration {

	@Bean
	public Account accountGenerator() {

		return new PersonalAccount(20, "110-234-567890", "1234");
	}

	@Bean
	public MemberDTO memberGenerator() { /* MemberDTO는 Account에 의존 중 */
		/* way 1. 생성자를 통해 Account를 생성하는 메소드를 호출한 리턴 값을 사용하여 bean을 조립 가능 */
		return new MemberDTO(1, "신짱아", "010-1234-5678", "zzang123@gmail.com", accountGenerator());

		/* way 2. setter 메소드를 사용한 의존성 주입 */
		// setter에는 필요로 하는 데이터만 설정하므로 없는 값이 있더라도 사용 가능(생성자를 통한 방법으로는 불가)
		MemberDTO member = new MemberDTO();
		member.setSequence(1);
		member.setName("봉미선");
		member.setPhone("010-1234-5432");
		member.setEmail("bong123@gmail.com");
		member.setPersonalAccount(accountGenerator());

		return member;
	}
}
👉 XML config
◼ spring-context.xml
<?xml version="1.0" encoding="UTF-8"?>
<beans xmlns="http://www.springframework.org/schema/beans"
	xmlns:xsi="http://www.w3.org/2001/XMLSchema-instance"
	xsi:schemaLocation="http://www.springframework.org/schema/beans http://www.springframework.org/schema/beans/spring-beans.xsd">

	<!-- bean 태그의 클래스 속성은 인터페이스 타입(Account)이 아닌 구현 클래스 타입(PersonalAccount)으로 작성 해야함 -->
	<bean id="accountGenerator" class="com.greedy.section02.xmlconfig.PersonalAccount">
		<constructor-arg index="0" value="20"/>
		<constructor-arg index="1" value="110-123-234563"/>
		<constructor-arg index="2" value="1234"/>
		<!-- public PersonalAccount(int bankCode, String accNo, String accPwd) 생성자 활용 -->
	</bean>

	<!-- way 1. 생성자를 통한 의존성 주입 -->
	 <bean id="memberGenerator" class="com.greedy.section02.xmlconfig.MemberDTO">
		<constructor-arg name="sequence" value="1"/>
		<constructor-arg name="name" value="신형만"/>
		<constructor-arg name="phone" value="010-4342-6334"/>
		<constructor-arg name="email" value="shin123@gmail.com"/>
		<constructor-arg name="personalAccount">
			<ref bean="accountGenerator"/> <!-- 의존성 주입 (위에 있는 bean을 참조할 것임) -->
		</constructor-arg>
	</bean>

	<!-- way 2. setter를 통한 의존성 주입 -->
	<bean id="memberGenerator" class="com.greedy.section02.xmlconfig.MemberDTO">
		<property name="sequence" value="1"/>
		<property name="name" value="신형만"/>
		<property name="phone" value="010-4342-6334"/>
		<property name="email" value="shin123@gmail.com"/>
		<property name="personalAccount" ref="accountGenerator"/> <!-- 의존성 주입 (위에 있는 bean을 참조할 것임) -->
	</bean>

	<!-- 생성 된 다른 bean을 의존성 주입할 경우에는 value 속성이 아닌 ref 속성을 사용하여 bean id를 전달 -->


</beans>
👀 autowired
💁♀️ autowired란,
스프링 컨테이너에 등록한 Bean에게 의존관계주입이 필요할 때, DI(의존성 주입)을 도와주는 어노테이션
@Autowired
◼ BookDAOImpl.java
@Repository : @Component의 세분화 어노테이션의 한 종류로 DAO 타입의 객체에 사용
@Repository("bookDAO")
public class BookDAOImpl implements BookDAO {

	private Map<Integer, BookDTO> bookList;

	public BookDAOImpl() {
		bookList = new HashMap<>();
		bookList.put(1, new BookDTO(1, 123456, "자바의 정석", "남궁성", "도우출판", new Date()));
		bookList.put(2, new BookDTO(2, 567893, "마쉬멜로우 이야기", "치즈", "강냉이출판", new Date()));
	}

	@Override
	public List<BookDTO> selectBookList() {

		return new ArrayList<>(bookList.values()); /* bookList.values()는 Collection 타입이므로 ArrayList 객체를 생성 */
	}

	@Override
	public BookDTO selectOneBook(int sequence) {

		return bookList.get(sequence);
	}
}
👉 필드 의존성 주입
◼ BookService.java
@Service : @Component의 세분화 어노테이션의 한 종류로 Service 레이어에서 사용
@Service
public class BookService {

	/* new BookDAOImpl()와 같은 코드는 BookDAOImpl 클래스와 강한 결합을 가지게 되어
	 * BookDAOImpl의 변경에 직접적으로 영향을 받게 되므로 결합을 느슨하게 하기 위해
	 * 의존성을 주입받는 방식을 사용 */
//	private BookDAO bookDAO = new BookDAOImpl();

	/* @Autowired : BookDAO 타입의 bean 객체를 이 프로퍼티에 의존성을 자동으로 주입 */
	/* BookDAOImpl 클래스에 @Repository("bookDAO") 어노테이션을 작성했으므로 @Autowired로 참조해올 수 있음 */
	@Autowired
	private BookDAO bookDAO; // @Autowired는 bookDAO라는 bean이 존재하는지 확인함 (bookDAOImpl 클래스에 존재)

	public List<BookDTO> selectAllBooks() {

		return bookDAO.selectBookList();
	}

	public BookDTO searchBookBySequence(int sequence) {

		return bookDAO.selectOneBook(sequence);
	}
}
◼ Application.java
/* @Autowired 필드 의존성 주입 테스트 */

// AnnotationConfigApplicationContext 생성자에 basePackages 문자열을 전달하며 생성
ApplicationContext context = new AnnotationConfigApplicationContext("com.greedy.section01.fieldInjection.javaconfig");

/* 이름이 bookService이고 타입이 BookService.class인 bean이 생성되었고 의존성이 주입되었다면 불러와질 것 */
BookService bookService = context.getBean("bookService", BookService.class);

/* 전체 목록 */
for(BookDTO book : bookService.selectAllBooks()) {
			System.out.println(book);
}
//		[ 출력문 ]
//		BookDTO [sequence=1, isbn=123456, title=자바의 정석, author=남궁성, publisher=도우출판, createdDate=Thu Feb 23 12:14:15 KST 2023]
//		BookDTO [sequence=2, isbn=567893, title=마쉬멜로우 이야기, author=치즈, publisher=강냉이출판, createdDate=Thu Feb 23 12:14:15 KST 2023]

/* 시퀀스로 검색 */
System.out.println(bookService.searchBookBySequence(1)); // BookDTO [sequence=1, isbn=123456, title=자바의 정석, author=남궁성, publisher=도우출판, createdDate=Thu Feb 23 12:14:15 KST 2023]
System.out.println(bookService.searchBookBySequence(2)); // BookDTO [sequence=2, isbn=567893, title=마쉬멜로우 이야기, author=치즈, publisher=강냉이출판, createdDate=Thu Feb 23 12:14:15 KST 2023]
👉 생성자 의존성 주입 🔥중요🔥
◼ BookService.java
@Service
public class BookService {

	/* 생성자 주입의 장점
	 * 1. 필드에 final 키워드 사용이 가능해지므로 변경 불가능하게 사용 가능
	 * 2. 순환 참조 방지 - 빠른 오류 발견 가능
	 * 	  (필드 주입이나 setter 주입은 메소드 실행 시점에만 오류가 발생하지만 생성자 주입의 경우 어플리케이션 실행 시점에서 확인 가능)
	 * 3. DI 컨테이너와의 결합도가 낮기 때문에 테스트 하기 용이 (스프링 컨테이너 없이 테스트 가능)
	 * */

	private final BookDAO bookDAO; // 필드에 final을 붙일 시, 처음으로 초기화 해둔 값 변경 불가

	/* @Autowired : BookDAO 타입의 bean 객체를 생성자로부터 전달 받아 의존성 주입 */
	/* @Autowired를 주석해도 정상 동작하는 이유는 스프링 4.3 버전 이후로는 !생성자 주입 방식을 사용할 때!
	 * 생성자가 한 개 뿐이라면 해당 생성자에 어노테이션을 생략해도 자동으로 주입해줌
	 * 단, 기본 생성자를 추가하면 오류가 나므로 그 때는 명시적으로 작성을 해줘야함
	 * (기본 생성자를 추가하고 실행 시, java.lang.NullPointerException 오류) */
//	@Autowired
	public BookService(BookDAO bookDAO) {
		this.bookDAO = bookDAO; /* 생성자에서 필드 초기화 */
	}

	public List<BookDTO> selectAllBooks() {

		return bookDAO.selectBookList();
	}

	public BookDTO searchBookBySequence(int sequence) {

		return bookDAO.selectOneBook(sequence);
	}
}
◼ Application.java
위의 '필드 의존성 주입'의 Application.java에서 basePackages가
"com.greedy.section02.constInjection.javaconfig"
인 것을 제외하고 모두 동일
👉 setter 의존성 주입
◼ BookService.java
@Service
public class BookService {

	private BookDAO bookDAO;

	/* @Autowired : BookDAO 타입의 bean 객체를 setter 메소드를 이용하여 의존성 주입 */
	/* @Autowired 어노테이션 없이 실행 시, java.lang.NullPointerException 오류 */
	@Autowired
	public void setBookDAO(BookDAO bookDAO) {
		this.bookDAO = bookDAO;
	}

	public List<BookDTO> selectAllBooks() {

		return bookDAO.selectBookList();
	}

	public BookDTO searchBookBySequence(int sequence) {

		return bookDAO.selectOneBook(sequence);
	}
}
◼ Application.java
위의 '필드 의존성 주입'의 Application.java에서 basePackages가
"com.greedy.section03.setterInjection.javaconfig"
인 것을 제외하고 모두 동일
👀 DI annotation
💁♀️ Annotation이란,
자바 소스 코드에 추가하여 사용할 수 있는 메타데이터의 일종. 소스코드에 추가하면 단순 주석의 기능이 아닌 특별한 기능을 사용 가능.
Annotation을 활용하여 Spring Framework는 해당 클래스가 어떤 역할인지 정하기도 하고, Bean을 주입하기도 하며, 자동으로 getter나 setter를 생성하기도 함. 특별한 의미를 부여하거나 기능을 부여하는 등 다양한 역할 수행 가능.
- 코드량 감소
- 유지보수 용이
- 생산성 증가
@Primary@Qualifier@Resource
📌 Setting 추가
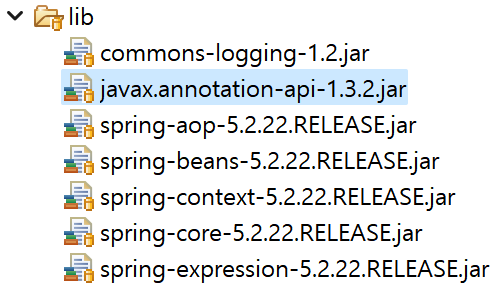
- DI annotation을 사용하기 위해 표시된 .jar파일 삽입 후 Classpath에 추가
👉 primary & qualifier
◼ Pokemon.java
public interface Pokemon {

	void attack();
}
◼ Pikachu.java
@Component
@Primary
/* @Primary 어노테이션을 설정하면 @Autowired로 동일한 타입의 여러 빈을 찾게 되는 경우
 * 자동으로 연결 우선 시 할 타입으로 설정 됨. 동일한 타입의 클래스 중 한 개만 @Primary 어노테이션을 사용 가능 */
public class Pikachu implements Pokemon {

	@Override
	public void attack() {
		System.out.println("피캇츄 백만볼트 찌----직-----⚡⚡");

	}
}
◼ Charmander.java
@Component
public class Charmander implements Pokemon {

	@Override
	public void attack() {
		System.out.println("파이리 불꽃 팡----------🔥🔥");
	}
}
◼ Squirtle.java
@Component
public class Squirtle implements Pokemon {

	@Override
	public void attack() {
		System.out.println("꼬부기 물대포 ----------🌊🌊🌊");

	}
}
◼ PokemonService.java
@Service
public class PokemonService {

	/* @Autowired만으로는 타입이 동일한 3개의 빈 중 어떤 빈을 선택해야 할지 고를 수 없으므로
	 * @Qualifier 어노테이션으로 빈의 이름을 명시하여 주입 가능
	 * 이는 @Primary로 우선권을 지정한 것보다 더 우선권을 가짐 */

	/* way 1. 필드를 활용한 의존성 주입 */
	@Autowired
	@Qualifier("charmander")
	private Pokemon pokemon;

	/* way 2. 생성자를 활용한 의존성 주입 */
	@Autowired
	public PokemonService(@Qualifier("squirtle") Pokemon pokemon) {
		this.pokemon = pokemon;
	}

	public void pokemonAttack() {
		pokemon.attack();
	}
}
◼ Application.java
/* 이 패키지를 베이스로 bean 스캐닝이 일어날 수 있도록 경로 작성 */
ApplicationContext context = new AnnotationConfigApplicationContext("com.greedy.section02.qualifier");

/* bean 등록이 잘 되었는지 확인 */
String[] beanNames = context.getBeanDefinitionNames();
for(String beanName : beanNames) {
	System.out.println(beanName);
}
//		[ 출력문 ]
//		charmander
//		pikachu
//		pokemonService
//		squirtle

/* attack 메소드 호출 */
PokemonService pokemonService = context.getBean("pokemonService", PokemonService.class);

pokemonService.pokemonAttack();
/* @Primary를 사용한 피카츄 아닌 @Qualifier를 사용하여 지정한 꼬부기의 attack 출력문이 출력 (더 우선 순위) */
👉 collection
◼ PokemonService.java
@Service
public class PokemonService {

	/* 같은 타입의 빈 여러 개 주입 받는 방법 */

	/* way 1. List 타입으로 주입
	 * bean 이름 사전순으로 생성되고 List에도 해당 순서대로 추가되어 주입 됨 */
	private List<Pokemon> pokemonList;

	@Autowired
	public PokemonService(List<Pokemon> pokemonList) {
		this.pokemonList = pokemonList;
	}

	/* 모든 포켓몬의 attck() 출력 */
	public void pokemonAttack() {
		for(Pokemon pokemon : pokemonList) {
			pokemon.attack();
		}
	}

	/* way 2. Map 타입으로 주입 */
	private Map<String, Pokemon> pokemonMap;

	@Autowired
	public PokemonService(Map<String, Pokemon> pokemonMap) {
		this.pokemonMap = pokemonMap;
	}

	public void pokemonAttack() {

		/* Map을 keyset()을 활용하여 Set으로 만든 뒤 get(key)로 attack() 호출 */
		for(String key : pokemonMap.keySet()) {
			pokemonMap.get(key).attack();
		}
	}
}
◼ Application.java
/* 이 패키지를 베이스로 bean 스캐닝이 일어날 수 있도록 경로 작성 */
ApplicationContext context = new AnnotationConfigApplicationContext("com.greedy.section03.collection");

/* bean 등록이 잘 되었는지 확인 */
String[] beanNames = context.getBeanDefinitionNames();
for(String beanName : beanNames) {
	System.out.println(beanName);
}

/* attack 메소드 호출 */
PokemonService pokemonService = context.getBean("pokemonService", PokemonService.class);

pokemonService.pokemonAttack();
/* 모든 포켓몬들의 attack 출력문이 출력 */
👉 resource
◼ PokemonService.java
@Service
public class PokemonService {

	/* 스프링 전용 @Autowired 어노테이션 대신 자바 표준 어노테이션 @Resource로 POJO 연결 테스트 */

	/* way 1. 같은 타입의 bean이 여러 개 있는 상황 (필드 방식의 주입)
	 * 기본적으로 bean name 으로 주입 받음. 하지만 bean의 이름이 일치하지 않으면 타입으로 주입 받음
	 * 동일한 타입의 빈이 있는 경우에는 주입 받지 못 함 */
	/* @Resource는 @Autowired와는 달리 주로 name(charmander)을 이용하여 bean을 찾아오고 그 이후에 type을 이용함 */
	@Resource(name = "charmander")
	private Pokemon pokemon;

	public void pokemonAttack() {
		pokemon.attack();
	}

	/* 모든 포켓몬들의 attack() 출력 */
	@Resource
	private List<Pokemon> pokemonList;

	public void pokemonAttack() {
		for(Pokemon pokemon : pokemonList) {
			pokemon.attack();
		}
	}

	/* way 2. 같은 타입의 bean이 피카츄 1개인 상황
	 * 필드 주입과 setter 주입은 가능하지만 생성자 주입은 불가능 */
    /* 필드 방식 가능 */
	@Resource
	private Pokemon pokemon;

	/* 생성자 방식의 주입 불가능 */
//	@Resource
//	public PokemonService(Pokemon pokemon) {
//		this.pokemon = pokemon;
//	}

    /* setter 방식 가능 */
	@Resource
	public void setPokemon(Pokemon pokemon) {
		this.pokemon = pokemon;
	}

	public void pokemonAttack() {
		pokemon.attack();
	}
}
◼ Application.java
/* 이 패키지를 베이스로 bean 스캐닝이 일어날 수 있도록 경로 작성 */
ApplicationContext context = new AnnotationConfigApplicationContext("com.greedy.section04.resource");

/* bean 등록이 잘 되었는지 확인 */
String[] beanNames = context.getBeanDefinitionNames();
for(String beanName : beanNames) {
	System.out.println(beanName);
}

/* attack 메소드 호출 */
PokemonService pokemonService = context.getBean("pokemonService", PokemonService.class);

pokemonService.pokemonAttack();
/* @Resource를 사용하여 지정한 포켓몬들의 attack 출력문이 출력 */

	}
}
👀 bean scope
GitHub
xml Config는 GitHub에서 확인 가능
💁♀️ bean scope란,
말 그대로 빈이 존재할 수 있는 범위를 뜻하며, 스프링은 다음과 같은 다양한 스코프를 지원.
- 싱글톤(Singleton) : 기본 스코프, 스프링 컨테이너의 시작과 종료까지 유지되는 가장 넓은 범위의 스코프
- 프로토타입(Prototype) : 스프링 컨테이너는 프로토타입 빈의 생성과 의존관계 주입까지만 관여하고 더는 관리하지 않는 매우 짧은 범위의 스코프
@Scope
👉 singleton
◼ Product.java
public abstract class Product {

	private String name;
	private int price;

	public Product() {}

	public Product(String name, int price) {
		super();
		this.name = name;
		this.price = price;
	}

	public String getName() {
		return name;
	}

	public void setName(String name) {
		this.name = name;
	}

	public int getPrice() {
		return price;
	}

	public void setPrice(int price) {
		this.price = price;
	}

	@Override
	public String toString() {
		return name + " " + price;
	}
}
◼ Bread.java
public class  Bread extends Product {

	private java.util.Date bakedDate;

	public Bread() {}

	public Bread(String name, int price, Date bakedDate) {
		super(name, price);
		this.bakedDate = bakedDate;
	}

	public java.util.Date getBakedDate() {
		return bakedDate;
	}

	public void setBakedDate(java.util.Date bakedDate) {
		this.bakedDate = bakedDate;
	}

	@Override
	public String toString() {
		return super.toString() + " " + bakedDate;
	}
}
◼ Beverage.java
public class Beverage extends Product {

	private int capacity;

	public Beverage() {}

	public Beverage(String name, int price, int capacity) {
		super(name, price);
		this.capacity = capacity;
	}

	public int getCapacity() {
		return capacity;
	}

	public void setCapacity(int capacity) {
		this.capacity = capacity;
	}

	@Override
	public String toString() {
		return super.toString() + " " + capacity;
	}
}
◼ ShoppingCart.java
public class ShoppingCart {

	private final List<Product> items;

	public ShoppingCart() {
		items = new ArrayList<>();
	}

	public void addItem(Product item) {
		items.add(item);
	}

	public List<Product> getItem() {
		return items;
	}
}
◼ ContextConfiguration.java
@Configuration
public class  ContextConfiguration {

	@Bean
	public Product carpBread() { // Bread의 상위 타입인 Product를 타입으로 설정

		return new Bread("붕어빵", 2000, new java.util.Date());
	}

	@Bean
	public Product milk() {

		return new Beverage("딸기우유", 1500, 500);
	}

	@Bean
	public Product water() {

		return new Beverage("제주삼다수", 1500, 500);
	}

	@Bean
	@Scope("singleton") // 기본 값
	public ShoppingCart cart() {

		return new ShoppingCart();
	}
}
◼ Application.java
ApplicationContext context = new AnnotationConfigApplicationContext(ContextConfiguration.class); /* [ ContextConfiguration 클래스 생성 ] */

/* 등록된 bean 꺼내오기 */
Product carpBread = context.getBean("carpBread", Bread.class);
Product milk = context.getBean("milk", Beverage.class);
Product water = context.getBean("water", Beverage.class);

ShoppingCart cart1 = context.getBean("cart", ShoppingCart.class);
cart1.addItem(carpBread);
cart1.addItem(milk);

System.out.println("cart1에 담긴 물건 : " + cart1.getItem());
// cart1에 담긴 물건 : [붕어빵 2000 Fri Feb 24 09:19:00 KST 2023, 딸기우유 1500 500]

ShoppingCart cart2 = context.getBean("cart", ShoppingCart.class);
cart2.addItem(water);

System.out.println("cart2에 담긴 물건 : " + cart2.getItem());
// cart2에 담긴 물건 : [붕어빵 2000 Fri Feb 24 09:19:00 KST 2023, 딸기우유 1500 500, 제주삼다수 1500 500]
// cart2에는 제주 삼다수만 담았으나, cart1에 담았던 물건들에 추가되어 나타남(Bean이 singleton으로 하나의 객체인 것을 알 수 있음)

/* cart1, 2의 hashCode */
System.out.println("cart1의 hashCode : " + cart1.hashCode());
System.out.println("cart2의 hashCode : " + cart2.hashCode());
// 같은 해쉬코드를 출력하므로 두 cart가 완전히 동일한 객체인 것을 확인
👉 prototype
◼ ContextConfiguration.java
@Configuration
public class ContextConfiguration {

	@Bean
	public Product carpBread() { // Bread의 상위 타입인 Product를 타입으로 설정

		return new Bread("붕어빵", 2000, new java.util.Date());
	}

	@Bean
	public Product milk() {

		return new Beverage("딸기우유", 1500, 500);
	}

	@Bean
	public Product water() {

		return new Beverage("제주삼다수", 1500, 500);
	}

	@Bean
	@Scope("prototype") // 기본 값 singleton에서 prototype으로 변경
	public ShoppingCart cart() {

		return new ShoppingCart();
	}
}
◼ Application.java
/* 기본적인 bean scope는 singleton으로 설정 되어있음
* singleton은 IoC 컨테이너 당 하나의 인스턴스만 생성
* prototype으로 설정을 변경하면 요청할 때마다 빈 인스턴스를 새롭게 생성 */

ApplicationContext context = new AnnotationConfigApplicationContext(ContextConfiguration.class); /* [ ContextConfiguration 클래스 생성 ] */

/* 등록된 bean 꺼내오기 */
Product carpBread = context.getBean("carpBread", Bread.class);
Product milk = context.getBean("milk", Beverage.class);
Product water = context.getBean("water", Beverage.class);

ShoppingCart cart1 = context.getBean("cart", ShoppingCart.class);
cart1.addItem(carpBread);
cart1.addItem(milk);

System.out.println("cart1에 담긴 물건 : " + cart1.getItem());
// cart1에 담긴 물건 : [붕어빵 2000 Fri Feb 24 09:19:00 KST 2023, 딸기우유 1500 500]

ShoppingCart cart2 = context.getBean("cart", ShoppingCart.class);
cart2.addItem(water);

System.out.println("cart2에 담긴 물건 : " + cart2.getItem());
// cart2에 담긴 물건 : [제주삼다수 1500 500]
// singleton을 prototype으로 Scope를 변경하여 이제 서로 다른 객체임을 확인 (cart2가 다른 bean 객체로 생성)

/* cart1, 2의 hashCode */
System.out.println("cart1의 hashCode : " + cart1.hashCode());
System.out.println("cart2의 hashCode : " + cart2.hashCode());
// 다른 해쉬코드를 출력하므로 두 cart가 다른 객체인 것을 확인
👀 properties
GitHub
xml Config는 GitHub에서 확인 가능
💁♀️ properties란,
사용하는 파일의 확장자로써, 주로 스프링의 설정 정보를 저장.
key(문자열) = value
@ValueReloadableResourceBundleMessageSourcesetBasename()setDefaultEncoding()
👉 Properties 파일의 설정 값 읽어오기
◼ product-info.properties
bread.carpbread.name=\uC220\uBE75
bread.carpbread.price=2000
beverage.milk.name=\uCEE4\uD53C\uC6B0\uC720
beverage.milk.price=1500
beverage.milk.capacity=500
beverage.water.name=\uC528\uADF8\uB7A8
beverage.water.price=1000
beverage.water.capacity=500
/* 술빵, 커피우유, 씨그램은 한글이므로 유니코드로 표시 됨 */
◼ ContextConfiguration.java
@Configuration
/* 클래스 패스 하위 경로를 기술. 폴더의 구분은 슬래쉬 또는 역슬래쉬
   (현재는 resources라는 소스폴더의 바로 하위에 위치해있기 때문에 생략) */
@PropertySource("product-info.properties")
public class ContextConfiguration {

	/* way 1. @Value를 필드에 작성하는 방법 */

	/* 치환자 문법을 이용하여 properties에 저장 된 key를 입력하면 value에 해당하는 값을 꺼내옴
	 * 내부에 공백을 사용하면 값을 읽어오지 못 하므로 주의
	 * :(콜론) 뒤의 값은 값을 읽어오지 못 했을 경우 사용하는 대체 값 */
	@Value("${bread.carpbread.name:눅눅한술빵}") // 만약 bread.carpbread.name라는 key값에 해당하는 value가 없다면 눅눅한술빵이라는 default 값을 미리 지정 가능
	private String carpBreadName;
	@Value("${bread.carpbread.price:50000}")
	private int carpBreadPrice;

	@Value("${beverage.milk.name}") // ${}에 공백이 존재하거나, default값이 없는 상태에서 key값을 올바르게 입력하지 않으면 그대로 ${ beverage.milk.name }와 같은 문자열이 출력
	private String milkName;
	@Value("${beverage.milk.price}")
	private int milkPrice;
	@Value("${beverage.milk.capacity}")
	private int milkCapacity;

	/* 필드에 선언한 변수를 생성자에 전달 */
	@Bean
	public Product carpBread() { // Bread의 상위 타입인 Product를 타입으로 설정

		return new Bread(carpBreadName, carpBreadPrice, new java.util.Date());
	}

	@Bean
	public Product milk() {

		return new Beverage(milkName, milkPrice, milkCapacity);
	}

	/* way 2. @Value를 필드가 아닌 매개변수부에 작성하는 방법 */
	@Bean
	public Product water(@Value("${beverage.water.name}") String waterName,
						 @Value("${beverage.water.price}") int waterPrice,
						 @Value("${beverage.water.capacity}") int waterCapacity
						) {

		return new Beverage(waterName, waterPrice, waterCapacity);
	}

	@Bean
	@Scope("prototype") // 기본 값 singleton에서 prototype으로 변경
	public ShoppingCart cart() {

		return new ShoppingCart();
	}
}
◼ Application.java
/* Properties 파일의 설정 값 읽어오기 */

ApplicationContext context = new AnnotationConfigApplicationContext(ContextConfiguration.class); /* [ ContextConfiguration 클래스 생성 ] */

/* 등록된 bean 꺼내오기 */
Product carpBread = context.getBean("carpBread", Bread.class);
Product milk = context.getBean("milk", Beverage.class);
Product water = context.getBean("water", Beverage.class);

ShoppingCart cart1 = context.getBean("cart", ShoppingCart.class);
cart1.addItem(carpBread);
cart1.addItem(milk);

System.out.println("cart1에 담긴 물건 : " + cart1.getItem());
// cart1에 담긴 물건 : [술빵 2000 Sat Feb 25 22:09:35 KST 2023, 커피우유 1500 500]

ShoppingCart cart2 = context.getBean("cart", ShoppingCart.class);
cart2.addItem(water);

System.out.println("cart2에 담긴 물건 : " + cart2.getItem());
// cart2에 담긴 물건 : [씨그램 1000 500]
// singleton을 prototype으로 Scope를 변경하여 이제 서로 다른 객체임을 확인 (cart2가 다른 bean 객체로 생성)

/* cart1, 2의 hashCode */
System.out.println("cart1의 hashCode : " + cart1.hashCode());
System.out.println("cart2의 hashCode : " + cart2.hashCode());
// 다른 해쉬코드를 출력하므로 두 cart가 다른 객체인 것을 확인
👉 Locale(지역)에 따라 다른 Properties의 메세지 읽어오기
◼ message_en_US.properties
error.404=Page NOT Found \uD83D\uDC7B
error.500=Something Wrong! It''s the developer {0}''s fault at {1} \uD83D\uDC80
◼ message_ko_KR.properties
error.404=\uD398\uC774\uC9C0\uB97C \uCC3E\uC9C0 \uBABB \uD588\uC2B5\uB2C8\uB2E4 \uD83D\uDC7B
error.500=\uAC1C\uBC1C\uC790 {0}\uC758 \uC798\uBABB\uC73C\uB85C \uC5D0\uB7EC \uBC1C\uC0DD! \uD83E\uDD2F [ \uD604\uC7AC\uC2DC\uAC04 {1} ]
◼ ContextConfiguration.java
@Configuration
public class ContextConfiguration {

	@Bean
	public ReloadableResourceBundleMessageSource messageSource() {
		/* 접속하는 세션의 로케일에 따라 자동 재로딩하는 기능을 가진 messageSource 구현체 */
		ReloadableResourceBundleMessageSource messageSource = new ReloadableResourceBundleMessageSource();

		/* 다국어 메세지를 읽어올 propertise 파일의 기본 파일 이름 설정 가능 */
		messageSource.setBasename("message");

		/* 기본 인코딩 셋 설정 가능 */
		messageSource.setDefaultEncoding("UTF-8");

		return messageSource;
	}
}
◼ Application.java
/* Locale(지역)에 따라 다른 Properties의 메세지 읽어오기 */
ApplicationContext context = new AnnotationConfigApplicationContext(ContextConfiguration.class);

/* 설정 파일에서 등록된 bean 가져오기 (ver.en) */
String error404Message = context.getMessage("error.404", null, Locale.US); // getMessage() : messageSource를 사용할 것
String error500Message = context.getMessage("error.500", new Object[]{ "Hyoyeon", new Date() }, Locale.US);
													  // new Object[]{ "Hyoyeon", new Date() } : {0}, {1}에 채워넣을 값 입력

System.out.println("error.404 : " + error404Message); // error.404 : Page NOT Found 👻
System.out.println("error.500 : " + error500Message); // error.500 : Something Wrong! It's the developer Hyoyeon's fault at 2/24/23, 11:21 AM 💀

/* 설정 파일에서 등록된 bean 가져오기 (ver.ko) */
String error404Message = context.getMessage("error.404", null, Locale.KOREA); // getMessage() : messageSource를 사용할 것
String error500Message = context.getMessage("error.500", new Object[]{ "효연", new Date() }, Locale.KOREA);
												      // new Object[]{ "효연", new Date() } : {0}, {1}에 채워넣을 값 입력

System.out.println("error.404 : " + error404Message); // error.404 : 페이지를 찾지 못 했습니다 👻
System.out.println("error.500 : " + error500Message); // error.500 : 개발자 효연의 잘못으로 에러 발생! 🤯 [ 현재시간 23. 2. 24. 오전 11:23 ]
👀 init & destroy method
GitHub
xml Config는 GitHub에서 확인 가능
💁♀️ initMethod에는 Bean 객체 초기화 시 호출할 메소드 이름을, destroyMethod에는 Bean 객체 소멸 시 호출할 메소드 이름을 설정. 해당하는 클래스에서 init-method, destroy-method 속성에 설정한 각 메소드를 구현.
initMethoddestroyMethod
👉 init & destroy method 활용
◼ Owner.java
public class Owner {

	public void openShop() {
		System.out.println("가게가 오픈했습니다! 이제 쇼핑을 할 수 있습니다 :)");
	}

	public void closeShop() {
		System.out.println("가게가 마감했습니다. 이제 쇼핑을 할 수 없습니다 :)");
	}
}
◼ ContextConfiguration.java
@Configuration
public class ContextConfiguration {

	@Bean
	public Product carpBread() { // Bread의 상위 타입인 Product를 타입으로 설정

		return new Bread("붕어빵", 2000, new java.util.Date());
	}

	@Bean
	public Product milk() {

		return new Beverage("딸기우유", 1500, 500);
	}

	@Bean
	public Product water() {

		return new Beverage("제주삼다수", 1500, 500);
	}

	@Bean
	@Scope("prototype")
	public ShoppingCart cart() {

		return new ShoppingCart();
	}

	@Bean(initMethod = "openShop", destroyMethod = "closeShop")
	public Owner owner() {

		return new Owner();
	}
}
◼ Application.java
/* init(초기화), desptroy(폐기) 메소드 설정
* Ioc 컨테이너가 Bean 객체를 생성할 때 bean 초기화가 필요하면 initMethod를 설정하고,
* IoC 컨테이너가 Bean 객체를 소멸시킬 때 자원 반납 등의 처리가 필요하면 destroyMethod를 설정
* */

ApplicationContext context = new AnnotationConfigApplicationContext(ContextConfiguration.class); /* [ ContextConfiguration 클래스 생성 ] */

/* 등록된 bean 꺼내오기 */
Product carpBread = context.getBean("carpBread", Bread.class);
Product milk = context.getBean("milk", Beverage.class);
Product water = context.getBean("water", Beverage.class);

ShoppingCart cart1 = context.getBean("cart", ShoppingCart.class);
cart1.addItem(carpBread);
cart1.addItem(milk);

System.out.println("cart1에 담긴 물건 : " + cart1.getItem());

ShoppingCart cart2 = context.getBean("cart", ShoppingCart.class);
cart2.addItem(water);

System.out.println("cart2에 담긴 물건 : " + cart2.getItem());

/* cart1, 2의 hashCode */
System.out.println("cart1의 hashCode : " + cart1.hashCode());
System.out.println("cart2의 hashCode : " + cart2.hashCode());

/* 가비지 컬렉터에서 해당 빈을 메모리에서 지울 때 destroyMethod가 동작하게 되는데
* 지금은 메모리에서 지우기 전에 main 메소드의 프로세스가 종료되어 호출되고 있지 않음
* 강제로 컨테이너를 종료 시키는 메소드를 호출하면 폐기 메소드가 동작 */
((AnnotationConfigApplicationContext)context).close();
💻 Mini Console
가게가 오픈했습니다! 이제 쇼핑을 할 수 있습니다 :)
cart1에 담긴 물건 : [붕어빵 2000 Sat Feb 25 22:31:30 KST 2023, 딸기우유 1500 500]
cart2에 담긴 물건 : [제주삼다수 1500 500]
cart1의 hashCode : 1403700359
cart2의 hashCode : 1387380406
가게가 마감했습니다. 이제 쇼핑을 할 수 없습니다 :)
👀 AOP
GitHub
xml Config는 GitHub에서 확인 가능
💁♀️ AOP(Aspect Oriented Programming)란,
관점 지향 프로그래밍의 약자로 일반적으로 사용하는
클래스(Service, DAO 등) 에서 중복되는 공통 코드 부분(commit,
rollback, log 처리)을 별도의 영역으로 분리해 내고, 코드가 실행 되기
전이나 이 후의 시점에 해당 코드를 붙여 넣음으로써 소스 코드의 중복을 줄이고, 필요할 때마다 가져다 쓸 수 있게 객체화하는 기술
@Aspect@Before@After@AfterReturning@AfterThrowing@Aroundproceed()
📌 Setting 추가
- AOP를 사용하기 위해 표시된 .jar파일들 삽입 후 Classpath에 추가
👉 Base
◼ Student.java
public interface Student {

	AchievementResult study(Passion passion) throws Exception;

}
◼ Passion.java
public class  Passion.java {

	private int score;

    /* 기본 생성자 & 매개변수 생성자 */

    /* toString */

}
◼ AchievementResult.java
public class AchievementResult {

	private int understandingScore;
	private int satisfactionScore;
	private double employmentRate;

    /* 기본 생성자 & 매개변수 생성자 */

    /* toString */

}
◼ NormalStudent.java
@Component
public class NormalStudent implements Student {

	/* AfterThrowing을 테스트하기 위해, 의도적으로 exception을 발생시키기 위한 구문을 상위 인터페이스인 Student에서 Override */
	@Override
	public AchievementResult study(Passion passion) throws Exception {

		if(passion.getScore() <= 0) {

			throw new Exception("열정이 부족합니다! 다시 열정을 가지고 오세요!");
		}

		int understandingScore = 0;
		int satisfactionScore = 0;
		double employmentRate = 0.0;

		int passionScore = passion.getScore();

		int difficulty = 5;

		for(int i = 1; i <= 8; i++) {
			System.out.println(i + "교시 수업을 열심히 듣습니다. 오~ 프로그래밍이 뭔지 알 것 같습니다!");
			System.out.println("이해도와 만족도가 열정에 비례하여 자꾸 올라갑니다.");
			understandingScore += difficulty + passionScore;
			satisfactionScore += difficulty + passionScore;

			System.out.println("하지만 신기하게 취업률은 오르지 않습니다. 취업난이 심각한가 봅니다.");
			employmentRate += difficulty + passionScore;

			if(i == 4) {
				System.out.println("밥을 먹습니다. 오늘 저녁에는 뭘 하고 놀아볼까?ㅎㅎㅎ");
				System.out.println("자바 따윈 잊어버려~~~");

				understandingScore /= 2;
				satisfactionScore *= 2;
				employmentRate /= 2;
			}
		}

		return new AchievementResult(understandingScore, satisfactionScore, employmentRate);
	}
}
◼ GreedyStudent.java
@Component
public class GreedyStudent implements Student {

	/* AfterThrowing을 테스트하기 위해, 의도적으로 exception을 발생시키기 위한 구문을 상위 인터페이스인 Student에서 Override */
	@Override
	public AchievementResult study(Passion passion) throws Exception {

		if(passion.getScore() != 10) {

			throw new Exception("GreedyStudent는 열정이 MAX여야 합니다. 열정이 부족합니다! 다시 열정을 가지고 오세요!");
		}

		int understandingScore = 0;
		int satisfactionScore = 0;
		double employmentRate = 0.0;

		int passionScore = passion.getScore();

		int difficulty = 10;

		for(int i = 1; i <= 8; i++) {
			System.out.println(i + "교시 수업을 열심히 듣습니다. 하지만 너무 어렵습니다.");
			System.out.println("이해도와 만족도가 열정에 비례하여 자꾸 떨어집니다.");
			understandingScore -= difficulty + passionScore;
			satisfactionScore -= difficulty + passionScore;

			System.out.println("하지만 신기하게 취업률은 올라가고 있습니다");
			employmentRate += difficulty * passionScore;

			if(i == 4) {
				System.out.println("잠시 밥을 먹으며 수업 들은 내용으로 토론을 합니다.");
				System.out.println("밥을 코로 먹는지 입으로 먹는지 모르겠습니다");

				employmentRate += difficulty * passionScore;
			}
		}

		return new AchievementResult(understandingScore, satisfactionScore, employmentRate);
	}
}
👉 AOP
◼ BeforeAttendingAdvice.java
@Component
@Aspect
public class BeforeAttendingAdvice {

	/* Point Cut으로 패치한 실행 시점을 Join Point라고 함
	 * Point Cut은 여러 Join Point를 매치하기 위해 지정한 표현식이고, 이렇게 매치된 Join Point에서 해야할 일이 Advice */
	// Point Cut 지정 (annotation.. : annotation 하위의 모든 패키지 / * : 모든 메소드 / (..) : 모든 파라미터)
	@Before("execution(* com.greedy.section01.advice.annotation..*(..))")
	public void beforeAttending(JoinPoint joinPoint) {

		System.out.println("===== Before Attending =====");
		System.out.println("오늘도 수혈할 커피☕를 들고 입실! 띢-");
		System.out.println("수강생 타입 : " + joinPoint.getTarget().getClass()); 	// 타겟 클래스의 정보 (getTarget() : 호출이 되는 대상 object 반환)
		System.out.println("수강생의 행동 : " + joinPoint.getSignature());			// 리턴 타입을 포함한 시그니처
		System.out.println("행동 요약 : " + joinPoint.getSignature().getName());  // 메소드 이름만
		System.out.println("수강생의 열정 : " + ((Passion)joinPoint.getArgs()[0]).getScore()); // getArgs()는 배열로 반환
		System.out.println("============================");
	}
}
◼ AfterAttendingAdvice.java
@Component
@Aspect
public class AfterAttendingAdvice {

	@After("execution(* com.greedy.section01.advice.annotation..*(..))")
	public void afterAttending(JoinPoint joinPoint) {

		System.out.println("===== After Attending =====");
		System.out.println("파김치가 된 상태로 또 공부를 하러 집으로 갑니다 .. 🫠");
		System.out.println("수강생 타입 : " + joinPoint.getTarget().getClass()); 	// 타겟 클래스의 정보 (getTarget() : 호출이 되는 대상 object 반환)
		System.out.println("수강생의 행동 : " + joinPoint.getSignature());		// 리턴 타입을 포함한 시그니처
		System.out.println("행동 요약 : " + joinPoint.getSignature().getName()); // 메소드 이름만
		System.out.println("수강생의 열정 : " + ((Passion)joinPoint.getArgs()[0]).getScore()); // getArgs()는 배열로 반환
		System.out.println("============================");

	}
}
◼ AfterReturningAttendingAdvice.java
@Component
@Aspect
public class AfterReturningAttendingAdvice {

	/* @AfterReturning은 메소드 정상 수행 후 반환이므로 반환 값 참조 가능
	 * returning 속성에 작성한 이름으로 매개변수에 Object 객체를 선언
	 * JoinPoint는 반드시 첫 번째 매개변수로 선언 해야함 */
	@AfterReturning(pointcut="execution(* com.greedy.section01.advice.annotation..*(..))", returning="result") //  returning="" : 안에 변수명 입력
	public void afterReturningAttending(JoinPoint joinpoint, Object result) { // returning에 작성한 값과 동일한 값을 매개변수로 전달

		System.out.println("===== AfterReturning Attending =====");
		System.out.println("오늘의 이해도 : " + ((AchievementResult)result).getUnderstandingScore());
		System.out.println("오늘의 만족도 : " + ((AchievementResult)result).getSatisfactionScore());
		System.out.println("취업률 : " + ((AchievementResult)result).getemploymentRate());

		/* 정상 수행 후 반환하는 반환 값을 가공해서 넘겨주기도 가능 */
		double employmentRate = ((AchievementResult)result).getemploymentRate();
		double percent = employmentRate / 1000.0 * 100;
		((AchievementResult)result).setemploymentRate(percent);

		// 전 : [understandingScore=-160, satisfactionScore=-160, employmentRate=900.0]
		// 후 : [understandingScore=-160, satisfactionScore=-160, employmentRate=90.0]
		// employmentRate가 가공된 형태로 출력되는 것 확인 가능

		System.out.println("====================================");

	}
}
◼ AfterThrowingAttendingAdvice.java
@Component
@Aspect
public class AfterThrowingAttendingAdvice {

	@AfterThrowing(pointcut="execution(* com.greedy.section01.advice.annotation..*(..))", throwing="exception")
	public void afterThrowingAttending(JoinPoint joinPoint, Throwable exception) {

		System.out.println("===== AfterThrowing Attending =====");
		System.out.println(exception.getMessage());
		System.out.println("===================================");

	}
}
◼ AroundAttendingAdvice.java
@Component
@Aspect
public class AroundAttendingAdvice {

	/* AroundAdvice는 가장 강력한 어드바이스로 조인 포인트를 완전히 장악하기 때문에
	 * 이전에 살펴본 어드바이스를 모두 around 어드바이스로 구현 가능
	 * 원본 조인 포인트를 언제 실행할지, 실행 자체를 안 할지 여부도 제어 가능
	 * 조인 포인트의 진행 호출을 잊는 경우가 발생할 수도 있어 주의가 필요하며
	 * 최소한의 요건을 충족하면서도 가장 기능이 약한 어드바이스를 선택해서 쓰는 것이 바람직 */

	/* 동일한 클래스 내의 포인트 컷을 사용하는 것이라면 클래스명 생략 가능
	 * 다른 클래스에서 가져와서 사용하는 경우에는 클래스명을 기재해야 하며 다른 패키지라면 패키지를 포함한 클래스명 기재 */
	@Around("studentAroundPointcut()")
	public Object aroundAttending(ProceedingJoinPoint joinPoint) throws Throwable {
	// AroundAdvice는 Object라는 반환값이 있고, Join Point가 ProceedingJoinPoint라는 형태

		System.out.println("===== Around Attending =====");
		System.out.println("오늘도 학원을 가는 날이군🥹 하며 벌떡 일어나 커피를 탑니다.");

		/* 공부 시간을 체크하기 위해 스탑워치 start */
		StopWatch stopWatch = new StopWatch();
		stopWatch.start();

		/* 원본 조인 포인트를 실행 후 반환 */
		Object result = joinPoint.proceed(); // proceed() : 앞의 진행이 끝난 후, 그 다음 진행으로 넘어가는 시점 / 예외 날리기

		/* 스탑워치 stop */
		stopWatch.stop();

		System.out.println("총 공부 소요 시간 : " + stopWatch.getTotalTimeMillis() + "(ms)");
		System.out.println("===================================");

		/* 원본 조인 포인트를 호출한 쪽 혹은 다른 어드바이스가 다시 실행할 수 있도록 리턴 값을 이어서 반환 */
		return result;
	}

	/* void형 메소드로 작성하고 Pointcut 표현식 작성. 메소드의 이름이 포인트 컷의 이름이 됨 */
	@Pointcut("execution(* com.greedy.section01.advice.annotation..*(..))")
	private void studentAroundPointcut() {}

}
👉 Context Configuration
◼ ContextConfiguration.java
@Configuration
/* AspectJ의 AutoProxy 사용에 관한 설정을 해주어야만 Advice가 동작
 * JoinPoint에 Advice를 끼워 넣는 행위를 weaving이라고 하고 위빙을 지원해주는 weaver 라이브러리도 추가해야함 */
@EnableAspectJAutoProxy(proxyTargetClass=true)
public class ContextConfiguration {

}
👉 Application
◼ Application.java
ApplicationContext context = new AnnotationConfigApplicationContext("com.greedy.section01.advice.annotation");

String[] beanNames = context.getBeanDefinitionNames();
for(String beanName : beanNames) {
	System.out.println("beanName : " + beanName);
}

Student normalStudent = context.getBean("normalStudent", Student.class);

System.out.println("========== Normal Student ==========");
AchievementResult normalResult = normalStudent.study(new Passion(10));
System.out.println("normalStudent Result : " + normalResult);

Student greedyStudent = context.getBean("greedyStudent", Student.class);

System.out.println("========== Greedy Student ==========");
AchievementResult greedyResult = greedyStudent.study(new Passion(10));
System.out.println("greedyStudent Result : " + greedyResult);
💻 Mini Console
AfterThrowingAdvice 발동 시,
========== Normal Student ==========
===== Around Attending =====
오늘도 학원을 가는 날이군🥹 하며 벌떡 일어나 커피를 탑니다.
===== Before Attending =====
오늘도 수혈할 커피☕를 들고 입실! 띢-
수강생 타입 : class com.greedy.section01.advice.annotation.NormalStudent
수강생의 행동 : AchievementResult com.greedy.section01.advice.annotation.NormalStudent.study(Passion)
행동 요약 : study
수강생의 열정 : 10
============================
===== AfterThrowing Attending =====
열정이 부족합니다! 다시 열정을 가지고 오세요!
===================================
===== After Attending =====
파김치가 된 상태로 또 공부를 하러 집으로 갑니다 .. 🫠
수강생 타입 : class com.greedy.section01.advice.annotation.NormalStudent
수강생의 행동 : AchievementResult com.greedy.section01.advice.annotation.NormalStudent.study(Passion)
행동 요약 : study
수강생의 열정 : 10
============================
Exception in thread "main" java.lang.Exception: 열정이 부족합니다! 다시 열정을 가지고 오세요!
💻 Mini Console
AfterReturningAdvice 발동 시,
========== Normal Student ==========
===== Around Attending =====
오늘도 학원을 가는 날이군🥹 하며 벌떡 일어나 커피를 탑니다.
===== Before Attending =====
오늘도 수혈할 커피☕를 들고 입실! 띢-
수강생 타입 : class com.greedy.section01.advice.annotation.NormalStudent
수강생의 행동 : AchievementResult com.greedy.section01.advice.annotation.NormalStudent.study(Passion)
행동 요약 : study
수강생의 열정 : 10
============================
1교시 수업을 열심히 듣습니다. 오~ 프로그래밍이 뭔지 알 것 같습니다!
이해도와 만족도가 열정에 비례하여 자꾸 올라갑니다.
하지만 신기하게 취업률은 오르지 않습니다. 취업난이 심각한가 봅니다.
2교시 수업을 열심히 듣습니다. 오~ 프로그래밍이 뭔지 알 것 같습니다!
이해도와 만족도가 열정에 비례하여 자꾸 올라갑니다.
하지만 신기하게 취업률은 오르지 않습니다. 취업난이 심각한가 봅니다.
3교시 수업을 열심히 듣습니다. 오~ 프로그래밍이 뭔지 알 것 같습니다!
이해도와 만족도가 열정에 비례하여 자꾸 올라갑니다.
하지만 신기하게 취업률은 오르지 않습니다. 취업난이 심각한가 봅니다.
4교시 수업을 열심히 듣습니다. 오~ 프로그래밍이 뭔지 알 것 같습니다!
이해도와 만족도가 열정에 비례하여 자꾸 올라갑니다.
하지만 신기하게 취업률은 오르지 않습니다. 취업난이 심각한가 봅니다.
밥을 먹습니다. 오늘 저녁에는 뭘 하고 놀아볼까?ㅎㅎㅎ
자바 따윈 잊어버려~~~
5교시 수업을 열심히 듣습니다. 오~ 프로그래밍이 뭔지 알 것 같습니다!
이해도와 만족도가 열정에 비례하여 자꾸 올라갑니다.
하지만 신기하게 취업률은 오르지 않습니다. 취업난이 심각한가 봅니다.
6교시 수업을 열심히 듣습니다. 오~ 프로그래밍이 뭔지 알 것 같습니다!
이해도와 만족도가 열정에 비례하여 자꾸 올라갑니다.
하지만 신기하게 취업률은 오르지 않습니다. 취업난이 심각한가 봅니다.
7교시 수업을 열심히 듣습니다. 오~ 프로그래밍이 뭔지 알 것 같습니다!
이해도와 만족도가 열정에 비례하여 자꾸 올라갑니다.
하지만 신기하게 취업률은 오르지 않습니다. 취업난이 심각한가 봅니다.
8교시 수업을 열심히 듣습니다. 오~ 프로그래밍이 뭔지 알 것 같습니다!
이해도와 만족도가 열정에 비례하여 자꾸 올라갑니다.
하지만 신기하게 취업률은 오르지 않습니다. 취업난이 심각한가 봅니다.
총 공부 소요 시간 : 9(ms)
===================================
===== AfterReturning Attending =====
오늘의 이해도 : 90
오늘의 만족도 : 180
취업률 : 90.0
====================================
===== After Attending =====
파김치가 된 상태로 또 공부를 하러 집으로 갑니다 .. 🫠
수강생 타입 : class com.greedy.section01.advice.annotation.NormalStudent
수강생의 행동 : AchievementResult com.greedy.section01.advice.annotation.NormalStudent.study(Passion)
행동 요약 : study
수강생의 열정 : 10
============================
normalStudent Result : AchievementResult [understandingScore=90, satisfactionScore=180, employmentRate=9.0]
========== Greedy Student ==========
===== Around Attending =====
오늘도 학원을 가는 날이군🥹 하며 벌떡 일어나 커피를 탑니다.
===== Before Attending =====
오늘도 수혈할 커피☕를 들고 입실! 띢-
수강생 타입 : class com.greedy.section01.advice.annotation.GreedyStudent
수강생의 행동 : AchievementResult com.greedy.section01.advice.annotation.GreedyStudent.study(Passion)
행동 요약 : study
수강생의 열정 : 10
============================
1교시 수업을 열심히 듣습니다. 하지만 너무 어렵습니다.
이해도와 만족도가 열정에 비례하여 자꾸 떨어집니다.
하지만 신기하게 취업률은 올라가고 있습니다
2교시 수업을 열심히 듣습니다. 하지만 너무 어렵습니다.
이해도와 만족도가 열정에 비례하여 자꾸 떨어집니다.
하지만 신기하게 취업률은 올라가고 있습니다
3교시 수업을 열심히 듣습니다. 하지만 너무 어렵습니다.
이해도와 만족도가 열정에 비례하여 자꾸 떨어집니다.
하지만 신기하게 취업률은 올라가고 있습니다
4교시 수업을 열심히 듣습니다. 하지만 너무 어렵습니다.
이해도와 만족도가 열정에 비례하여 자꾸 떨어집니다.
하지만 신기하게 취업률은 올라가고 있습니다
잠시 밥을 먹으며 수업 들은 내용으로 토론을 합니다.
밥을 코로 먹는지 입으로 먹는지 모르겠습니다
5교시 수업을 열심히 듣습니다. 하지만 너무 어렵습니다.
이해도와 만족도가 열정에 비례하여 자꾸 떨어집니다.
하지만 신기하게 취업률은 올라가고 있습니다
6교시 수업을 열심히 듣습니다. 하지만 너무 어렵습니다.
이해도와 만족도가 열정에 비례하여 자꾸 떨어집니다.
하지만 신기하게 취업률은 올라가고 있습니다
7교시 수업을 열심히 듣습니다. 하지만 너무 어렵습니다.
이해도와 만족도가 열정에 비례하여 자꾸 떨어집니다.
하지만 신기하게 취업률은 올라가고 있습니다
8교시 수업을 열심히 듣습니다. 하지만 너무 어렵습니다.
이해도와 만족도가 열정에 비례하여 자꾸 떨어집니다.
하지만 신기하게 취업률은 올라가고 있습니다
총 공부 소요 시간 : 3(ms)
===================================
===== AfterReturning Attending =====
오늘의 이해도 : -160
오늘의 만족도 : -160
취업률 : 900.0
====================================
===== After Attending =====
파김치가 된 상태로 또 공부를 하러 집으로 갑니다 .. 🫠
수강생 타입 : class com.greedy.section01.advice.annotation.GreedyStudent
수강생의 행동 : AchievementResult com.greedy.section01.advice.annotation.GreedyStudent.study(Passion)
행동 요약 : study
수강생의 열정 : 10
============================
greedyStudent Result : AchievementResult [understandingScore=-160, satisfactionScore=-160, employmentRate=90.0]