jQuery를 이용한 DOM변경
요소의 내용을 가져오거나 변경할 수 있다. - text(), html()
요소의 속성을 가져오거나 변경할 수 있다. - attr() //attribute -> attr
요소의 스타일 속성을 가져오거나 변경할 수 있다. - css()
요소를 추가 하거나 삭제할 수 있다. - append(), remove()
복습
<a href="http://www.naver.com">네이버</a>
요소,속성,값		      내용   요소

<img src="image/americano.jpg">
요소, 속성, 값
요소의 콘텐츠 가져오기
jQuery에서 특정 요소의 내용(콘텐츠)을 얻으려면 다음과 같은 메서드를 사용한다.
// img같은 태그는 닫히는 태그가 없으므로 내용을 가져올 수 없음.
$("#target").text(); //id가 "target"인 요소의 텍스트를 가져온다.
$("선택자").text() : 가져오기
$("선택자").text("내용") : 내용을 보내기
ex)
<!DOCTYPE html>
<html>
<head>
<meta charset="UTF-8">
<title>Insert title here</title>
<script type="text/javascript" src="https://code.jquery.com/jquery-3.6.3.min.js
"></script>
<script>
	$(document).ready(function(){
		//text()버튼을 클릭하면
		$("#text").on("click", function(){
			// p요소의 내용을 가져와라!
			alert($("#target").text());
		});
		//html()버튼을 클릭하면
		$("#html").click(function(){
			//p요소의 내용을 가져와라!
			alert($("#target").html());
		})
	})
</script>
</head>
<body>
	<p id="target">이것은 <strong>하나의</strong> 단락입니다.</p>
	<button id="text">text()</button>
	<button id="html">html()</button>
</body>
</html>
예제 결과
요소의 콘텐츠 변경하기
$("#target").text("안녕하세요?");
$("선택자").html() : 가져오기
$("선택자").html("내용") : 내용을 보내기
ex)
<!DOCTYPE html>
<html>
<head>
<meta charset="UTF-8">
<title>Insert title here</title>
<script type="text/javascript" src="https://code.jquery.com/jquery-3.6.3.min.js
"></script>
<script type="text/javascript">
	$(document).ready(function(){
		$("#text").on("click", function(){
			$("#target").text("안녕하세요");
		})

		$("#html").click(function(){
			$("#target").html("<b>안녕하세요</b>");
		})
	})
</script>
</head>
<body>
	<p id="target">이것은 <strong>하나의</strong> 단락입니다.</p>
	<button id="text">text()</button>
	<button id="html">html()</button>
</body>
</html>
예제 결과
입력 필드의 값 읽어오기
input 태그에 있는 값을 받아오고 싶을때 사용
// input태그는 닫는 태그가 없어서 val을 사용해서 가지고 값을 와야함
$("#name").val()은 id="name"인  입력 필드 요소의 값을 가져온다.
$("#name").val("홍길동") -> input type id가 name에 홍길동 값을 넣는다.
<!DOCTYPE html>
<html>
<head>
<meta charset="UTF-8">
<title>Insert title here</title>
<script type="text/javascript" src="https://code.jquery.com/jquery-3.6.3.min.js
"></script>
<script type="text/javascript">
$(document).ready(function(){
$("#text").on("click", function(){
$("#target").text("안녕하세요");
})
$("#html").click(function(){
$("#target").html("<b>안녕하세요</b>");
})
//val()버튼을 클릭하면
$("#val").click(function(){
// alert($("#name").val()); 1번 예제
$("#name").val("홍길동") //2번 예제
})
})
</script>
</head>
<body>
<p id="target">이것은 <strong>하나의</strong> 단락입니다.</p>
이름 <input type="text" id="name">
<button id="text">text()</button>
<button id="html">html()</button>
<button id="val">val</button>
</body>
</html>
1번 예제
2번 예제
요소의 속성 가져오기
attr() 메서드는 선택된 요소의 속성 값을 가져온다. attr() 인수로 값을 알고 싶은 속성 이름을 적어준다.
$(선택자).attr(attributeName);
값을 알고싶은 속성의 이름
$("선택자").attr(속성명) : 속성명의 값 가져오기
$("선택자").attr(속성명, 속성값) : 속성명의 값을 보내기

예를들어 $("#myImage").attr("src")라고 하면 id="myImage" 인 요소의 "src" 속성값을 가져온다.
$("#target").attr("href")은 id="target" 인 요소의 "href" 속성을 가져온다.
ex)
<!DOCTYPE html>
<html>
<head>
<meta charset="UTF-8">
<title>Insert title here</title>
<script type="text/javascript" src="https://code.jquery.com/jquery-3.6.3.min.js"></script>
<script>
	$(document).ready(function(){
		$("button").click(function(){
        	// id가 dog인 img 요소의 src속성의 값을 가져와라
			alert($("#dog").attr("src"));	// 1번 예제
            // id가 dog인 img 요소의 id속성의 값을 가져와라
            alert($("#dog").attr("id"));	// 2번 예제
		});
        // 이미지 변경 버튼을 클릭하면,
			$("#change").click(function(){
				// img 요소로 src속성의 값 보내라
				$("#dog").attr("src","image/다람쥐.jpg")	// 3번 예제
			});
	});
</script>
</head>
<body>
	<img src="image/dog.jpg" id="dog"><br>
	<button> attr() </button>
    <button id="change"> 이미지 변경 </button>
</body>
</html>
1번 예제 결과 (id가 dog인 src의 값을 받아와 알려줌)
2번 예제 결과 (id가 dog인 id의 값을 받아와 알려줌)
위 내용을 총 정리하면
$("선택자").text() : 가져오기
$("선택자").text("내용") : 내용을 보내기

$("선택자").html() : 가져오기
$("선택자").html("내용") : 내용을 보내기

$("선택자").val() : 가져오기
$("선택자").val("내용") : 내용을 보내기

$("선택자").attr(속성명) : 속성명의 값 가져오기
$("선택자").attr(속성명, 속성값) : 속성명의 값을 보내기
DOM에 요소 추가하기
jQuery를 사용하면 DOM트리의 기존 요소 아래에 새로운 콘텐츠를 추가할 수 있다.
즉 HTML에 새로운 콘텐츠를 추가할 수 있는 것이다. 여기서 가장 대표적인 메서드가 append()
새로운 콘텐츠를 추가할 때 사용되는 4개의 메서드
속성
$("#target").append("<p>Test</p>"); id가 target인 요소를 <p>요소를 id="target"인 끝에 삽입한다.- append() : 선택된 요소의 끝(end)에 새로운 콘텐츠를 추가한다.
- prepend() : 선택된 요소의 처음(beginning)에 새로운 콘텐츠를 추가한다.
- after() : 선택된 요소의 뒤에 콘텐츠를 삽입한다.
- before() : 선택된 요소의 앞에 콘텐츠를 삽입한다.
append(), prepend()
append() : 선택된 요소의 끝(end)에 새로운 콘텐츠를 추가한다.
prepend() : 선택된 요소의 처음(beginning)에 새로운 콘텐츠를 추가한다.
ex)
<!DOCTYPE html>
<html>
<head>
<meta charset="UTF-8">
<title>Insert title here</title>
<script type="text/javascript" src="https://code.jquery.com/jquery-3.6.3.min.js"></script>
<script type="text/javascript">
	$(document).ready(function(){
		// append() 버튼을 클릭하면
		$("#button1").click(function(){
			$("p").append("<b style='color:red'>Hello!</b>");
		})
		// 글자색이 bold 처리된 빨간색이며 hello 라는 문자열을 뒤에 추가

		$("#button2").click(function(){
			$("p").prepend("<b style='color:red'>Hello! </b>");
		})
	})
</script>
</head>
<body>
	<p>I would like to say : </p>
	<button id="button1">append()</button>
	<button id="button2">prepend()</button>
</body>
</html>
예제 결과
콘텐츠 삭제하기
jQuery를 사용하면 특정 요소를 DOM에서 삭제할 수 있다. 요소를 삭제하려면 다음과 같은 2개의 메서드를 사용한다.
- remove() : 선택된 요소와 그 자식 요소를 삭제한다. (부모와 자식요소 둘다 삭제)
- empty() : 선택된 요소의 자식 요소를 삭제한다.
ex)
<!DOCTYPE html>
<html>
<head>
<meta charset="UTF-8">
<title>Insert title here</title>
<style type="text/css">
p{
	background-color:yellow
}
.container{
	height:80px;width:200px;border:1px dotted red;
}
</style>
<script type="text/javascript" src="https://code.jquery.com/jquery-3.6.3.min.js
"></script>
<script>
	$(document).ready(function(){
		// remove() 버튼을 클릭하면,
		$("#button1").click(function(){
			// div요소를 제거
			$(".container").remove();
		});
		// empty() 버튼을 클릭하면
		$("#button2").click(function(){
			// div요소를 제거
			$(".container").empty();
		});
	});
</script>
</head>
<body>
	<button id="button1">remove()</button>
	<button id="button2">empty()</button><br>
	<div class="container">
		<p class="hello">hello</p>
		<p class="goodbye">Goodbye</p>
	</div>
</body>
</html>

첫 화면의 개발자 도구 상태
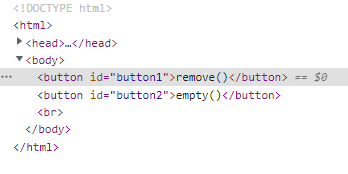
remove()를 눌렀더니 div까지 사라짐
$("#button1").click(function(){
			$(".container").remove();
});
<div class="container">
		<p class="hello">hello</p>
		<p class="goodbye">Goodbye</p>
</div>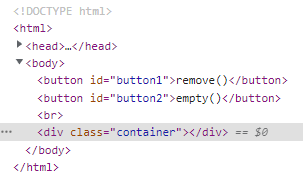
empty()를 눌렀더니 p태그만 사라짐
$("#button2").click(function(){
		$(".container").empty();
});
<div class="container">
		<p class="hello">hello</p>
		<p class="goodbye">Goodbye</p>
</div>- remove() : 선택된 요소와 그 자식 요소를 삭제한다. (부모와 자식요소 둘다 삭제)
- empty() : 선택된 요소의 자식 요소를 삭제한다.
jQuery를 이용한 css 조작
- css() : 선택된 요소의 스타일 속성을 설정하거나 반환한다.
- addClass() : 선택된 요소에 하나 이상의 클래스를 추가한다.
- removeClass() : 선택된 요소에 하나 이상의 클래스를 삭제한다.
요소의 스타일 속성을 가져오거나 변경할 수 있다.
$("선택자").css(속성) : 속성명의 값을 가져오기
$("#target").css("color");

$("선택자").css(속성,속성값) : 속성명의 값을 보내기(변경)
$("#target").css("color", "blue");
ex)
<!DOCTYPE html>
<html>
<head>
<meta charset="UTF-8">
<title>Insert title here</title>
<style type="text/css">
div{
	width:80px;
	height:80px;
	background-color: blue;
}
</style>
<script type="text/javascript" src="https://code.jquery.com/jquery-3.6.3.min.js"></script>
<script>
	$(document).ready(function(){
		// css(element)버튼을 클릭하면,
		$("#button1").click(function(){
			// div요소에 현재 있는 css값을 가져와라
			var color = $("#div1").css("background-color");
			// 가져온 값을 n요소에서.출력
			$("#result").text("background-color : " + color)
		})
		// css(element.style)버튼을 클릭하면,
		$("#button2").click(function(){
			// 현재 div요소에 적용되어 있는 css를 변경(background-color:blue -> background-color:red)
			$("#div1").css("background-color","red");
		});
	})
</script>
</head>
<body>
	<div id="div1"></div>
	<button id="button1">css(element)</button>
	<button id="button2">css(element.style)</button>
	<p id="result">여기에 결과가 표시됩니다.</p>
</body>
</html>
예제 결과
addClass(), removeClass()
- addClass() : 선택된 요소에 하나 이상의 클래스를 추가한다.
- removeClass() : 선택된 요소에 하나 이상의 클래스를 삭제한다.
ex)
<!DOCTYPE html>
<html>
<head>
<meta charset="UTF-8">
<title>Insert title here</title>
<script type="text/javascript" src="https://code.jquery.com/jquery-3.6.3.min.js"></script>
<script type="text/javascript">
	$(document).ready(function(){
		$("button").click(function(){
			$("#div1").addClass("warning");
			// 버튼을 클릭하면 클래스가 추가됨 -> 'css'에 선언해둔걸 warning 클래스에 입혀줌
		});
	});
</script>
<style type="text/css">
	.warning{
		border:1px solid black;
		background-color: yellow;
	}
</style>
</head>
<body>
	<div id="div1">
	<p>예제 단락입니다.</p>
	</div>
	<br>
	<button>addClass</button>
</body>
</html>
버튼을 클릭하면 클래스가 추가되면서 기존 선언해뒀던 warning 클래스에 css를 입혀줌
요소의 크기 알기
width() - 요소의 가로 크기를 반환한다.
height() - 요소의 가로 크기를 반환한다.
$("button").click(function(){
	alert($("#div1").width());	// 가로 크기
	alert($("#div1").width());	// 세로 크기
};

$(window).width();		// 브라우저 뷰포트의 폭
$(document).width();	// HTML 문서의 폭
<!DOCTYPE html>
<html>
<head>
<meta charset="UTF-8">
<title>Insert title here</title>
<script type="text/javascript" src="https://code.jquery.com/jquery-3.6.3.min.js"></script>
<script>
	$(document).ready(function(){
		var modWidth = 50;
		$("div").click(function(){
         	$(div).width(modWidth).addClass("next");
            //$("div")로 작성하면 전체 다 줄어든다. (예제 1)
 			$(this).width(modWidth).addClass("next");
 			// this 선택자를 사용하면 사용자가 선택한 div를 줄여준다.
            (그 위의 값을 따름, 현재는 div ) (예제 2)
			modWidth -= 8;	//modWidth = modWidth - 8;
		});
	})
</script>
	<style type="text/css">
		div{
			width:70px;
			height:50px;
 			float: left;
/*  		float: left -> 가로로 배치시키기 위해서 사용 */
 			margin: 5px;
/*  		margin: 5px; -> 바깥쪽 여백 5px  */
			background: red;
		}
		.next{ background : blue; }
	</style>
</head>
<body>
	<div>1</div>
	<div>2</div>
	<div>3</div>
	<div>4</div>
	<div>5</div>
</body>
</html>
예제1 ) $("div")로 작성한 예제 전체 다 줄어든다.
예제2) this 선택자를 사용하면 사용자가 선택한 div를 줄여준다.
(그 위의 값을 따름, 현재는 div)
https://api.jquery.com/width/ 예제
jQuery 참고 문헌
jQuery의 메서드에 대한 참고 문헌은 https://api.jquery.com/ 을 참고할 것.
끝