MVVM 적용해보기
이전에 RxSwift를 이용하여 짰던 코드를 MVVM 패턴을 적용하여 바꿔보았다.
//View
import UIKit
import RxSwift
import RxCocoa

class ViewController: UIViewController {

    @IBOutlet weak var idField: UITextField!
    @IBOutlet weak var pwField: UITextField!
    @IBOutlet weak var loginButton: UIButton!
    @IBOutlet weak var idValidView: UIImageView!
    @IBOutlet weak var pwValidView: UIImageView!

    let viewModel = ViewModel()
    var disposeBag = DisposeBag()

    override func viewDidLoad() {
        super.viewDidLoad()
        bindUI()
    }

    private func bindUI() {
        idField.rx.text.orEmpty
            .bind(to: viewModel.emailText)
            .disposed(by: disposeBag)

        pwField.rx.text.orEmpty
            .bind(to: viewModel.pwText)
            .disposed(by: disposeBag)

        viewModel.isEmailValid
            .bind(to: idValidView.rx.isHidden)
            .disposed(by: disposeBag)

        viewModel.isPasswordValid
            .bind(to: pwValidView.rx.isHidden)
            .disposed(by: disposeBag)

        Observable.combineLatest(viewModel.isPasswordValid, viewModel.isPasswordValid){$0 && $1}
            .bind(to: loginButton.rx.isEnabled)
            .disposed(by: disposeBag)
    }
}

//ViewModel
import RxSwift

class ViewModel {

    //Input
    let emailText = BehaviorSubject(value: "")
    let pwText = BehaviorSubject(value: "")

    //Output
    let isEmailValid = BehaviorSubject(value: false)
    let isPasswordValid = BehaviorSubject(value: false)

    init(){
        _ = emailText.distinctUntilChanged()
            .map(checkEmailVaild(_:))
            .bind(to: isEmailValid)

        _ = pwText.distinctUntilChanged()
            .map(checkPasswordVaild(_:))
            .bind(to: isPasswordValid)
    }

    //logic
    private func checkEmailVaild(_ email: String) -> Bool{
        return email.contains("@") && email.contains(".")

    }
    private func checkPasswordVaild(_ password: String) -> Bool{
        return password.count > 5
    }

}
추가적으로 앞으로 RxSwift를 이용하여 MVVM패턴을 짜려면 스토리보드를 이용하는것보다 코드를 이용하여 뷰를 짜는 것이 더 낫다고 생각했다. 따라서 코드로 UIView를 잘 짤 수 있도록 SnapKit, Then 라이브러리를 추가로 공부하였다.
아래에 사용법 위주로 코드를 작성해보았다.
Then
Then은 UIView를 초기화할때 사용한다. 클로저를 이용하여 UIView를 초기화해줄 수도 있지만 조금 더 간결하게 짤 수 있기에 많이 사용되는 것 같다.
음.. Then 다 좋은데 클로저를 사용한 것과 달리 UI 생성시점에 불리는게 아닌거같았다. 그래서 컬렉션 뷰를 생성할 때 UICollectionView: must be initialized with a non-nil layout parameter 이 에러때문에 꽤나 고생했다..
import UIKit
class SeparateViewController: UIViewController {
// MARK: - UIComponenets
let navigationView = UIView().then {
$0.backgroundColor = .white
}
let navigationLabel = UILabel().then {
$0.text = "분리수거"
$0.font = UIFont.nanumSquareFont(type: .extraBold, size: 20)
$0.textColor = UIColor.header
}
let graphButton = UIButton().then {
$0.setImage(UIImage(named: "btnGraph"), for: .normal)
}
let navigationDividerView = UIView().then {
$0.backgroundColor = .paper1
}
let explanationView = UIView().then {
$0.backgroundColor = .paper1
$0.cornerRound(radius: 10)
$0.setShadow(radius: 13, offset: CGSize(width: 1, height: 4) , opacity: 0.1, color: .black)
}
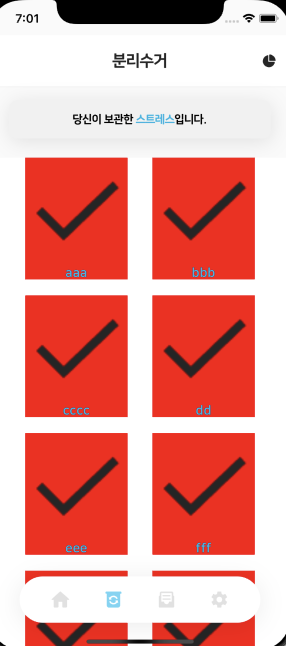
let explanationLabel = UILabel().then {
$0.text = "당신이 보관한 스트레스입니다."
$0.font = UIFont.nanumSquareFont(type: .extraBold, size: 14)
let attributedStr = NSMutableAttributedString(string: "당신이 보관한 스트레스입니다.")
attributedStr.addAttribute(.foregroundColor, value: UIColor.blue3, range: ("당신이 보관한 스트레스입니다." as NSString).range(of: "스트레스"))
$0.attributedText = attributedStr
}
let separateCollectionView = UICollectionView(frame: .zero, collectionViewLayout: UICollectionViewFlowLayout()).then{
let layout = UICollectionViewFlowLayout()
layout.scrollDirection = .vertical
$0.backgroundColor = .white
$0.frame = .zero
$0.collectionViewLayout = layout
$0.showsVerticalScrollIndicator = false
}
// MARK: - LifeCycle
override func viewDidLoad() {
super.viewDidLoad()
setView()
setCollectionView()
setConstraint()
}
// MARK: - Methods
func setView() {
view.backgroundColor = .background
}
func setCollectionView() {
separateCollectionView.delegate = self
separateCollectionView.dataSource = self
separateCollectionView.register(SeparateCollectionViewCell.self, forCellWithReuseIdentifier: SeparateCollectionViewCell.identifier)
}
}SnapKit
Snapkit을 이용하여 레이아웃을 잡았다. 아직 익숙하지 않아서 뷰컨트롤러에 뷰와 관련 constraints 코드를이 많아지니까 더 복잡해보였다. 그래도 이것도 익숙해져야지.. 아래 관련 코드이다.
   func setConstraint(){
        view.addSubviews([navigationView, navigationDividerView, explanationView, separateCollectionView])
        navigationView.addSubviews([navigationLabel, graphButton])

        let screenSize = UIScreen.main.bounds

        navigationLabel.snp.makeConstraints { make in
            make.center.equalToSuperview()
        }

        navigationView.snp.makeConstraints { make in
            make.top.equalTo(view.safeAreaLayoutGuide.snp.top)
            make.width.equalToSuperview()
            make.height.equalTo(64 * screenSize.width / 375)
        }

        graphButton.snp.makeConstraints { make in
            make.trailing.equalToSuperview().offset(-8 * screenSize.width / 375)
            make.width.height.equalTo(36 * screenSize.width / 375)
            make.centerY.equalToSuperview()
        }

        navigationDividerView.snp.makeConstraints { make in
            make.top.equalTo(navigationView.snp.bottom)
            make.leading.trailing.equalToSuperview()
            make.height.equalTo(1)
        }

        explanationView.addSubviews([explanationLabel])

        explanationView.snp.makeConstraints { make in
            make.top.equalTo(navigationDividerView.snp.bottom).offset(16 * screenSize.width / 375)
            make.leading.trailing.equalToSuperview().inset(24 * screenSize.width / 375)
            make.height.equalTo(48 * screenSize.width / 375)
        }

        explanationLabel.snp.makeConstraints { make in
            make.center.equalToSuperview()
        }

        separateCollectionView.snp.makeConstraints { make in
            make.leading.trailing.equalToSuperview()
            make.top.equalTo(explanationView.snp.bottom).offset(24 * screenSize.width / 375)
            make.bottom.equalToSuperview()
        }
    }
이밖에 collectionview의 UICollectionViewDelegateFlowLayout과 UICollectionViewDataSource를 extension하여 구현한 뷰는 아래와 같다.
하지만 View에 Logic에 Extension에 Layout에...
언뜻봐도 ViewController가 매우 무겁다.
CollectionView, TableView도 RxSwift를 이용하여 MVVM패턴으로 짜도록 공부해보자..!