1. 기사 웹스크래핑(크롤링)하기
제목 스크래핑articles = soup.select("#main_pack > div.news.mynews.section._prs_nws > ul > li")
for article in articles:
a_tag = article.select_one("dl > dt > a")
print(a_tag.text)url = a_tag["href"]
title = a_tag.text
comp = article.select_one("dd.txt_inline > span._sp_each_source").text.split(" ")[0].replace('언론사','')
print(title, url, comp)from bs4 import BeautifulSoup
from selenium import webdriver
from openpyxl import Workbook
driver = webdriver.Chrome('chromedriver')
url = "https://search.naver.com/search.naver?where=news&sm=tab_jum&query=nct+127"
driver.get(url)
req = driver.page_source
soup = BeautifulSoup(req, 'html.parser')
articles = soup.select('#main_pack > section > div > div.group_news > ul> li')
for article in articles:
a_tag = article.select_one('div.news_wrap.api_ani_send > div > a')
title = a_tag.text
url = a_tag['href']
comp = article.select_one('div.news_wrap.api_ani_send > div > div.news_info > div.info_group > a.info.press').text.split(' ')[0].replace('언론사', '')
img_src = article.select_one('div.news_wrap.api_ani_send > a > img')
img = img_src['src']
print(title, url, comp, img)
driver.quit()
- 결과

2. 엑셀 파일로 저장하기
openpyxl 패키지- 파이썬으로 엑셀 파일을 읽고 쓸 때 openpyxl 이용
from openpyxl import Workbook

wb = Workbook()
ws1 = wb.active
ws1.title = "articles"
ws1.append(["제목", "링크", "신문사"])

wb.save(filename='articles.xlsx')- 코드
from bs4 import BeautifulSoup
from selenium import webdriver
from openpyxl import Workbook

driver = webdriver.Chrome('chromedriver')

url = "https://search.naver.com/search.naver?where=news&sm=tab_jum&query=nct+127"

driver.get(url)
req = driver.page_source
soup = BeautifulSoup(req, 'html.parser')

wb = Workbook()
ws1 = wb.active
ws1.title = "articles"
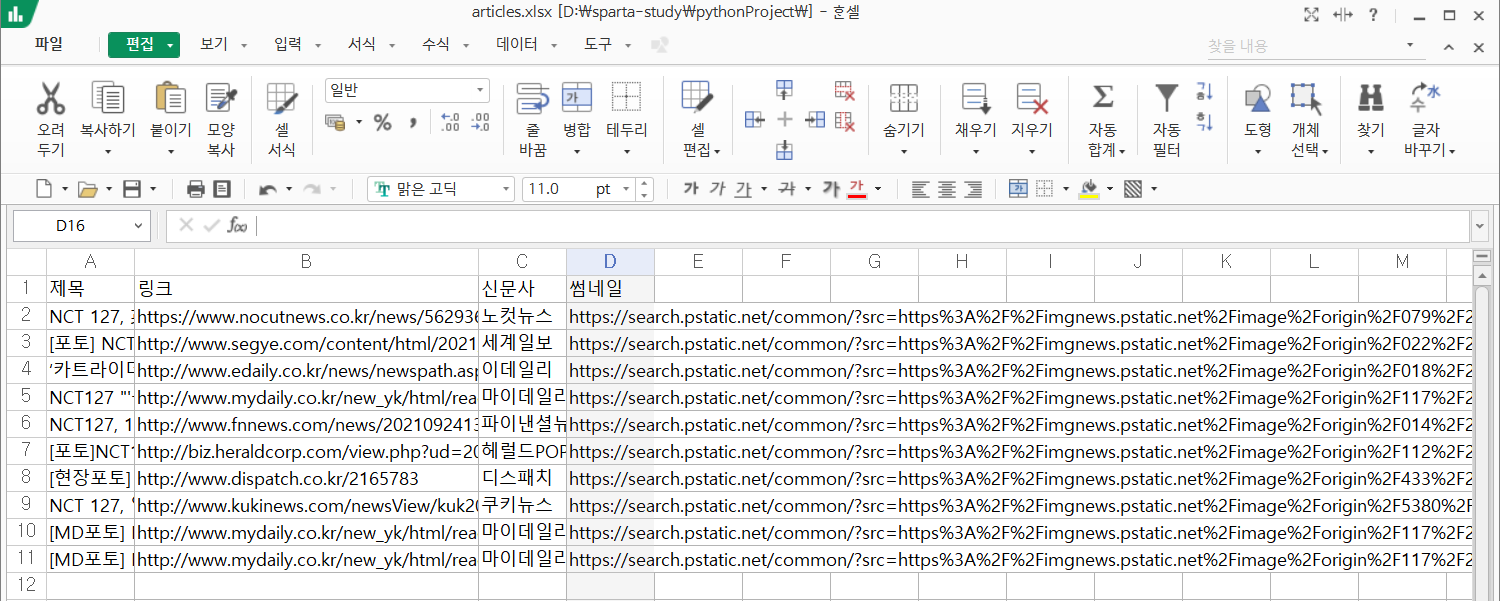
ws1.append(["제목", "링크", "신문사", "썸네일"])

articles = soup.select('#main_pack > section > div > div.group_news > ul> li')

for article in articles:

   a_tag = article.select_one('div.news_wrap.api_ani_send > div > a')
   title = a_tag.text
   url = a_tag['href']
   comp = article.select_one('div.news_wrap.api_ani_send > div > div.news_info > div.info_group > a.info.press').text.split(' ')[0].replace('언론사', '')
   img_src = article.select_one('div.news_wrap.api_ani_send > a > img')
   img = img_src['src']
   ws1.append([title, url, comp, img])
   # print(thum)

driver.quit()
wb.save(filename='articles.xlsx')- 결과

3. 이메일 보내기
SMTP 이용- 기본 내장 패키지 smtplib을 이용하여 메일 서버 접속
- 지메일 기준 코드 (보내는 사람 이메일 꼭 지메일 계정(@gmail.com)사용)
import smtplib
from email.mime.multipart import MIMEMultipart
from email.mime.base import MIMEBase
from email.mime.text import MIMEText
from email import encoders


# 보내는 사람 정보
me = "보내는사람@gmail.com"
my_password = "비밀번호"

# 로그인하기
s = smtplib.SMTP_SSL('smtp.gmail.com')
s.login(me, my_password)

# 받는 사람 정보
you = "받는사람@아무_도메인"

# 메일 기본 정보 설정
msg = MIMEMultipart('alternative')
msg['Subject'] = "제목"
msg['From'] = me
msg['To'] = you

# 메일 내용 쓰기
content = "메일 내용"
part2 = MIMEText(content, 'plain')
msg.attach(part2)

# 메일 보내고 서버 끄기
s.sendmail(me, you, msg.as_string())
s.quit()-
이메일 주소 / 비밀번호 틀린 경우
smtplib.SMTPAuthenticationError: (535, b'5.7.8 Username and Password not accepted. Learn more at\n5.7.8 https://support.google.com/mail/?p=BadCredentials h9sm3842285pfc.28 - gsmtp') -
2-Step-Verification이 켜져있는 경우:
2-Step-Verification (2단계 인증) 설정이 되어있을 때 위와 같은 메시지가 종종 나타납니다. 에러메시지의 URL을 클릭하여 단계를 따라가거나 아래 도움말을 보시고 2단계 인증을 풀어주세요.smtplib.SMTPAuthenticationError: (534, b'5.7.9 Application-specific password required. Learn more at\n5.7.9 https://support.google.com/mail/?p=InvalidSecondFactor n7sm4135021pfq.114 - gsmtp') -
'보안 수준이 낮은 앱의 액세스'가 사용 중지된 경우:
이메일 주소 / 비밀번호를 틀렸을 때와 같은 에러 메시지가 나오는데, 링크를 따라가보시면 다른 이메일 플랫폼을 통해 Gmail에 로그인할 수 없을 때의 해결법이 나옵니다. 여기서 '보안 수준이 낮은 앱이 계정에 액세스하도록 허용'을 따라가서 풀어주시면 됩니다.smtplib.SMTPAuthenticationError: (535, b'5.7.8 Username and Password not accepted. Learn more at\n5.7.8 https://support.google.com/mail/?p=BadCredentials r3sm4185855pfh.88 - gsmtp')
import smtplib
from email.mime.multipart import MIMEMultipart
from email.mime.base import MIMEBase
from email.mime.text import MIMEText
from email import encoders


# 보내는 사람 정보
me = "보내는사람@gmail.com"
my_password = "비밀번호"

# 로그인하기
s = smtplib.SMTP_SSL('smtp.gmail.com')
s.login(me, my_password)

# 받는 사람 정보
email_list = ["이메일1", "이메일2"]

for you in email_list:
   # 메일 기본 정보 설정
   msg = MIMEMultipart('alternative')
   msg['Subject'] = "제목"
   msg['From'] = me
   msg['To'] = you

   # 메일 내용 쓰기
   content = "메일 내용"
   part2 = MIMEText(content, 'plain')
   msg.attach(part2)

		part = MIMEBase('application', "octet-stream")
		with open("articles.xlsx", 'rb') as file:
		    part.set_payload(file.read())
		encoders.encode_base64(part)
		part.add_header('Content-Disposition', "attachment", filename="추석기사.xlsx")
		msg.attach(part)

   # 메일 보내기
   s.sendmail(me, you, msg.as_string())

# 다 끝나고 닫기
s.quit()