
강의를 시작하며
안녕하세요, 단테입니다.
next.js 13 master course에 오신 여러분 환영합니다.
오늘은 아래와 같은 내용으로 강의를 진행합니다.
많은 것을 얻어가시기 바랍니다.

선언적 Loading UI
리엑트에서 Loading state를 표현하는 방법은 대표적으로 로딩 여부를 판단할 수 있는 상태값을 이용하여 conditional rendering을 하는 것과
비동기 데이터 패칭 로직을 사용하는 컴포넌트를 React.Suspense로 감싸 fallback UI를 Suspense의 props로 전달하는 두가지 방법이 있습니다.
conditional rendering을 사용하는 예제코드
import React, { useState, useEffect } from 'react';

function App() {
  const [loading, setLoading] = useState(true);

  useEffect(() => {
    // Simulating an asynchronous operation
    setTimeout(() => {
      setLoading(false);
    }, 2000);
  }, []);

  return (
    <div>
      {loading ? (
        // Loading UI
        <div>Loading...</div>
      ) : (
        // Content UI
        <div>Welcome to the App!</div>
      )}
    </div>
  );
}

export default App;React.Suspense를 사용하는 예제코드
import React, { Suspense } from 'react';

const LazyComponent = React.lazy(() => import('./LazyComponent'));

function App() {
  return (
    <div>
      <h1>Welcome to the App!</h1>
      <Suspense fallback={<div>Loading...</div>}>
        <LazyComponent />
      </Suspense>
    </div>
  );
}

export default App;
Instance loading state
Next.js13 app router의 로딩 UI는 조금 특별합니다. 특정 컴포넌트 내부에 conditional rendering이나 React.Suspense로 코드의 일부분을 선언적으로 작성하는 것이 아닌
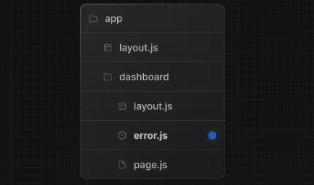
특정 세그먼트에서 로딩 UI를 담당할 파일을 생성합니다.
special files라는 말들을 제가 이전 강의들에서 몇번 언급했었는데요, 이 Loading UI를 담당하는 파일이 바로 special files에 포함됩니다. 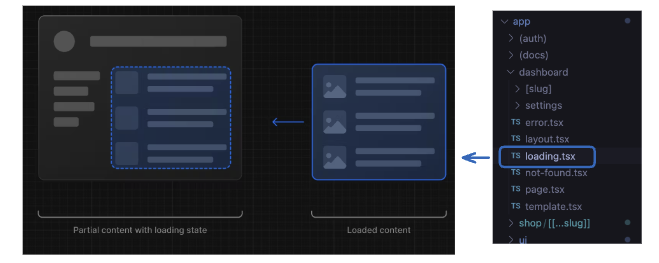
loading.tsx
loading UI 표현을 쉬워지게 한 loading.js
아래코드는 next.js 12의 page directory 기반에서 작성한 post 페이지입니다.
이 포스트 페이지는 페이지를 렌더링 하기 전에 api를 호출합니다.
import { InferGetServerSidePropsType } from "next"
import { getPosts } from "../lib/get-posts";
export default function Posts({
posts,
}: InferGetServerSidePropsType<typeof getServerSideProps>) {
return (
<div>
<p>Posts</p>
<ul>
{posts.map((post, id) => (
<li key={id}>{post}</li>
))}
</ul>
</div>
)
}
export async function getServerSideProps() {
const posts = await getPosts();
return { props: { posts } };
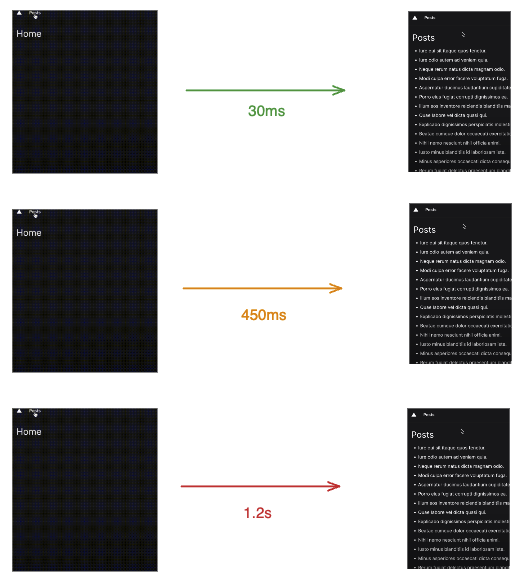
}위 코드를 실제로 렌더링하면 아래와 같은 페이지가 나오게 됩니다. 이 예제 영상과 코드는 vercel에서 제작한 Loading UI with Next.js 13 and React Suspense 영상에서 가져왔습니다.
로고를 누르면 홈으로, Posts를 누르면 포스트 페이지로 이동합니다. Next.js를 기존에 사용해보신 분들이면 미묘하게 클라이언트사이드 렌더링만 사용하는 앱보다 앱이 동작하는게 미묘하게 느렸던 경험이 있으실 지도 모르겠습니다.
Posts를 눌러 네비게이션을 했을 때 api response를 받을때까지 페이지 네비게이션이 되지 않는 모습
이 경우 유저가 느끼는 페이지 전환 경험이 api response가 내려오는 시간에 따라 천차만별로 변경되게됩니다. 최악의 경우 앱이 멈춘 것 같은 착각을 줄 수 도 있지요.
next.js13 에서는 유저가 기다리는 동안 앱이 동작한다는 느낌을 받을 수 있도록 loading.js를 사용해 로딩 UI를 표현할 수 있습니다.
Posts를 눌렀을 때 loading 글자를 보여주는 모습
아래처럼 스켈레톤 UI를 보여줄 수도 있습니다.
스켈레톤 UI를 통해 로딩 인디케이트를 보여주는 모습
loading.js 는 loading template이라고도 부릅니다.
이러한 템플릿 기반의 로딩 인디케이터가 좋은 점은 loading.js에서 작성한 템플릿은 실제 렌더링 될 때 서버 컴포넌트의 Suspense 내부에서 실행되는데
내부적으로 스트리밍이 적용되어 서버사이드 렌더링 시에도 로딩 템플릿이 사용자에게 노출될 수 있다는 것입니다.
URL을 통한 hard 네비게이션 시에도 로딩 UI가 표기되는 모습
이제 아래에서 예제 코드와 함께 실제로 로딩 템플릿 렌더링을 해보겠습니다.
예제 실습
post.tsx를 app 디렉토리 하위에 만듭니다.
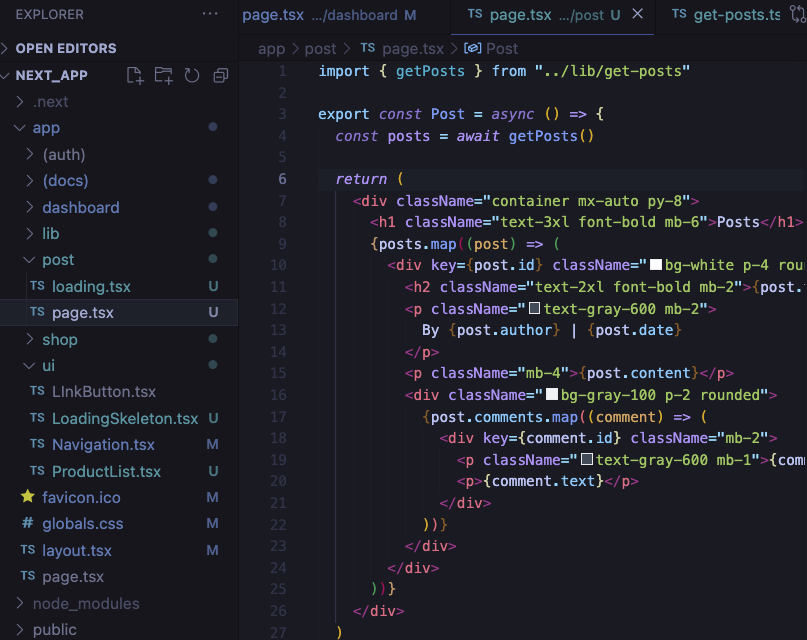
- app/post/page.tsx
import { getPosts } from "../lib/get-posts"

export const Post = async () => {
  const posts = await getPosts()

  return (
    <div className="container mx-auto py-8">
      <h1 className="text-3xl font-bold mb-6">Posts</h1>
      {posts.map((post) => (
        <div key={post.id} className="bg-white p-4 rounded shadow mb-4">
          <h2 className="text-2xl font-bold mb-2">{post.title}</h2>
          <p className="text-gray-600 mb-2">
            By {post.author} | {post.date}
          </p>
          <p className="mb-4">{post.content}</p>
          <div className="bg-gray-100 p-2 rounded">
            {post.comments.map((comment) => (
              <div key={comment.id} className="mb-2">
                <p className="text-gray-600 mb-1">{comment.author}</p>
                <p>{comment.text}</p>
              </div>
            ))}
          </div>
        </div>
      ))}
    </div>
  )
}

export default Post
실습을 위해 Post 페이지 내부에서 더미 데이터를 반환하는 getPosts를 생성해야 합니다.
- app/lib/get-posts.tsx
type Post = {
  id: number
  title: string
  content: string
  author: string
  date: string
  comments: Array<{ id: number; text: string; author: string }>
}

export const getPosts = async (): Promise<Post[]> => {
  return new Promise((resolve) => {
    setTimeout(() => {
      resolve([
        {
          id: 1,
          title: "First Post",
          content: "This is the first post.",
          author: "John Doe",
          date: "May 1, 2023",
          comments: [
            { id: 1, text: "Great post!", author: "Jane Smith" },
            { id: 2, text: "I totally agree.", author: "Mike Johnson" },
          ],
        },
        {
          id: 2,
          title: "Second Post",
          content: "This is the second post.",
          author: "Jane Smith",
          date: "May 5, 2023",
          comments: [
            { id: 1, text: "Thanks for sharing!", author: "John Doe" },
            { id: 2, text: "Looking forward to more.", author: "Mike Johnson" },
          ],
        },
        {
          id: 3,
          title: "Third Post",
          content: "This is the third post.",
          author: "Mike Johnson",
          date: "May 10, 2023",
          comments: [
            { id: 1, text: "Amazing content!", author: "Jane Smith" },
            { id: 2, text: "Keep up the good work.", author: "John Doe" },
          ],
        },
        // Add more posts as needed
      ])
    }, 500)
  })
}
그리고 내부에 loading.tsx도 생성합니다.
- app/post/loading.tsx
import LoadingSkeleton from "../ui/LoadingSkeleton"

export default function loading() {
  return <LoadingSkeleton />
}
url로 접근했을 때의 모습
Link태그를 이용한 페이지 네비게이션시
에러 UI

주니어 개발자와 중간레벨 개발자의 차이를 가르는 데 가장 두드러지는 포인트는 에러 핸들링을 적절하게 할 수 있는지에 대한 여부입니다.
렌더링이 어떻게 이뤄지는지에 대해서 알아야 하고 에러 UI를 위한 컴포넌트 작업이 적재적소 위치에서 수행되어야 하기 때문입니다.
loading template이 loading.js에 선언된 컴포넌트를 Suspense에 자동으로 래핑해준다면,
error template은 error.js에 선언된 컴포넌트를 React Error Boundary에 자동으로 래핑해줍니다.
먼저 error ui 형태를 잡아볼까요?
error.tsx는 서버 컴포넌트일까 클라이언트 컴포넌트일까?
앞선 loading template은 서버 컴포넌트로 작성했었습니다. error template은 어떨까요?
이를 알아보기 위해 다음과 같이 서버 컴포넌트 형태로 먼저 작성해보겠습니다.
- app/post/error.tsx
// - app/post/error.tsx
type ErrorUIProps = {
  error: unknown
  reset: () => void
}

export default function ErrorUI({ error, reset }: ErrorUIProps) {
  console.log({ error, reset })

  return (
    <div className="flex flex-col items-center justify-center h-screen">
      <h1 className="text-4xl font-bold mb-4">Oops! Something went wrong.</h1>
      <p className="text-gray-600 text-lg mb-8">
        We apologize for the inconvenience. Please try again later.
      </p>
      <button
        className="px-4 py-2 bg-blue-500 text-white rounded hover:bg-blue-600"
        onClick={reset}
      >
        Retry
      </button>
    </div>
  )
}
정상적으로 코드가 렌더링된다면 tailwind는 아래와 같은 UI를 보여주어야 합니다.

하지만 아래와 같이 에러가 발생하는데요,
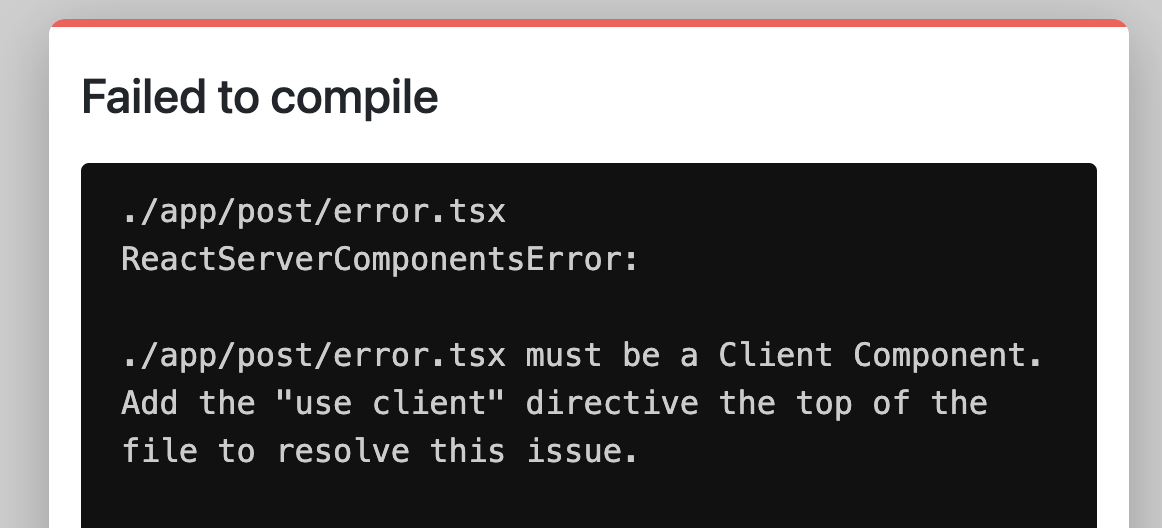
이를 통해 error.tsx는 클라이언트 컴포넌트가 되어야 함을 알 수 있습니다.
왜 클라이언트 컴포넌트가 되어야 할까? 좀 더 나아가 봅시다.
error template은 기본적으로 UI 표기와 함께 앱을 새로고침하지 않아도 복구 가능한 기능을 제공해야 합니다. 여의치 않을 경우는 페이지 전체를 새로고침해도 되지만 트레이드 오프로 사용자는 전체 페이지를 렌더링해야 합니다.

에러 발생 직후 앱의 복구는 특별한 제약사항이 없는한 유저의 버튼 클릭과 같은 인터렉션이 역할을 담당합니다.
하지만 서버 컴포넌트에서는 유저 인터렉션을 담당하는 이벤트 핸들러 코드를 주입할 수 없습니다.

만약 post/page.tsx에서 각 리스트에 클릭 핸들러를 제공한다면 아래와 같은 에러가 발생합니다.
주석 처리된 부분을 지우면 에러가 발생합니다.
{posts.map((post) => (
        <div key={post.id} className="bg-white p-4 rounded shadow mb-4">
          <h2 className="text-2xl font-bold mb-2">{post.title}</h2>
          <p className="text-gray-600 mb-2">
            By {post.author} | {post.date}
          </p>
          <p className="mb-4">{post.content}</p>
          <div className="bg-gray-100 p-2 rounded">
            {post.comments.map((comment, idx) => (
              <div
                key={comment.id}
                className="mb-2"
                // onClick={handleClick}
              >
                <p className="text-gray-600 mb-1">{comment.author}</p>
                <p>{comment.text}</p>
              </div>
            ))}
          </div>
        </div>
      ))}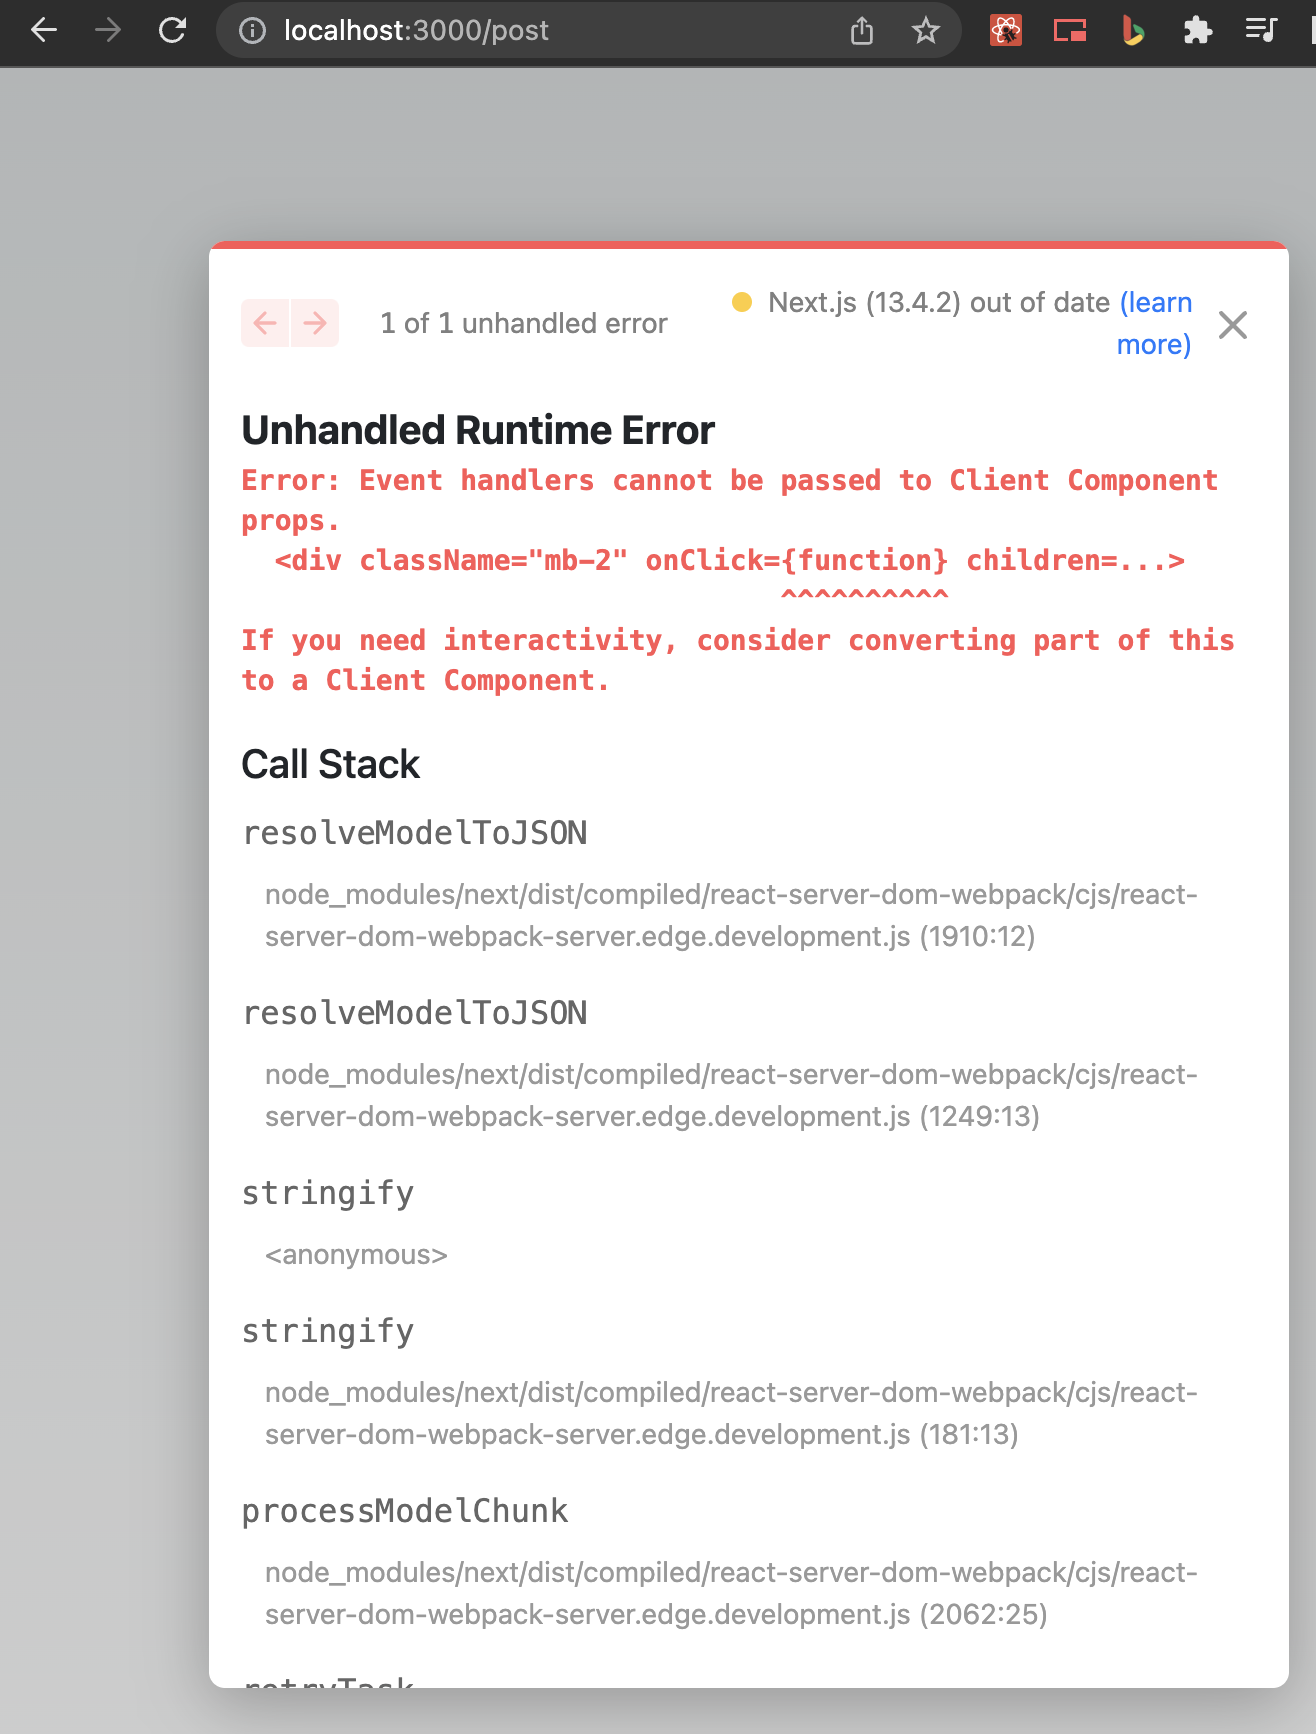
훅과 마찬가지로 이벤트 핸들러를 작성할 수 없는 서버 컴포넌트
따라서 유저 인터렉션 기능이 필수로 지원되어야 할 error ui는 클라이언트 컴포넌트로 작성되는 것이 자연스럽다고 할 수 있습니다.
기존 코드 수정하기
앞선 error.tsx에서 "use client"를 추가합니다!
"use client"

type ErrorUIProps = {
  error: unknown
  reset: () => void
}

export default function ErrorUI({ error, reset }: ErrorUIProps) {
  // ... 이하 코드 생략
}
에러 표기해보기
먼저 리엑트에서는 클릭 이벤트로 부터 전파되는 명시적인 error throw로는 Error Boundary ui를 트리거 시킬 수 없습니다.
렌더링 과정에서 발생하는 에러를 통해서만 Error Boundary를 활성화 시킬 수 있죠.
따라서 우리 post 페이지에서는 유저의 세션이 존재하지 않을 때 에러를 발생시킨다고 가정하고 다음과 같이 코드를 작성 하겠습니다.
const session = null

export const Post = async () => {
  const posts = await getPosts()

  if (session == null) {
    throw new Error("no session provided")
  }
// ... 이하 코드 생략 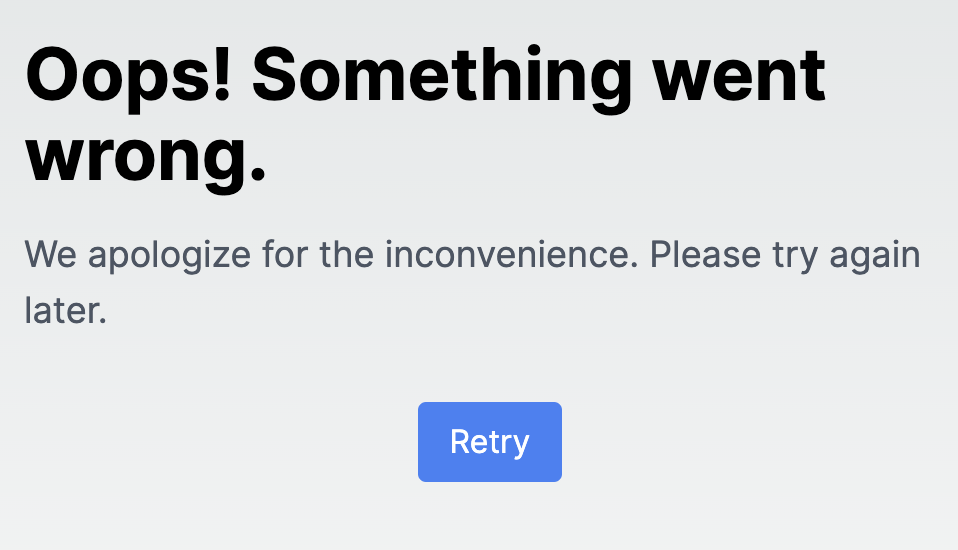
에러 표기가 정상적으로 되는 것을 확인할 수 있습니다.
이 때 발생한 에러는 error.tsx의 props를 통해 조회 가능합니다.
type ErrorUIProps = {
  error: unknown
  reset: () => void
}

export default function ErrorUI({ error, reset }: ErrorUIProps) {
  console.log({ error, reset })
// ...
}
위에서 에러 발생시 출력되는 에러 객체는 아래와 같으며
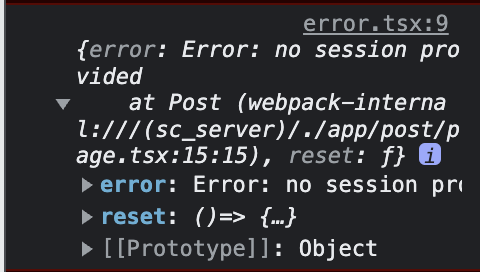
props에 전달되는 reset 함수를 통해 컴포넌트를 복구 시킬 수 있습니다.
수고하셨습니다.
오늘은 special files의 일부이며 next.js 12와 크게 달라지는 변경점인
loading template / error template에 대해 알아보았습니다.
다음 강의에서 봐요!