🖊️Web Socket 이론
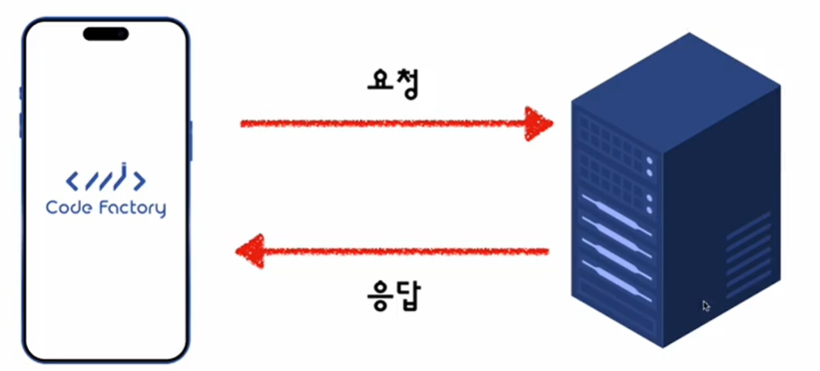
이 HTTP통신의 단점은 단방향이라는 것입니다. client쪽에서 반드시 요청을 보내야 서버에서 응답을 보내주게 됩니다.
카카오톡의 경우 누군가가 메세지롤 보면 나는 카카오톡에게 요청을 보내지 않았지만 응답이 자동으로 오게됩니다.따라서 웹소켓을 사용하게 되면 요청와 응답의 경계가 사라집니다.
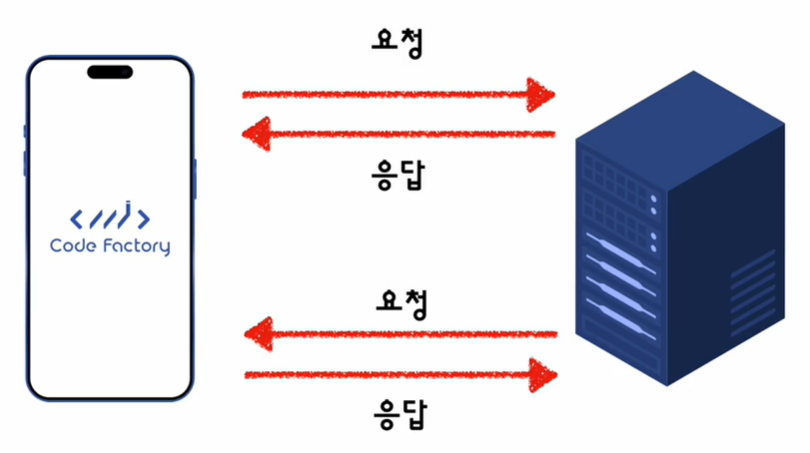
웹소켓을 사용하면 파이프가 생기게 됩니다. 이를 통해서 서버에서 어떤일이 발생하면 사용자에게 알려 줄 수 있게 됩니다.
🖊️Socket IO 이론
Socket IO는 Websocket 프로토콜을 사용해서 만든 low-latency(낮은 지연 시간), bidrectional(양방향 소통), event based(이벤트 기반)으로 클라이언트와 서버가 통신 할 수 있게 해주는 기능입니다.
즉, web socket위에 소켓 IO를 올린 것 입니다. 예를 들면 nest.js가 express.js를 사용하는 것과 비슷합니다.먼저 기본적인 통신 방법에 대해서 알아보겠습니다.
기본적인 통신
- 서버 코드
import { Server } from "socket.io";

const io = new Server(3000); // Socket.io 서버 생성

// 클라이언트가 서버에 연결되면 실행되는 함수 정의
// on 함수를 실행하면 특정 이벤트 (첫 번째 파라미터)가
// 있을 때 콜백 함수를 실행 할 수 있으며
// 해당 콜백 함수는 메세지를 첫번째 파라미터로 받는다.
// connection 이벤트는 미리 정의된 이벤트로 "연결 됐을때" 실행된다.
io.on("connection", (socket) => {
  	// 메세지 보내기
  	// 첫번째 파라미터는 이벤트 이름
  	// 두번째~이후 무한 파라미터 메시지
	socket.emit("hello_from_server", "this is message for server");

  	// hello_from_client 이벤트 메세지 받기(on 리스닝)
  	socket.on("hello_from_client", (message) => {
    	console.log(message); // 클라이언트로 부터 온 메세지
    });
});- 클라이언트 코드
ws : websockt 약자
import { io } from "socket.io-client";

const socket = io("ws://localhost:3000"); // Socket.io 서버에 연결

// "hello_from_client" 이벤트를 듣고 있는 소켓에 메세지 보내기
socket.emit("hello_from_client", "this is message for client");

// "hello_from_server" 이벤트로 메세지가 오면 함수 실행(on 리스닝)
socket.on("hello_from_server", (message) => {
	console.log(message); // 서버로 부터 온 메세지
});
웹소켓은 기본적으로 양방향 통신입니다. 하지만 연결을 할 때 만큼은 클라이언트에서 서버에게 연결을 해야합니다. 그 이후에 누가 먼저랄거 없이 메세지를 보내면 됩니다.
위의 코드에서 on은 특정 이벤트를 리스닝(받는)하는 함수입니다. 반대로 emit은 보내는 함수입니다.
따라서 양방향에서 서로 on으로 보내고 emit을 통해서 받으면서 양방향 통신을 하게 됩니다.
Acknowledgment
메세지를 잘 받았다는 OK신호를 보내는 것입니다. 보냈을 경우 상대방이 잘 받았는지 확인을 위해 존재합니다.
- 서버 코드
// "hello" 룸에 "world"라는 메세지를 보낸다.
// 세번째 파라미터는 콜백 함수로 acknowledgment가 오면 실행
socket.emit("hello", "world", (response) => {
	console.log(response); // 수신양호
});- 클라이언트 코드
// 첫번쨰 파라미터에 이벤트 이름을 입력하고
// 두번째 파라미터에 메세지가 왔을때 실행할 함수를 입력한다.
// 함수는 첫번쨰 파라미터로 메세지, 두번째 파라미터로
// 수신 응답을 할 수 있는 콜백 함수가 주어진다.
socket.on("hello", (message, callback) => {
	console.log(message); // "world"
  	callback("수신 양호");
});
Namespace와 Room
이 부분은 소켓을 정리하는 부분입니다.
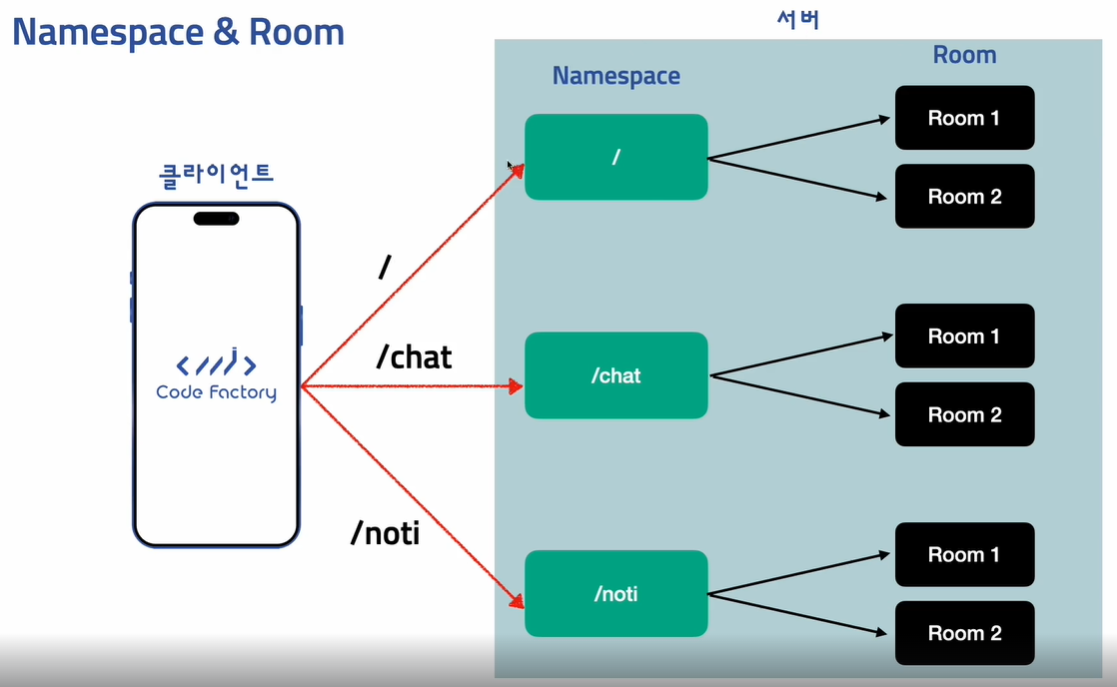
우리가 처음 시작하면 기본으로 설정하지 않아도 emit을 사용하면 /로 이동을 하게 됩니다.
그리고 각각의 namespace 내부에는 room으로 나눠지게 됩니다. 예를 들면 카카오의 각각의 톡방같은 개념이 Namespace입니다.namespace가 /인 room1과 namespace가 /chat인 room1은 완전히 서로 다른 것입니다. 왜냐하면 namespace가 다르기 때문입니다. 따라서 완전히 다른 room입니다.
- 서버 코드
// of를 이용하면 namespace를 정할 수 있다.
// namespace는 일반적으로 라우트 형태를 따라 지정한다.
const chatNamespace = io.of("/chat");

// chatNamespace에 연결된 소켓만 아래 코드가 실행된다.
chatNamespace.on("connection", (socket) => {
	// 현재 연결된 socket을 room1에 연결한다.
  	// 이 room1은 /chat namespace에만 존재하는 room1이다.
  	socket.join("room1");
  	chatNamespace.to("room1").emit("hello", "world");
});

// /noti namespace를 생성
const notiNamespace = io.of("/noti");

// /noti namespace에 연결된 소켓만 실행된다.
notiNamesapce.on("connection", (socket) => {
	// 이 room1은 /chat namespace의 room1과 전혀 관련이 없다.
  	// 다른 namespace의 room1에는 들어갈 수 없다.
  	socket.join("room1");

  	// 역시나 /noti namespace의 room1에만 메세지를 보낸다.
  	notiNamespace.to("room1").emit("hello", "codefactory");
});- 클라이언트 코드
// 기본 namespace로 연결한다 -> /
const socket = io("https://localhost:3000");

// chat namespace로 연결한다. -> /chat
const chatSocket = io("https://localhost:3000/chat");

// noti namespace로 연결한다. -> /noti
const chatSocket = io("https://localhost:3000/noti");

// client에서는 room을 정할 수 있는 기능이 없다.
// room은 서버에서만 socket.join()을 실행해서 특정 룸에
// 들어가도록 할 수 있다.
emit & broadcast
broadcast는 나를 제외한 모두에게 메세지를 보내는 것입니다.
// 연결된 모든 socket들에 메세지를 보낸다.
socket.emit("hello", "world");
socket.to("room1").emit("hello", "world"); // 예시

// 나 뺴고 모두에게 메세지를 보낸다.
socket.broadcast.emit("hello", "world");
지금까지는 SocketIO를 생으로 작업하는 코드입니다. 다음부터는 nest.js에서 지원하는 소켓코드를 학습하겠습니다.
🖊️Gateway 생성하고 메세지 리스닝
코드로 websocket을 다뤄보도록 하겠습니다. 아래 3가지(@nestjs/websockets @nestjs/platform-socket.io socket.io)를 설치합니다.
yarn add @nestjs/websockets @nestjs/platform-socket.io socket.io이후에 package.json으로 이동해서 버전을 맞춰주도록 하겠습니다.
이렇게 해주는 이유는 REST API의 경우에는 상관이 없지만 양방향 통신을 할 경우에는 버전의 호환성 문제가 생기기 때문입니다. 싱크를 맞춰주는 것으로 이해하면 됩니다.
yarn add @nestjs/common @nestjs/core @nestjs/jwt @nestjs/platform-express @nestjs/platform-socket.io @nestjs/typeorm @nestjs/websockets리소스를 생성하겠습니다. WebSockets으로 하면 훨씬 간단하지만 저희는 직접 REST API로 구현을 해보면서 깊게 이해해보겠습니다.
nest g resource -> chats -> REST API -> no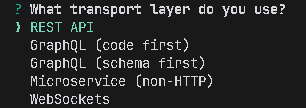
chats에 Socket IO를 연결하는 gateway파일을 생성하겠습니다.
- chats/chats.gateway.ts
import { WebSocketGateway } from "@nestjs/websockets";

@WebSocketGateway({
    // ws:localhost:3000/chats
    namespace: '/chats',
})
export class ChatGateway {

}
이제 on connect설정을 하겠습니다.
import { OnGatewayConnection, WebSocketGateway } from "@nestjs/websockets";
import { Socket } from "socket.io";
@WebSocketGateway({
namespace: '/chats',
})
export class ChatGateway {
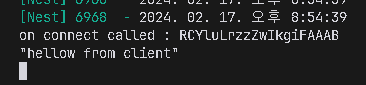
handleConnection(socket: Socket) {
console.log(`on connect called : ${socket.id}`); // 어떤 id 소켓이 연결됨?
}
}이벤트 리스너 코드를 작성하겠습니다. 기본 클래식 코드는 socket.on()으로 시작합니다. 하지만 nest.js에서는 어노테이션을 사용해서 간결하게 만들어줍니다.
아래 추가된 코드는 기본 코드와 동일한 의미를 가지는 코드입니다.
@WebSocketGateway({
    namespace: '/chats',
})
export class ChatGateway {

    handleConnection(socket: Socket) {
      	console.log(`on connect called : ${socket.id}`);
    }

  	// 기본 코드와 동일 -> socket.on('send_message', (message) => {console.log(message)});
    @SubscribeMessage('send_message')
    sendMessage(
    	@MessageBody() message: string,
    ) {
      	console.log(message);
    }
}
gateway를 만들었으니 chats.module.ts에 등록을 해줘야 합니다.
- chats.module.ts
import { Module } from '@nestjs/common';
import { ChatsService } from './chats.service';
import { ChatsController } from './chats.controller';
import { ChatsGateway } from './chats.gateway';

@Module({
    controllers: [ChatsController],
    providers: [
        ChatsGateway, // 등록
        ChatsService
    ],
})
export class ChatsModule {}
그러면 로그에서 재미있는 것을 발견할 수 있습니다.

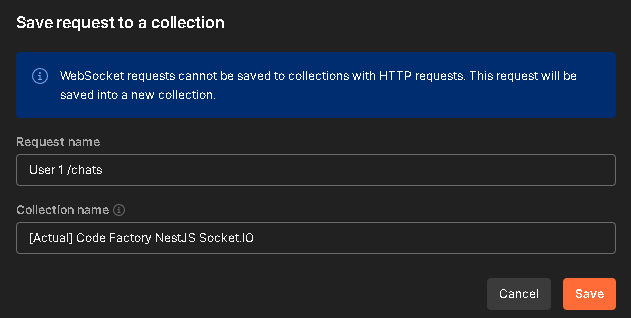
ChatsGateway가 send_message를 구독했다는 것을 알 수 있습니다. 이제 포스트맨으로 구독을 테스트 하겠습니다.

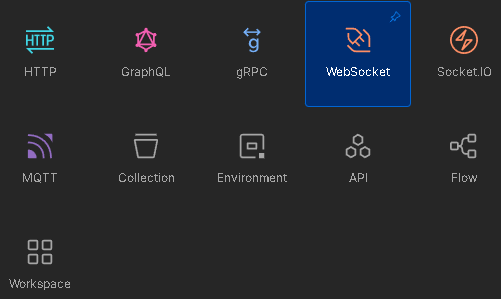
new를 누릅니다.
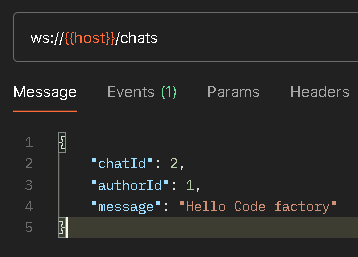
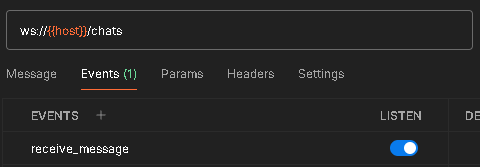
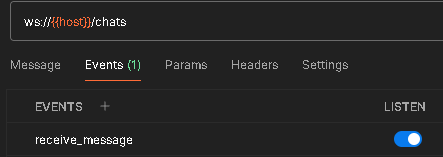
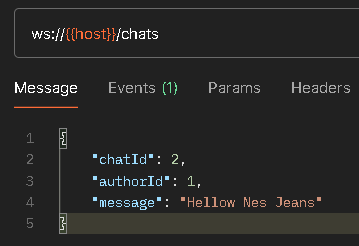
주소: ws://{{host}}/chats

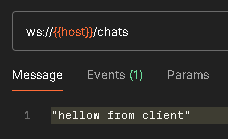
현재 우리는 send_message라는 이벤트에 우리는 subscribe를 했습니다. 여기서 메세지를 보낼려면 client에서는 emit을 해야합니다.
포스트맨으로 client에서 Server에게 emit을 하는 방법은 간단합니다. 아래와 같이 진행하면 됩니다.
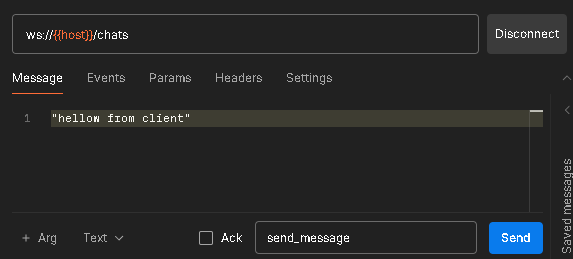

그러면 Client 쪽에서 emit을 통해서 보낸 메세지가 Server에서는 on을 통해서 받아지는 것을 알 수 있습니다.
🖊️서버에서 메시지 보내기
Client에서 emit을 통해서 받은 메세지를 Client 전체에다가 메시지를 보낼려면 chats.gateway.ts에서 Server를 inject 해야합니다.
Inject를 하게 되면 nest.js가 알아서 server에 Server 객체를 넣어줍니다. 여기서 server는 우리가 이전에 기본 형태로 만들었던 const io = new Server(3000); 과 동일합니다.
- chats.gateway.ts
import { MessageBody, OnGatewayConnection, SubscribeMessage, WebSocketGateway, WebSocketServer } from "@nestjs/websockets";
import { Socket, Server } from "socket.io";

@WebSocketGateway({
    namespace: '/chats',
})
export class ChatsGateway implements OnGatewayConnection{

  	@WebSocketServer()
    server: Server; // Nest.js가 Server 객체를 주입해준다.

    handleConnection(socket: Socket) {
      	console.log(`on connect called : ${socket.id}`);
    }

    @SubscribeMessage('send_message')
    sendMessage(
    	@MessageBody() message: string,
    ) {
      	this.server.emit('receive_message', 'hello_from_server'); // 변경
    }
}
코드로 알 수 있지만, server에서 receive_message 이벤트를 emit해서 hello_from_server를 메세지로 보내주고 있습니다.
포스트맨으로 테스트를 하겠습니다. 포스트맨으로 서버에서 보내는 값을 리스닝을 해보겠습니다.

연결을 해줍니다.

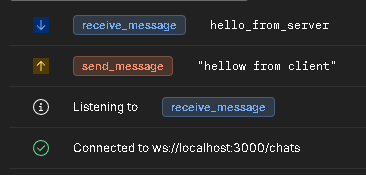
send 메시지를 하자마자 receive 메시지가 온 것을 알 수 있습니다.
이번에는 여러개의 Socket IO를 만들어 보겠습니다. 왜냐하면 서버에서 메시지를 보내면 연결되어 있는 모든 client에게 메시지가 가기 때문입니다.
User 2를 만들고 리스너를 활성화 시킵니다

그리고 User 1은 disconnect를 하고 다시 연결하겠습니다. 여기서 알 수 있는 것은 2개의 소켓은 완전히 다른 것임을 알 수 있습니다.

소켓을 1개더 추가해서 총 3개를 만들겠습니다. 현재 완전히 다른 ID로 소켓이 연결되었습니다. 즉 /chats으로 연결되어 있는 소켓이 3개라는 의미입니다.

만약 User 1으로 이동해서 send_message를 보내게 되면?
-> User 1, User 2, User 3 모두 receive_message를 받게된다!
🖊️Room 활용
이번에는 User가 총 3명이 있는데, 특정 Room에 있는 사용자만 메세지를 받을 수 있도록 만들어 보겠습니다.
- chats/chats.gateway.ts
@WebSocketGateway({
	namespace: '/chats',
})
export class ChatsGateway implements OnGatewayConnection{

    @WebSocketServer()
    server: Server;

    handleConnection(socket: Socket) {
      	console.log(`on connect called : ${socket.id}`);
    }

    @SubscribeMessage('enter_chat')
    enterChat(
        // Room의 Id를 리스트로 받는다.
        @MessageBody() data: number[],
        // 지금 현재 연결된 소켓
        @ConnectedSocket() socket: Socket,
    ) {
        for (const chatId of data) {
            // socket.join()
            // join은 string만 받는다.
            socket.join(chatId.toString());
        }
    }

    @SubscribeMessage('send_message')
    sendMessage(
   	 	@MessageBody() message: string,
    ) {
      	this.server.emit('receive_message', 'hello_from_server');
    }
}
이제 보내고 싶은 Room에다가 보내는 코드를 추가하겠습니다. 지금 현재의 단점은 sendMessage()를 보면 모든 연결된 소켓에게 전부 메시지를 보내고 있습니다. 따라서 보내고 싶은 곳만 골라서 보내겠습니다.
@SubscribeMessage('send_message')
sendMessage(
  	@MessageBody() message: string,
) {
  	this.server.in(
      	// message.chatId에 해당하는 Room
      	message.chatId.toString()
    ).emit('receive_message', 'hello_from_server');
}
포스트맨으로 테스트를 하겠습니다. 서버를 재실행 할때마다 당연히 client 연결도 끊어지기 때문에 다시 연결해 줍니다.
User 1을 1번방에, User 2는 2번방에, User 3은 1번방에 넣겠습니다.


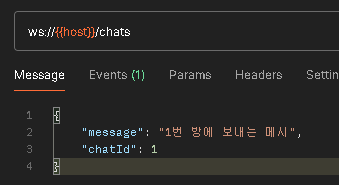
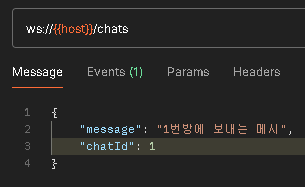
이제 User 1에서 메세지를 보내겠습니다. 메세지를 보내는 형태는 @MessageBody() message: {message: string, chatId: number}, 형태로 바뀌어져서 JSON 형태로 작성을 해줍니다.


1, 3번 User는 메시지를 받고 2번 사용자는 메시지를 안받는 결과가 나왔습니다.
이번에는 client에서 받아온 메세지를 그대로 받아오도록 만들겠습니다.
@SubscribeMessage('send_message')
sendMessage(
  	@MessageBody() message: string,
) {
  	this.server.in(
      	message.chatId.toString()
    ).emit('receive_message', message.message); // 변경
}
이번에는 disconnect 후 다시 연결해서 User 1(1, 2) / User 2(2) / User 3(1)방에 넣도록 하겠습니다.
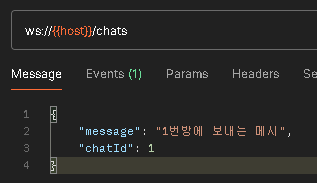
User 1이 다음과 같이 send_message를 하게되면, User 1번과 User 3번이 메세지를 받습니다.
이번에는 User 1번이 2번 방에 보내보도록 하겠습니다.
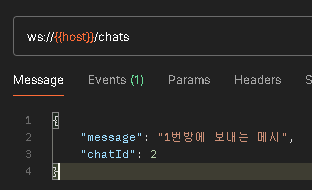
User 1과 User 2가 메세지를 받습니다.
이로써 특정 Room에 들어있는 User에게만 고르는 것을 알아보았습니다.
🖊️BroadCasting
BroadCasting을 적용해서 User 1이 1번방 또는 2번방으로 보내면, 나를 제외하고 메세지를 받도록 만들겠습니다.
@SubscribeMessage('send_message')
sendMessage(
  	@MessageBody() message: string,
) {
  	socket.to(message.chatId.toString()).emit('receive_message', message.message);
}
이전에 구현한 this.server는 연결된 서버 전체를 의미하기 때문에 따로 사용자를 구분하지 않고 모두에게 메시지 전달이 됩니다. 하지만 socket.to의 경우 나를 제외한 사람들에게 메세지가 전달됩니다.
포스트맨으로 테스트를 하겠습니다.
User 1(1, 2) / User 2(2) / User 3(1) 후, 다음과 같이 전송을 하게 되면,
1번 User에게는 receive_message는 오지 않고 3번 User에게 전달됩니다.
즉 여기서 알 수 있는 것은, this.server를 사용하면, in으로 필터링한 모든 소켓들에게 전부 다 보냅니다.
반면 socket을 이용해서 보내면 해당 소켓에 나를 제외한 사람들에게 보내게됩니다.
🖊️Chart Entity
지금부터 chat을 생성할 때는 복잡해집니다. 왜냐하면 해당 Room에 사용자가 존재하는지 이런 것들을 여러가지로 체크해야하기 때문입니다.
그리고 dto를 통해서 생성을 하도록 하겠습니다.
- chats/dto/create-chat.dto.ts
import { IsNumber } from "class-validator";

export class CreateChatDto {

    // 첫 번째 파라미터는 어떤 숫자들인지
    // 두 번쨰 파라미터는 각각 검증할 거야?
    @IsNumber({}, {each: true})
    userIds: number[];
}- chats/chats.gateway.ts
@SubscribeMessage('create_chat')
createChat(
    @MessageBody() data: CreateChatDto,
    @ConnectedSocket() socket: Socket,
) {

}
그리고 Chats Entity를 생성하겠습니다. 그리고 반대쪽인 UsersModel에도 추가를 하겠습니다.
- chats/entities/chats.entity.ts
@Entity()
export class ChatsModel extends BaseModel {

    // 1명의 사용자는 N개의 채팅방에 들어간다.
    // 1개의 채팅방은 여러 사용자가 있다.
    @ManyToMany(() => UsersModel, (user) => user.chats)
  	@JoinTable()
    users: UsersModel[];
}- users/entities/users.entity.ts
@Entity()
export class UsersModel extends BaseModel {

  	.
    .
    @ManyToMany(() => ChatsModel, (chat) => chat.users)
    chats: ChatsModel[];
}
2개중 1곳에 @JoinTable()을 만들어 주겠습니다. 왜냐하면 ManyToMany은 테이블을 3개로 관리합니다. 중간테이블이 추가되는 것입니다.
그리고 까먹지 말고 app.module.ts에 ChatsModel을 등록합니다. 그리고 Chat 서비스코드에 TypeORM을 사용할 것이기 때문에 chats.module.ts에 가서 TypeORM을 등록합니다.
- chats/chats.module.ts
@Module({
    imports: [
        TypeOrmModule.forFeature([
          	ChatsModel,
        ])
    ],
    controllers: [ChatsController],
    providers: [
        ChatsGateway,
        ChatsService
    ],
})
export class ChatsModule {}
이제 서비스 코드에서 기능을 구현하겠습니다.
- chats.service.ts
@Injectable()
export class ChatsService {

    constructor(
    	@InjectRepository(ChatsModel)
     	private readonly chatRepository: Repository<ChatsModel>,
    ) {}


    async createChat(dto: CreateChatDto) {
        // await가 붙어있으면 async 필요
        const chat = await this.chatRepository.save({
            // 1, 2, 3
            // [{id:1}, {id:2}, {id:3}]
            users: dto.userIds.map((id) => ({id})),
        });

        return this.chatRepository.findOne({
            where: {
              	id: chat.id,
            },
        });
    }
}- chats.gateway.ts
export class ChatsGateway implements OnGatewayConnection{

    constructor(
    	private readonly chatsService: ChatsService,
    ){}
.
.
@SubscribeMessage('create_chat')
async createChat(
    @MessageBody() data: CreateChatDto,
    @ConnectedSocket() socket: Socket,
) {
    const chat = await this.chatsService.createChat(
      	data,
    );
}
포스트맨으로 1번 사용자와 2번 사용자가 같이있는 chat 방을 만들어 보도록 하겠습니다.


select * from chats_model_users_users_model;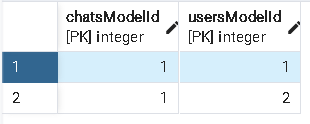
🖊️Pagination Chat API 생성
채팅방을 페이지네이션하는 기능을 만들겠습니다. dto를 생성하고 서비스 코드에 적용을 하겠습니다.
- chats/dto/paginate-chat.dto.ts
import { BasePaginationDto } from "src/common/dto/base-pagination.dto";

export class PaginateChatDto extends BasePaginationDto {}- chats.service.ts
@Injectable()
export class ChatsService {

    constructor(
       @InjectRepository(ChatsModel)
       private readonly chatRepository: Repository<ChatsModel>,
       private readonly commonService: CommonService,
    ) {}

  	// 페이지네이션 적용
    paginateChats(dto: PaginateChatDto) {
        return this.commonService.paginate(
            dto,
            this.chatRepository,
            {}, // overrideOption
            'chats'
        );
    }

  	.
.- chats.module.ts
@Module({
    imports: [
        TypeOrmModule.forFeature([
          	ChatsModel,
        ]),
        CommonModule, // 추가 -> CommonService 사용하기 때문에
    ],
    controllers: [ChatsController],
    providers: [
        ChatsGateway,
        ChatsService
    ],
})
export class ChatsModule {}
컨트롤러로 이동해서 페이지네이션 API를 작성하겠습니다.
- chats.controller.ts
@Get()
paginateChat(
  	@Query() dto: PaginateChatDto
) {
  	return this.chatsService.paginateChats(dto);
}
포스트맨으로 테스트를 하겠습니다.

잘 생성이 되는 것을 알 수 있습니다.
{
    "data": [
        {
            "id": 1,
            "updatedAt": "2024-02-17T15:43:39.735Z",
            "createdAt": "2024-02-17T15:43:39.735Z"
        }
    ],
    "cursor": {
        "after": null
    },
    "count": 1,
    "next": null
}
하지만 어떤 사용자들이 존재하는지 또한 보고 싶습니다.
- chats.service.ts
paginateChats(dto: PaginateChatDto) {
    return this.commonService.paginate(
      dto,
      this.chatRepository,
      {
          relations: { // 추가
            	users: true,
          }
      },
      'chats'
    );
}
{
"data": [
{
"id": 1,
"updatedAt": "2024-02-17T15:43:39.735Z",
"createdAt": "2024-02-17T15:43:39.735Z",
"users": [
{
"id": 1,
"updatedAt": "2024-01-26T05:58:10.800Z",
"createdAt": "2024-01-26T05:58:10.800Z",
"nickname": "codefactory",
"email": "codefactory@codefactory.ai",
"role": "USER"
},
{
"id": 2,
"updatedAt": "2024-01-26T06:48:51.110Z",
"createdAt": "2024-01-26T06:48:51.110Z",
"nickname": "codefactory1",
"email": "codefactory1@codefactory.ai",
"role": "USER"
}
]
}
],
"cursor": {
"after": null
},
"count": 1,
"next": null
}🖊️Enter Chat 이벤트 업데이트 & WSException 던지기
- chats.gateway.ts
@SubscribeMessage('enter_chat')
enterChat(
    @MessageBody() data: number[],
    @ConnectedSocket() socket: Socket,
) {
    socket.join(data.map((x) => x.toString())); // 한번에 join
}
다음과 같이 바꿔주도록 하겠습니다. 어차피 이전에 for 루핑을 통한 방법과 동일한 코드입니다. 한번에 모든 방들이 join이 되는 것 입니다.
이제는 enterChat하는 코드를 수정해보겠습니다. 먼저 enterChat에도 dto를 생성하겠습니다.
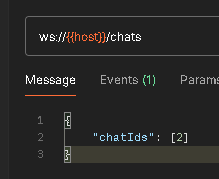
- chats/dto/enter-chat.dto.ts
import { IsNumber } from "class-validator";

export class EnterChatDto {

    @IsNumber({}, {each: true})
    chatIds: number[];
}- chats.gateway.ts
@SubscribeMessage('enter_chat')
enterChat(
    @MessageBody() data: EnterChatDto, // 변경
    @ConnectedSocket() socket: Socket,
) {
    socket.join(data.chatIds.map((x) => x.toString())); // 변경
}
그리고 chat을 join하려고 할때, 굳이 존재하지 않는 chat은 할 필요가 없습니다. 따라서 chat이 존재하는지 존재하지 않는지 확인하는 절차를 추가하겠습니다.
- chats.service.ts
.
.
async checkIfChatExists(chatId: number) {
    const exists = await this.chatRepository.exists({
        where: {
          	id: chatId,
        },
    });
    return exists;
}- chats.gateway.ts
@SubscribeMessage('enter_chat')
async enterChat(
    @MessageBody() data: EnterChatDto,
    @ConnectedSocket() socket: Socket,
) {
    for (const chatId of data.chatIds) {
        const exists = await this.chatsService.checkIfChatExists(
          	chatId,
        );

        if (!exists) throw new WsException({
            code: 100,
            message: `존재하지 않는 chat 입니다. chatId: ${chatId}`,
        });
    }

    socket.join(data.chatIds.map((x) => x.toString()));
}
포스트맨으로 테스트를 하겠습니다. 먼저 User 1 ~ 3번까지 연결을 합니다. 이후에는 존재하지 않는 chatId를 enter_chat 해보겠습니다. 현재 2번 chat은 존재하지 않습니다.
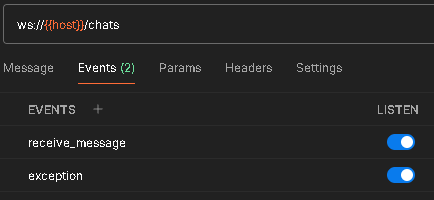
WsException은 exception이라는 이벤트로 받을 수 있습니다. exception으로 리스닝을 해줍니다.


이번에는 올바르게 넣어보도록 하겠습니다.


🖊️메세지 보내기 끝
1개의 Room에는 여러개의 message가 있을 수 있습니다. 따라서 MessagesModel을 생성하겠습니다.
또한 1명의 사용자만이 N개의 message를 작성할 수 있습니다.
- chats/messages/entities/messages.entity.ts
import { ChatsModel } from "src/chats/entities/chats.entity";
import { BaseModel } from "src/common/entity/base.entity";
import { ManyToOne } from "typeorm";

@Entity()
export class MessagesModel extends BaseModel {

    // N개의 메시지가 1개의 Chat방에 연결된다.
    @ManyToOne(() => ChatsModel, (chat) => chat.messages)
    chat: ChatsModel;

  	// 1명의 사용자가 N개의 message를 작성한다.
  	@ManyToOne(() => UsersModel, (user) => user.messages)
    author: UsersModel;

  	@Column()
    @IsString()
    message: string;
}
이제 ChatsModel로도 이동을 해서 @OneToMany를 작성하겠습니다.
- chats/entities/chats.entity.ts
import { BaseModel } from "src/common/entity/base.entity";
import { UsersModel } from "src/users/entities/users.entity";
import { Entity, JoinTable, ManyToMany, OneToMany } from "typeorm";
import { MessagesModel } from "../messages/entities/messages.entity";

@Entity()
export class ChatsModel extends BaseModel {

    @ManyToMany(() => UsersModel, (user) => user.chats)
    @JoinTable()
    users: UsersModel[];

  	// 추가
    @OneToMany(() => MessagesModel, (message) => message.chat)
    messages: MessagesModel;
}- users/entites/users.entity.ts
@Entity()
export class UsersModel extends BaseModel {

  	// 추가
    @OneToMany(() => MessagesModel, (message) => message.author)
    messages: MessagesModel;
}
마지막으로 잊지말고 app.module.ts에 MessagesModel을 등록합니다.
message 관련 서비스 코드를 작성하겠습니다.
- chats/messages/messages.service.ts
@Injectable()
export class ChatsMessagesService {

    constructor(
    	@InjectRepository(MessagesModel)
     	private readonly messagesRepository: Repository<MessagesModel>,
     	private readonly commonService: CommonService,
    ) {}
}
메세지를 페이지네이션하는 코드를 만들겠습니다.
@Injectable()
export class ChatsMessagesService {

    constructor(
    	@InjectRepository(MessagesModel)
     	private readonly messagesRepository: Repository<MessagesModel>,
     	private readonly commonService: CommonService,
    ) {}

  	paginateMessages(
    	dto: BasePaginationDto,
     	overrideFindOptions: FindManyOptions<MessagesModel>,
    ) {
        return this.commonService.paginate(
            dto,
            this.messagesRepository,
            overrideFindOptions, // 외부에서도 받도록 만들기
            'message'
        )
    }
}
다음에는 createMessage를 만들겠습니다. 우선은 관련된 dto가 필요합니다.
- chats/messages/dto/create-messages.dto.ts
import { PickType } from "@nestjs/mapped-types";
import { MessagesModel } from "../entities/messages.entity";
import { IsNumber } from "class-validator";

export class CreateMessagesDto extends PickType(MessagesModel, [
    'message', // MessagesModel에서 message를 제외하고는 전부 객체이기 때문에 message만 골라서 상속을 받는다.
]) {
    @IsNumber()
    chatId: number;

    @IsNumber()
    authorId: number; // 원래는 작성자의 이름을 이렇게 주면 안된다. CC) accessToken -> 임시로
}
서비스코드로 이동해서 마저 작성을 하겠습니다.
- chats.service.ts
async createMessage(
  	dto: CreateMessagesDto,
) {
    const message = await this.messagesRepository.save({
        chat: {
          	id: dto.chatId,
        },
        author: {
          	id: dto.authorId,
        },
        message: dto.message,
    });
    return this.messagesRepository.findOne({
        where: {
          	id: message.id,
        }
    });
}chats.module.ts로 이동 후, ChatsMessagesService와 MessagesModel을 등록합니다.
chats.gateway.ts로 이동을 해서 코드를 수정하겠습니다.
- chats.module.ts
@Module({
    imports: [
        TypeOrmModule.forFeature([
            ChatsModel,
            MessagesModel,
        ]),
        CommonModule,
    ],
    controllers: [ChatsController],
    providers: [
        ChatsGateway,
        ChatsService,
        ChatsMessagesService,
    ],
})
export class ChatsModule {}- chats.gateway.ts
@SubscribeMessage('send_message')
async sendMessage(
    @MessageBody() dto: CreateMessagesDto,
    @ConnectedSocket() socket: Socket,
) {
    const chatExists = await this.chatsService.checkIfChatExists(
      	dto.chatId,
    );

    if (!chatExists) {
        throw new WsException(
          	`존재하지 않는 채팅방입니다. Chat ID : ${dto.authorId}`,
        );
    }

  	// 메세지 생성
    const message = await this.messagesService.createMessage(
      	dto,
    );

  	// 소켓 속에다가 생성된 메시지를 기반으로, 해당되는 방(message.chat.id)에다가 메시지를 보낸다.
    socket.to(message.chat.id.toString()).emit('receive_message', message.message);
}
메세지를 페이지네이션하는 컨트롤러 코드를 작성하겠습니다.
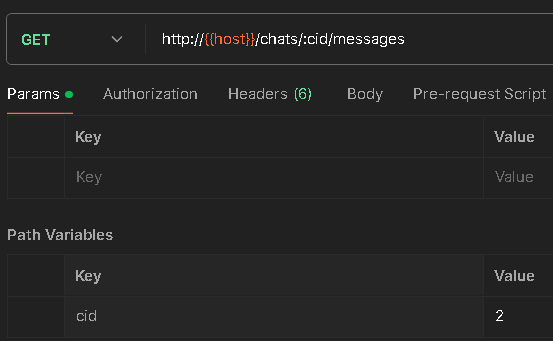
- messages.controller.ts
@Controller('chats/:cid/messages')
export class MessagesController {

    constructor(
    	private readonly messagesService: ChatsMessagesService,
    ) {}

    @Get()
    paginateMessage(
    	@Param('cid', ParseIntPipe) id: number,
     	dto: BasePaginationDto,
    ) {
        return this.messagesService.paginateMessages(
            dto,
            { // overrideOption
                where: {
                    // 특정 chat에 관련된 id만 필터링됨
                    chat: {
                      	id,
                    }
                }
            }
        );
    }
}- chats.module.ts
@Module({
    imports: [
        TypeOrmModule.forFeature([
            ChatsModel,
            MessagesModel,
        ]),
        CommonModule,
    ],
    controllers: [
        ChatsController,
        MessagesController,
    ],
    providers: [
        ChatsGateway,
        ChatsService,
        ChatsMessagesService,
    ],
})
export class ChatsModule {}
포스트맨으로 테스트를 하겠습니다. 현재는 chat 방이 1, 2 총 2개로 구성되어 있습니다. 사용자 1, 2, 3 을 연결해줍니다.
2번 방에 사용자 1, 2, 3을 전부 넣어줍니다.


{
    "data": [
        {
            "id": 2,
            "updatedAt": "2024-02-17T20:27:53.986Z",
            "createdAt": "2024-02-17T20:27:53.986Z",
            "message": "Hellow Nes Jeans"
        }
    ],
    "cursor": {
        "after": null
    },
    "count": 1,
    "next": null
}
2번 chat에 해당하는 아이디가 2인 메세지가 1개있는 것을 알 수 있습니다. 만약에 우리가 메세지에 해당되는 chat room까지 보고 싶으면 다음과 같이 코드를 바꾸면 됩니다.
- chats/messages/messages.controller.ts
@Get()
paginateMessage(
    @Param('cid', ParseIntPipe) id: number,
    @Query() dto: BasePaginationDto,
) {
    return this.messagesService.paginateMessages(
        dto,
        {
            where: {
                chat: {
                  	id,
                }
            },
          	// 추가
            relations: {
                author: true,
                chat: true,
            }
        }
    );
}
{
"data": [
{
"id": 2,
"updatedAt": "2024-02-17T20:27:53.986Z",
"createdAt": "2024-02-17T20:27:53.986Z",
"message": "Hellow Nes Jeans",
"author": {
"id": 1,
"updatedAt": "2024-01-26T05:58:10.800Z",
"createdAt": "2024-01-26T05:58:10.800Z",
"nickname": "codefactory",
"email": "codefactory@codefactory.ai",
"role": "USER"
},
"chat": {
"id": 2,
"updatedAt": "2024-02-17T20:01:57.991Z",
"createdAt": "2024-02-17T20:01:57.991Z"
}
}
],
"cursor": {
"after": null
},
"count": 1,
"next": null
}메세지의 정보와 누가 어떤 방에서 보냈는지를 알 수 있습니다.
포스트맨에서 다시 한번 테스트를 해보겠습니다.
사용자 1, 2, 3을 전부 2번방에 넣습니다. 그리고 1번 사용자가 메세지를 보냅니다. 결과는 1번 사용자가 보낸 메세지가 2, 3번 사용자에게 도달하게 됩니다.