1. Web 개발의 이해 - FE/BE
2) 웹의 동작 (HTTP 프로토콜 이해)
HTTP
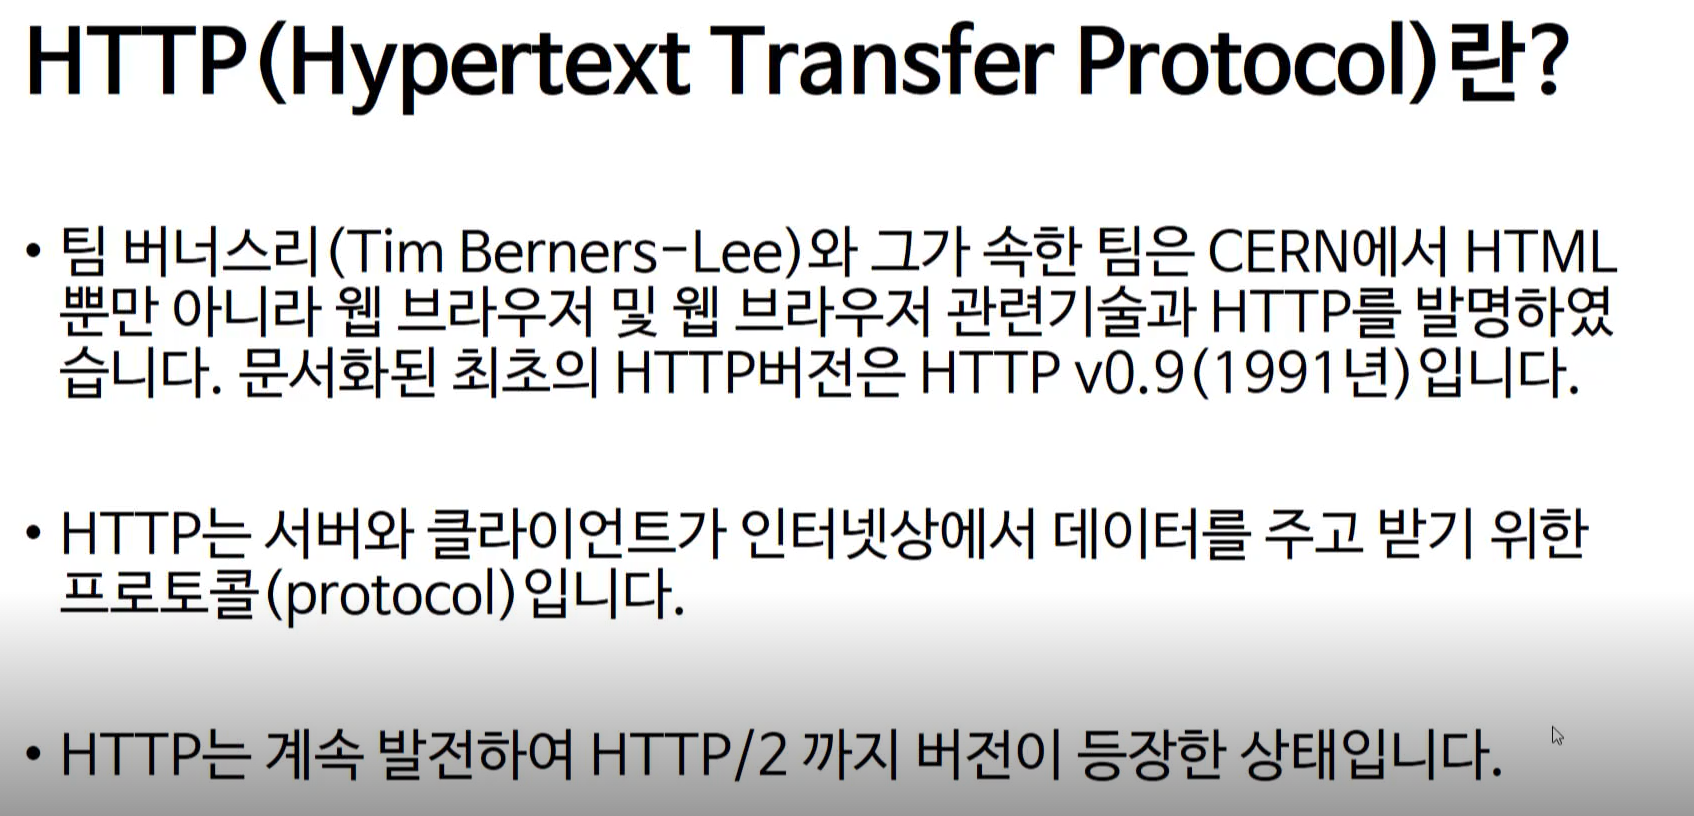
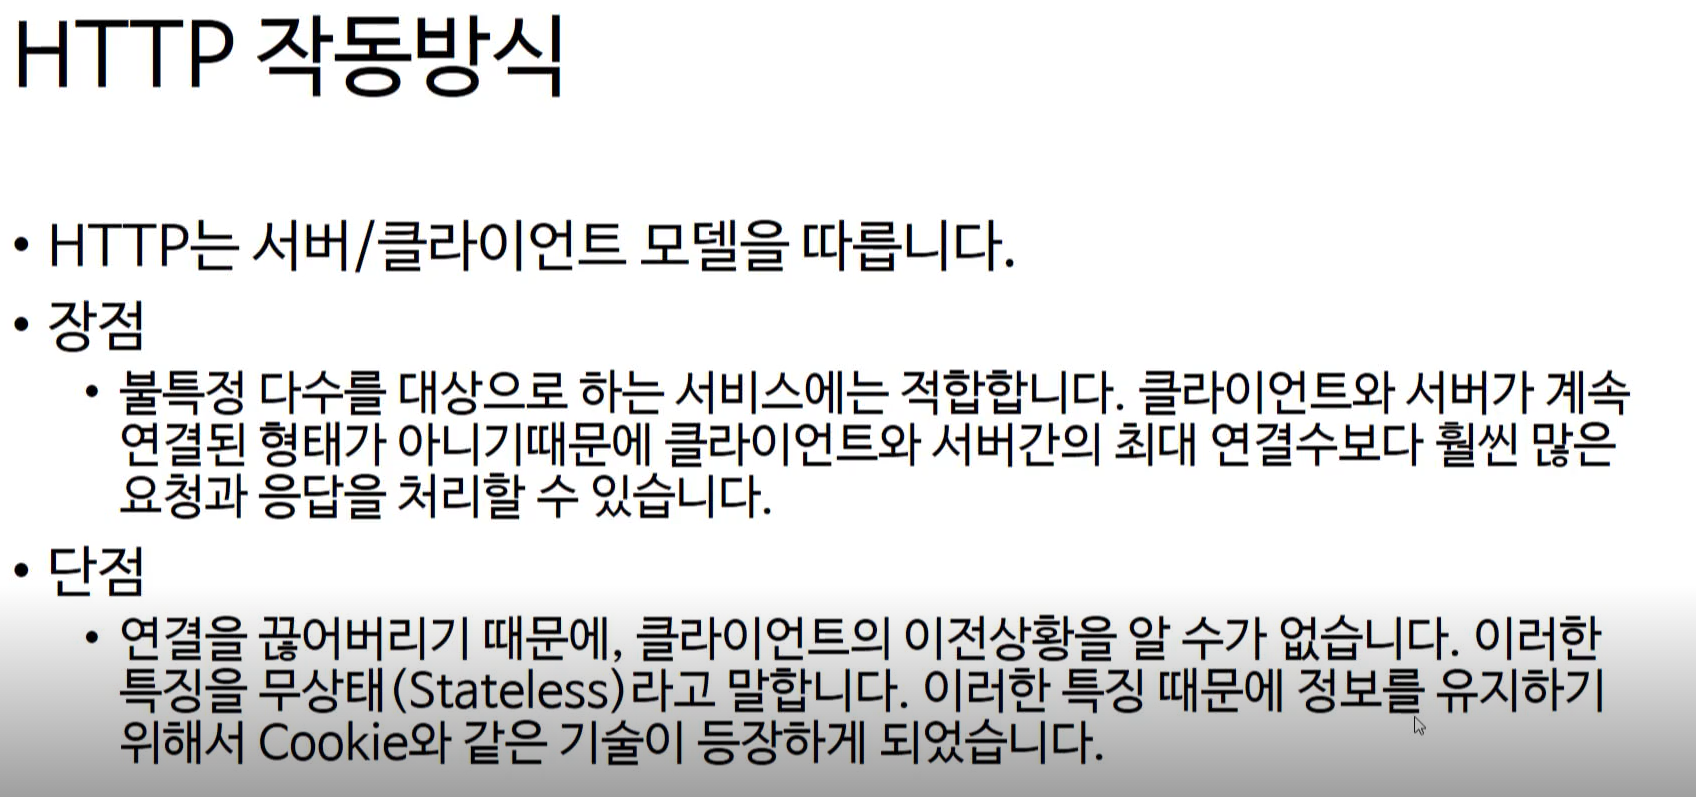
HTTP는 stateless이다! 즉 연결이 끊기기 때문에 클라이언트가 바로 다음 것을 요청해도 서버는 그 이전의 클라이언트인지 아닌지 알 수 없다. Stateless가 아니라면 보통 최대 ~개의 클라이언트까지만 동시에 접속할 수 있다. Stateless기 때문에 훨씬 많은 요청과 응답 처리가 가능하다
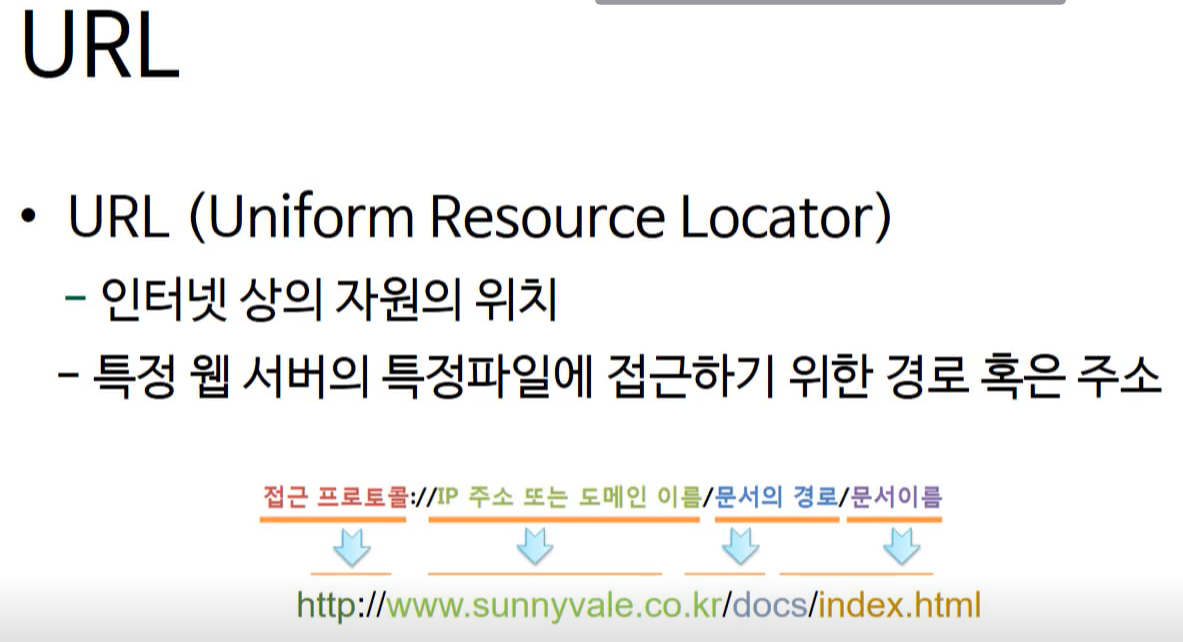
URL
HTTP 과정
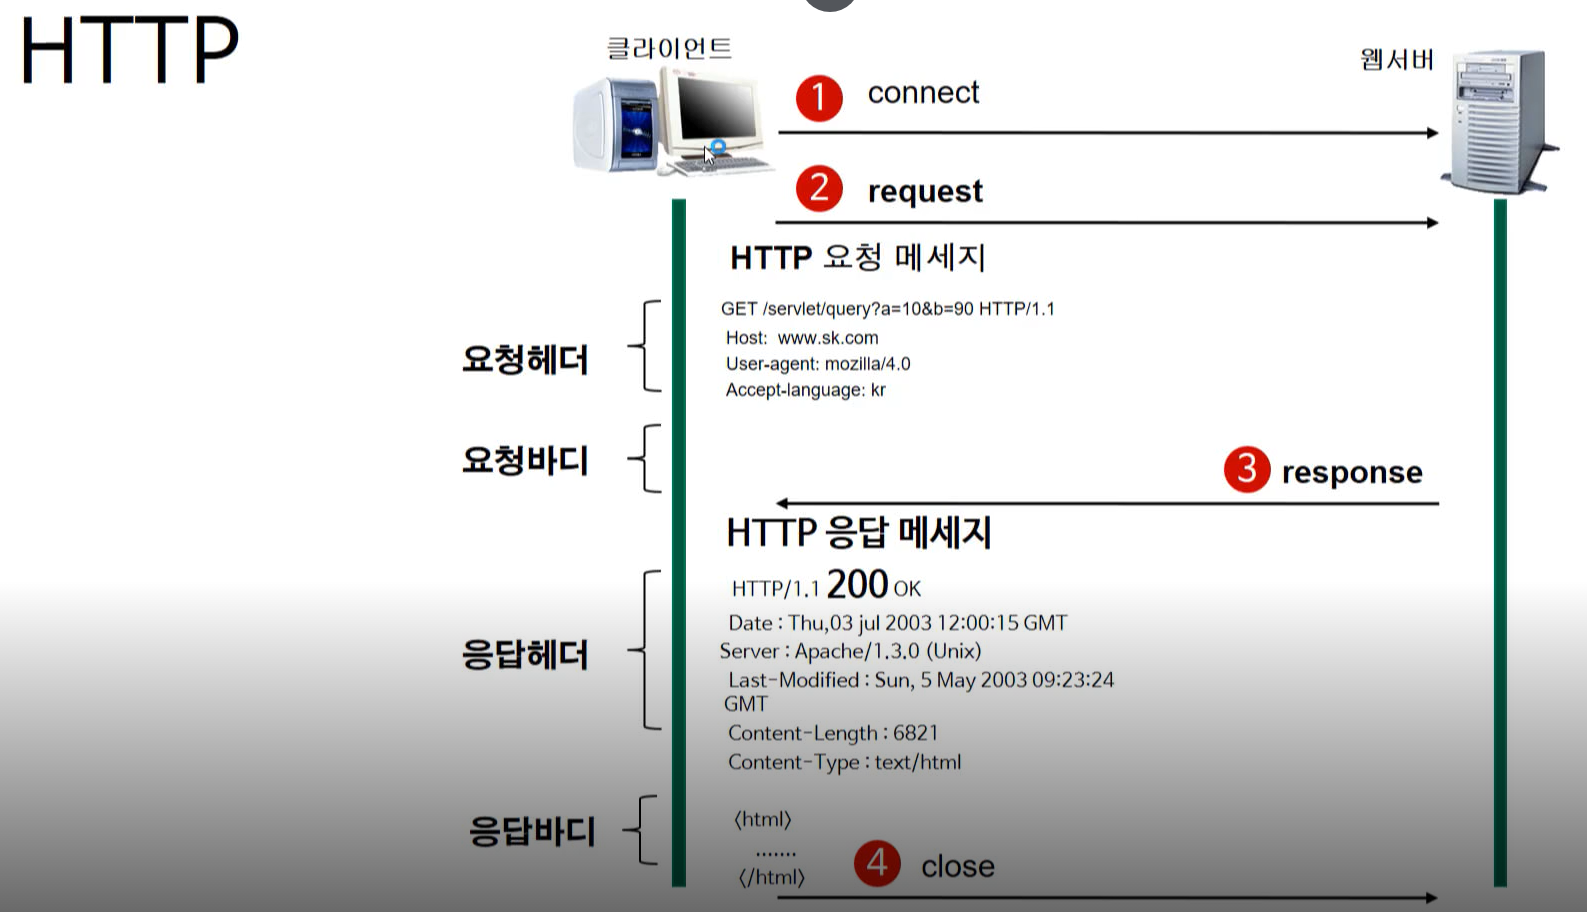
기본 포맷은 헤더, 빈줄, 바디이다
GET 방식은 body가 비어있고 파라미터가 헤더에 붙어있는 것이 포인트이다.
3) 웹 Front-End와 웹 Back-end-1
3) 웹 Front-End와 웹 Back-end-2
4) browser의 동작 - 1
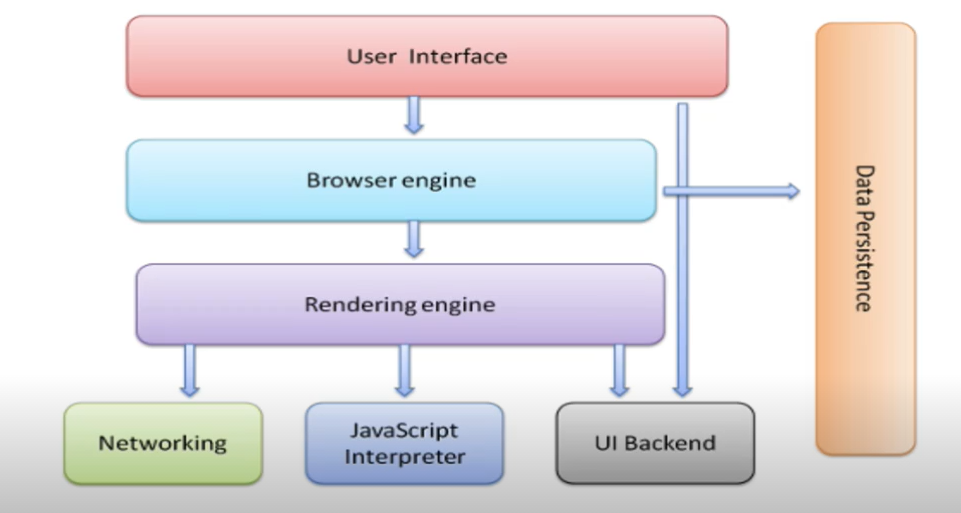

render할 때 css들을 합치게 된다
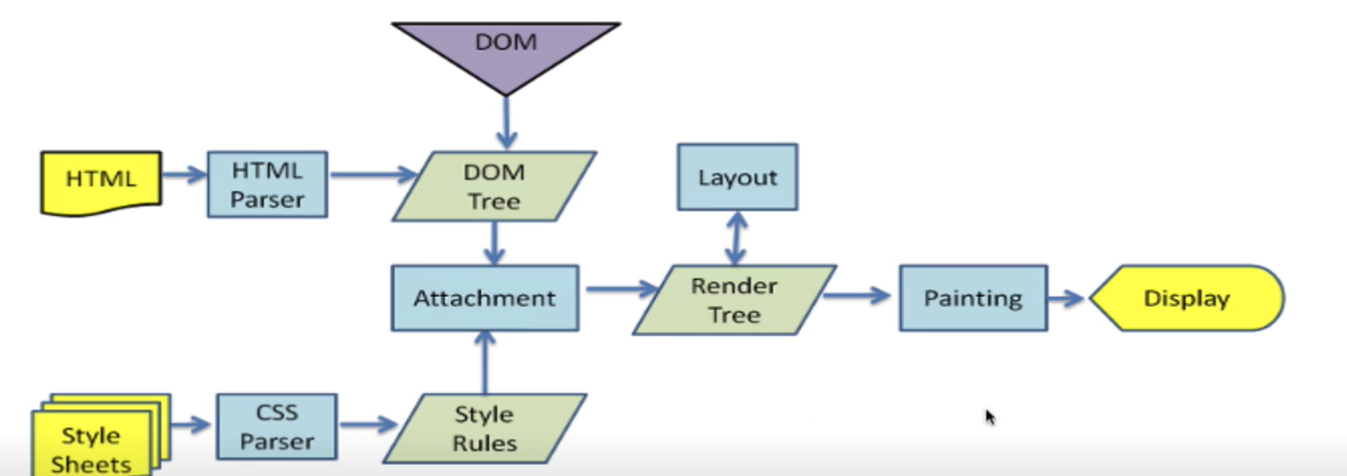
4) browser의 동작 - 2
5) browser에서의 웹 개발 - 1
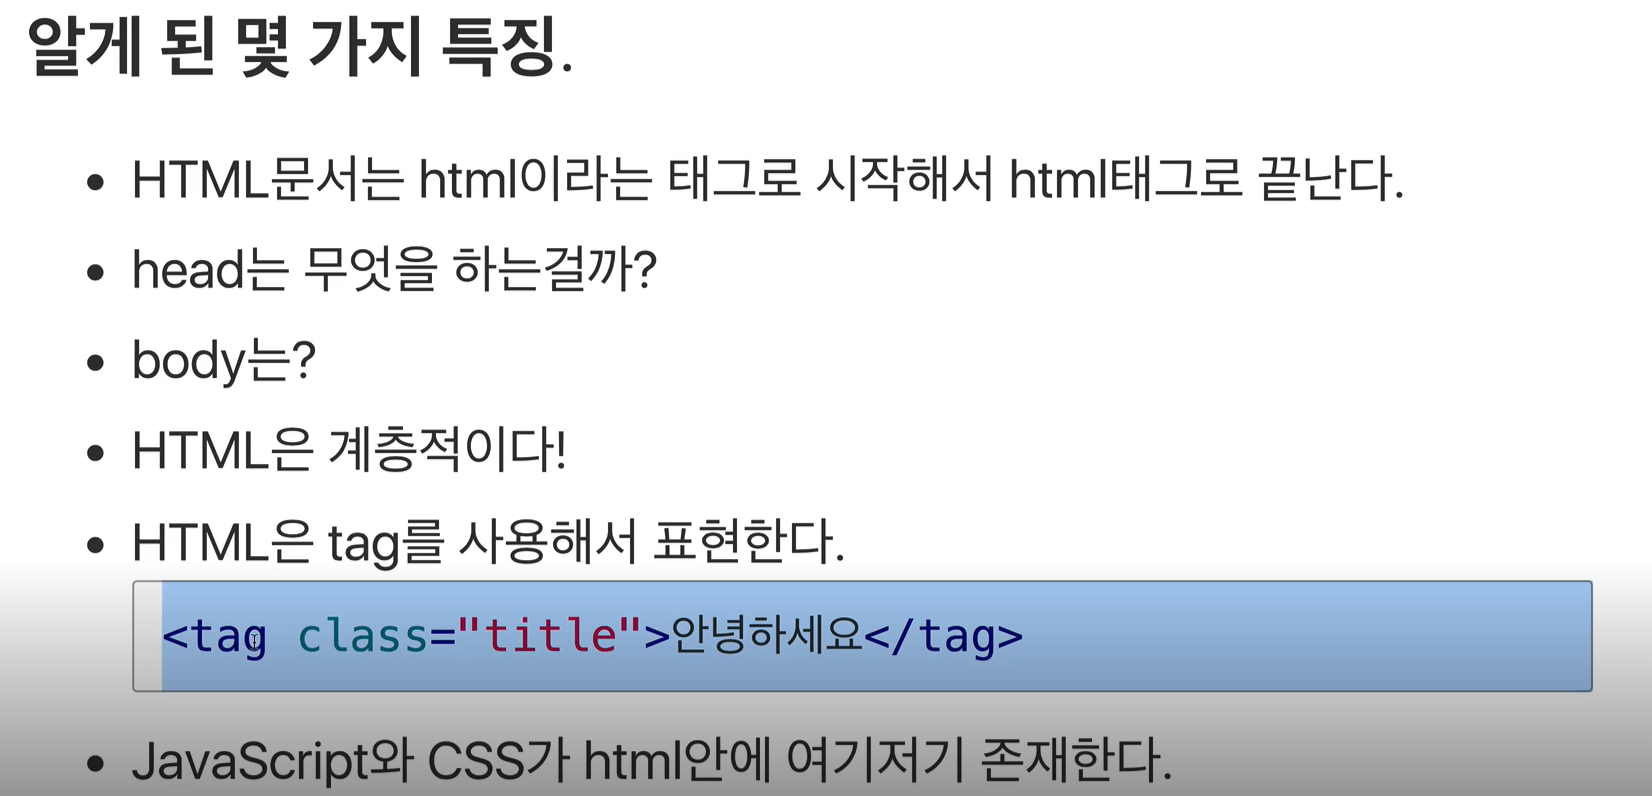
head에는 부가적인 정보가 들어간다.
자바스크립트 코드는 일반적으로 바디 태그의 가장 밑에 있다. 방해가 될 수 있기 때문이다.
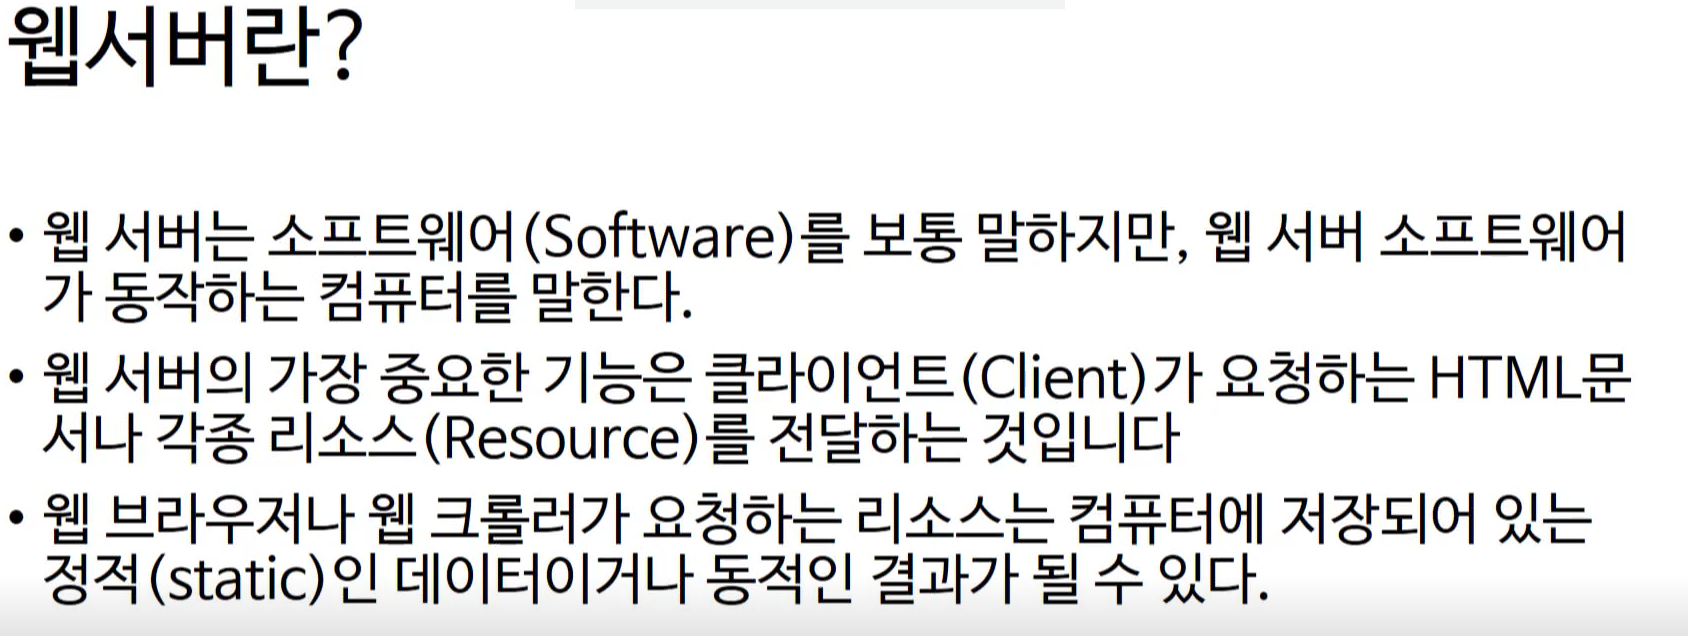
6) 웹서버
웹 서버 소프트웨어의 종류
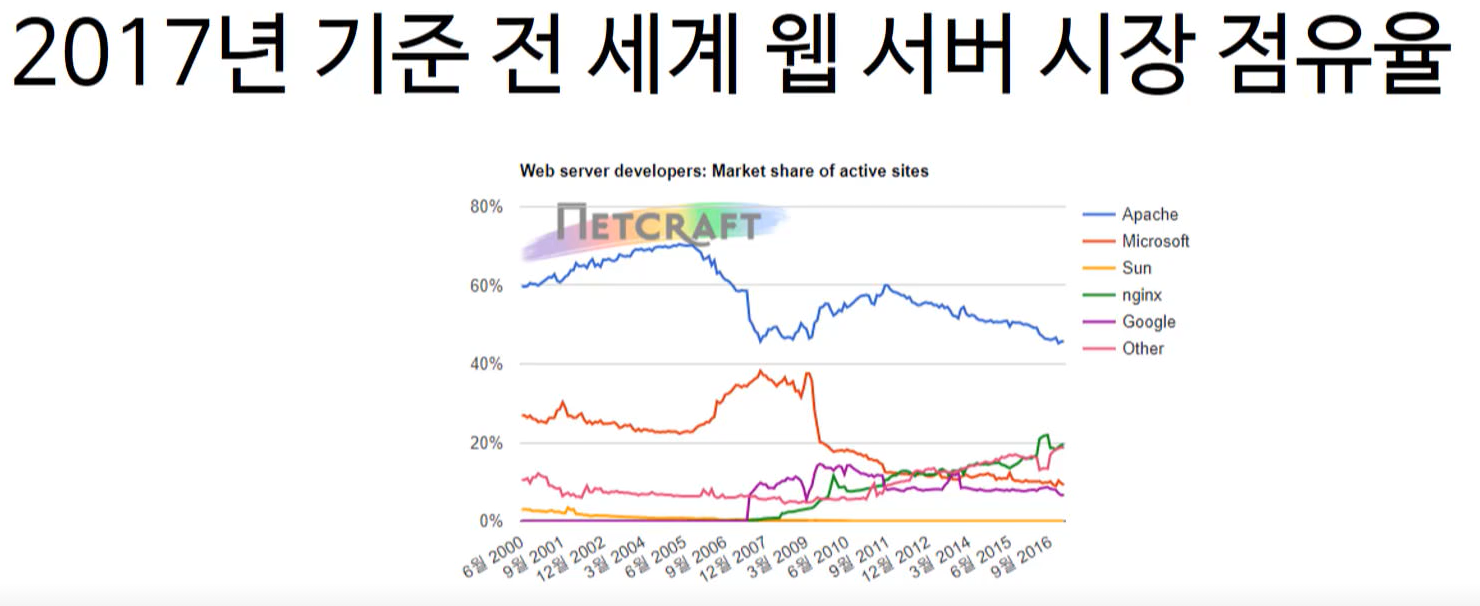
nginx가 성장하고 있는 것을 뚜렷이 볼 수 있다.
7) WAS
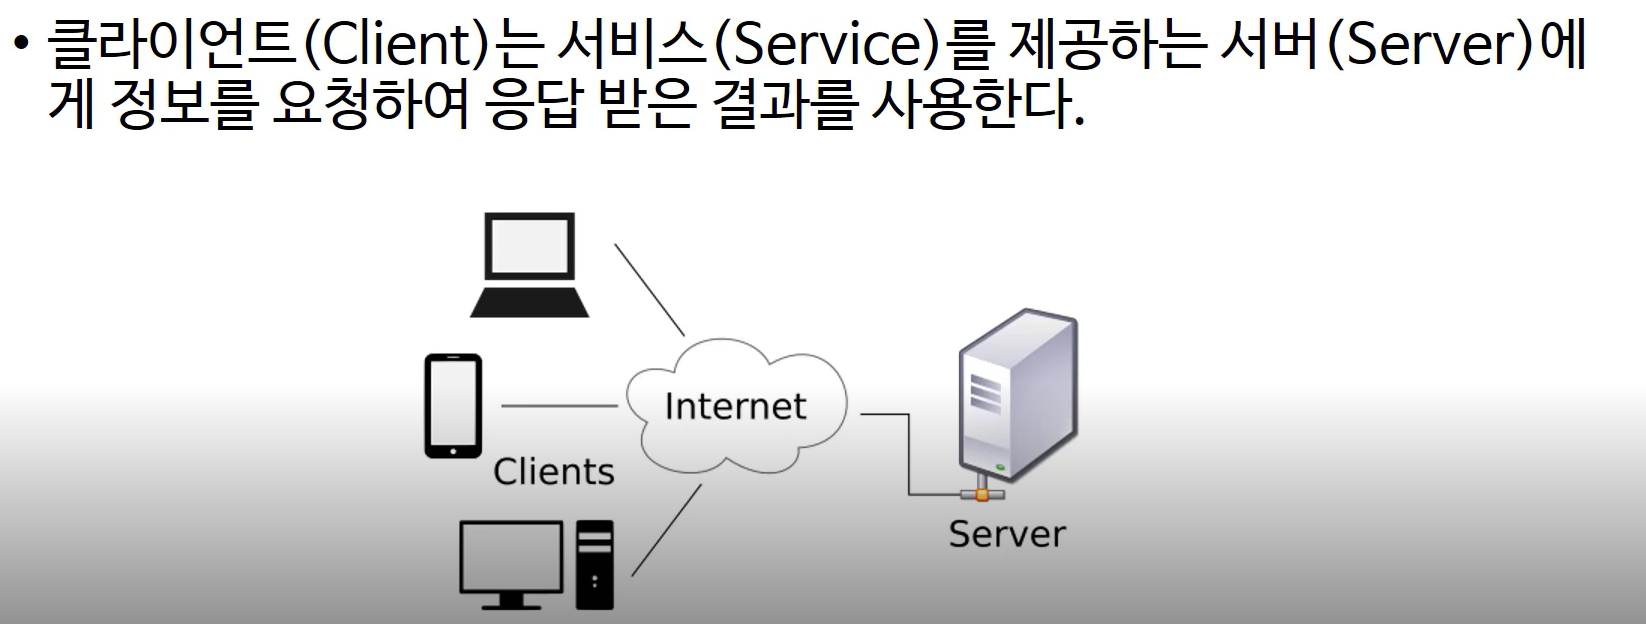
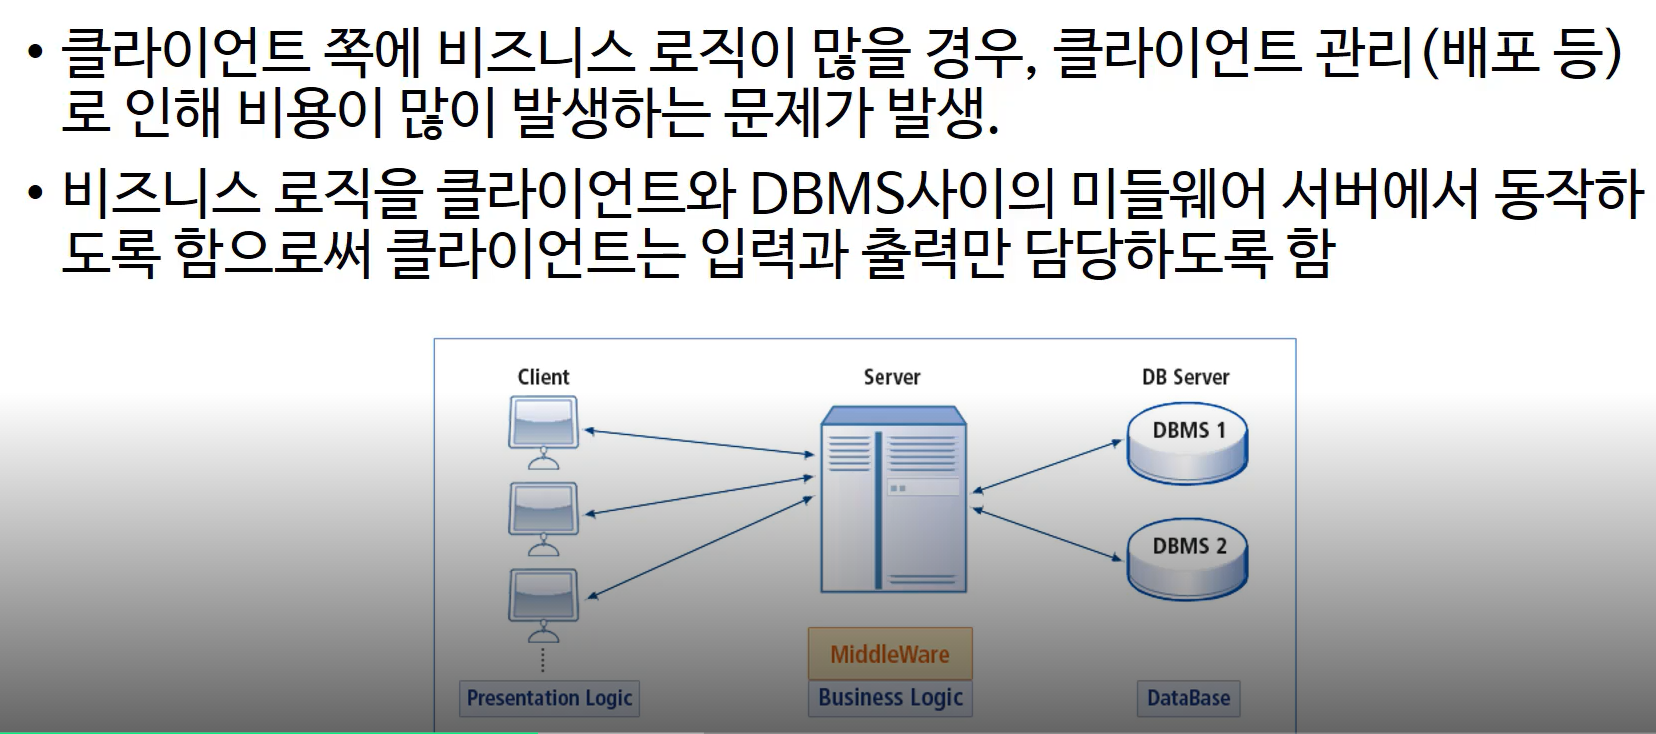
클라이언트와 서버의 구조
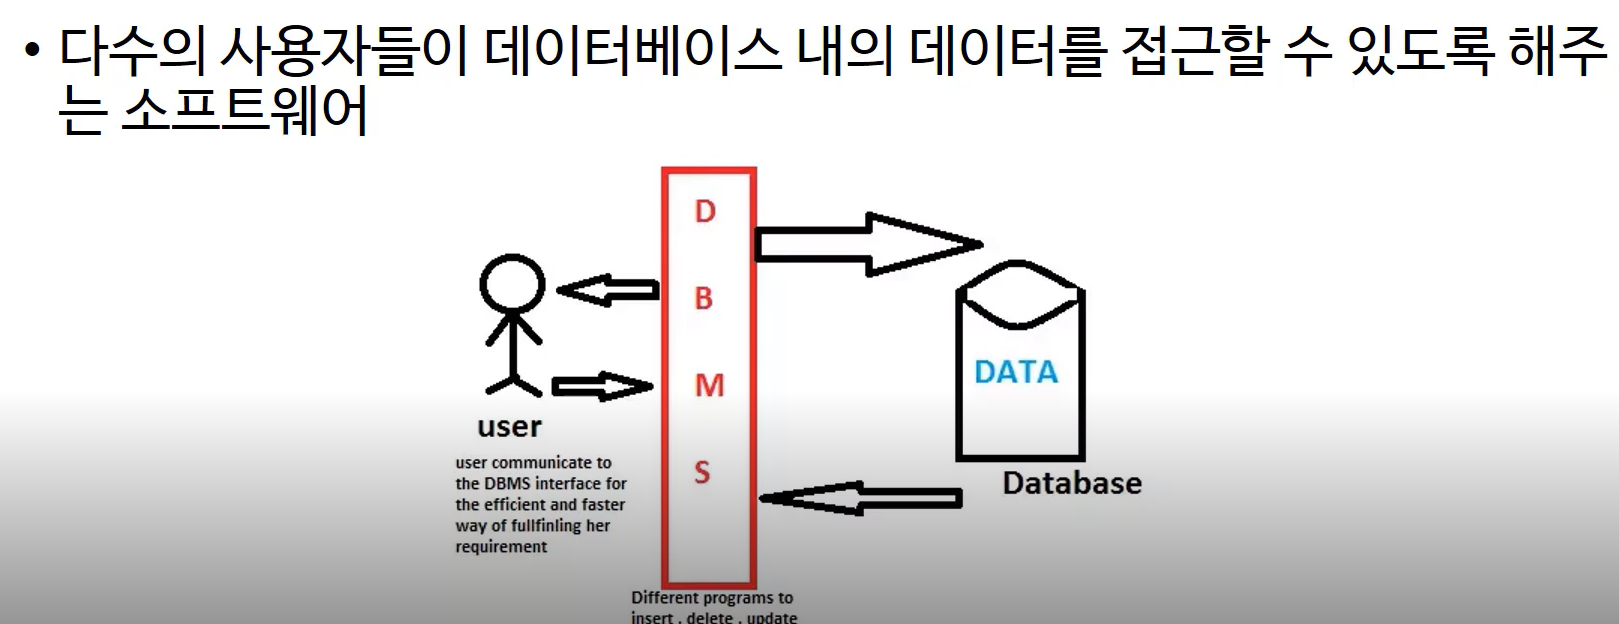
DBMS
클라이언트의 로직이 많아지고 크기가 커진다는 단점이 있었다. 또한 보안도 좋지 않았다. 그래서 미들 웨어가 나왔다.
미들웨어
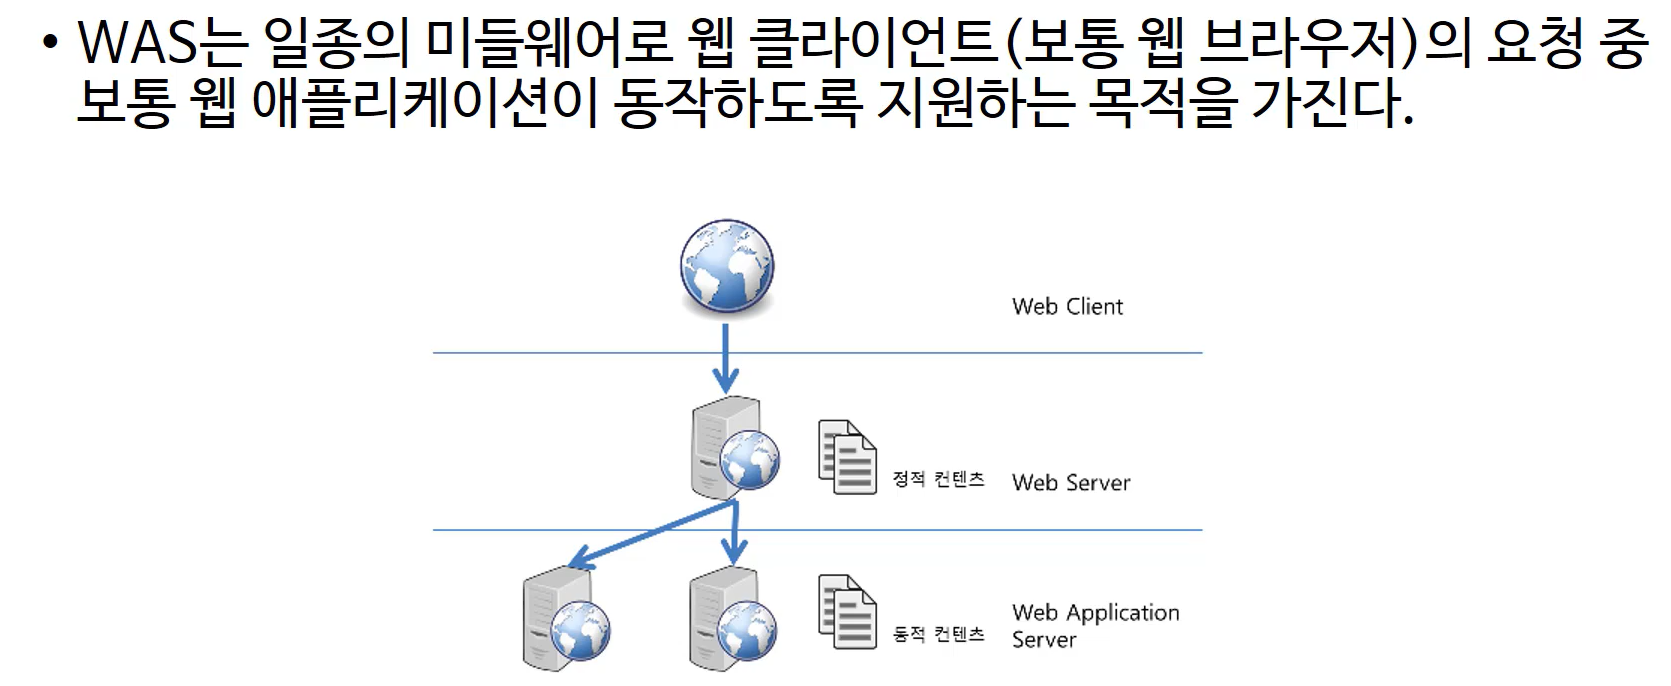
WAS
WAS의 중요한 기능
- WAS는 프로그램 실행환경과 데이터베이스 접속 기능 제공
- 여러 개의 트랜잭션 관리
- 비즈니스 로직 실행
이번 과정을 진행할 때 웹서버와 WAS 따로 두지 않는 이유는 톰캣이라는 WAS만으로 충분한 기능을 하기 때문이다.
웹 서버 vs WAS
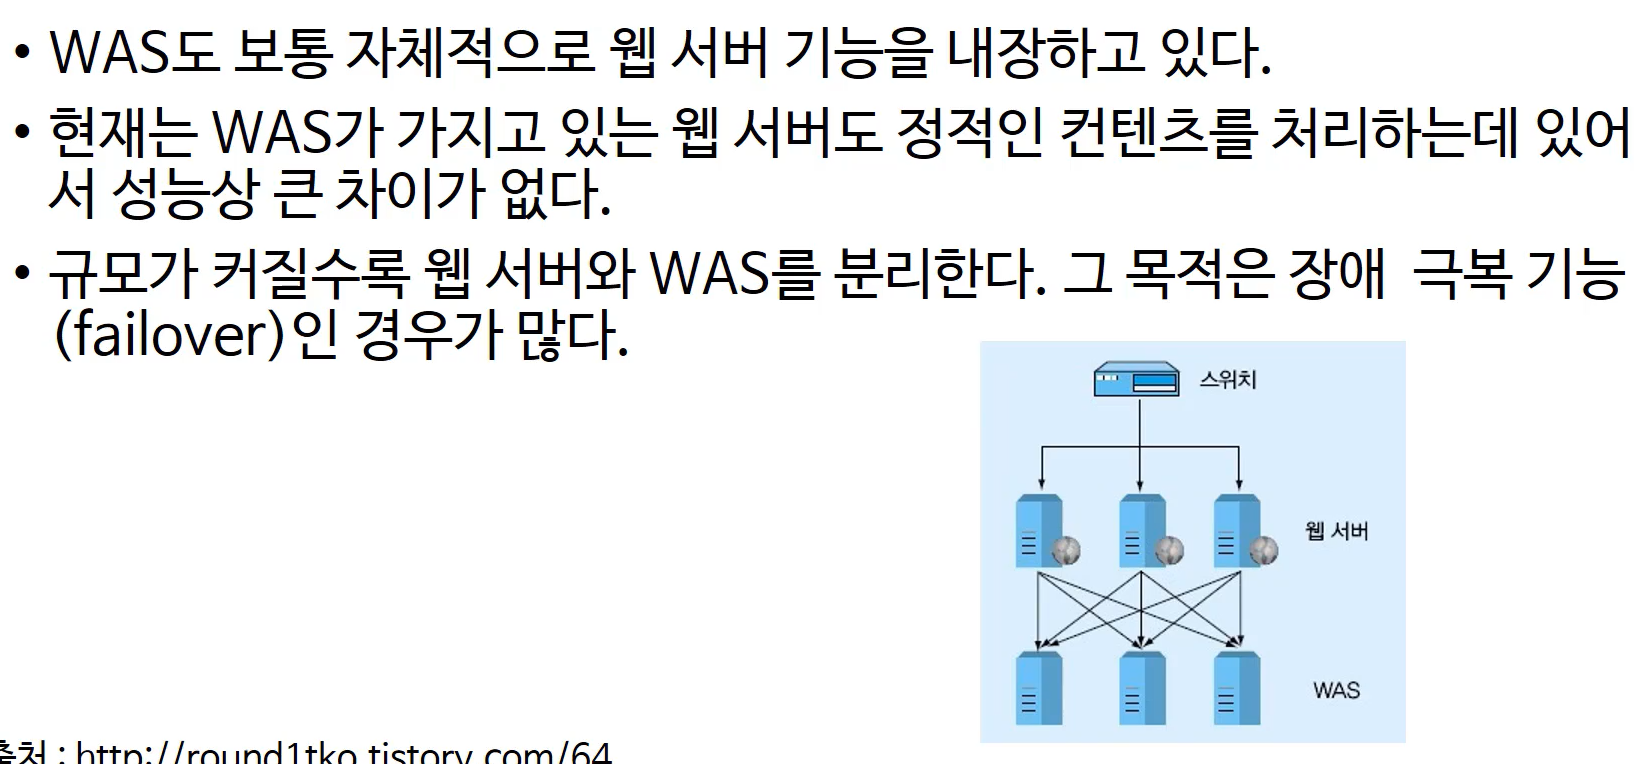
웹서버 없이 동적 컨텐츠, 정적 컨텐츠 모두 제공이 가능하다. 그럼에도 불구하고 웹서버가 WAS 앞에 있으면 좋은 점이 있다. WAS에 오류가 생겨서 재시작할 때 웹 서버가 해당 WAS를 사용하짐 못하게하면 된다. 이를 장애 극복 기능이라 한다.
HTML - FE
1) HTML Tags
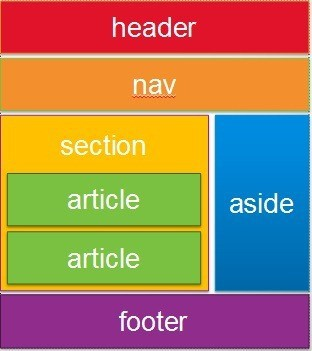
2) HTML Layout 태그
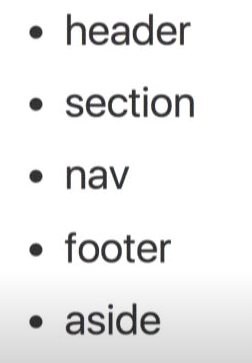
html layout tag
3) HTML 구조설계
<!DOCTYPE html>
<html>
<head>
  <meta charset="utf-8">
  <meta name="viewport" content="width=device-width">
  <title>JS Bin</title>
</head>
<body>
  <header>
    <h1>Company Name</h1>
    <img src="...." alt="logo">
  </header>

  <section>
    <nav>
      <li>Home</li>
      <li>Home</li>
      <li>About</li>
      <li>Map</li>
    </nav>

    <section>
      <button></button>
      <div><img src="" alt=""></div>
      <div><img src="" alt=""></div>
      <div><img src="" alt=""></div>
      <button></button>
    </section>

    <section>
      <ul>
        <li>
          <h3>About us</h3></li>
          <div>Bla blabla</div>
        <li>
          <h3>What we do</h3></li>
        <div>Bla blabla</div>
        <li>
          <h3>What we do</h3></li>
        <div>Bla blabla</div>
      </ul>
    </section>
  </section>

  <footer><span>Copyright @codesquad</span></footer>
</body>

</html>
3) HTML 구조 설계
<!DOCTYPE html>
<html>
<head>
  <meta charset="utf-8">
  <meta name="viewport" content="width=device-width">
  <title>JS Bin</title>
</head>
<body>
  <header>
    <h1>Company Name</h1>
    <img src="...." alt="logo">
  </header>

  <section id = "nav-section">
    <nav>
      <li>Home</li>
      <li>Home</li>
      <li>About</li>
      <li>Map</li>
    </nav>

    <section id="roll-section">
      <button></button>
      <div><img src="" alt=""></div>
      <div><img src="" alt=""></div>
      <div><img src="" alt=""></div>
      <button></button>
    </section>

    <section>
      <ul>
        <li class="our_description">
          <h3>About us</h3></li>
          <div>Bla blabla</div>
        <li class="our_description">
          <h3>What we do</h3></li>
        <div>Bla blabla</div>
        <li class="our_description">
          <h3>What we do</h3></li>
        <div>Bla blabla</div>
      </ul>
    </section>
  </section>

  <footer><span>Copyright @codesquad</span></footer>
</body>
3. CSS - FE
1) CSS 선언 방법
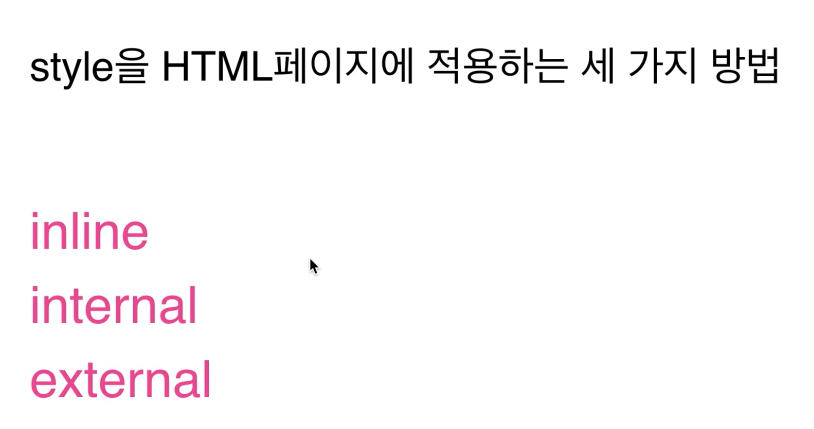
inline
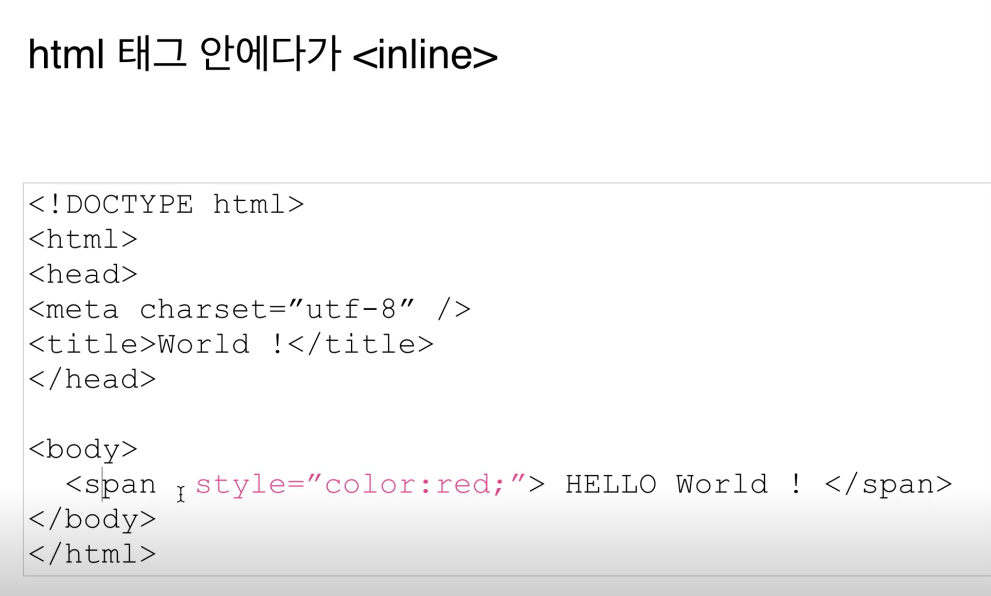
최우선권을 가진다. 구조와 선언이 섞여있으므로 유지보수가 어렵다.
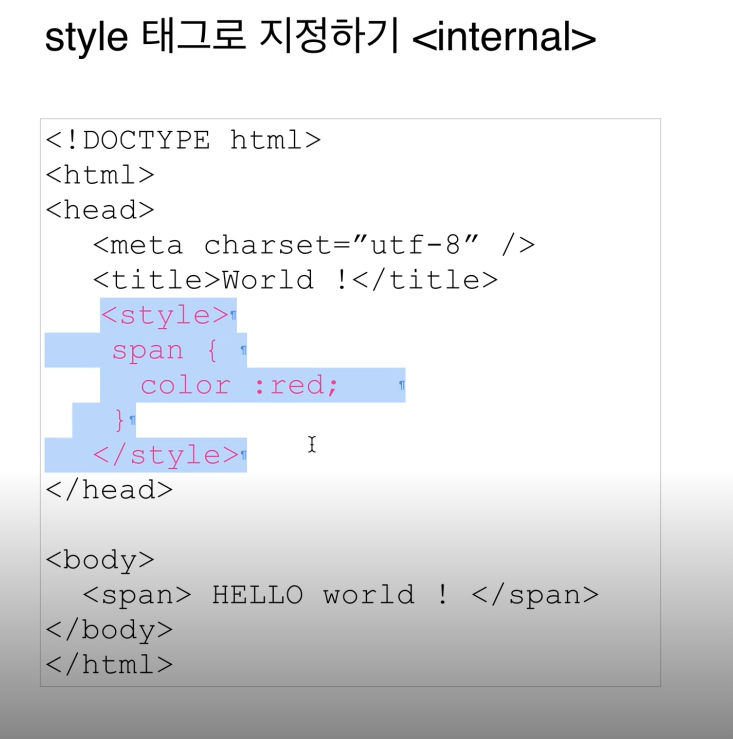
internal
external
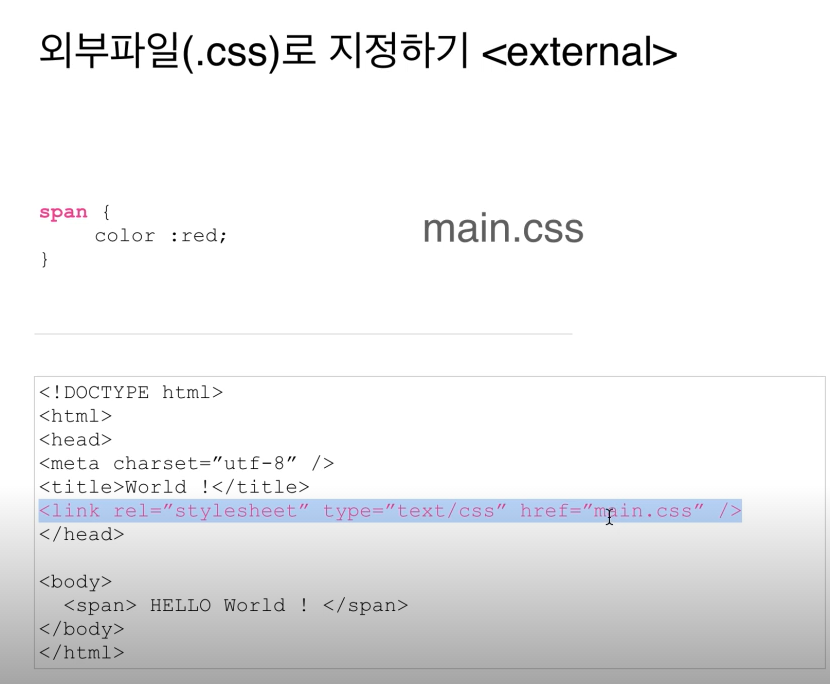
외부의 파일 하나만 관라히면 되므로 효율적이다.
2) 상속과 우선순위 결정 - 1
<!DOCTYPE html>
<html>
<head>
  <meta charset="utf-8">
  <meta name="viewport" content="width=device-width">
  <title>JS Bin</title>
  <style>
    body > div {
      color: red;
      font-size : 30px;
      border:2px solid slategray;
      padding: 30px;
    }

    div ul li div p {
      color: green;
    }
  </style>
</head>

<body>
  <div>
    <span>my text is upper</span>
    <ul>
      <li>
        <span>my text is dummy</span>
        <div>
            <p>Lorem ipsum ~~~ssdsdsaasasdf</p>
        </div>
      </li>
      <li></li>
    </ul>
  </div>
</body>

</html>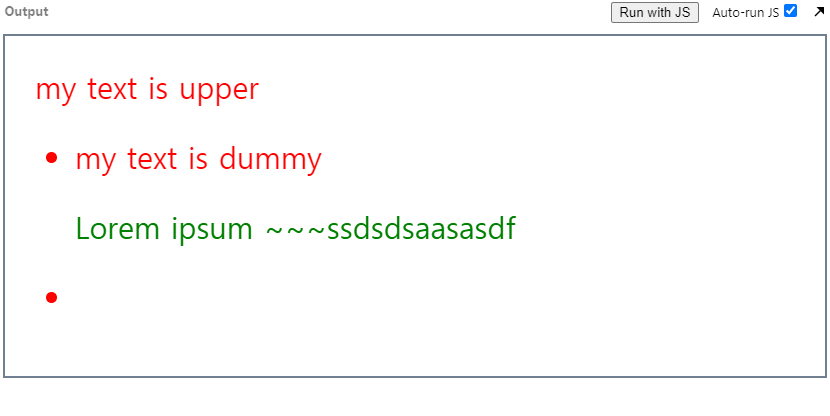
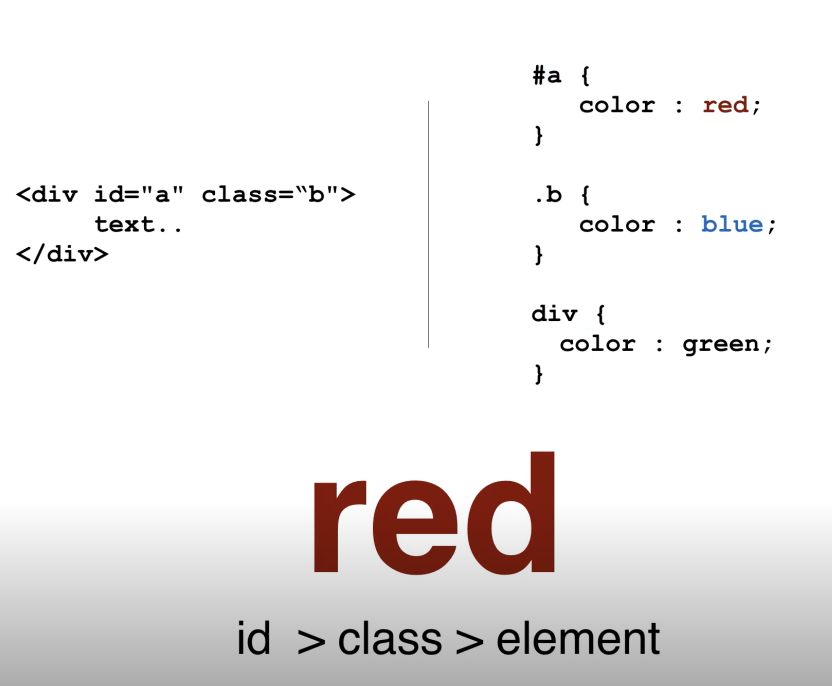
2)상속과 우선순위 결정 - 2
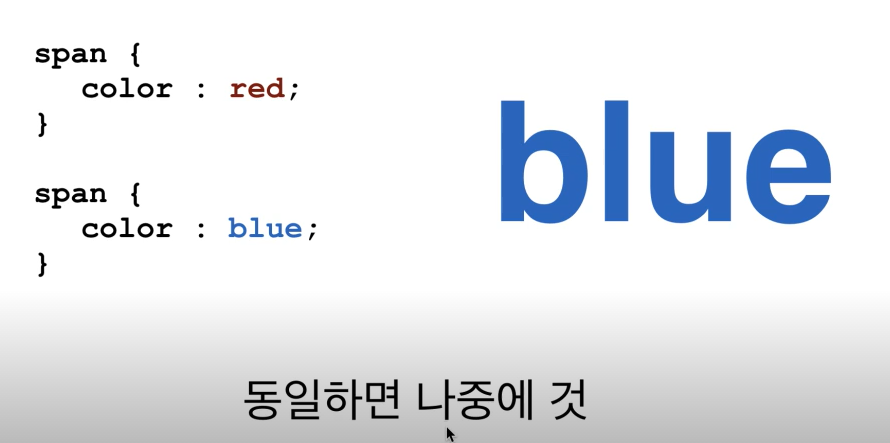
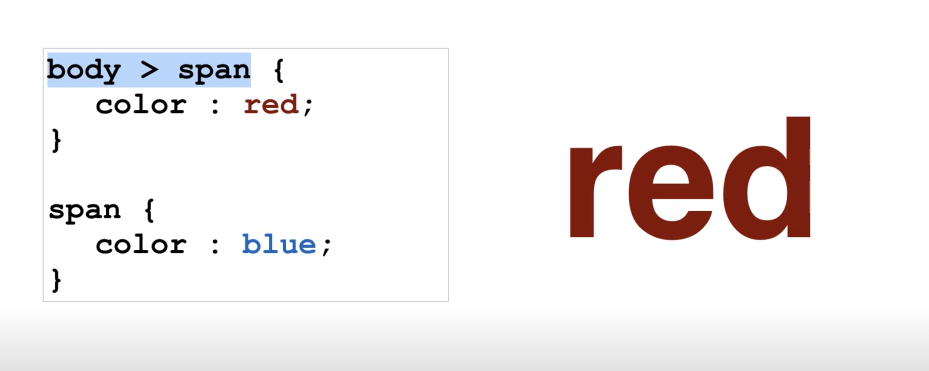
구체적인것을 우선으로 적용한다
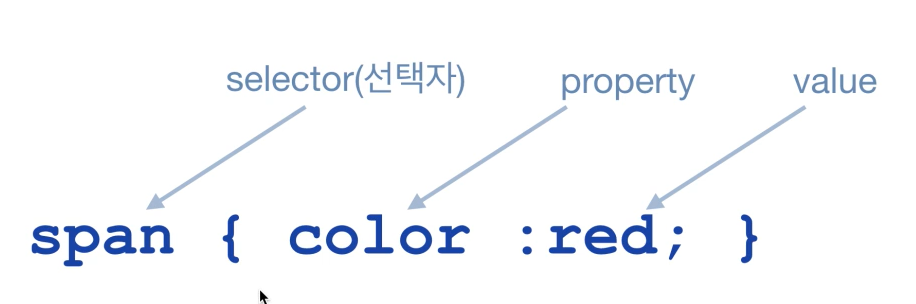
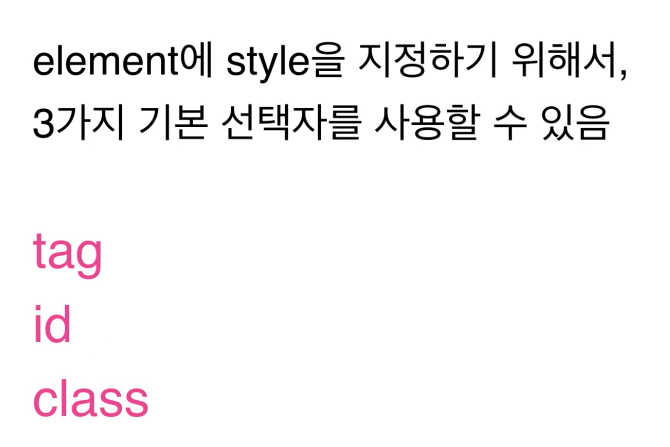
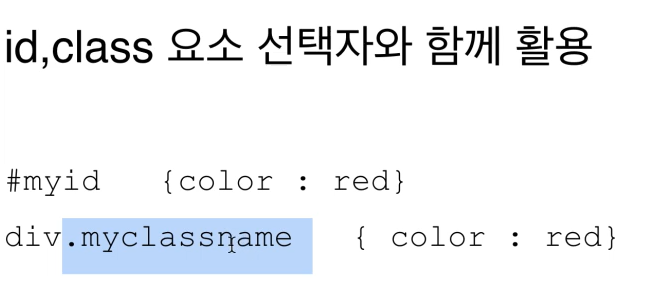
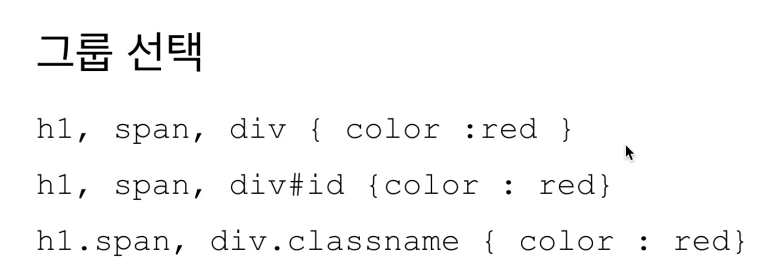
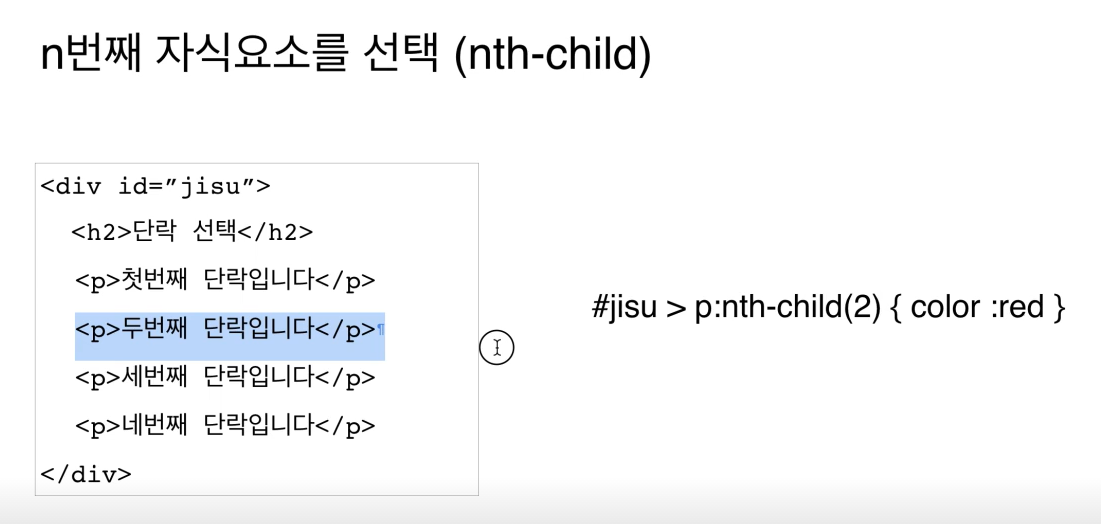
3) CSS Selector
HTML의 요소를 tag, id, class, html 태그 속성등을 통해 쉽게 찾아주는 방법

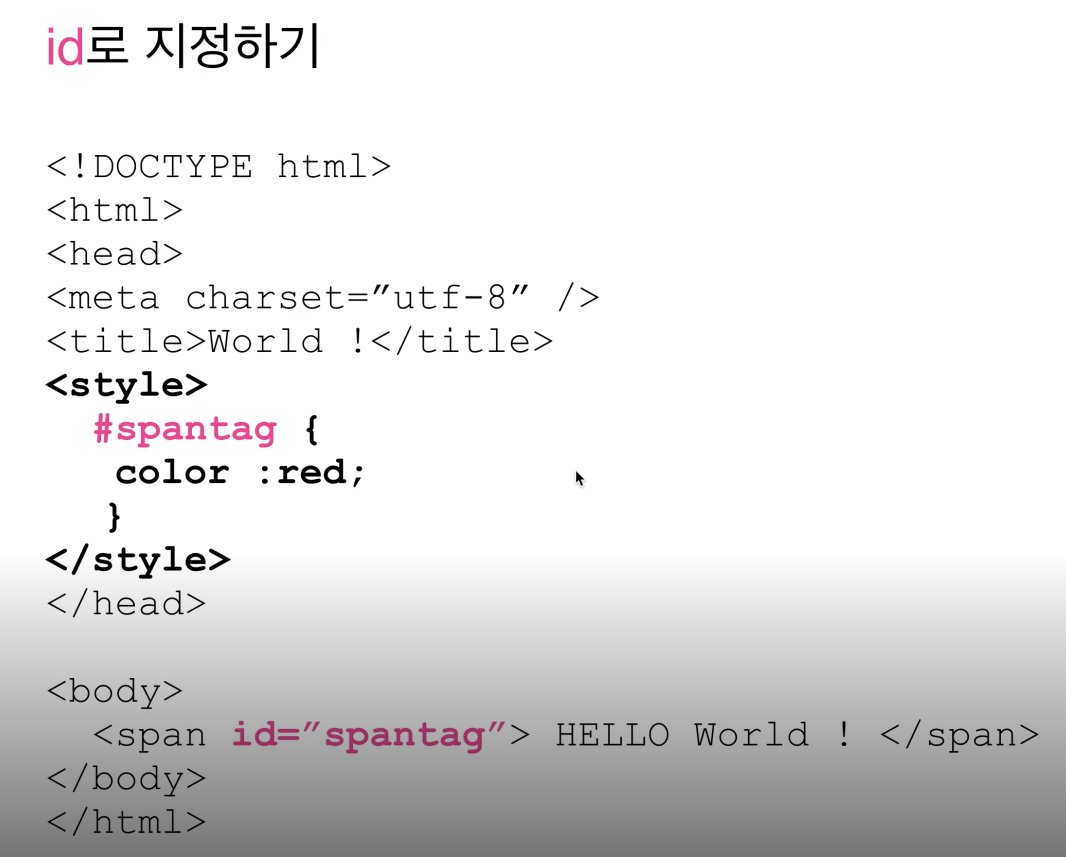
같은 아이디가 여러개 있을 때, 자바스크립트에서는 제일 위 하나만 찾아지지만 css는 다 찾아서 적용한다.
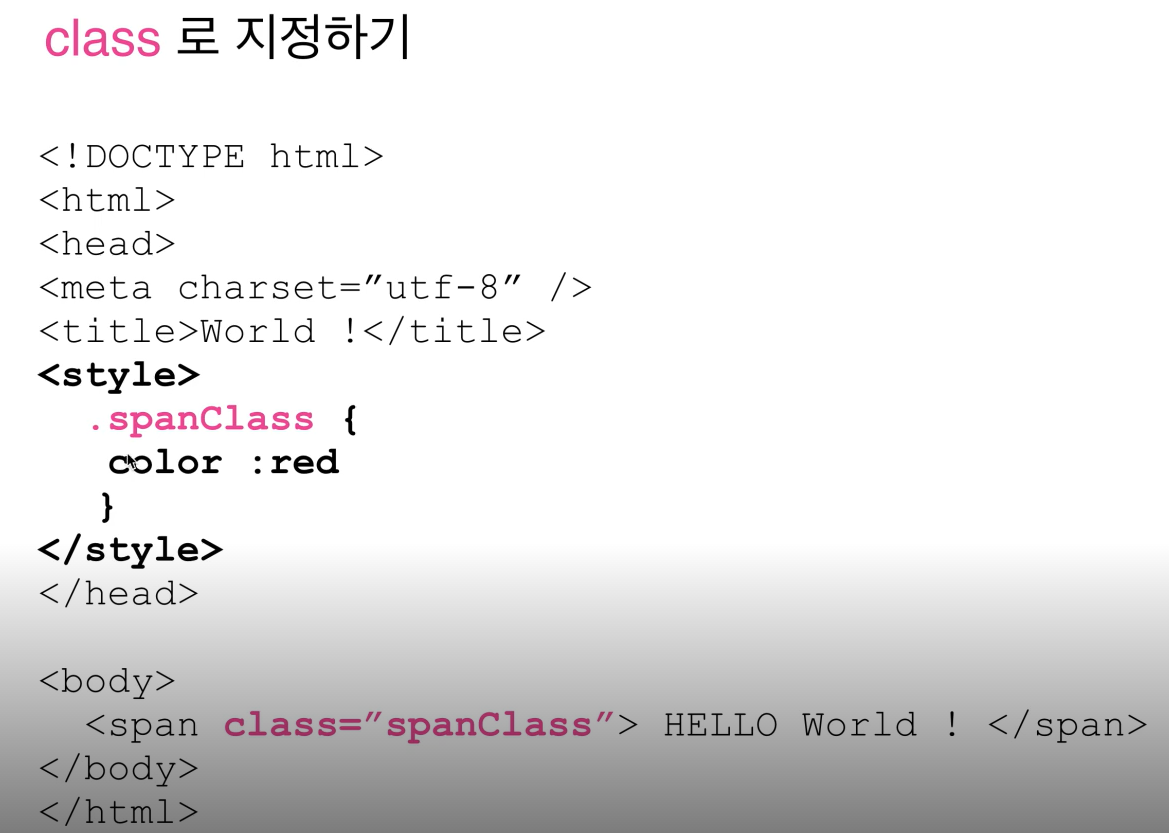

3) CSS 기본 Style 변경하기
<!DOCTYPE html>
<html>
<head>
  <meta charset="utf-8">
  <meta name="viewport" content="width=device-width">
  <title>JS Bin</title>
  <style>
    body > div {
      font-size: 32px;
      background-color: #ff0;
      font-family: monospace;
    }

    .myspan {
      color: #f00;
      font-size: 2em;
    }
  </style>
</head>

<body>
  <div>
    <span class="myspan">My text is upper</span>
  </div>

</body>

</html>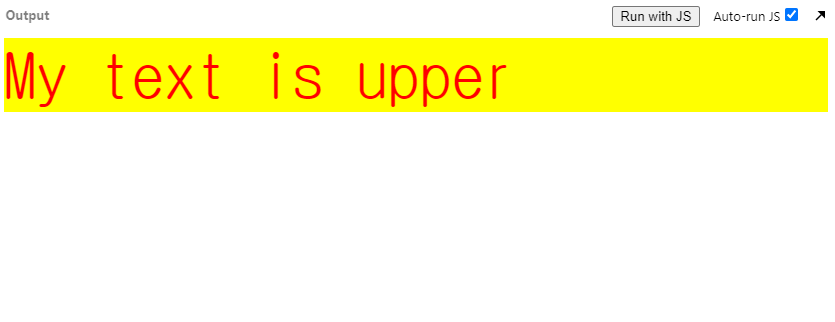
em은 상속받은 기본 값의 몇배를 의미한다. 여기에서는 div의 기본 값이 32px이므로 2em을 하면 64px가 된다.
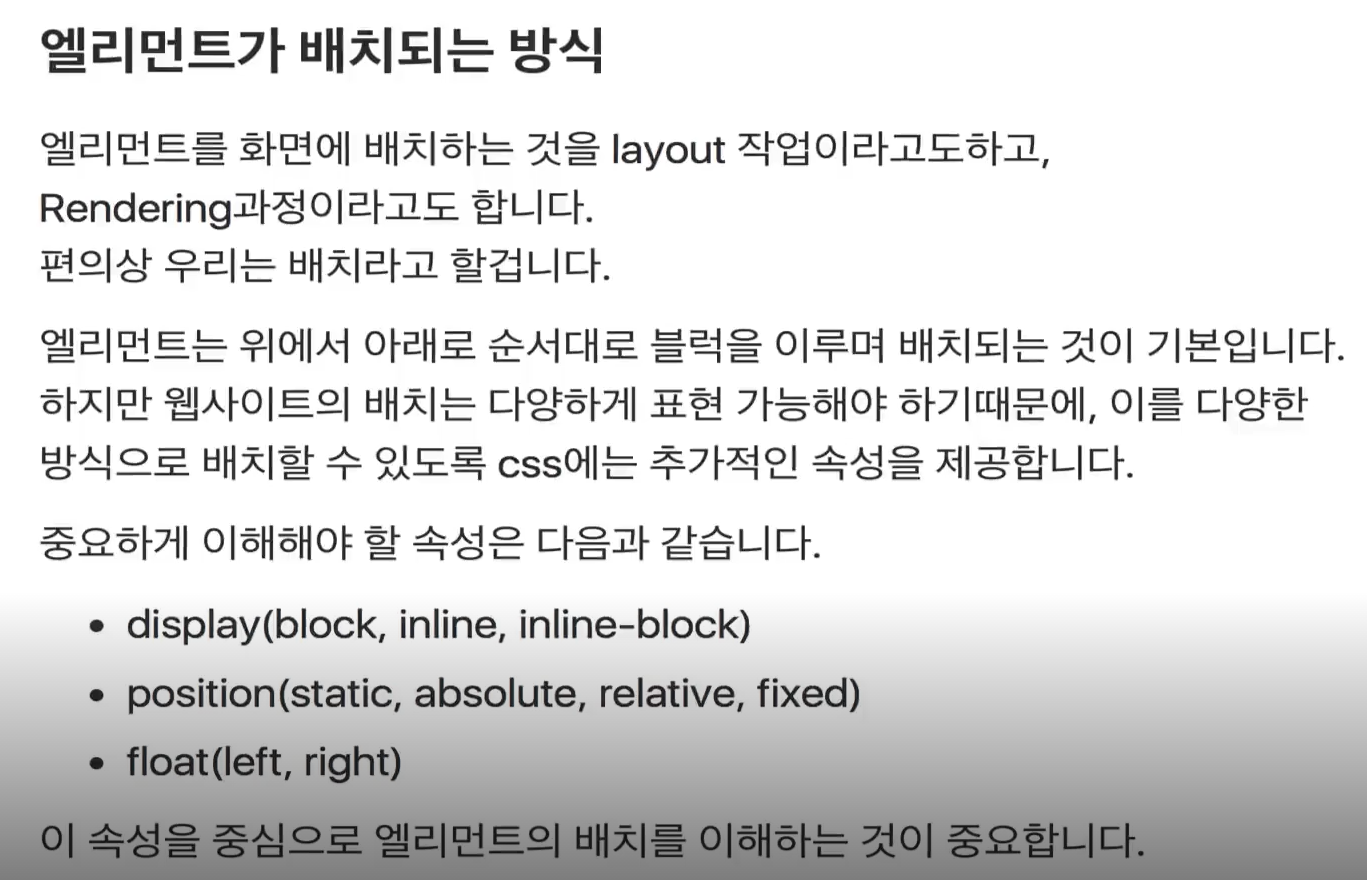
5) Element가 배치되는 방법(CSS layout)-1
<!DOCTYPE html>
<html>
<head>
<meta charset="utf-8">
<meta name="viewport" content="width=device-width">
<title>JS Bin</title>
</head>
<body>
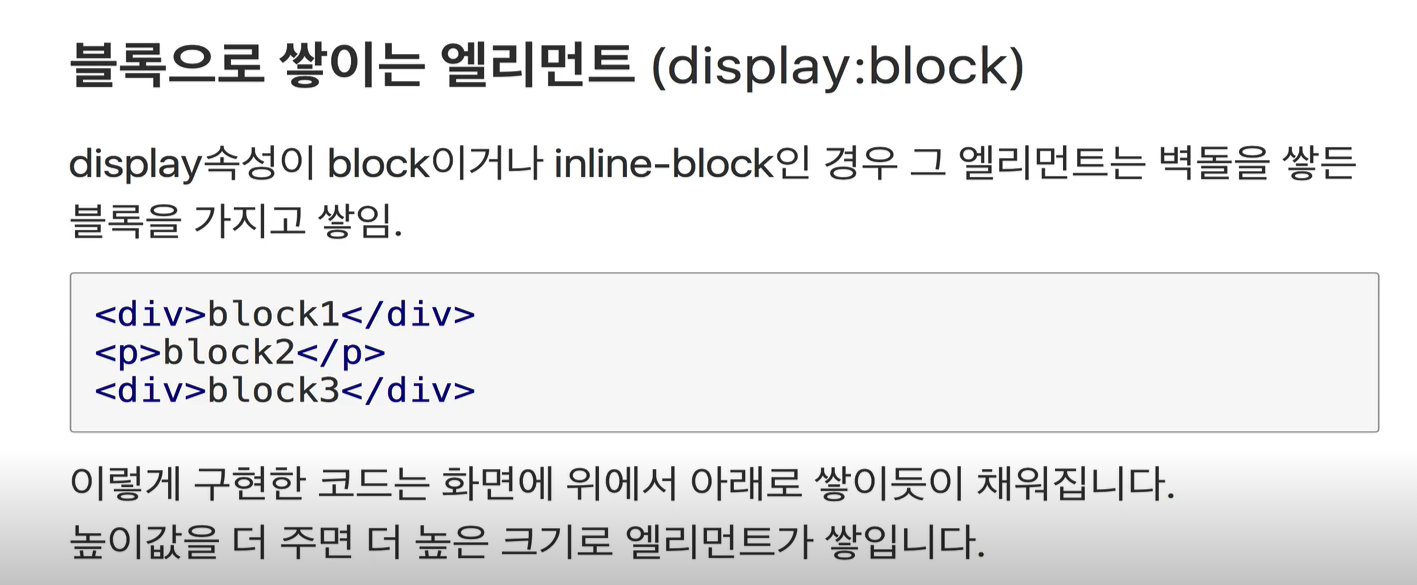
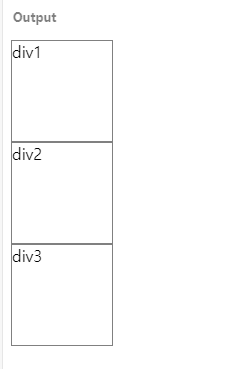
<div>div1</div>
<div>div2</div>
<div>div3</div>
</body>
</html>div {
width: 100px;
height: 100px;
border: 1px solid gray;
}
div {
  width: 100px;
  height: 100px;
  border: 1px solid gray;
  display: inline;
}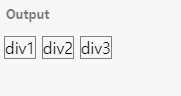
inline 속성을 주면 오른쪽으로 배치가 된다.

오른쪽으로 흐르다가 꽉차만 아래로 내려간다.
<div>
  <span>나는 어떻게 배치되나요?</span>
  <span>좌우로 배치되는군요</span>
  <a>링크는요?</a>
  <strong>링크도 강조도 모두 좌우로 흐르는군요</strong>
  모두다 display속성이 inline인 엘리먼트이기 때문입니다.
</div>
span, a, strong 모두 inline 태그다.
상위 엘리먼트 중 static이 아닌 것이 기준점이다.
<!DOCTYPE html>
<html>
<head>
  <meta charset="utf-8">
  <meta name="viewport" content="width=device-width">
  <title>JS Bin</title>

</head>

<body>
  <div class="wrap">
    <div class="static">static(default)</div>
    <div class="relative">relative(left:10px)</div>
    <div class="absolute">absolute(left:130px;top:30px)</div>
    <div class="fixed">fixed(top:250px)</div>
  </div>

</body>

</html>
css
.wrap {
  position: relative;
}

.wrap > div {
  width: 150px;
  height: 100px;
  border:1px solid gray;
  font-size: 0.7em;
  text-align:center;
  line-height:100px;
}

.relative {
  position:relative;
  left:10px;
}

.absolute {
  position:absolute;
  left:130px;
  top:30px;
}

.fixed {
  position: fixed;
  top: 250px;
}
absolute는 top과 left를 0이라도 꼭 주는 것이 좋다.
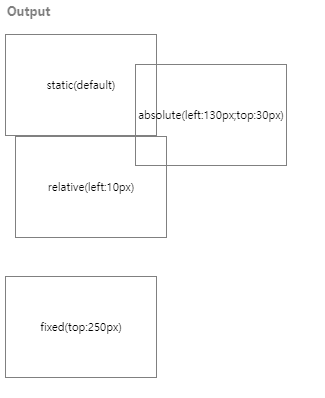
absolute의 위치가 저기인 이유는 absolute의 기준점은 상위 엘리먼트의 static이 아닌 것이다. 현재 absolute의 상위는 "wrap"클래스인데 그 클래스는 static이 아닌 relative이므로 기준점이 된다.
relative는 원래 자기가 있을 자리를 기준으로 이동한다.
fixed는 바디를 기준으로 변경되는 것이다. 스크롤을 내려고 그대로 된다.
<!DOCTYPE html>
<html>
<head>
  <meta charset="utf-8">
  <meta name="viewport" content="width=device-width">
  <title>JS Bin</title>

</head>

<body>
  <div>left</div>
  <div class="bottom">bottom</div>
</body>
</html>
css
* {
 border:1px solid gray;
}

.bottom {
  margin-top : 10px;
  margin-left: 20px;
}
5) Element가 배치되는 방법(CSS layout)-2
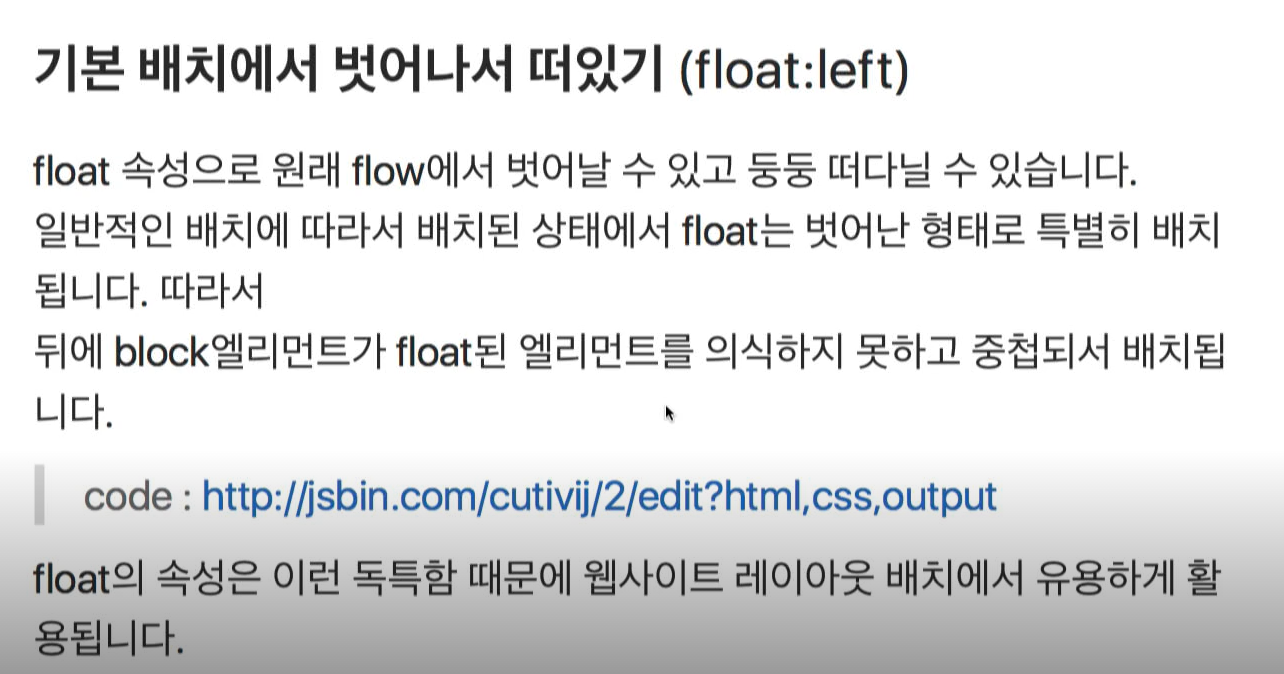
float
<!DOCTYPE html>
<html>
<head>
  <meta charset="utf-8">
  <meta name="viewport" content="width=device-width">
  <title>JS Bin</title>

</head>

<body>
  <div class="blue"></div>
  <div class="green"></div>
  <div class="red"></div>
</body>
</html>
css
div {
  width: 100px; height: 100px;
  border:1px solid gray;
  font-size: 0.7em;
}

.blue {
  background-color:blue;
}

.green {
  float:left;
  background-color:green;
  margin-left:40px;
}

.red {
  background-color:red;
}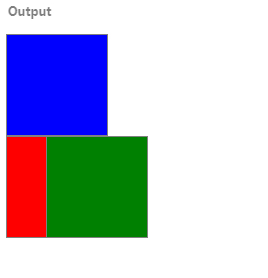
green은 float가 되어 떠다니게되고, 그 자리를 red가 밑에서 올라와서 채운다.

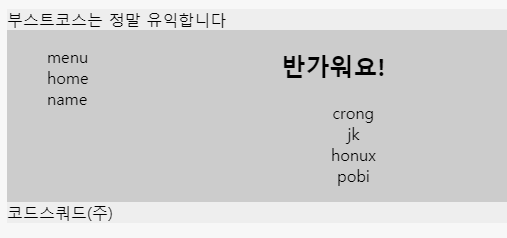
6) float 기반 샘플 화면 레이아웃 구성
<!DOCTYPE html>
<html>
<head>
  <meta charset="utf-8">
  <meta name="viewport" content="width=device-width">
  <title>JS Bin</title>

</head>

<body>
  <header>부스트코스는 정말 유익합니다</header>
  <div id="wrap">
    <nav class="left">
      <ul>
        <li>menu</li>
        <li>home</li>
        <li>name</li>
      </ul>
    </nav>
    <div class="right"><h2>반가워요!</h2>
      <ul>
        <li>crong</li>
        <li>jk</li>
        <li>honux</li>
        <li>pobi</li>
      </ul>
     </div>
  </div>
  <footer>코드스쿼드(주)</footer>
</body>
</html>
css
header {
  background-color: #eee;
}

#wrap {
  background-color: #ccc;
}

.left, .right {
  float:left;
}

footer {
  background-color: #eee;
}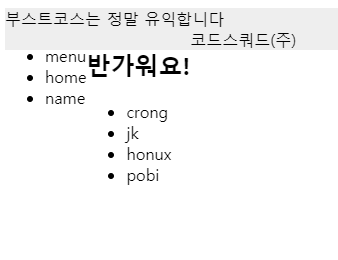
left와 right가 float이니 footer가 밀고 올라와버렸다. float에게 위의 float을 밀지 않게 css를 변경해주자
footer {
  background-color: #eee;
  clear: left;
}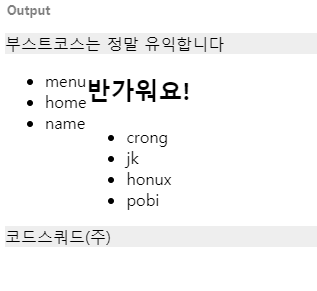
상위 박스의 float을 인지하고 올라가지 않는다.
css
header {
  background-color: #eee;
}

#wrap {
  background-color: #ccc;
}

.left, .right {
  float:left;
}

.left {
  width: 20%;
}

.right {
  width: 80%;
  text-align: center;
}

footer {
  background-color: #eee;
  clear: left;
}

li {
  list-style: none;
}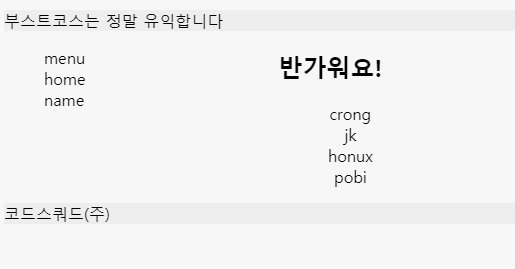
css를 고쳐줬지만, 배경 색깔이 없어졌다.
자식이 float인 경우에는 떠있기 때문에 자식으로 생각하지 않는다.
css
#wrap {
  background-color: #ccc;
  overflow: auto;
}
자식을 overflow줘서 인지하므로 색깔이 나온다.
<!DOCTYPE html>
<html>
<head>
  <meta charset="utf-8">
  <meta name="viewport" content="width=device-width">
  <title>JS Bin</title>

</head>

<body>
  <header>부스트코스는 정말 유익합니다</header>
  <div id="wrap">
    <nav class="left">
      <ul>
        <li>menu</li>
        <li>home</li>
        <li>name</li>
      </ul>
    </nav>
    <div class="right">
      <h2>
         <span>반가워요!</span>
         <div class="emoticon">:-)</div>
      </h2>
      <ul>
        <li>crong</li>
        <li>jk</li>
        <li>honux</li>
        <li>pobi</li>
      </ul>
     </div>
     <div class="realright">
        oh~ right
     </div>
  </div>
  <footer>코드스쿼드(주)</footer>
</body>
</html>
css
li {
   list-style:none;
}

header {
   background-color : #eee;
}

#wrap {
   overflow:auto;
   margin:20px 0px;
}

.left, .right, .realright {
   float:left;
   height: 200px;
}

.left {
   width:17%;
   margin-right:3%;
   background-color : #47c;
}

.right {
   width : 60%;
   text-align:center;
   background-color : #47c;
}

.realright {
   width: 17%;
   margin-left:3%;
   background-color : #67c;
}

.right > h2 {
   position:relative;
}

.right .emoticon {
   position:absolute;
   top:0px;
   right:5%;
   color:#fff;
}

footer {
   background-color : #eee;
}
7) 디버깅-HTML-CSS
개발환경 설정 - BE
1) JDK 다운받기 및 설치하기
2) 환경설정하기
3) 이클립스 다운받기 및 설치하고 인코딩 설정하기
4) HelloWorld 컴파일하고 실행하기
5) Tomcat 다운받기 및 설치하기
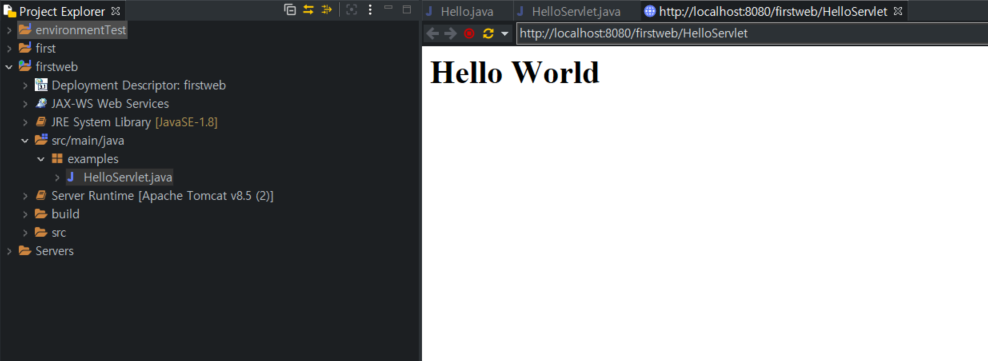
6) HelloWorld 서블릿 컴파일 및 실행하기-1
new -> project -> web -> Dynamic Web Project
project name: firstweb
Target runtime: Tomcat v8.5 (next후 tomcat 설치된 경로 설정해주기)
6) HelloWorld 서블릿 컴파일 및 실행하기-2
new -> servlet
java package: examples
class Name: HelloServlet
http://localhost:8080/{프로젝트이름}/{URL Mapping값}
HelloServlet
@WebServlet("/HelloServlet")
public class HelloServlet extends HttpServlet {
	private static final long serialVersionUID = 1L;

    /**
     * @see HttpServlet#HttpServlet()
     */
    public HelloServlet() {
        super();
        // TODO Auto-generated constructor stub
    }

	/**
	 * @see HttpServlet#doGet(HttpServletRequest request, HttpServletResponse response)
	 */
	protected void doGet(HttpServletRequest request, HttpServletResponse response) throws ServletException, IOException {
		response.setContentType("text/html;charset=UTF-8");
		PrintWriter out = response.getWriter();
		out.println("<h1>Hello World</h1>");
	}

}
5. Servlet - BE
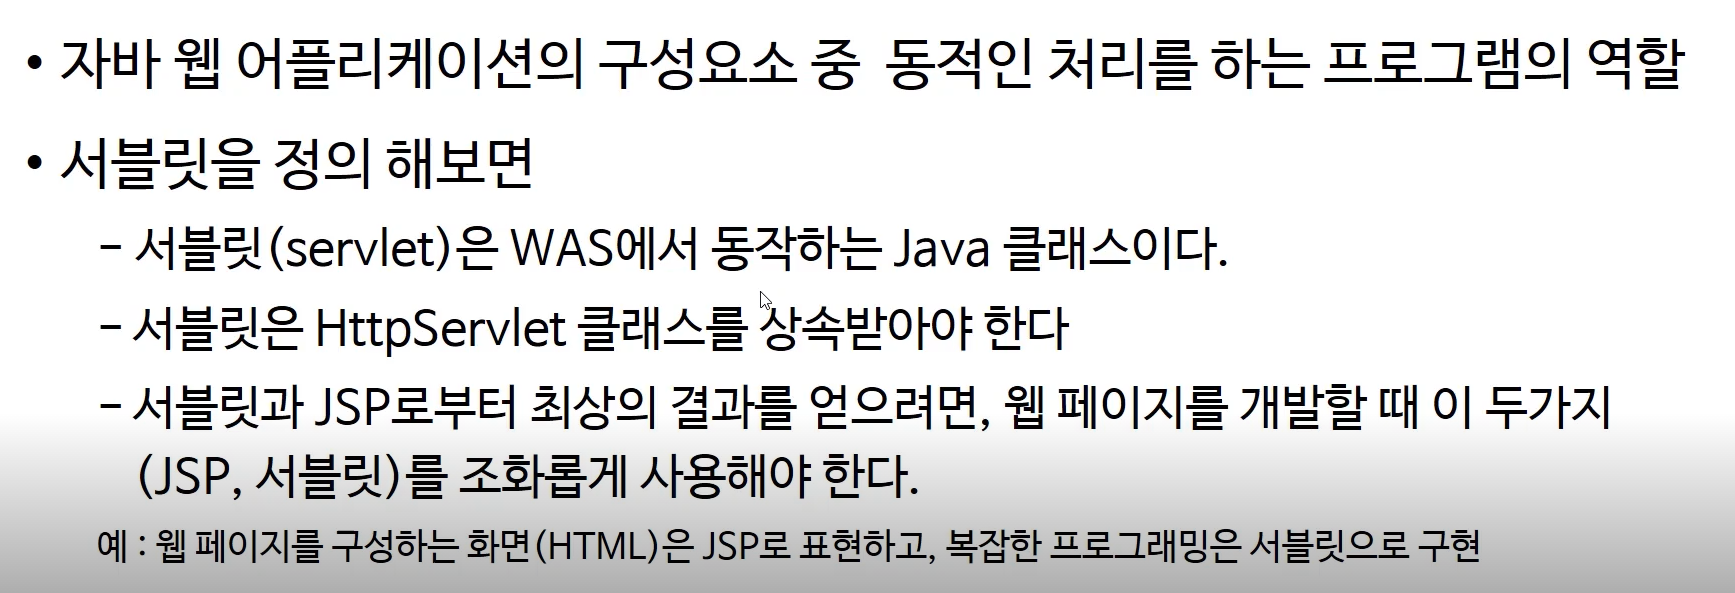
1) Servlet 이란?
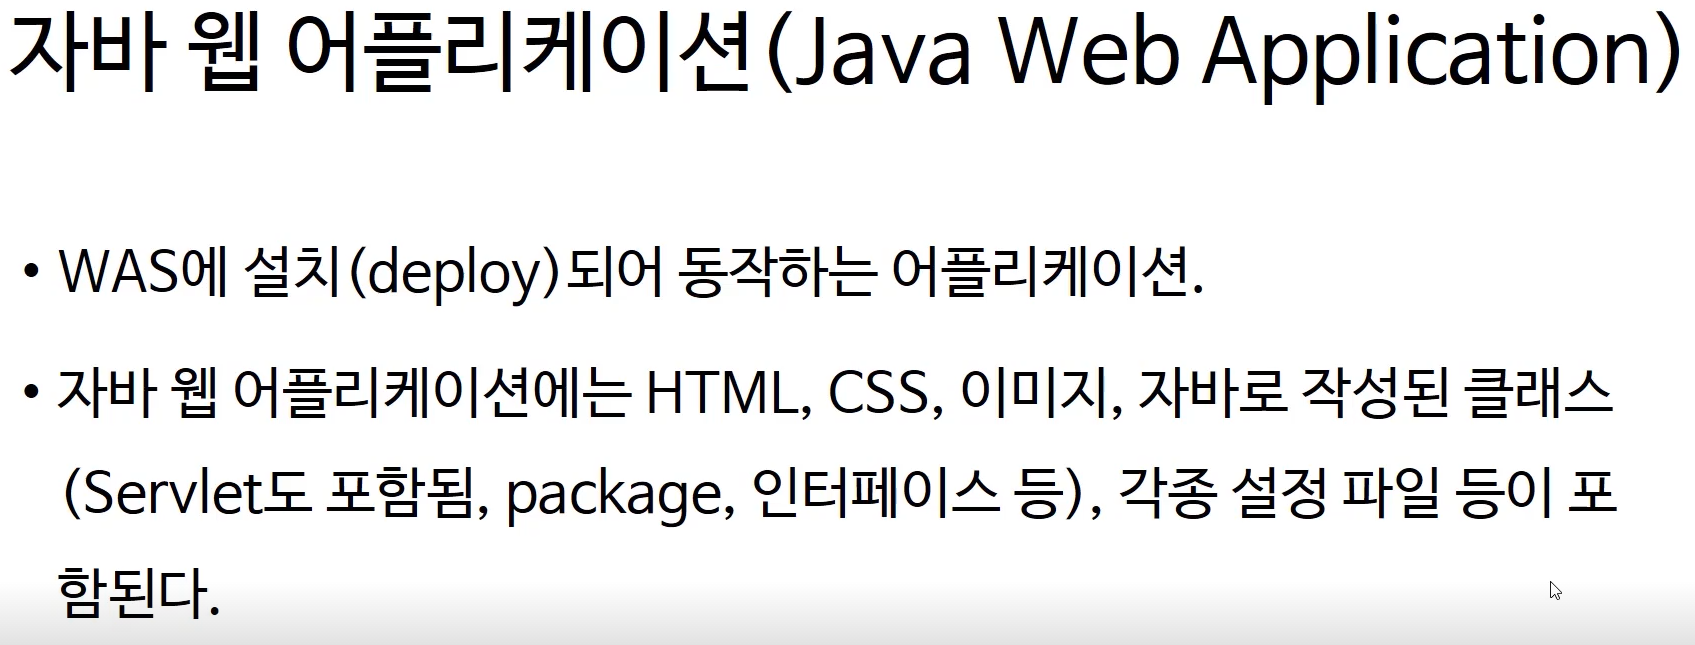
자바 웹 어플리케이션
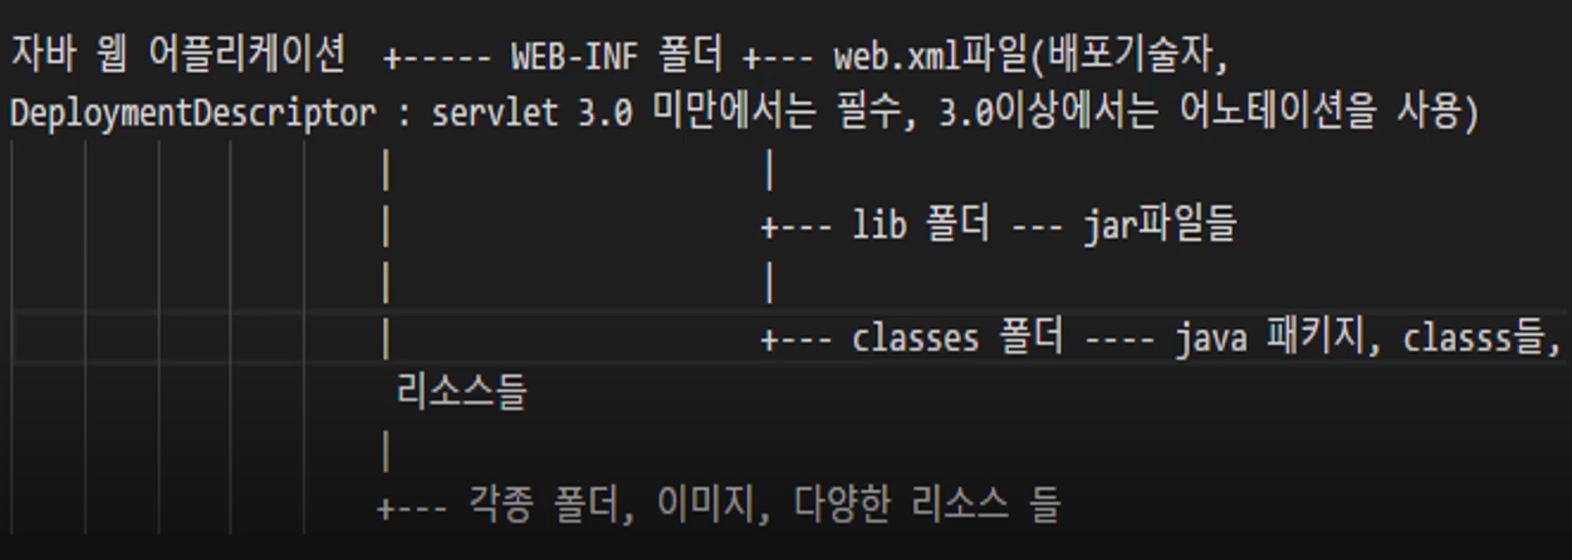
자바 웹 어플리케이션의 폴더 구조
Servlet이란?
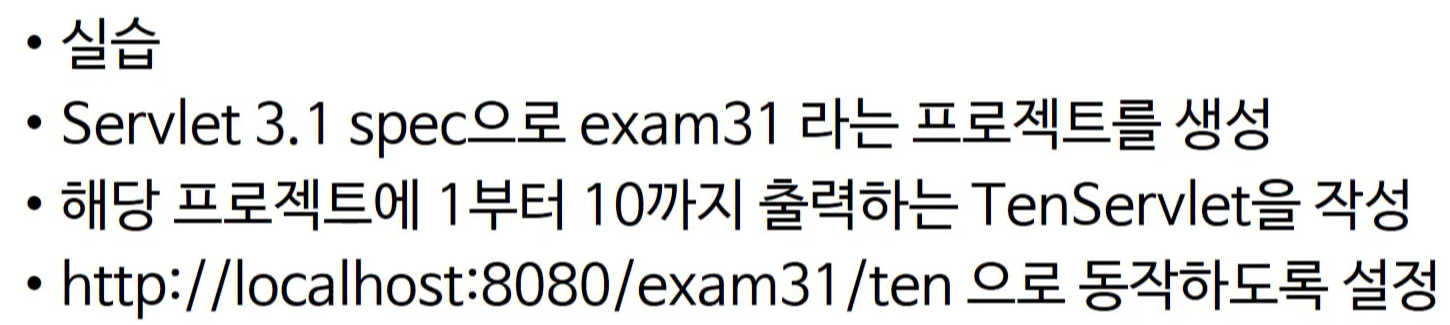
2) Servlet 작성 방법-1

2) Servlet 작성 방법-2
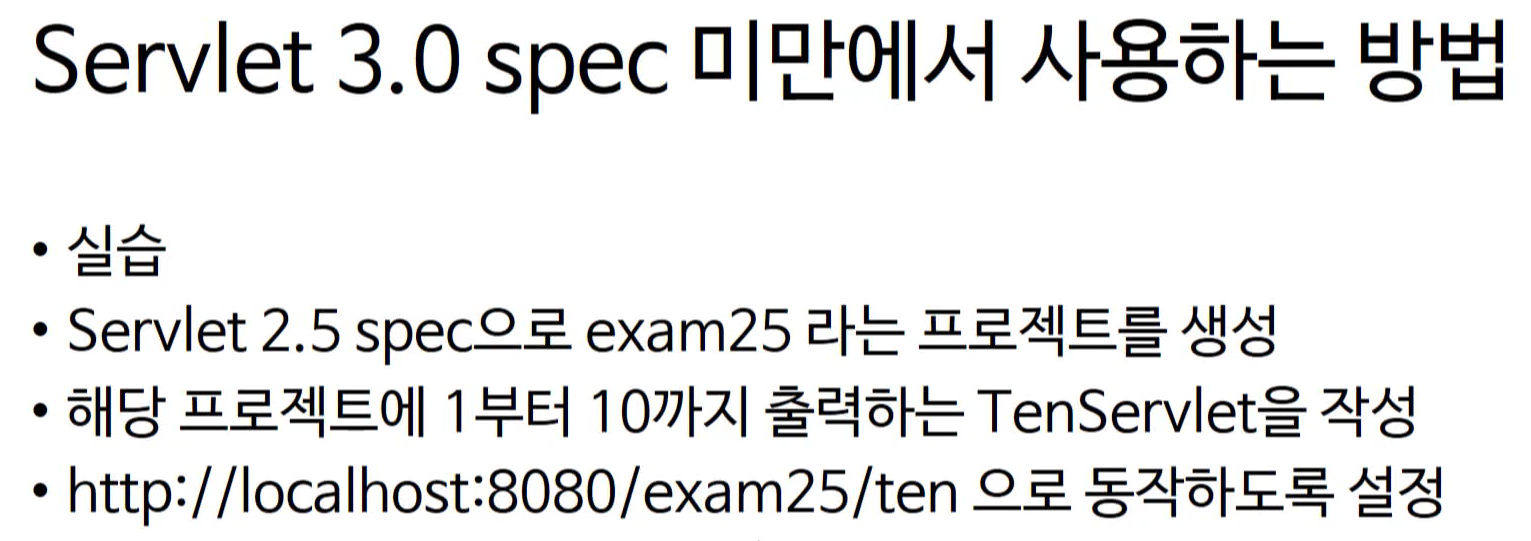
Servlet 3.0 spec 이상에서 사용하는 방법
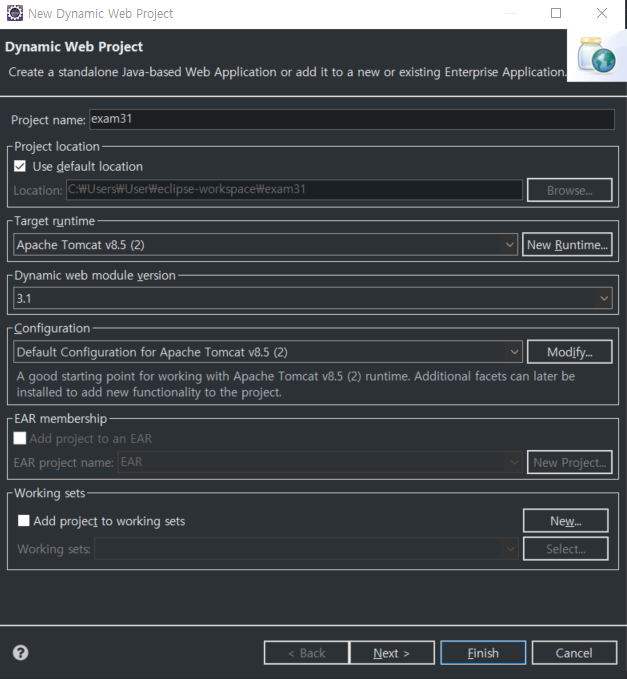
dynamic web module version이 서블릿 버전이다.
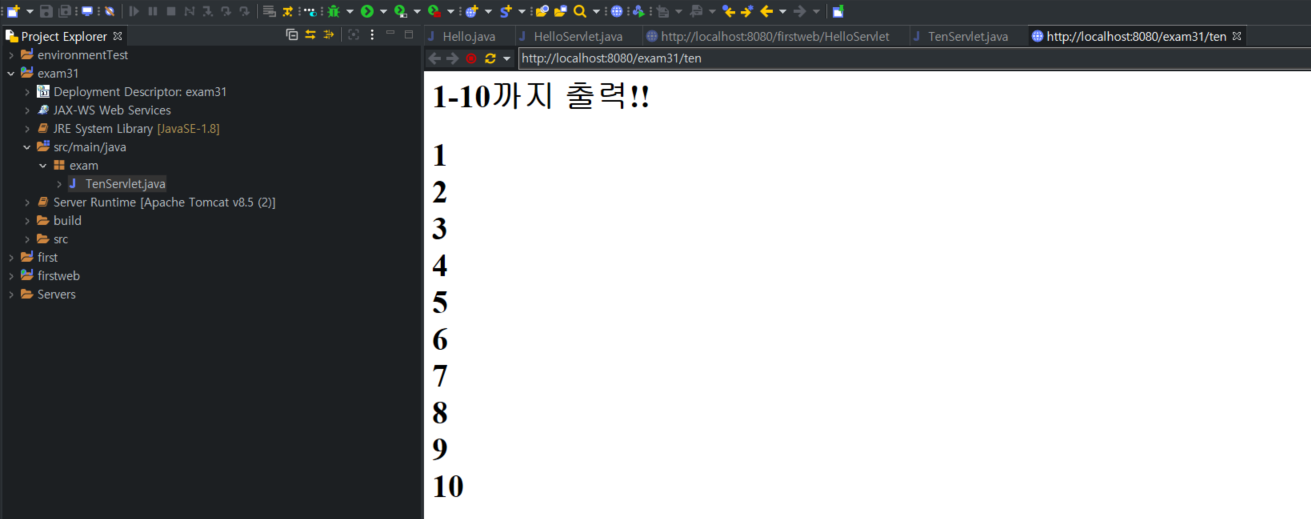
TenServlet
package exam;

import java.io.IOException;
import javax.servlet.ServletException;
import javax.servlet.annotation.WebServlet;
import javax.servlet.http.HttpServlet;
import javax.servlet.http.HttpServletRequest;
import javax.servlet.http.HttpServletResponse;

/**
 * Servlet implementation class TenServlet
 */
@WebServlet("/ten")
public class TenServlet extends HttpServlet {
	private static final long serialVersionUID = 1L;

    /**
     * @see HttpServlet#HttpServlet()
     */
    public TenServlet() {
        super();
        // TODO Auto-generated constructor stub
    }

	protected void doGet(HttpServletRequest request, HttpServletResponse response) throws ServletException, IOException {
		response.setContentType("text/html;charset=utf-8");
		PrintWriter out = response.getWriter();
		out.println("<h1>1-10까지 출력!!<h1>");
		for (int i = 1; i <= 10; i++) {
			out.print(i + "<br>");
		}
		out.close();
	}

}
doGet에서 함수 파라미터로 request 와 response가 있다. 클라이언트는 요청을 받아내는 객체와 응답을 위한 객체를 자동으로 생성해서 가지고 있다.
out.println()이든 out.print()이든 상관없다. 어짜피 html이므로 <br> 태그를 넣어주지 않으면 줄바꿈은 되지 않는다.
위의 애노테이션에 값을 바꾸면 url이 바뀌는 것이다.
2) Servlet 작성 방법-3
<?xml version="1.0" encoding="UTF-8"?>
<web-app xmlns:xsi="http://www.w3.org/2001/XMLSchema-instance" xmlns="http://java.sun.com/xml/ns/javaee" xsi:schemaLocation="http://java.sun.com/xml/ns/javaee http://java.sun.com/xml/ns/javaee/web-app_2_5.xsd" id="WebApp_ID" version="2.5">
  ...
  <servlet>
    <description></description>
    <display-name>TenServlet</display-name>
    <servlet-name>TenServlet</servlet-name>
    <servlet-class>exam.TenServlet</servlet-class>
  </servlet>
  <servlet-mapping>
    <servlet-name>TenServlet</servlet-name>
    <url-pattern>/ten</url-pattern>
  </servlet-mapping>
</web-app>
url로 요청이오면 servlet-mapping에 해당 url-pattern을 찾고, 그 servlt-name을 찾는다. servlet-name으로 위의 등록된 servlet들에서 클래스를 찾는다.
3) Servlet 라이프 싸이클-1
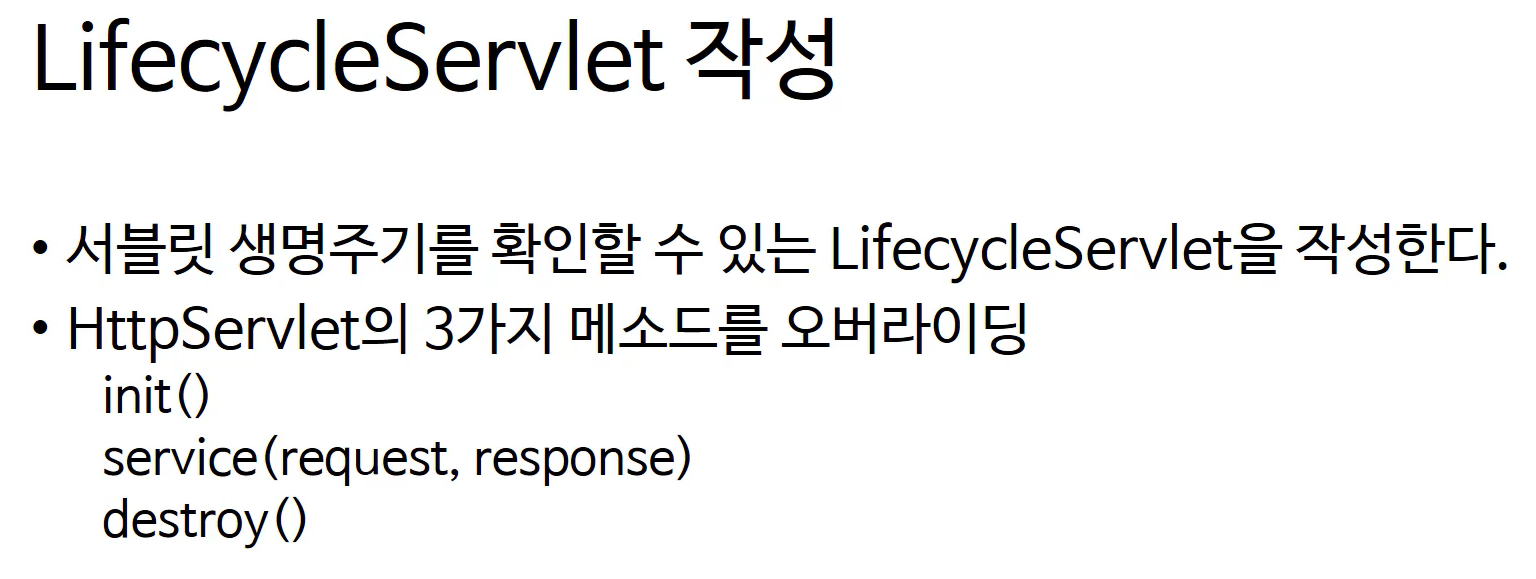
LifecycleServlet
package examples;

import java.io.IOException;
import javax.servlet.ServletConfig;
import javax.servlet.ServletException;
import javax.servlet.annotation.WebServlet;
import javax.servlet.http.HttpServlet;
import javax.servlet.http.HttpServletRequest;
import javax.servlet.http.HttpServletResponse;


@WebServlet("/LifecycleServlet")
public class LifecycleServlet extends HttpServlet {
	private static final long serialVersionUID = 1L;


    public LifecycleServlet() {
        System.out.println("LifecycleServlet 생성!!");
    }


	public void init(ServletConfig config) throws ServletException {
		System.out.println("init 호출!!");
	}


	public void destroy() {
		System.out.println("destroy 호출!!");
	}


	protected void service(HttpServletRequest request, HttpServletResponse response) throws ServletException, IOException {
		System.out.println("service 호출!!");
	}

}
URL로 요청이오면 해당 서블릿이 메모리에 있는지 확인한다. 만약 메모리에 없으면 생성한다. 한번 생성된 이후에는 다른 창에서 요청을 해도 생성하지 않고 service만 호출하는 것을 알 수 있다. 만약 코드에 변경을 하고 서버를 재시작하면 다시 생성자부터 호출된다.
7월 13, 2021 8:02:18 오후 org.apache.coyote.AbstractProtocol start
정보: 프로토콜 핸들러 ["http-nio-8080"]을(를) 시작합니다.
7월 13, 2021 8:02:18 오후 org.apache.catalina.startup.Catalina start
정보: Server startup in 642 ms
LifecycleServlet 생성!!
init 호출!!
service 호출!!
service 호출!!
3) Servlet 라이프 싸이클-2
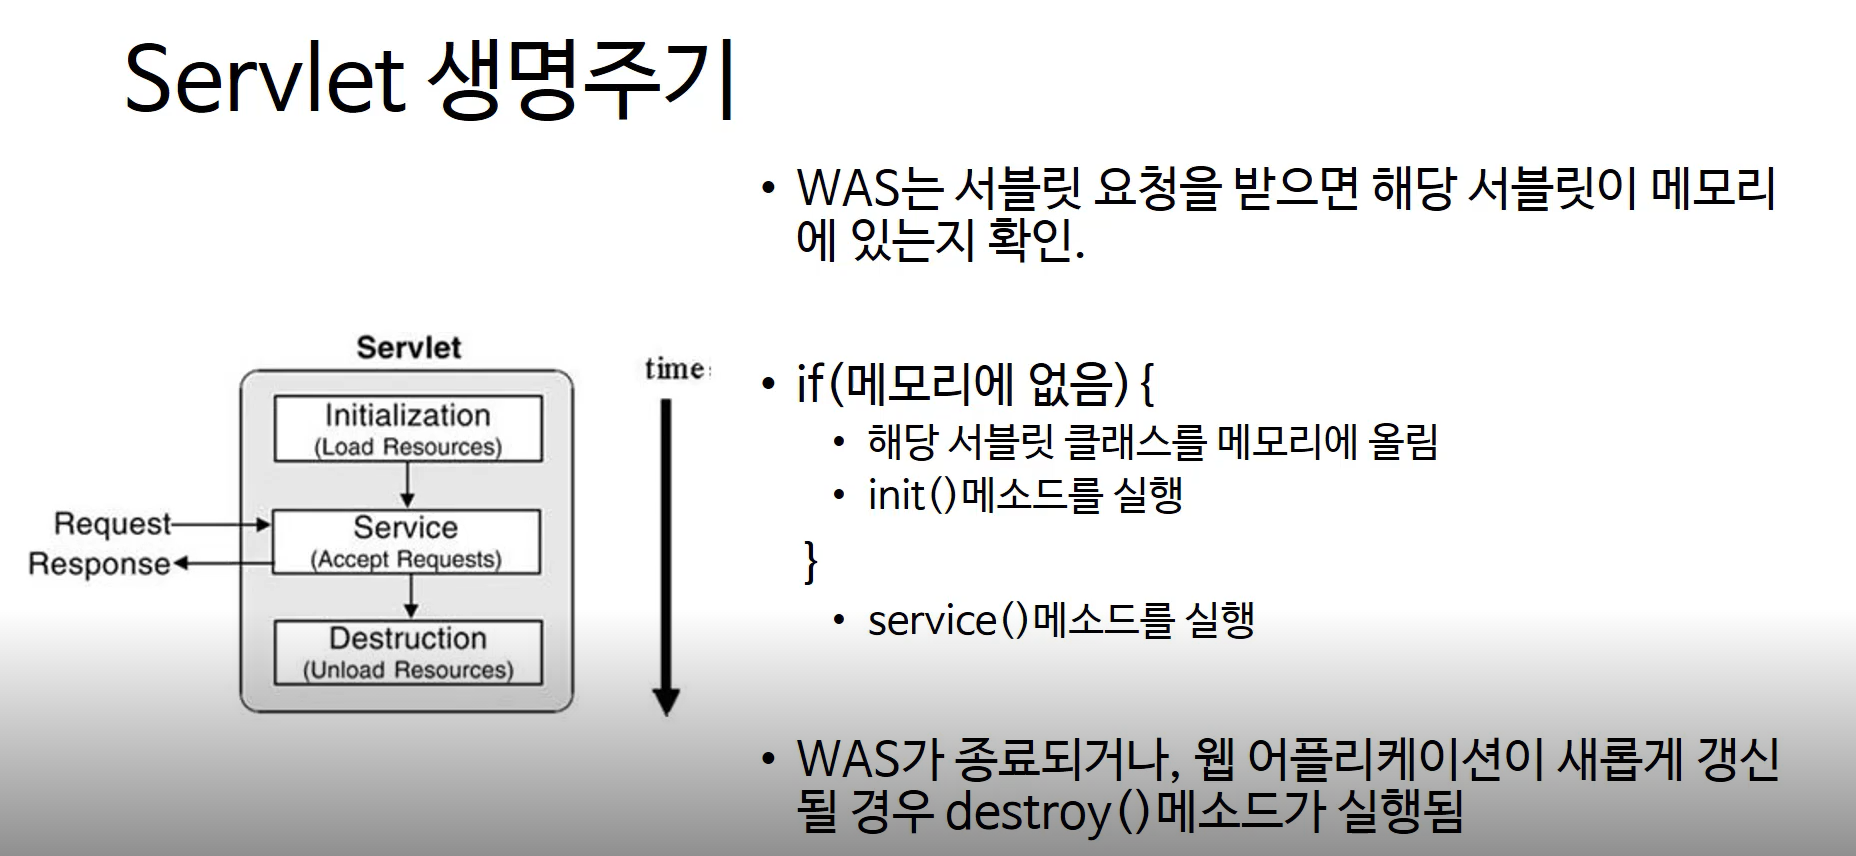
Servlet 생명주기
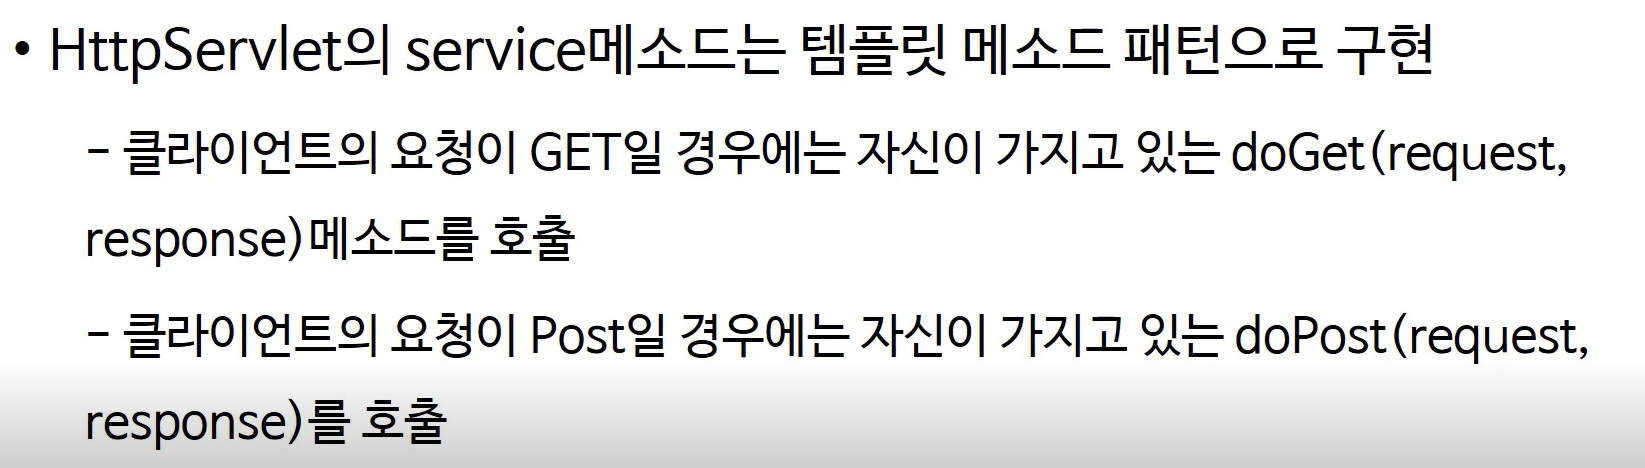
service(request, response) 메소드
LifecycleServlet 수정
LifecycleServlet
package examples;
import java.io.IOException;
import java.io.PrintWriter;
import javax.servlet.ServletConfig;
import javax.servlet.ServletException;
import javax.servlet.annotation.WebServlet;
import javax.servlet.http.HttpServlet;
import javax.servlet.http.HttpServletRequest;
import javax.servlet.http.HttpServletResponse;
@WebServlet("/LifecycleServlet")
public class LifecycleServlet extends HttpServlet {
private static final long serialVersionUID = 1L;
public LifecycleServlet() {
System.out.println("LifecycleServlet 생성!!");
}
public void init(ServletConfig config) throws ServletException {
System.out.println("init 호출!!");
}
public void destroy() {
System.out.println("destroy 호출!!");
}
// protected void service(HttpServletRequest request, HttpServletResponse response) throws ServletException, IOException {
// System.out.println("service 호출!!");
//}
@Override
protected void doGet(HttpServletRequest request, HttpServletResponse response) throws ServletException, IOException {
response.setContentType("text/html;charset=UTF-8");
PrintWriter out = response.getWriter();
out.println("<html>");
out.println("<head><title>form</title></head>");
out.println("<body>");
out.println("<form method='post' action='/firstweb/LifecycleServlet'>");
out.println("name : <input type='text' name='name'><br>");
out.println("<input type='submit' value='ok'><br>");
out.println("</form>");
out.println("</body>");
out.println("</html>");
out.close();
}
@Override
protected void doPost(HttpServletRequest request, HttpServletResponse response) throws ServletException, IOException {
response.setContentType("text/html;charset=UTF-8");
PrintWriter out = response.getWriter();
String name = request.getParameter("name");
out.println("<h1> hello " + name + "</h1>");
out.close();
}
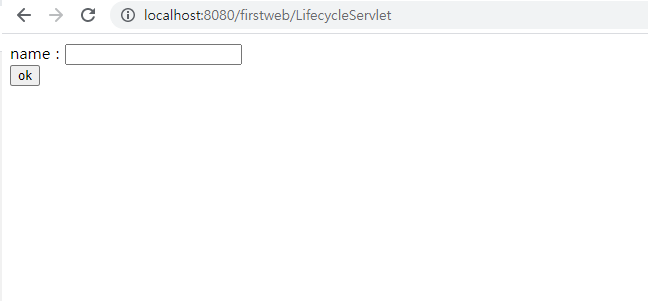
}URL을 직접 입력하거나 링크를 클릭하는 것은 GET 방식으로 요청하는 것이다. 그래서 doGet() 메서드가 실행되어서 아래 페이지가 보여진다.
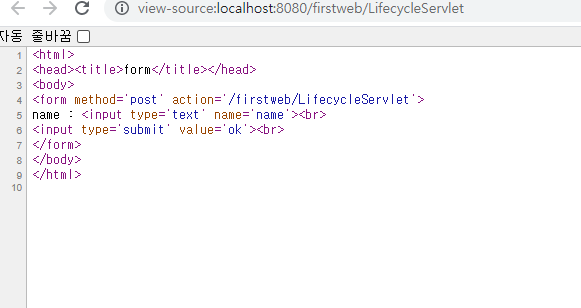
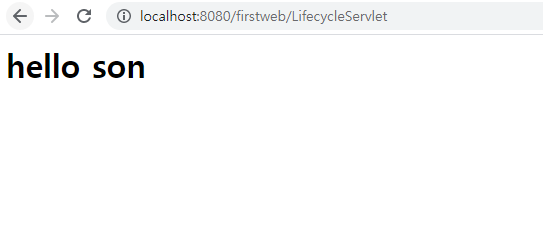
HTML을 뜯어보면 post 방식으로 마찬가지 URL에 요청을 보내는 것을 알 수 있다. 그러면 doPost()가 반응을 한다. doPost()에서는 넘어온 인자를 받아서 출력한다.
4) Request, Response 객체 이해하기-1
요청과 응답

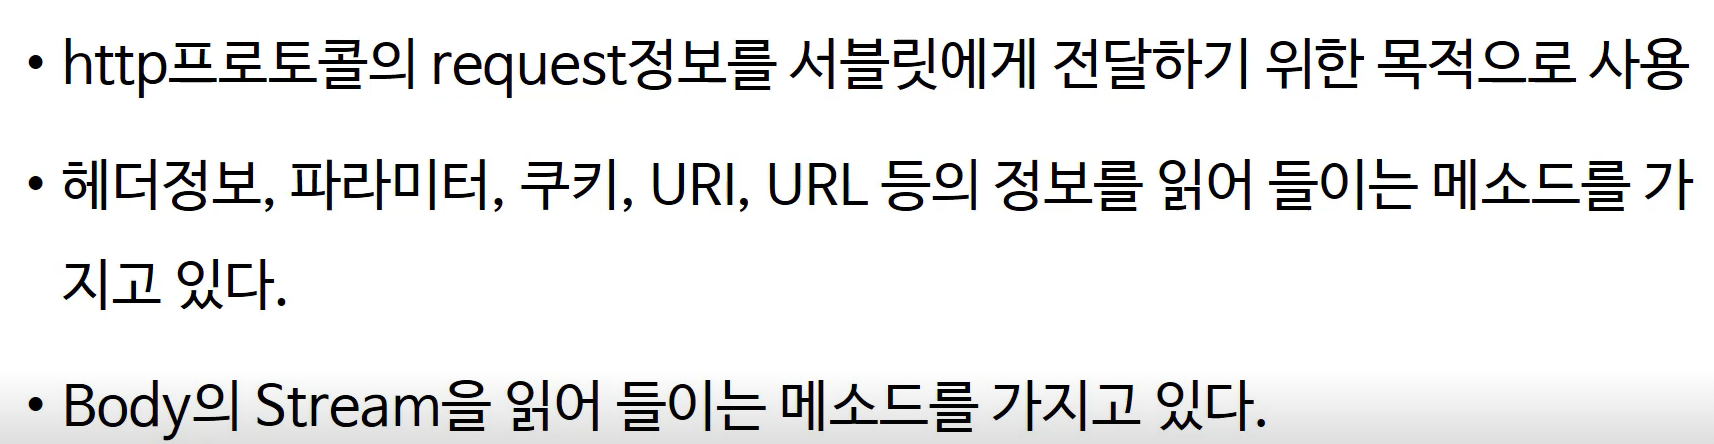
HttpServletRequest
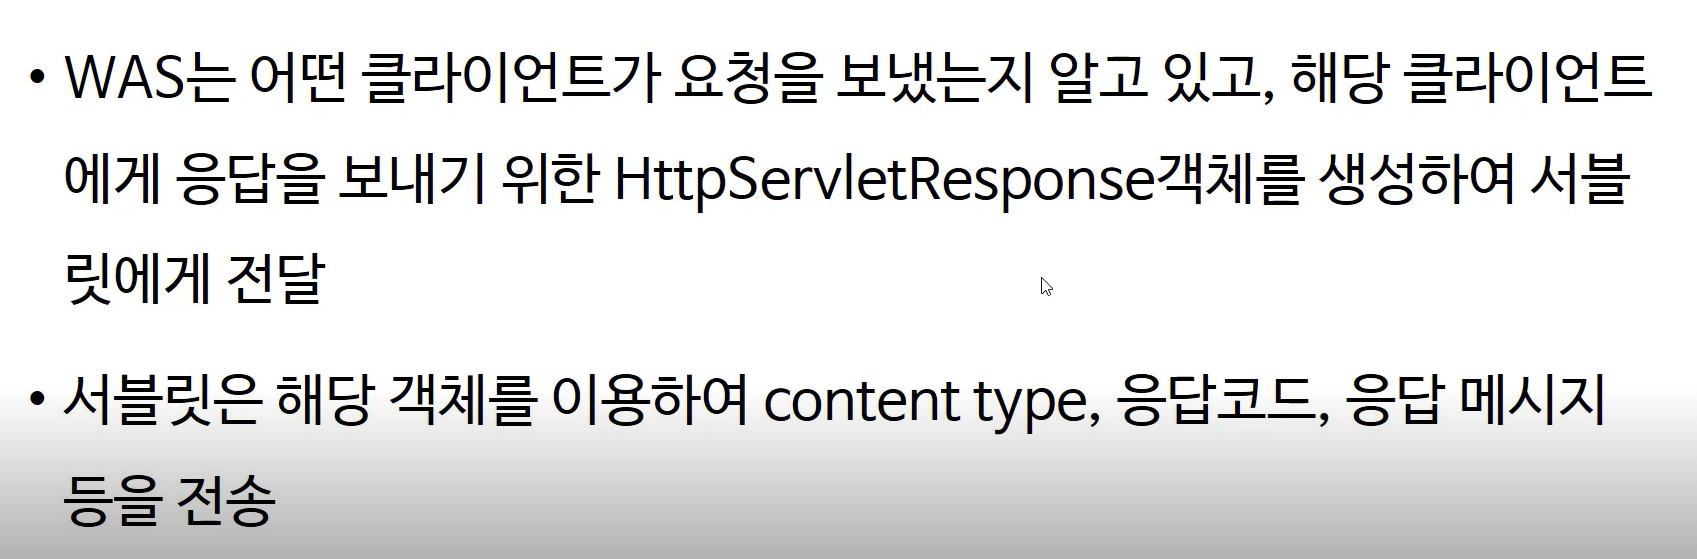
HttpServletResponse
4) Request, Response 객체 이해하기-2
헤더 정보 읽어 들이기
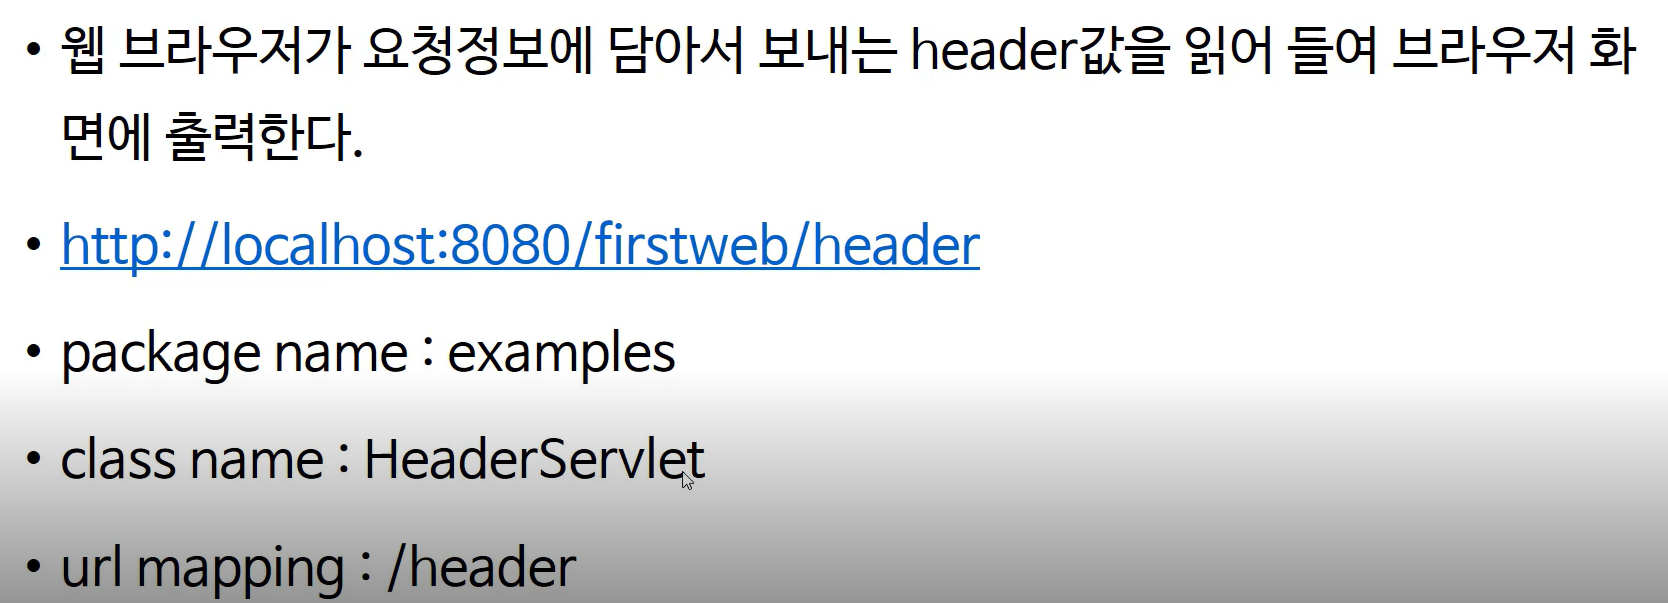
HeaderServlet
@WebServlet("/header")
public class HeaderServlet extends HttpServlet {
	private static final long serialVersionUID = 1L;


    public HeaderServlet() {
        super();
    }


	protected void doGet(HttpServletRequest request, HttpServletResponse response) throws ServletException, IOException {
		response.setContentType("text/html");
		PrintWriter out = response.getWriter();
		out.println("<html>");
		out.println("<head><title>form</title></head>");
		out.println("<body>");

		Enumeration<String> headerNames = request.getHeaderNames();
		while(headerNames.hasMoreElements()) {
			String headerName = headerNames.nextElement();
			String headerValue = request.getHeader(headerName);
			out.println(headerName + " : " + headerValue + " <br> ");
		}

		out.println("</body>");
		out.println("</html>");
	}


	protected void doPost(HttpServletRequest request, HttpServletResponse response) throws ServletException, IOException {
		doGet(request, response);
	}

}
Get메소드에서 request에 담긴 정보들을 다 출력해보고있다.
4) Request, Response 객체 이해하기- 3
파라미터 읽어 들이기
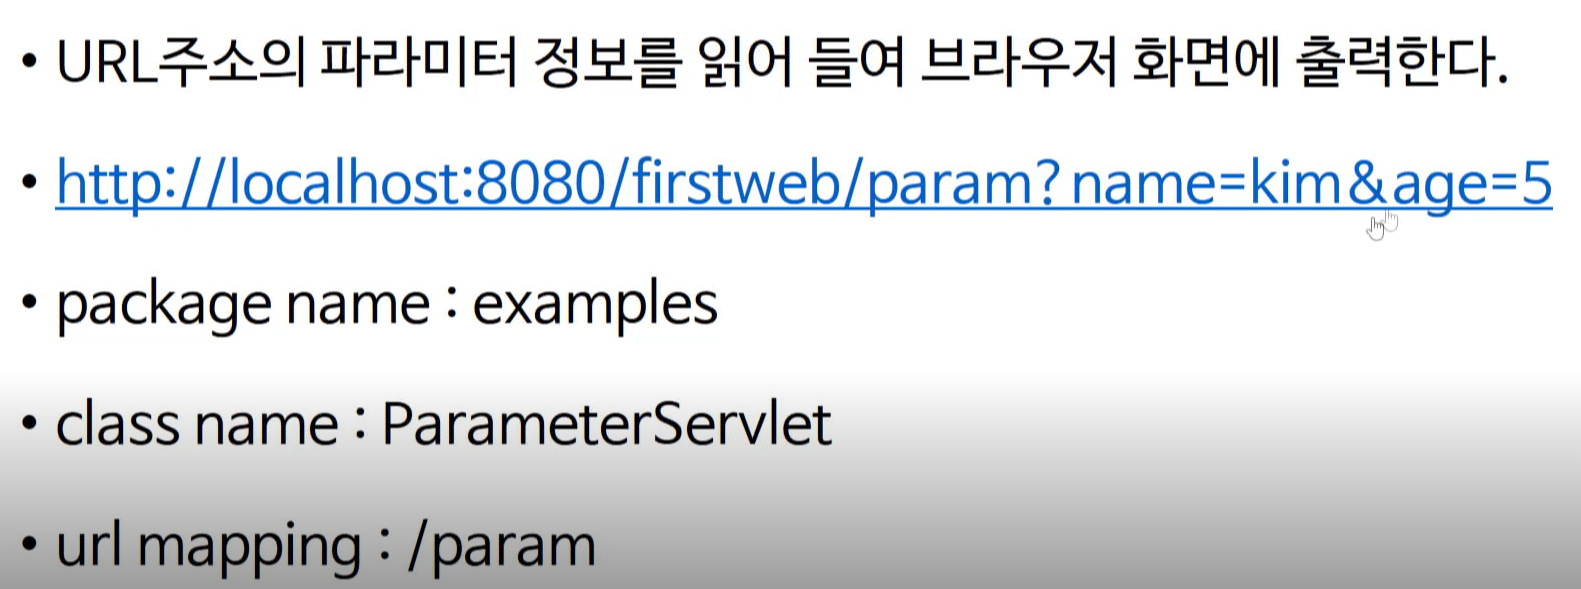
ParameterServlet
@WebServlet("/param")
public class ParameterServlet extends HttpServlet {
	private static final long serialVersionUID = 1L;


    public ParameterServlet() {
        super();
    }


	protected void doGet(HttpServletRequest request, HttpServletResponse response) throws ServletException, IOException {
		response.setContentType("text/html");
		PrintWriter out = response.getWriter();
		out.println("<html>");
		out.println("<head><title>form</title></head>");
		out.println("<body>");

		String name = request.getParameter("name");
		String age = request.getParameter("age");

		out.println("name: " + name);
		out.println("age: " + age);

		out.println("</body>");
		out.println("</html>");
	}

}
4) Request, Response 객체 이해하기- 4
그외의 요청정보 출력
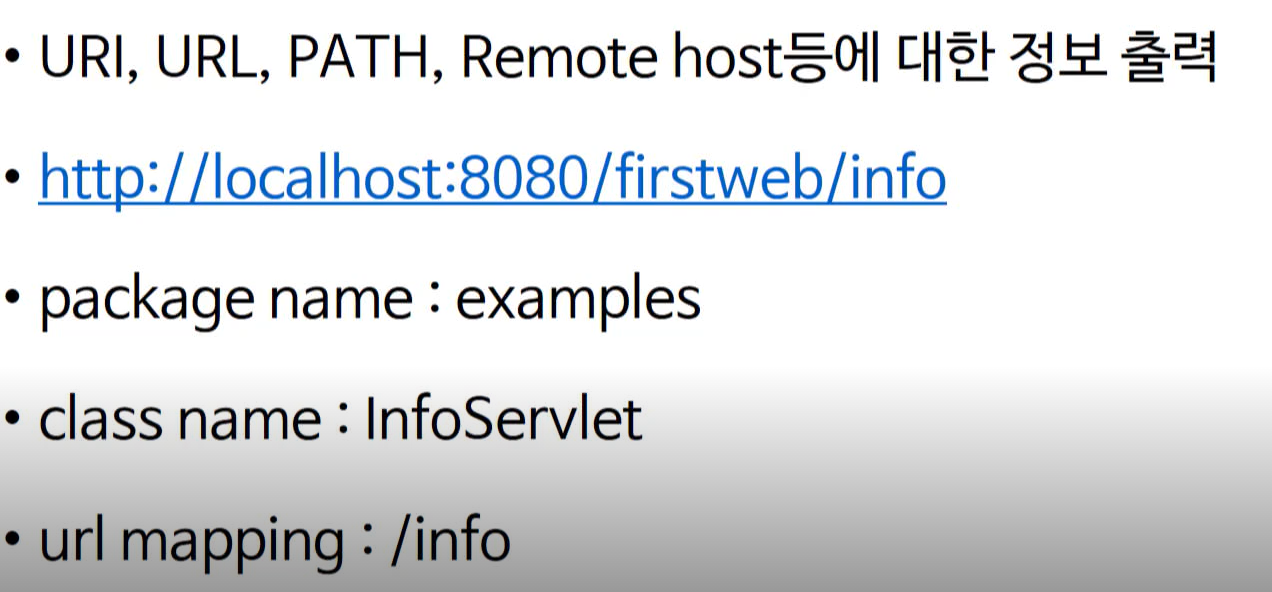
InfoServlet
@WebServlet("/info")
public class InfoServlet extends HttpServlet {
	private static final long serialVersionUID = 1L;

    public InfoServlet() {
        super();
        // TODO Auto-generated constructor stub
    }

	protected void doGet(HttpServletRequest request, HttpServletResponse response) throws ServletException, IOException {
		response.setContentType("text/html");
		PrintWriter out = response.getWriter();
		out.println("<html>");
		out.println("<head><title>info</title></head>");
		out.println("<body>");

		String uri = request.getRequestURI();
		StringBuffer url = request.getRequestURL();
		String contentPath = request.getContextPath();
		String remoteAddr = request.getRemoteAddr();


		out.println("uri : " + uri + "<br>");
		out.println("url : " + url + "<br>");
		out.println("contentPath : " + contentPath + "<br>");
		out.println("remoteAddr : " + remoteAddr + "<br>");

		out.println("</body>");
		out.println("</html>");
	}
}
URL은 인터네에서 자원의 주소이고 uri는 해당 서버에서 자원의 주소다.
WAS내에 어플리케이션 서버가 여러 개일 수 있는데 그 서버를 찾아가는데 contentPath가 사용된다.