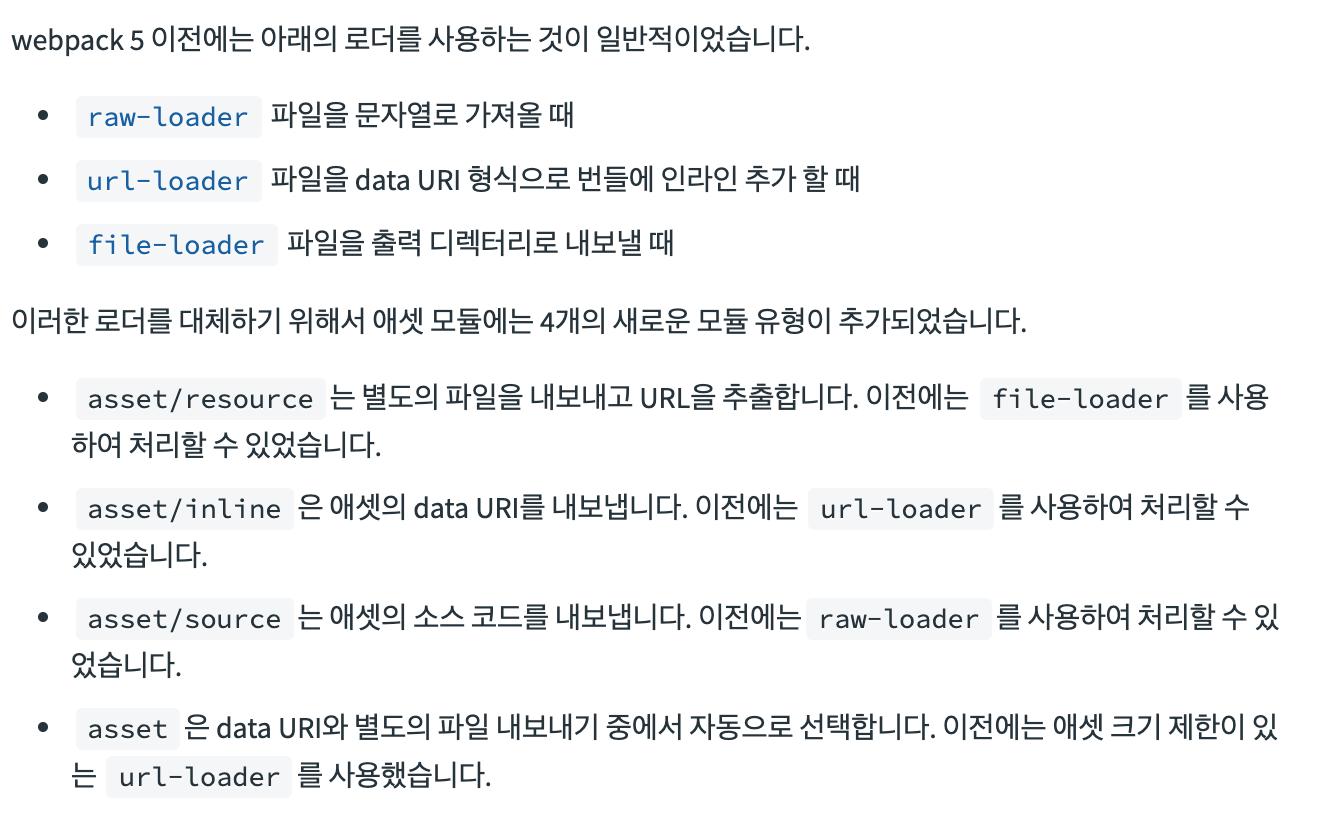
Webpack Asset Modules
Webpack 5버전 부터 가능!
참고 사이트: https://webpack.kr/guides/asset-modules/
Webpack 자체적으로 Assets 관리
이미지 전용 웹팩 설정
config.dev.js
{
  test: /\.(jpe?g|gif|png|webp|bmp|svg)$/,
  type: 'asset',
}
asset/inline으로 바꾸면data-uri방식으로 바뀌어 용량을 줄일 수 있다.
자신이 설정한 maxSize KB보다 크다면assets으로 파일 생성해서 내보냄
src로 불러오는 것이 아닌 직접 리액트 컴포넌트에서 파일(이미지)을 불러와 작성
App.js
import React from 'react';
import reactLogoPath from '../../assets/react.svg';

// App Component 모듈 관리
export default function App({ greetingMessage }) {
  return (
    <div className="app">
      <img src={reactLogoPath} alt="React" />
      <h1>{greetingMessage}</h1>
    </div>
  );
}
리액트 로고를 화면에서 볼 수 있다.(8KB보다 작으니(내가 설정한 maxSize) data-uri방식으로 내보냄)
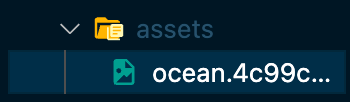
그러나 아래와 같은 큰 이미지의 경우

yarn run build 정적파일들을 생성 시

dist폴더에 다음과 같이 assets으로 들어가는 것을 볼 수 있음
옵션 자동 설정
참고 사이트: https://webpack.kr/guides/asset-modules/#general-asset-type
type: asset
이렇게 작성을 해두면, 기본 조건에 따라서 type 설정을
assets/resource와assets/inline중 자동으로 선택한다.
config.dev.js
        parser: {
          dataUrlCondition: {
            maxSize: 8 * 1024, // 8kb
          },
        },
설정 추가하여 8kb이하면
inline, 아니면resource
output에 대한 파일 이름 설정하기
참고 사이트: https://webpack.kr/configuration/output/#outputassetmodulefilename
config.dev.js
assetModuleFilename: 'assets/[name].[contenthash].[ext]',이 설정 추가 --> yarn run build시
assets폴더를 만들어 관심사 분리 + 웹 접근성 측면에서 해시값이 아닌 이미지 파일 이름을 읽어서 접근성을 높임
설정한 뒤 yarn run build 명령어를 수행해보면 사진 이름 + 해시 값이 붙은 파일이 생성되는 것을 확인할 수 있음
커스텀 output 파일이름 설정 참고자료: https://webpack.kr/guides/asset-modules/#custom-output-filename
A11yHidden 컴포넌트 작성
A11yHidden.css
.a11yHidden {
  overflow: hidden;
  position: absolute;
  clip: rect(0, 0, 0, 0);
  clip-path: circle(0);
  width: 1px;
  height: 1px;
  margin: -1px;
  white-space: nowrap;
}

caption.a11yHidden {
  position: static;
}

/* 포커스가 가게되면 화면에 표시하기 위해 다음과 같이 처리 */
.a11yHidden.focusable:focus {
  overflow: initial;
  position: static;
  clip: auto;
  clip-path: unset;
  width: initial;
  height: initial;
  margin: initial;
  white-space: initial;
}
caption의 경우
a11yHidden사용 시 문제가 발생하는 경우가 있어서 위와 같이 처리해줌
A11yHidden.js
import './A11yHidden.css';
import React from 'react';
import { classNames } from '../../utils';

// <span class="a11yHidden">화면에서는 감추되, 스크린 리더는 읽어야 하는 콘텐츠</span>

export default function A11yHidden(props) {
  return (
    <span
      className={classNames('a11yHidden', {
        focusable: props.focusable,
      })}
    >
      {props.children}
    </span>
  );
}
그러나 현재로서는 컴포넌트 독립성을 가지지 못함.(태그를 받지 않고 있기 때문에) 따라서 아래와 같이 as문법을 사용하여 바꾸어줌
import './A11yHidden.css';
import React from 'react';
import { classNames } from '../../utils';

export default function A11yHidden({ as, className, focusable, ...restProps }) {
  return React.createElement(as, {
    className: classNames(
      'a11yHidden',
      {
        focusable: focusable,
      },
      className
    ),
    ...restProps,
  });
  // 아래와 같이 사용하면 그냥 as태그로 인식!
  //   return (
  //     <as
  //       className={classNames('a11yHidden', {
  //         focusable: focusable,
  //       })}
  //       {...restProps}
  //     />
  //   );
}

A11yHidden.defaultProps = {
  as: 'span',
  className: '',
  focusable: false,
};
JSX로 사용하기 위해서는 as를 아래와 같이 Uppercase로 시작하는 별칭을 주면 됨
import './A11yHidden.css';
import React from 'react';
import { classNames } from '../../utils';

// <span class="a11yHidden">화면에서는 감추되, 스크린 리더는 읽어야 하는 콘텐츠</span>

export default function A11yHidden({
  as: ComponentName,
  className,
  focusable,
  ...restProps
}) {
  // 아래와 같이 사용하면 그냥 as태그로 인식!

  return (
    <ComponentName
      className={classNames(
        'a11yHidden',
        {
          focusable: focusable,
        },
        className
      )}
      {...restProps}
    />
  );
}

A11yHidden.defaultProps = {
  as: 'span',
  className: '',
  focusable: false,
};
index.js
import React, { StrictMode } from 'react';
import { render } from 'react-dom';
import { App, A11yHidden } from './components';
render(
<StrictMode>
<App greetingMessage={'Presentational Component'}>
<A11yHidden as="a" focusable href="#demo" rel="noopenner norefferer">
I'm Invisible
</A11yHidden>
<A11yHidden as="div" tabIndex={-1} id="invisible">
I'm Invisible 2
</A11yHidden>
<A11yHidden as="figure" tabIndex={-1} className="figure-invisible">
I'm Invisible 3
</A11yHidden>
</App>
</StrictMode>,
document.getElementById('root')
);tabindex -1은 키보드 접근이 되지 않지만 js나 시각적으로는 포커스가 가능하다.
banner 컴포넌트 작성
index.js
import React, { StrictMode } from 'react';
import { render } from 'react-dom';
import { Banner } from './components';
import bannerImagePath from './assets/cover/good-influence.jpg';
import bannerImagePath2 from './assets/cover/happiness-world.jpg';
render(
<StrictMode>
<>
<Banner
as="div"
id="banner-unique-1"
className="banner-extends"
url={bannerImagePath}
width={374}
height={800}
style={{ border: '20px solid #fff' }}
>
선한 영향력 = 플라스틱으로부터 바다를 지키는 능력 우리 모두를 생각하는
‘선한 영향력’이 더 큰 영향력이 되도록 SK도 노력하겠습니다.
모두가 함께, 행복하도록 OK! SK
</Banner>
<Banner url={bannerImagePath2} width={374} height={800}>
세상.행복하길 지구가 더 깨끗해지길 사회는 함께 더 따뜻해지길 기업은
신뢰와 함께 더 따뜻해지길 SK가 ESG로 만들어가는 길 지구도 사회도 기업도
지속가능한 행복으로 가는길입니다 ESG로 세상.행복하도록
</Banner>
</>
</StrictMode>,
document.getElementById('root')
);
Banner.js
/* eslint-disable no-unused-vars */
import './Banner.css';
import { A11yHidden } from '..';
import { classNames } from '../../utils';
import React from 'react';


export function Banner({
  as: ComponentName,
  url,
  width,
  height,
  className,
  style,
  children,
  ...restProps
}) {
  const componentStyle = {
    width,
    height,
    background: `url(${url}) no-repeat left top /contain`,
    ...style,
  };
  return (
    <ComponentName
      className={classNames('banner', className)}
      style={componentStyle}
      {...restProps}
    >
      <A11yHidden>{children}</A11yHidden>
    </ComponentName>
  );
}

Banner.defaultProps = {
  as: 'figure',
  width: 187,
  height: 400,
};
webpack postcss 구성
참고 사이트: https://webpack.kr/loaders/postcss-loader/

postcss-preset-env도 설치 필요!
패키지 설치
yarn add -D postcss-loader postcss postcss-preset-envpostcss.config.js
module.exports = {
  plugins: [
    [
      'postcss-preset-env',
      {
        stage: false, // 0 ~ 4
      },
    ],
  ],
};
stage에 대한 참고: https://preset-env.cssdb.org/features
0부터 4까지 있음

참고: https://preset-env.cssdb.org/playground
브라우저 어디까지 지원할건지? 설정해주는 것
postcss.config.js
module.exports = {
  plugins: [
    [
      'postcss-preset-env',
      {
        stage: false, // 0 ~ 4
        browsers: 'default, > 5% in KR, ie 10-11',
        autoprefixer: {
          grid: true,
        },
        features: {
          'nesting-rules': true,
          'custom-properties': true,
          'custom-selectors': true,
        },
      },
    ],
  ],
};
config.dev.js
        use: [
          'style-loader',
          {
            loader: 'css-loader',
            options: {
              // 앞에서 불러올 로더의 개수
              importLoader: 1,
              sourceMap: true,
            },
          },
          {
            loader: 'postcss-loader',
            options: {
              sourceMap: true,
            },
          },
        ],
.browserslistrc
defaults
> 5% in KR
not dead
ie 11
이렇게 작성해주면 postcss에서 작성한 browserslist를 제거해주어도 됨
현재 브라우저 리스트 설정의 지원범위 보여주는 명령어
npx browserslistwebpack sass-loader
dart sass 설치
yarn add -D sass sass-loader {
loader: 'sass-loader',
options: {
sourceMap: true,
},
},reactLogo svg component 만들기
import React from 'react';

export function ReactLogo({
  size = 64,
  color = '#00d8ff',
  title = null,
  ...restProps
} = {}) {
  const halfSize = size / 2;
  return (
    <svg
      width={size}
      height={size}
      viewBox={`0 0 ${halfSize} ${halfSize}`}
      {...restProps}
    >
      {title ? <title>{title}</title> : null}
      <g
        transform="matrix(.05696 0 0 .05696 .647744 2.43826)"
        fill="none"
        fillRule="evenodd"
      >
        <circle r="50.167" cy="237.628" cx="269.529" fill={color} />
        <g stroke={color} strokeWidth="24">
          <path d="M269.53 135.628c67.356 0 129.928 9.665 177.107 25.907 56.844 19.57 91.794 49.233 91.794 76.093 0 27.99-37.04 59.503-98.083 79.728-46.15 15.29-106.88 23.272-170.818 23.272-65.554 0-127.63-7.492-174.3-23.44-59.046-20.182-94.61-52.103-94.61-79.56 0-26.642 33.37-56.076 89.415-75.616 47.355-16.51 111.472-26.384 179.486-26.384z" />
          <path d="M180.736 186.922c33.65-58.348 73.28-107.724 110.92-140.48C337.006 6.976 380.163-8.48 403.43 4.937c24.248 13.983 33.042 61.814 20.067 124.796-9.8 47.618-33.234 104.212-65.176 159.6-32.75 56.788-70.25 106.82-107.377 139.272-46.98 41.068-92.4 55.93-116.185 42.213-23.08-13.3-31.906-56.92-20.834-115.233 9.355-49.27 32.832-109.745 66.8-168.664z" />
          <path d="M180.82 289.482C147.075 231.2 124.1 172.195 114.51 123.227c-11.544-59-3.382-104.11 19.864-117.566 24.224-14.024 70.055 2.244 118.14 44.94 36.356 32.28 73.688 80.837 105.723 136.173 32.844 56.733 57.46 114.21 67.036 162.582 12.117 61.213 2.31 107.984-21.453 121.74-23.057 13.348-65.25-.784-110.24-39.5-38.013-32.71-78.682-83.253-112.76-142.115z" />
        </g>
      </g>
    </svg>
  );
}
svg react component plugin 설치
html에 svg를 삽입할 때, 컴포넌트들을 계속해서 만들 수 없으니까 svg react component plugin을 사용함
참고 사이트: https://react-svgr.com/docs/webpack/
패키지 설치
yarn add -D @svgr/webpackassets쪽 부분에서 svg를 제거해주고(assets에서 관리하는 것이 아닌 svgr 에서 관리하게 만들어줌)
config.dev.js
{
  test: /\.svg$/i,
  issuer: /\.jsx?$/,
  use: [
    {
      loader: '@svgr/webpack',
      options: {
        prettier: false,
        svgo: true,
        titleProp: true,
      },
    },
  ],
},
다음과 같은 설정을 삽입해줌
title설정을 주기위해 titleProp 넣기
이렇게 되면 무조건 컴포넌트로밖에 사용할 수 없게됨
cra에선 다음과 같이 svg를 사용할 수 있음: https://create-react-app.dev/docs/adding-images-fonts-and-files/#adding-svgs
이와 동일하게 작성하려면,
참고 사이트: https://react-svgr.com/docs/webpack/#use-svgr-and-asset-svg-in-the-same-project
      {
        test: /\.svg$/i,
        type: 'asset',
        resourceQuery: /url/,
      },
경로를 가져올 수 있게 해줌(url-loader 없이)
url-loader를 설치해서 하는 방법
config.dev.js
      {
        test: /\.svg$/i,
        issuer: /\.jsx?$/,
        use: [
          'babel-loader',
          {
            loader: '@svgr/webpack',
            options: {
              prettier: false,
              svgo: true,
              titleProp: true,
            },
          },
          'url-loader',
        ],
      },
App.js
import React from 'react';

import reactlogoPath, {
  ReactComponent as ReactLogo,
} from '../../assets/react.svg';

console.log(reactlogoPath); // asset SVG (file path)
console.log(ReactLogo); // SVGR (React Component)

// App Component 모듈 관리
export default function App({ greetingMessage }) {
  return (
    <div className="app">
      <img src={reactlogoPath} alt="리액트" />
      <ReactLogo title="React UI Library" />
      <h1>{greetingMessage}</h1>
    </div>
  );
}
웹 컴포넌트 기술 사양
<!DOCTYPE html>
<html lang="en">
  <head>
    <meta charset="UTF-8" />
    <meta http-equiv="X-UA-Compatible" content="IE=edge" />
    <meta name="viewport" content="width=device-width, initial-scale=1.0" />
    <title>웹 컴포넌트 기술 사양</title>
    <script src="./components/EuidInput/index.js"></script>
  </head>
  <body>
    <euid-input type="email" onclick="" value=""> </euid-input>
  </body>
</html>
아직 아무것도 작성을 안해주어서 결과값은 undefined가 나옴
index.js
// euid-input 커스텀 요소 등록(정의)
if ('customElements' in window && !window.customElements.get('euid-input')) {
console.log('supported customElement');
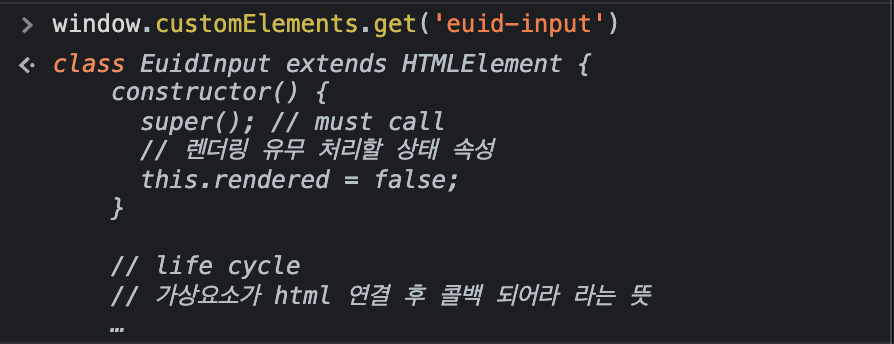
// 컴포넌트 클래스
class EuidInput extends HTMLElement {
constructor() {
super(); // must call
// 렌더링 유무 처리할 상태 속성
this.rendered = false;
}
// life cycle
// 가상요소가 html 연결 후 콜백 되어라 라는 뜻
connectedCallback() {
if (!this.rendered) {
this.render();
this.rendered = true;
}
}
render() {
const type = this.getAttribute('type');
this.innerHTML = `
<div>
<label for=""></label>
<input type=${type}/>
</div>
`;
}
}
// 컴포넌트를 커스텀 요소로 정의
window.customElements.define('euid-input', EuidInput);
}