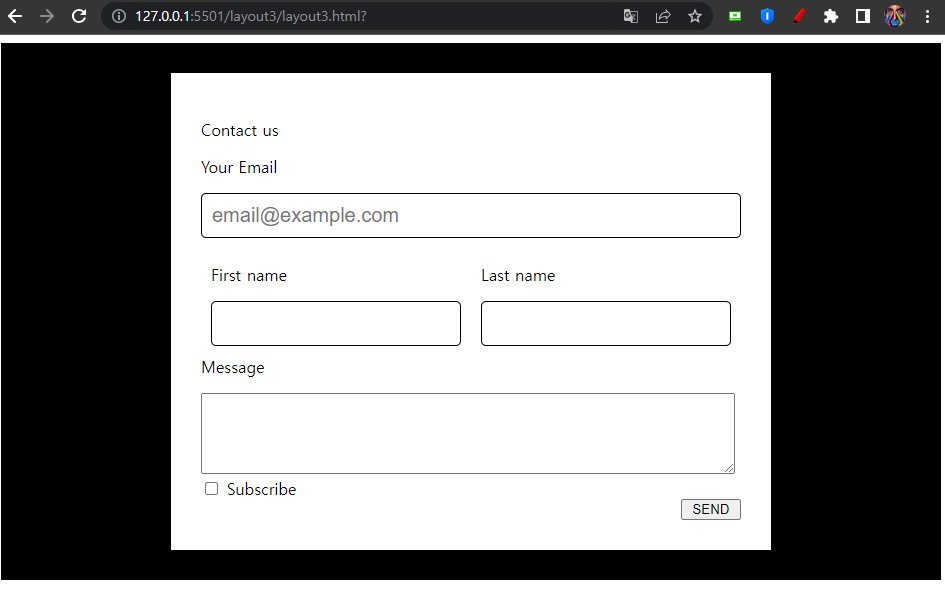
<form> 태그를 이용해 Contact Us 레이아웃 섹션을 만들어 보았다.
공부 정리
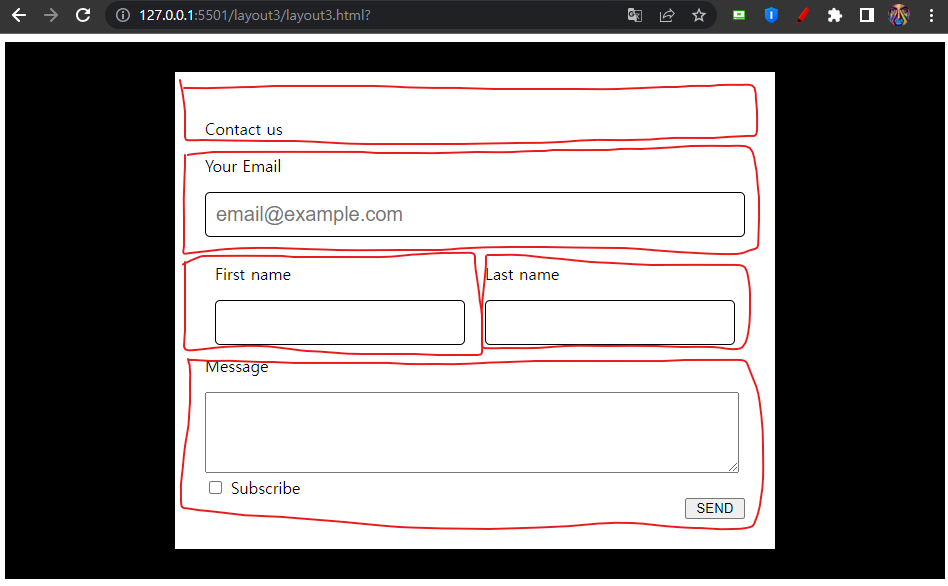
<div>태그를 이용해 박스 디자인을 한다. (빨간색 테두리)
- 뭐가 들어갈지 생각하면서 박스를 만들자
<form>태그
<form action="">
작성한 내용이 어떤 서버경로로 전달될지
<form method="">
작성한 내용이 어떤 방식으로 서버에 전달될지
<input>태그
<input type="">
- text: 텍스트 입력할 때
- password: 패스워드 입력할 때
- email: 이메일 입력할 때
- date: 날짜 입력할 때 (date picker 소환)
- checkbox: 체크박스
- radio: 라디오 버튼 소환
- file: 업로드 할 때
- submit: 전송버튼 만들기
<input value="미리 채워진 값">
<input placeholder="미리 채워진 값인데 배경 글자">
<input name="인풋 이름"> <-- 서버 개발시 필요
<input> 스타일링
input[속성명=속성값]
input[type=text]
- select 박스
<select>
    <option></option>
</select>- textarea
<textarea></textarea><label>태그와 for 속성
input 대신 label을 눌러도 input을 선택할 수 있다.
<input type="checkbox" id="subscribe">
<label for="subscribe"> 누르기 </label>
전체 코드
<!-- layout3.html -->
<!DOCTYPE html>
<html lang="en">
<head>
   <meta charset="UTF-8">
   <meta http-equiv="X-UA-Compatible" content="IE=edge">
   <meta name="viewport" content="width=device-width, initial-scale=1.0">
   <link rel="stylesheet" href="./layout3.css">
   <title>Document</title>
</head>
<body>
   <div class="form-background">
       <div class="form-white">
           <form action="">
               <div>
                   <p>Contact us</p>
               </div>

               <div>
                   <p>Your Email</p>
                   <input class="form-input" placeholder="email@example.com" type="email">
               </div>

               <div class="first-name">
                   <p>First name</p>
                   <input class="form-input" type="text">
               </div>
               <div class="first-name">
                   <p>Last name</p>
                   <input class="form-input" type="text">
               </div>

               <div class="last-name">
                   <p>Message</p>
                   <textarea cols="73" rows="5"></textarea>
               </div>

               <div>
                   <input id="sub" type="checkbox">
                   <label for="sub">Subscribe</label>
                   <button class="button">SEND</button>
               </div>
           </form>
       </div>
   </div>
</body>
</html>
// layout3.css
div, input, textarea {
box-sizing: border-box;
}
.form-background {
background-color: black;
padding: 30px;
}
.form-white {
background-color: white;
padding: 30px;
width: 80%;
max-width: 600px;
margin: auto;
}
.form-input {
width: 100%;
padding: 10px;
font-size: 20px;
border: 1px solid black;
border-radius: 5px;
}
.first-name {
width: 50%;
float: left;
padding: 10px;
}
.button {
width: 60px;
display: block;
margin-left: auto;
}
데이터로 세상을 쓰고 읽고 싶은 헤븐리뷰입니다.