처음에는 socket.io를 구현해서 React로 채팅할 수 있는 화면을 간단히 구현해보려고 했다.
그러다보니... 소켓 통신 자체를 로컬끼리해서 의미가 있나 싶었다. 그래서 배포를 해보려고 시작하는데...
서버 코드랑 클라이언트 코드는 생략하겠습니다!
1. 인스턴스 생성
https://wikidocs.net/179437
위의 링크로 들어가서 회원가입부터 SSH 접속 및 기본 세팅까지 시작합니다.
2. 도메인 구매 (가비아)
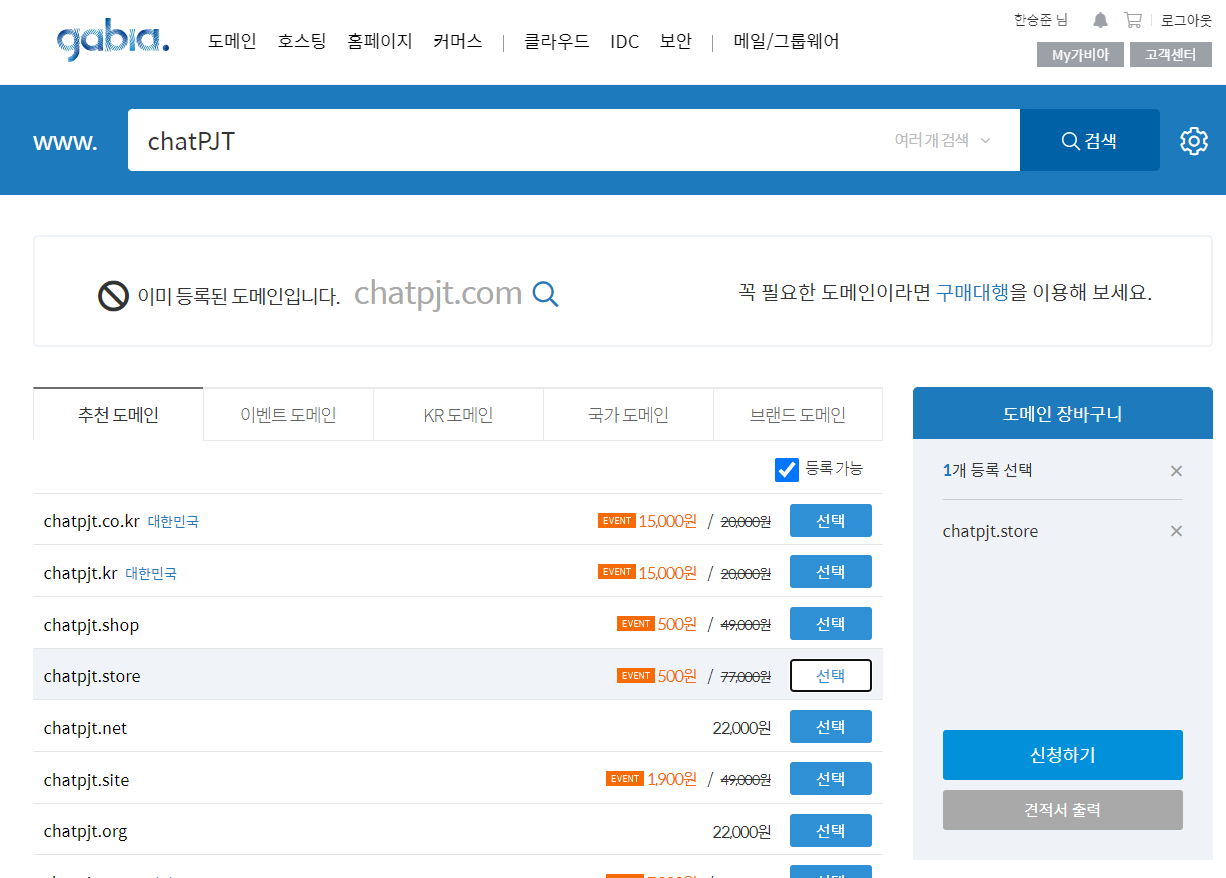
여기서 원하는 도메인을 클릭하고 구매한다! 그리고...
서비스 관리로 들어가서 DNS 설정에서 도메인을 설정한다.

2-2 도메인이 완전히 등록되면?
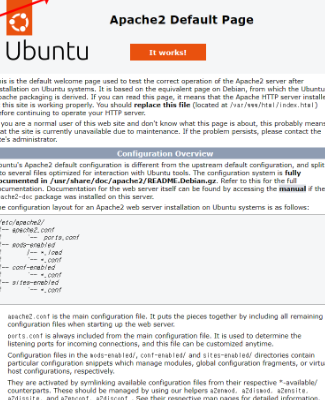
해당 화면이 나왔는지 확인하고, 인스턴스 ssh 명령어에 다음 코드를 작성하고 잠깐 끈다.
sudo systemctl stop apache23. 포트 포워딩 설정
위의 링크를 참고하면 쉽게 할 수 있다
4. Vercel 배포
Vercel CLI 설치
npm i -g vercel프로젝트 배포
vercel선택해야하는 경우
> > No existing credentials found. Please log in:
? Log in to Vercel
● Continue with GitHub
○ Continue with GitLab
○ Continue with Bitbucket
○ Continue with Email
○ Continue with SAML Single Sign-On
  ─────────────────────────────────
○ Cancel
$ vercel
Vercel CLI 32.0.0
? Set up and deploy “~\OneDrive\바탕 화면\socket.io\chatting”? [Y/n] y
? Which scope do you want to deploy to? hanseungjune
? Link to existing project? [y/N] n
In which directory is your code located? ./5. 서버 실행
Node.js 및 NPM 설치
curl -sL https://deb.nodesource.com/setup_14.x | sudo -E bash -
sudo apt-get install -y nodejs
앱 코드 업로드
git clone https://github.com/your-username/your-repo.git
cd your-repo
의존성 설치
npm installLet's Encrypt 인증서 발급(https)
Certbot 패키지를 설치
sudo apt-get update
sudo apt-get install certbot
웹 서버용 Certbot 플러그인도 설치
sudo apt-get install python3-certbot-apacheCertbot을 사용하여 인증서를 생성
sudo certbot --apache -d chattingsite.store자동 갱신 설정
sudo certbot renew --dry-runindex.js 수정했을 경우에 서버 반영
scp -i C:\Users\tmdwn\Downloads\keypairname.pem "C:\Users\tmdwn\OneDrive\바탕 화면\index.js" ubuntu@[인스턴스 ip]:~/chatting-server/node.js 서버 실행 명령어
sudo node index.js
필요하다면 공부하는 개발자, 한승준