NestJS 인증
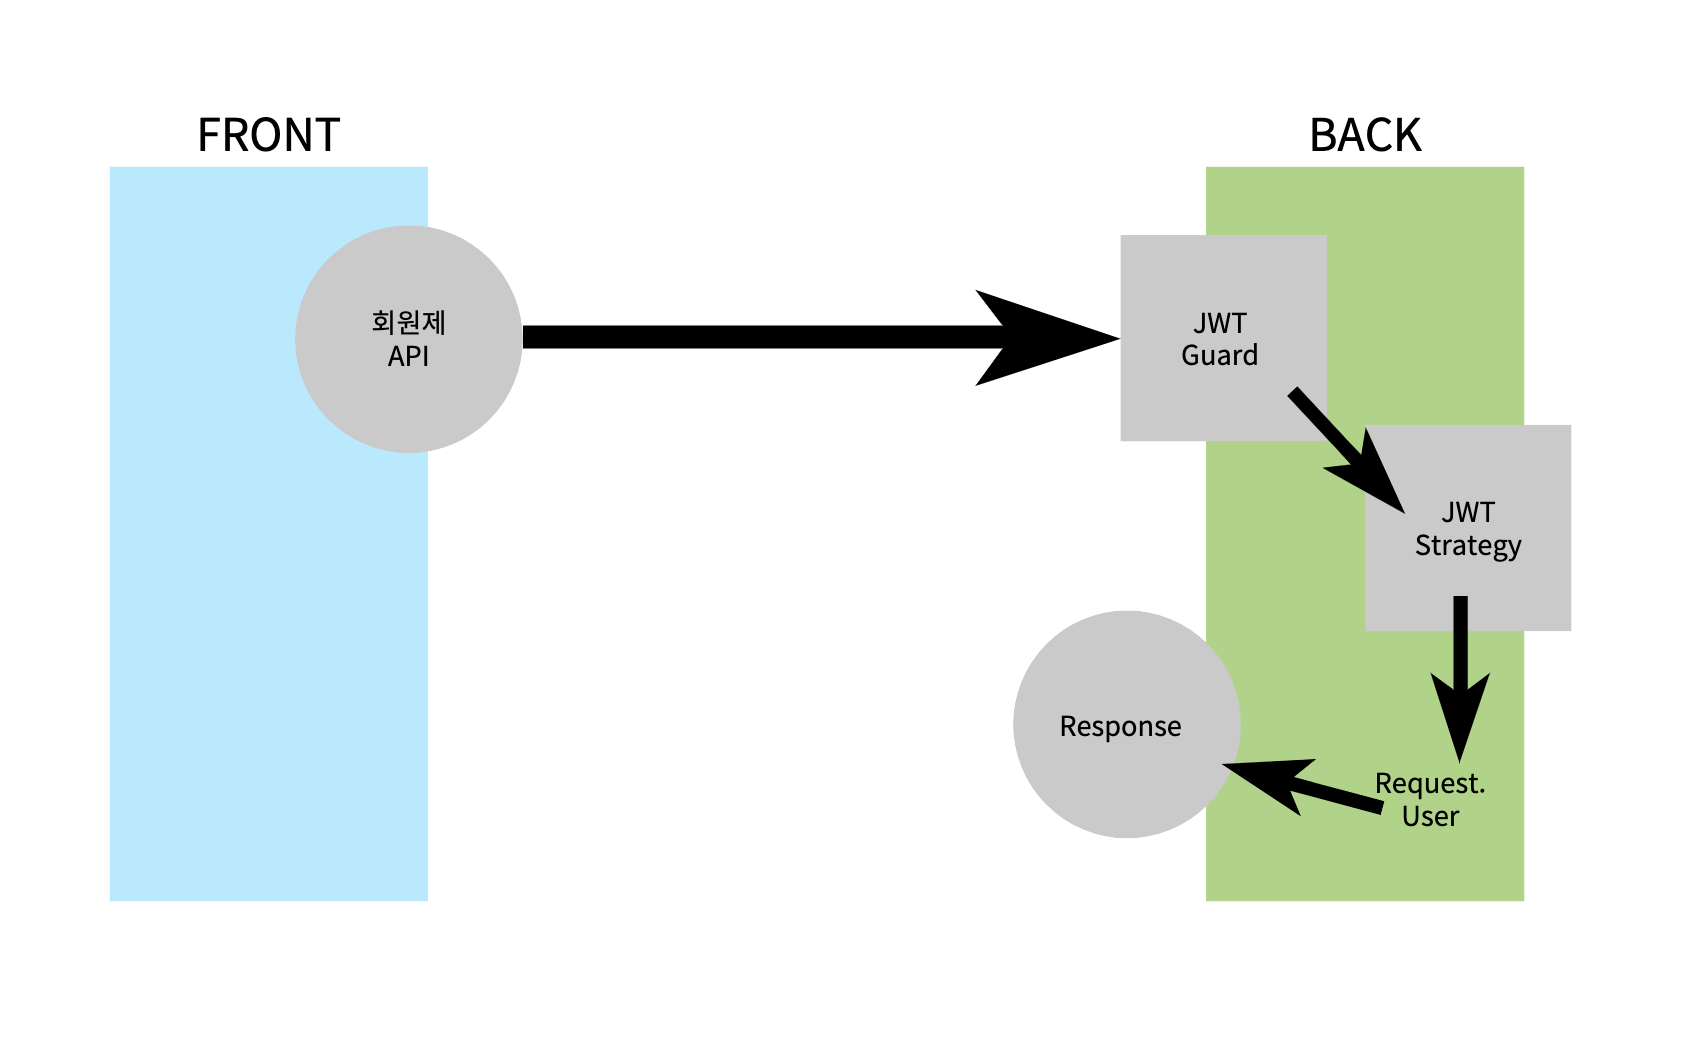
- 헤더에서 JWT토큰을 넣어서 회원제 API(글쓰기)를 요청한다.
- JWT Guard에서 유저의 로그인 여부를 판별한다.
- JWT Strategy에서 user Validator를 해준다.
- Request.User에 담아서 Response 해준다.
JWT Guard
import {
  ExecutionContext,
  Injectable,
  // UnauthorizedException,
} from '@nestjs/common';
import { AuthGuard } from '@nestjs/passport';

@Injectable()
export class JwtAuthGuard extends AuthGuard('jwt') {
  canActivate(context: ExecutionContext) {
    return super.canActivate(context);
  }

  handleRequest(err: any, user: any, info: any) {
    if (err || !user) {
      // throw err || new UnauthorizedException('인증 문제가 있습니다.')
    }
    return user;
  }
}

//* guard -> strategy
- token이 들어왔는지 확인 해준다.
JWT Strategy
import { Payload } from './jwt.payload';
import { UsersService } from '../../users/users.service';
import { ExtractJwt, Strategy } from 'passport-jwt';
import { PassportStrategy } from '@nestjs/passport';
import { Injectable, UnauthorizedException } from '@nestjs/common';

@Injectable()
export class JwtStrategy extends PassportStrategy(Strategy) {
  constructor(private readonly usersService: UsersService) {
    super({
      jwtFromRequest: ExtractJwt.fromAuthHeaderAsBearerToken(),
      secretOrKey: 'secret',
      ignoreExpiration: false,
    });
  }

  async validate(payload: Payload) {
    try {
      const user = await this.usersService.findUserById(payload.sub);
      if (user) {
        return user;
      } else {
        throw new Error('해당하는 유저는 없습니다.');
      }
    } catch (error) {
      throw new UnauthorizedException(error);
    }
  }
}

export type Payload = {
  email: string;
  sub: string;
};
- jwt token의 id 값을 추출해서 user를 구별하여 유저를 판별해준다.
Controller
  @ApiOperation({ summary: '회원조회'})
  @Get()
  @UseGuards(JwtAuthGuard)
  getCurrentUser(@CurrentUser() currentUser: UserDTO) {
    console.log(currentUser);
    return currentUser;
  }
- contorller에 guard처리 해주고, user를 return 해준다.
https://docs.nestjs.com/security/authentication#jwt-functionality

푸로구래머