AWS EC2 GPU 인스턴스 생성
- 리전 - us-west2(오레곤) - 가장 저렴함
- OS 이미지 - Deep Learning OSS Nvidia Driver AMI GPU PyTorch 2.5 (Amazon Linux 2023)
- ‘더 많은 AMI 찾아보기’ 선택
- 인스턴스 유형 - G6 이상
- g6.xlarge - $0.8/hr
g5.xlarge - $1/hrg4dn.xlarge - $0.5/hr- G6 미만은 ComfyUI랑 버전 호환이 안 돼서 다른 OS 이미지 선택해야 함
- 키페어 - 새로 생성
- 보안 그룹
- 다음에서 SSH 트래픽 허용 - 0.0.0.0/0 (위치 무관) 또는 자기 IP
- 아웃바운드 - 모든 IP, 모든 port 열기
- 스토리지 구성 - 200 GB gp3
- ai 모델 1개당 몇 GB
EC2 SSH 접속
chmod 400 키페어_경로
ssh -i "키페어_경로" ec2-user@EC2-주소.compute.amazonaws.com
EC2 환경 설정
- 사전 환경 확인
git -v
python3 --version # 또는 python --version
conda --version- 가상환경 설정
source activate pytorch
conda config --set auto_activate_base true- ComfyUI 다운로드
cd ~
mkdir ai && cd ~/ai
git clone https://github.com/comfyanonymous/ComfyUI.git- ComfyUI 디펜던시 설치
cd ~/ai/ComfyUI
pip install -r requirements.txt
pip install --upgrade pip- 커스텀 노드 매니저 설치
cd ~/ai/ComfyUI/custom_nodes
git clone https://github.com/ltdrdata/ComfyUI-Manager.git- ComfyUI 프로세스 실행
cd ~/ai/ComfyUI
python3 main.py- (선택) one-line 스크립트 생성
vi run-comfyui.sh#!/bin/bash
# pytorch 가상 환경 활성화
source activate pytorch
# ComfyUI 폴더 이동
cd /ai/ComfyUI/
# ComfyUI 실행
python3 main.pychmod +x run-comfyui.sh./run-comfyui.shSSH 포트 포워딩
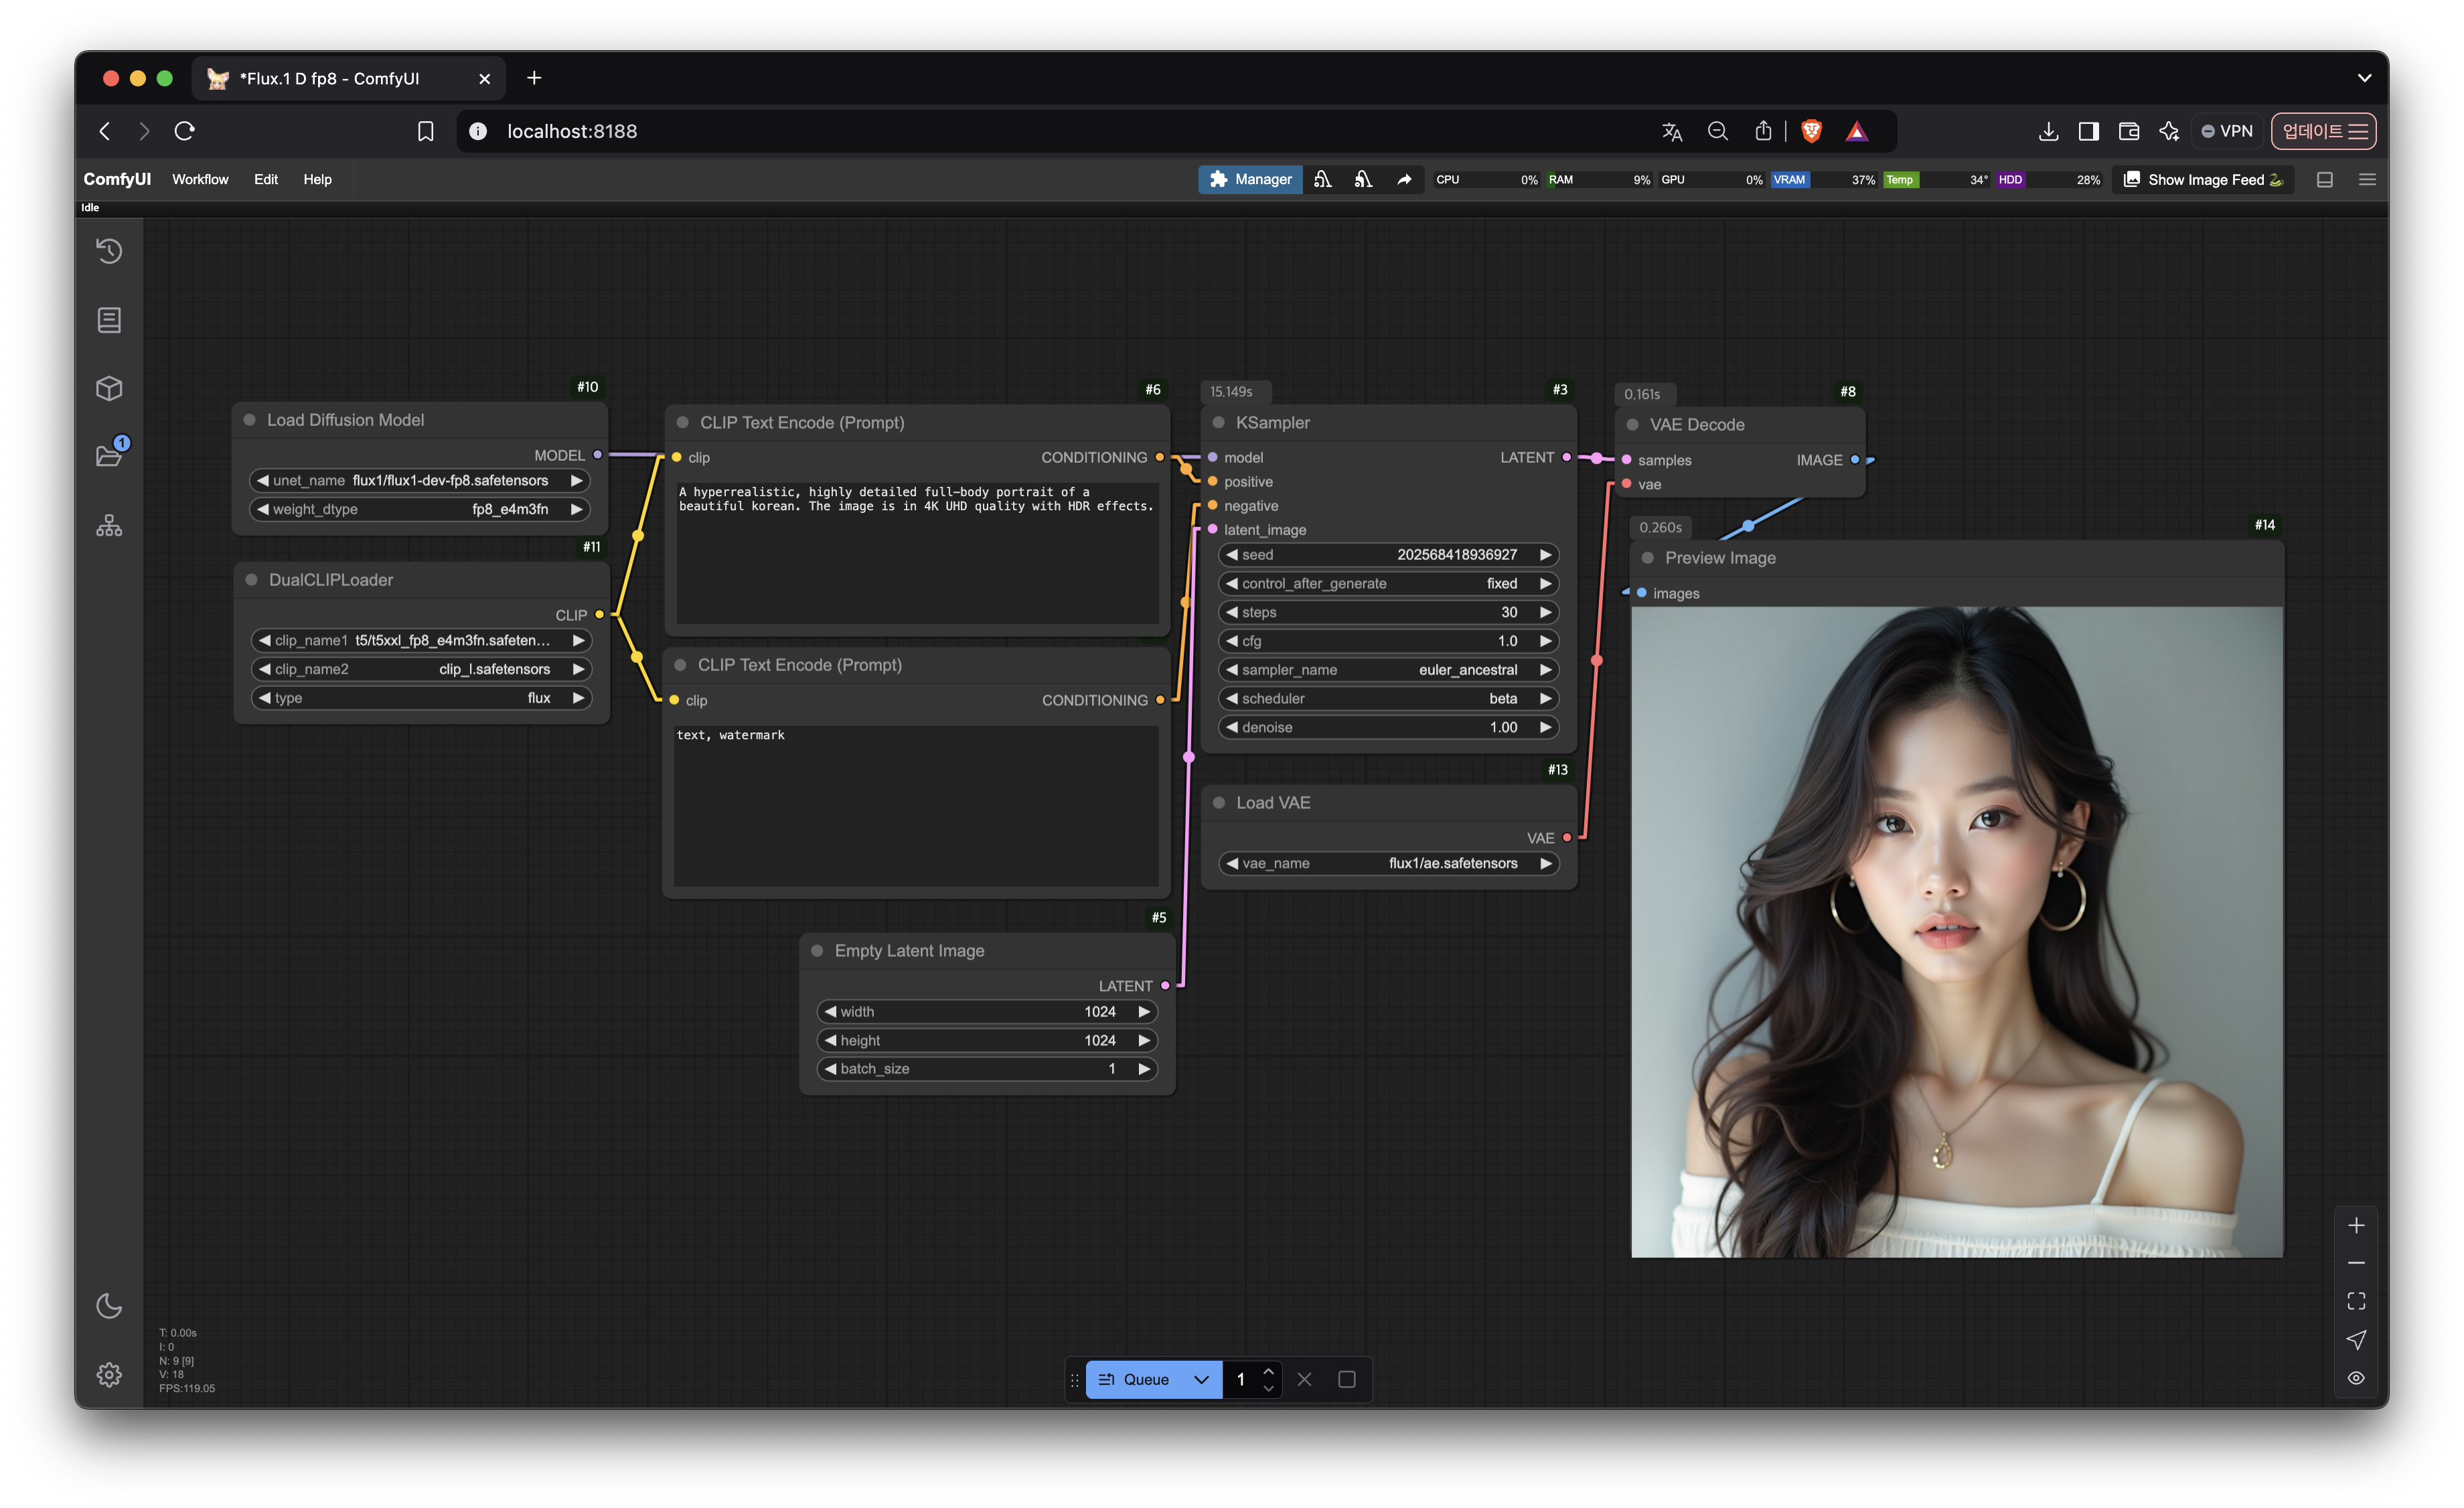
ssh -L 8188:127.0.0.1:8188 -i "키페어_경로" ec2-user@EC2-주소.compute.amazonaws.com브라우저 접속
http://localhost:8188(선택) 터미널 백그라운드 실행
- https://github.com/tmux/tmux
- SSH 터미널 연결이 끊어져도 SSH 포트 포워딩만 되어 있으면 접속 가능
- 세션 생성
tmux new -s comfyui- 세션 접속
tmux attach -t comfyui- 세션 삭제
tmux kill-session -t comfyui- 유용한 단축어 (한/영 유의)
세션 나오기 : ctrl + b, d
세션 중 스크롤하기 : ctrl + b, [
스크롤 나오기 : q
참고
https://github.com/comfyanonymous/ComfyUI
https://civitai.com/models
Amazon EBS 볼륨 크기 조정 후 파일 시스템 확장
Amazon EC2 인스턴스 유형 변경

이유와 방법을 알려주는 메모장 겸 블로그 (Frontend, AI, 경제, 책)