
오늘은 12가지 유용한 배열 API에 관해서 알아보고자 한다.
오늘 TIL은 드림 코딩 엘리님의 강의와 코드스테이츠에서 학습한 내용을 바탕으로 작성됐다. 또한, 그 어떠한 상업적인 용도도 없음을 밝힌다.
시작에 앞서, 엘리님 강의에서 제공된 11가지 배열 문제를 풀어봤다.
- join( )
// Q1. make a string out of an array
const fruits = ["apple", "banana", "orange"];

 // tip. 코드에 method가 어떻게 작동하는지 모르겠다면, ctrl을 눌러서,
 // 해당 method에 대한 설명을 볼 수 있다.

  // join()은 Array => String으로 바꿔준다.
  // join은 ()안에 조건을 넣어줘도 되고 안 넣어줘도 된다.
  console.log( fruits.join() );
  // () 안에 들어가는 것은 구분자로, string으로 만들때, 배열들 사이에 무엇을 넣어줄지를 말한다.
  console.log( fruits.join("ㅣ") );
  // join()의 장점은 구분자가 맨 끝에는 들어가지 않는다는 것이다.

  // join()은 원본은 훼손하지 않는다.
  fruits;
- 코드 출력값

- split( )
// Q2. make an array out of a string
// split()
{
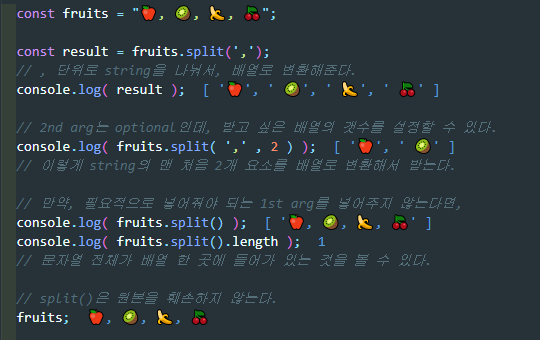
const fruits = "🍎, 🥝, 🍌, 🍒";
const result = fruits.split(',');
// , 단위로 string을 나눠서, 배열로 변환해준다.
console.log( result );
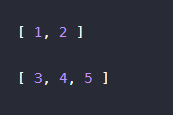
// 2nd arg는 optional인데, 받고 싶은 배열의 갯수를 설정할 수 있다.
console.log( fruits.split( ',' , 2 ) );
// 이렇게 string의 맨 처음 2개 요소를 배열로 변환해서 받는다.
// 만약, 필요적으로 넣어줘야 되는 1st arg를 넣어주지 않는다면,
console.log( fruits.split() );
console.log( fruits.split().length );
// 문자열 전체가 배열 한 곳에 들어가 있는 것을 볼 수 있다.
// split()은 원본을 훼손하지 않는다.
fruits;
}
- 코드 출력값
- reverse( )
// Q3. make this array look like this: [5, 4, 3, 2, 1]
// reverse()
{
  const array = [1, 2, 3, 4, 5];
  console.log( array.reverse() );

  // (중요) reverse()는 원본을 변형시킨다.
 console.log( array );

}- 코드 출력값

- splice( ) vs slice( )
// Q4. make new array without the first two elements
{
  const array = [1, 2, 3, 4, 5];

  //  1. splice()는 원본을 변형시킨다.
  //  원본에서 index 0을 기준으로 2개를 잘라냈다.
   console.log( array.splice(0,2) );
  // 그래서 원본을 찍어보면, 잘린 부분을 제외한 나머지만 남아있는 것을 확인할 수 있다.
   console.log ( array );
} 
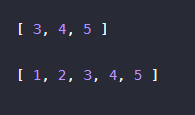
  // 그러나, 여기서는 new array 즉, 원본을 훼손하면 안 되기 때문에 => slice()를 써야한다.
  // 2. slice()는 원본을 훼손하지 않는다.
  const array = [1, 2, 3, 4, 5];

  console.log( array.slice( 2, 5 ) );
  // 시작점 index는 포함하지만, 마지막점 index는 포함하지 않는다.
  //즉, 여기서는 2번 인덱스 ~ 4번 인덱스까지만 포함한다.
  console.log( array );
  // slice()는 원본을 훼손하지 않는다.
  // slice()는 배열에서 원하는 부분만 return해서 받아오고 싶을 때, 사용하면 된다.

}
Q5 - Q11 )
class Student {
  constructor(name, age, enrolled, score) {
    this.name = name;
    this.age = age;
    this.enrolled = enrolled;
    this.score = score;
  }
}
const students = [
  new Student("A", 29, true, 45),
  new Student("B", 28, false, 80),
  new Student("C", 30, true, 90),
  new Student("D", 40, false, 66),
  new Student("E", 18, true, 88),
];
- find( )
// Q5. find a student with the score 90

  // find()는 콜백 함수이다.
  // 조건에 맞는 첫번쨰 값을 찾아서 return한다.
  const result = students.find( function( student, index ){
    // console.log( student, index );
    return student.score === 90;
  });

  console.log( result );
  // 만약 아무것도 찾지 못하면, undefined가 뜬다.
  // find()는 원본을 훼손하지 않는다.
- 코드 출력값

- filter( )
// Q6. make an array of enrolled students

  // find()와 다르게 조건에 맞는 모든 배열의 요소들을 return한다.
  // 그러나, find()는 배열을 만들지는 않았지만,
  // filter()는 여러개를 return하므로 새로운 배열을 만들어서 return한다.

  const result = students.filter( student => student.enrolled );

  console.log(result);

  // console.log(students);
  // console.log("------------------------");
// filter()는 원본을 훼손하지 않는다.- 코드 출력값

- map( )
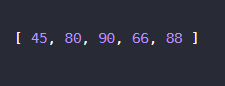
// Q7. make an array containing only the students' scores
// result should be: [45, 80, 90, 66, 88]


// map()은 배열 안에 들어있는 요소들을 조건에 맞게 번형해서 새로운 배열로 return한다.
// map() 안의 parameter 이름은 어떤 것이 되도 상관없지만,
// 다른 개발자들이 한 눈에 알아보기 쉽도록, 최대한 연관된 단어로 작명하는 게 좋다.
// const result = students.map(value => value.score);
// value 보다는 student가 더 직관적이다.

const result = students.map(student => student.score) ;
  // student.score만을 return 하라

console.log(result);
  // map()도 원본을 훼손하지 않는다.
  // console.log( students );
- 코드 출력값
- some( ) vs every( )
// Q8. check if there is a student with the score lower than 50

// 1. some()은 배열의 요소 중에서
// some()의 콜백함수가 true가 되는 요소가 있는지 없는지를 확인해준다.

// 예제에서는 배열의 요소 중에서
// 50점 보다 낮은 학생이 단 한 명이라도 있는 true가 return 된다.
  const result = students.some( (student) => student.score < 50 );

  console.log(result);

/////////////////////////////////////////////////////////////////////////

// 2. every()는 배열의 "모든" 요소들이 주어진 조건을 충족해야지만, true가 찍힌다.
  const result2 = students.every( (student) => student.score < 50 );

  console.log(result2);
- 코드 출력값

- reduce( ) vs reduceRight( )
=> 개인적으로 이 친구가 좀 어렵다.
// Q9. compute students' average score

// 1. reduce()
  // prev는 이전의 콜백 함수에서 return 된 값이 전달 되어져 오고,
  //curr은 배열의 item을 순차적으로 전달 받는다.

  const result = students.reduce( (prev, curr) => {
   // console.log('----------')
   // console.log(prev);
   // console.log(curr);
    return prev + curr.score;
  } , 0);
  // prev의 시작점은 0이 된다.

  console.log( result / 5 );

  // 2. reduceRight()은 reduce()와 작동 원리는 같으나,
  //    배열의 맨 뒤부터 시작하는 거다.
- map( ) + join( )
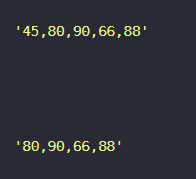
// Q10. make a string containing all the scores
// result should be: '45, 80, 90, 66, 88'

{
  const result = students.map( (student) => student.score ).join();

  console.log( result );
  // 만약 50점 이상인 학생들만 뽑아서 string으로 만들고 싶다면,
  // map() + filter() + join();
  const result1 = students.map( (student) => student.score )
                  .filter( score => score>50 ).join();

  console.log( result1 );
  // 이것을 함수형 프로그래밍이라고 하기도 한다.
  // for문 같은 거 안 돌려도,
  // 배열 API에 내장된 콜백 함수를 통해서 더 쉽게 원하는 바가 구현되기 때문에,
  // 그렇게 불리는 게 아닌가 싶다.
}
- 코드 출력값
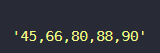
- sort( )
// Bonus Q! do Q10 sorted in ascending order
// result should be: '45, 66, 80, 88, 90'
{

  // 1. 점수가 낮은 것이 먼저 나오게 할 떄,
  // .sort( (a,b) => a - b )
  // a,b 즉 이전값과 현재값이 전달이 되는데,
  // 만약 - (음수) 를 return하게 되면,
  // 첫번째것이 뒤에 것보다 더 작다고 간주되어, 정렬이 된다.

  // 2. 점수가 높은 것이 먼저 나오게 할 때,
  // .sort( (a,b) => b - a )
 // a,b 즉 이전값과 현재값이 전달이 되는데,
 // 만약 + (양수) 를 return하게 되면,
 // 첫번째것이 뒤에 것보다 더 크다고 간주되어, 정렬이 된다.

  const result = students.map( (student) => student.score )
                 .sort( (a,b) => a - b).join();

  console.log(result);
}
- 코드 출력값
- Array.from( )
-
Array.from은 유사 배열이나 String을 배열로 바꿔주기 위해 사용한다. 주로, HTMLCollection 같은 유사 배열에 Array 객체에서 제공하는 배열 메소드를 사용하고 싶을 때, 사용한다.
-
Array.from은 3개의 arg를 받는다.
=> Array.from( 배열, handler_function, this )
그러나, 가장 많이 볼수 있는 사용 패턴은 Array.from( 배열, handler_function )이다.
- 첫번째 arg만 사용할 때,
let arrayLike = 'woof';
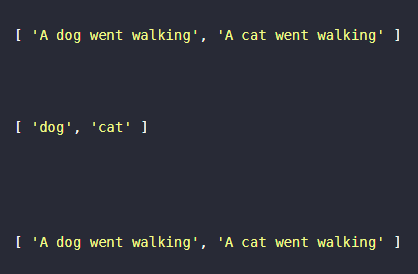
console.log( Array.from(arrayLike) ); => [ 'w', 'o', 'o', 'f' ]- 두번째 arg까지 사용할 때,
let arr = [ 'dog', 'cat' ];

function handler(animal) {
    return `A ${animal} went walking`;
}

console.log( Array.from( arr, handler ) );

// (중요) Array.from()은 원본을 훼손하지 않는다.

console.log(arr);

// arr은 handler의 arg로 들어가서 => return 값으로 새로운 배열이 나온다.
let arr_from = Array.from( arr, handler );

console.log( arr_from );
- indexOf( )
-
indexOf( )는 String과 Array에서 사용할 수 있는 메소드이다.
-
배열이나 string 내에서 찾고자 하는 character나 string을 찾아서 해당 index값을 return한다. 이때, 찾고자하는 값이 여러 개 존재한다면, 맨 처음 등장하는 값의 인덱스를 return한다.
-
찾고자 하는 값을 찾지 못했을 때는 -1 을 return한다.
- (중요) 그러나, -1은 boolean으로 false가 아니다. false는 오직 0뿐이니, 유념하자!!
let animal = [ 'dog', 'cat', 'bird', 'tiger' ];

console.log( animal.indexOf('bird') );  // => 2

console.log( animal.indexOf( 'dog', 2 ) ); // => -1
//////////////////// 2. String에서 사용법

let sentence = "Hello World, the universe welcomes you";

console.log(typeof(sentence)); // => 'string'

let n = sentence.indexOf('welcomes');

console.log(n); // => 26
const SENTENCE = "Are you learning a lot in this course? Keep learning!";

let searchWord = 'learning';

let firstTime = SENTENCE.indexOf(searchWord);

console.log( firstTime ); // => 8

let secondTime = SENTENCE.indexOf(searchWord, firstTime + 1 );
// learning 의 l 다음부터 searchWord를 찾기 시작한다.

console.log( secondTime ); // => 44
// 간단한 indexOf() 활용법

let solution1 = `The index of the first
                "${searchWord} word from the begining is ${firstTime}`;

// 해당 숫자들이 찍히는 것을 알 수 있다.
console.log( solution1 );
// => 'The index of the first "learning word from the begining is 8'

let solution2 = `The index of the first
                "${searchWord} word from the begining is ${secondTime}`

console.log( solution2 );
// => 'The index of the first "learning word from the begining is 44'

// 그러나, indexOf()는 대소문자를 구분한다.  //////////////

const word = "Red dog";

console.log( word.indexOf('dog') ); // => 4

console.log( word.indexOf('red') ); // => -1

/////////////////////////////////////////////////

// 그러나, -1 은 false가 아니다. 0이 false이지!

if( word.indexOf('red') === -1 ){
    console.log('this is the correct answer');
} else {
    console.log('this is the wrong answer');
}
// => 'this is the correct answer'
// 이렇게 잘못된 값이 나오는 것을 확인할 수 있다.
// 즉, 이런 if 절 사용시에는 -1 으로 비교해야 한다.

if( word.indexOf('red') === false ){
    console.log('this is the correct answer');
} else {
    console.log('this is the wrong answer');
}

// => 'this is the wrong answer'

좋은 길로만 가는 "조은길"입니다😁