목표:
1. certbot을 사용하여 Let's Encrypt 인증서를 설치, 인증서를 수동으로 발급 및 연결
2. 발급받은 https 인증서를 Nginx 웹 서버에 적용해 서버 띄우기
사전작업
- ubuntu 18.x 환경에 certbot 설치
#apt install certbot -y필요 작업
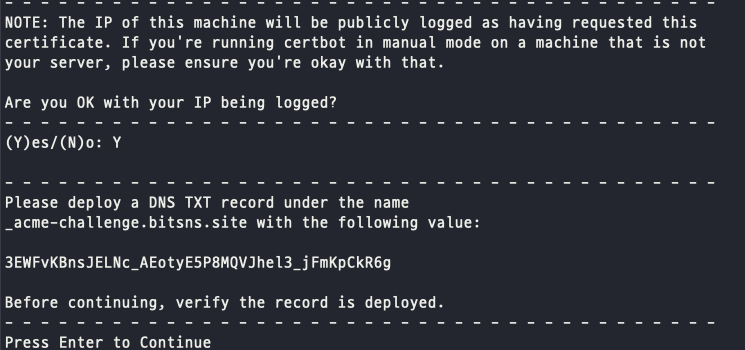
- 수동 설정: Certbot가 지시한대로, certbot certonly를 실행하여 인증서를 수동으로 발급
# certbot certonly --manual -d *.bitsns.site --preferred-challenges dns-01핵심 명령어 설명
--preferred-challenges dns-01
DNS 챌린지를 사용하여 도메인 소유권을 검증하겠다는 것을 지정certbot certonly --manual: certbot 프로그램을 실행하여 인증서만(certonly) 수동으로 인증 과정을 처리하여 발급(인증서 파일만 제공)
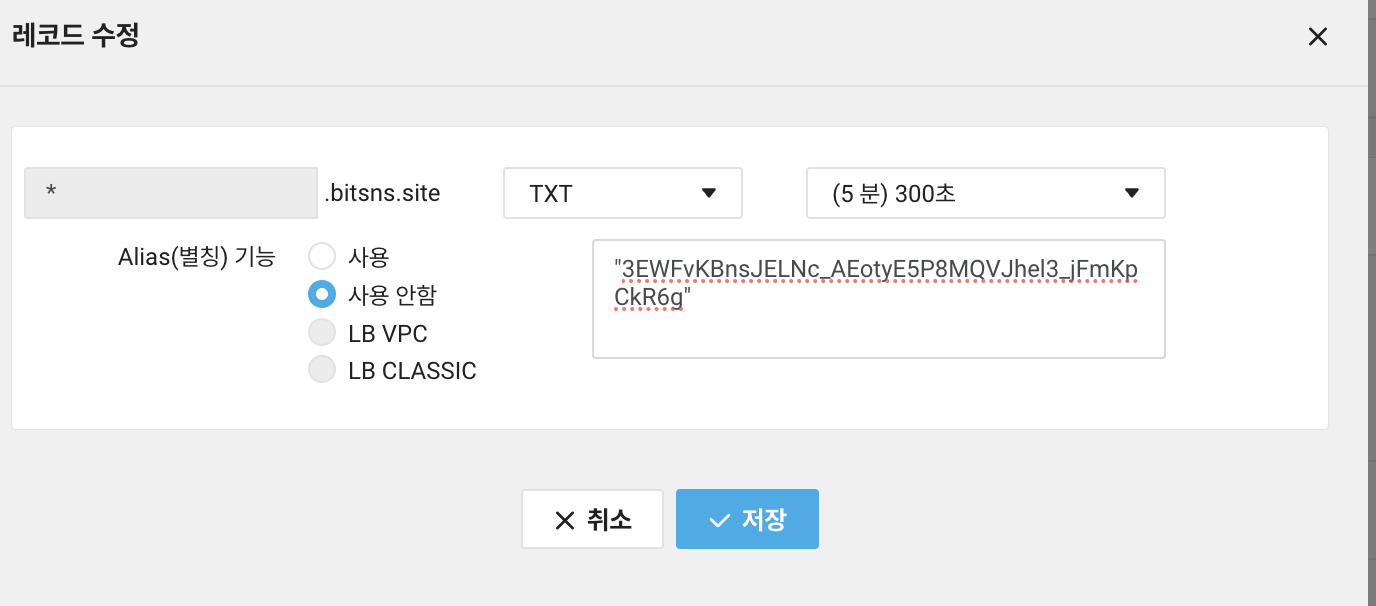
- "Please deploy a DNS TXT record under the name” 아래 나오는 값을 해당 도메인의 네임서버에 (TXT 방식으로) 사진과 같이 추가 (예시)
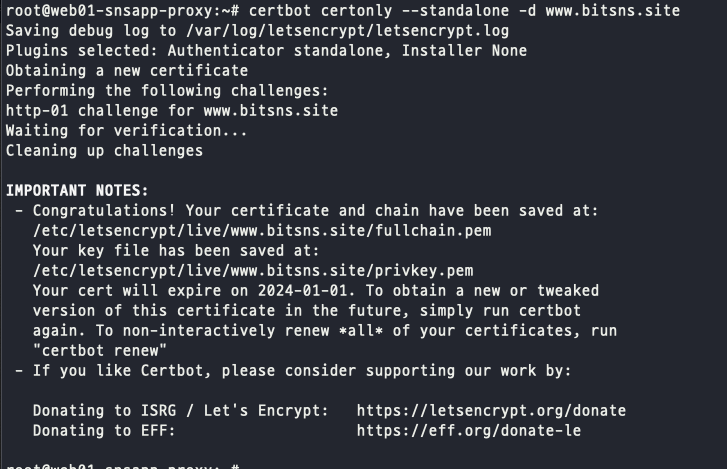
- 생성 완료
- Root CA 정보가 포함된 chain 을 직접 추가하는 작업
# cd /etc/letsencrypt/archive# ls
bitsns.site www.bitsns.site
# cd bitsns.site
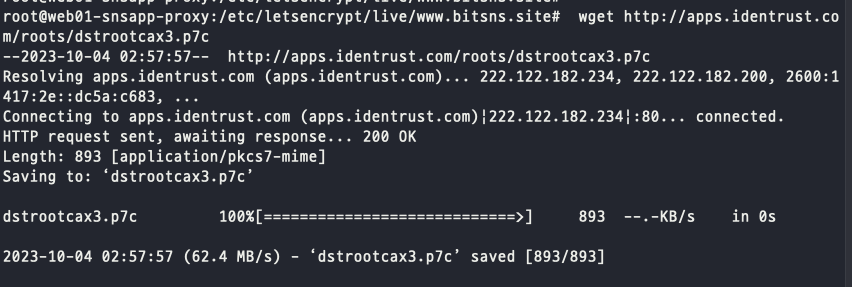
# wget http://apps.identrust.com/roots/dstrootcax3.p7c
# ls
cert.pem chain.pem dstrootcax3.p7c fullchain.pem privkey.pem README
# openssl pkcs7 -inform der -in dstrootcax3.p7c -out dstrootcax3.pem -print_certs
==> OpenSSL을 사용하여 DER 형식의 PKCS#7 인증서 파일(dstrootcax3.p7c)을 PEM 형식(dstrootcax3.pem)으로 변환하고, 변환된 인증서의 내용을 출력
# ls
cert1.pem dstrootcax3.p7c fullchain1.pem root@1.235.229.87
chain1.pem dstrootcax3.pem privkey1.pem
# cat dstrootcax3.pem >> fullchain1.pem- 인증서 등록하기
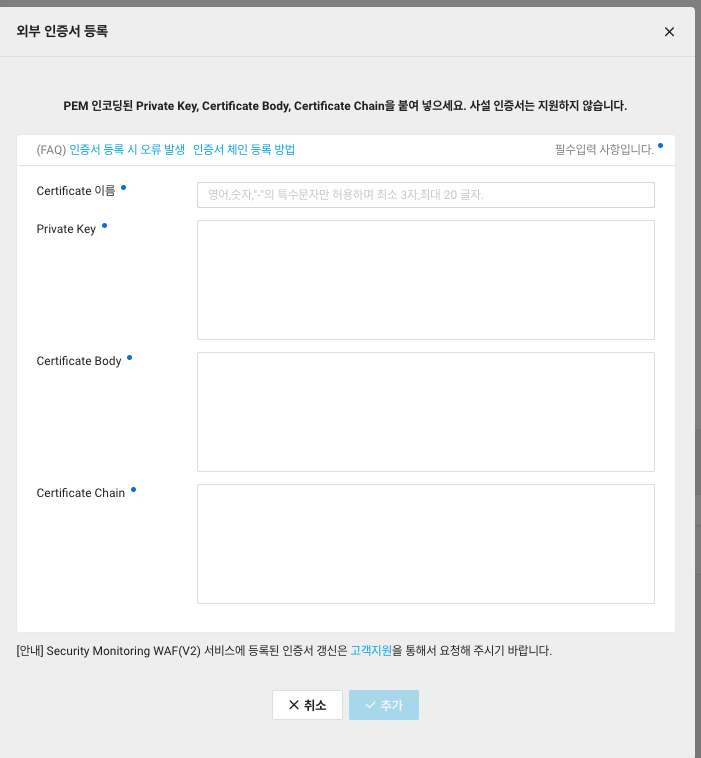
Private Key
- privkey.pem
Certificate Body
- cert1.pem
Certificate chain
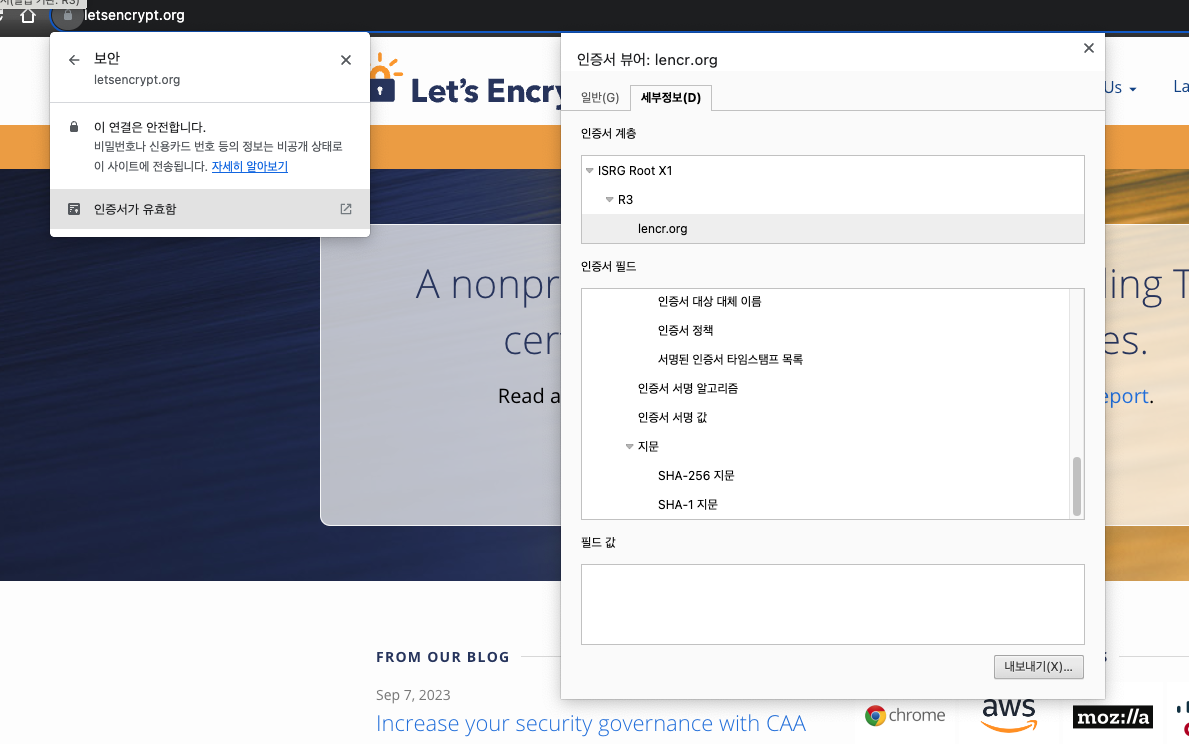
- https://letsencrypt.org/ 사이트에서 내보내기 ("Base 64 인코딩 ASCII, 인증서 체인" 형식으로 내보내기 후 텍스트 붙여넣기)
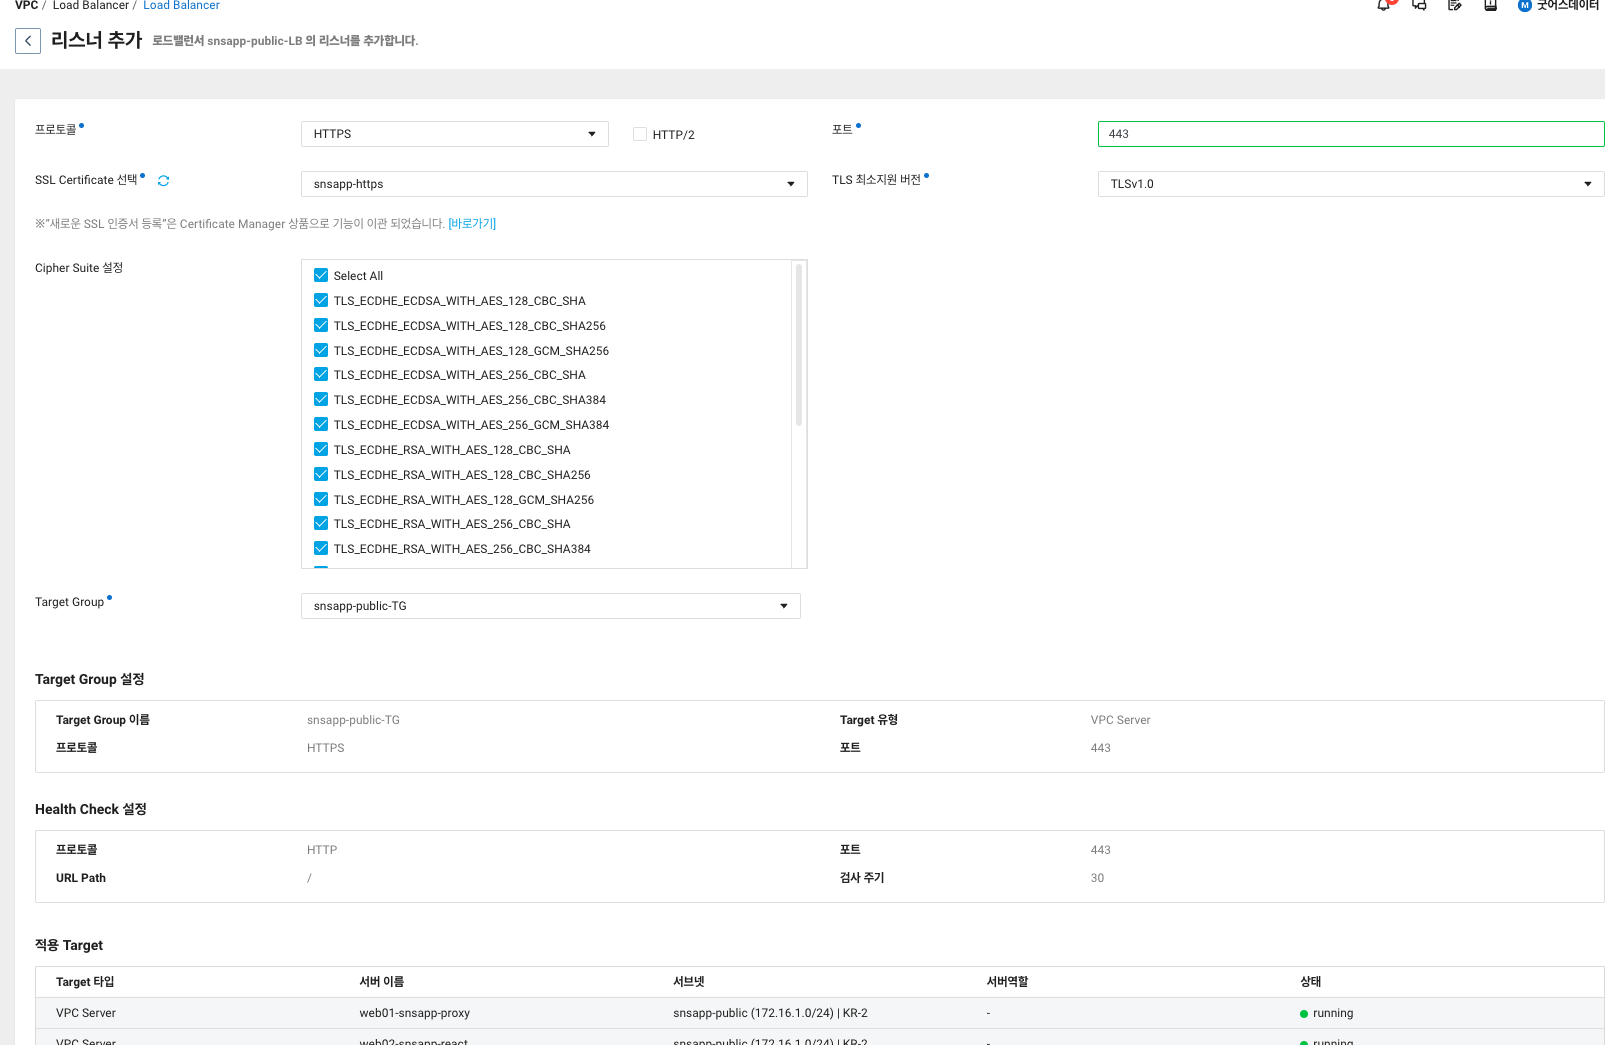
로드 밸런스에 https 적용
- 리스너 추가!
초기화 과정
먼저, 현재 시스템에 설치된 인증서의 목록을 확인하려면 다음의 명령어를 사용합니다:
# certbot certificates- 인증서의 목록 중에서 삭제하려는 인증서의 이름을 확인
다음 명령어를 사용하여 해당 인증서를 삭제합니다:
# certbot delete --cert-name [인증서 이름]

ex ) certbot delete --cert-name www.bitsns.site
-인증서 갱신: 삭제 후 인증서를 갱신
certbot renew- 정상적인 삭제가 된 모습

- /etc/letsencrypt/renewal 에 문제 발생

- "Renewal configuration file /etc/letsencrypt/renewal/bitsns.site.conf produced an unexpected error: fullchain does not match cert + chain for bitsns.site!" = bitsns.site에 대한 갱신(renewal) 설정에 문제가 있다는 것
Nginx 설치 및 https 접속해보기
- certbot을 이용한 letsencrypt 인증서 존재 확인
# certbot certificates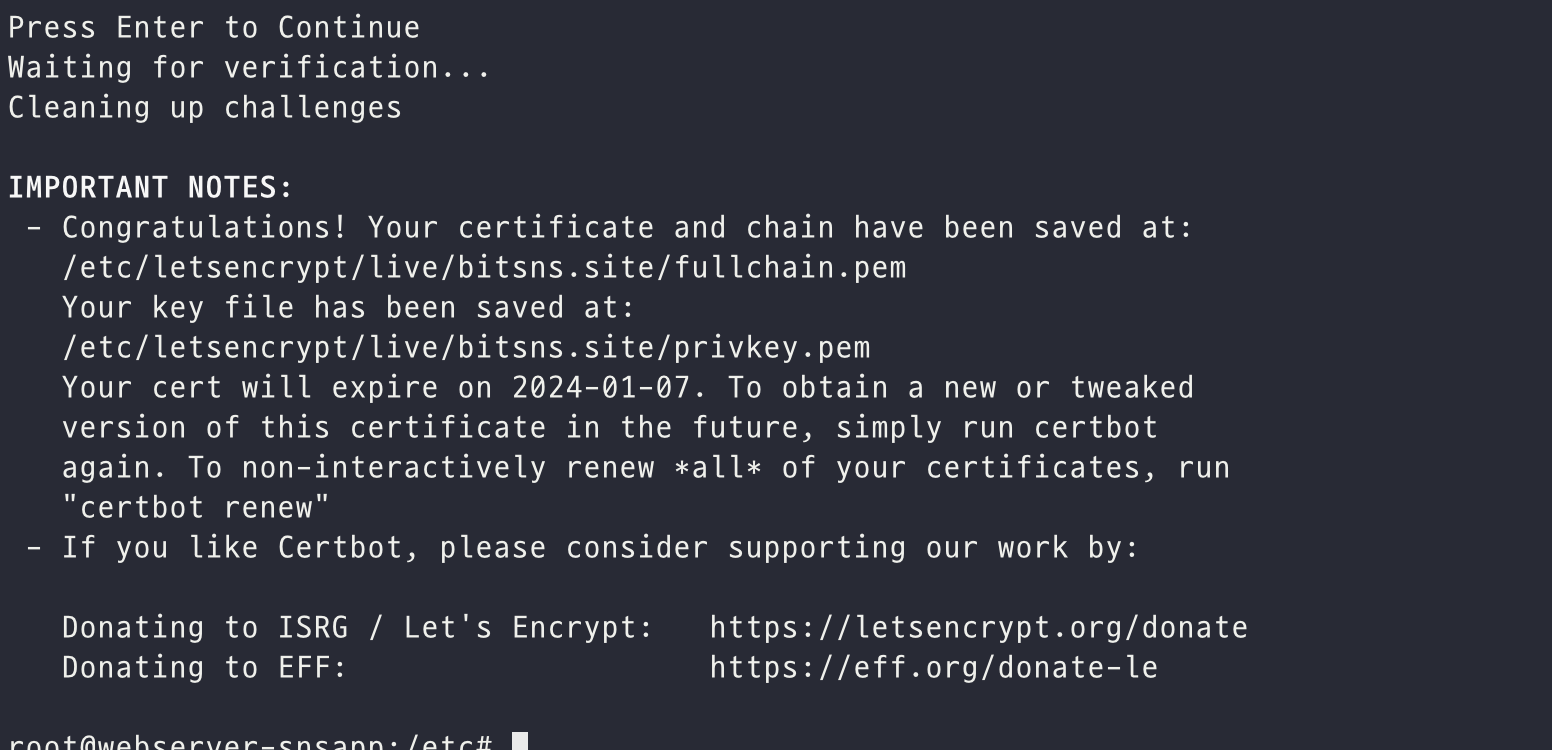
- /etc/nginx/nginx.conf 수정
user www-data;
worker_processes auto;
pid /run/nginx.pid;
include /etc/nginx/modules-enabled/*.conf;

http {

    ...

        ##
        # SSL Settings
        ##

        ssl_protocols TLSv1 TLSv1.1 TLSv1.2 TLSv1.3; # Dropping SSLv3, ref: POODLE
        ssl_prefer_server_ciphers on;
		ssl_certificate /etc/letsencrypt/live/bitsns.site/fullchain.pem;
		ssl_certificate_key /etc/letsencrypt/live/bitsns.site/privkey.pem;
		ssl_dhparam /etc/letsencrypt/ssl_dhparam.pem;

==> 경로에 맞게  SSL/TLS 연결을 위한 인증서와 개인 키의 경로를 지정

==> Diffie-Hellman 파라미터를 사용하여 Perfect Forward Secrecy를 강화하기 위한 설정

   ....

server {
    listen 80;
    server_name www.bitsns.site fail_timeout=0;
    return 308 https://www.bitsns.site$request_uri;
    }

 ==> 80 port redirection code


server {
	listen 443 ssl;
	server_name www.bitsns.site;
	root  html;
    # 요청된 URL에 해당하는 파일을 서버에서 찾을 때 기본 경로로 html 디렉토리를 사용하라는 것
    }

 ==>  SSL/TLS를 사용하여 443 포트에서 수신 대기하도록 설정하는 서버 블록

}
- /etc/nginx/site-available/ 수정
# vim www.bitsns.siteserver {
listen 443;
server_name www.bitsns.site;
location / {
root /var/www/html/index.nginx-debian.html;
try_files $uri $uri/ /index.html;
index index.html;
}
}- 코드 입력 후 nginx 문법 검사 및 nginx 재 가동 명령어
# nginx -t

# systemctl status nginx ==> nginx 상태 확인

# systemctl restart nginx ==> nginx 재가동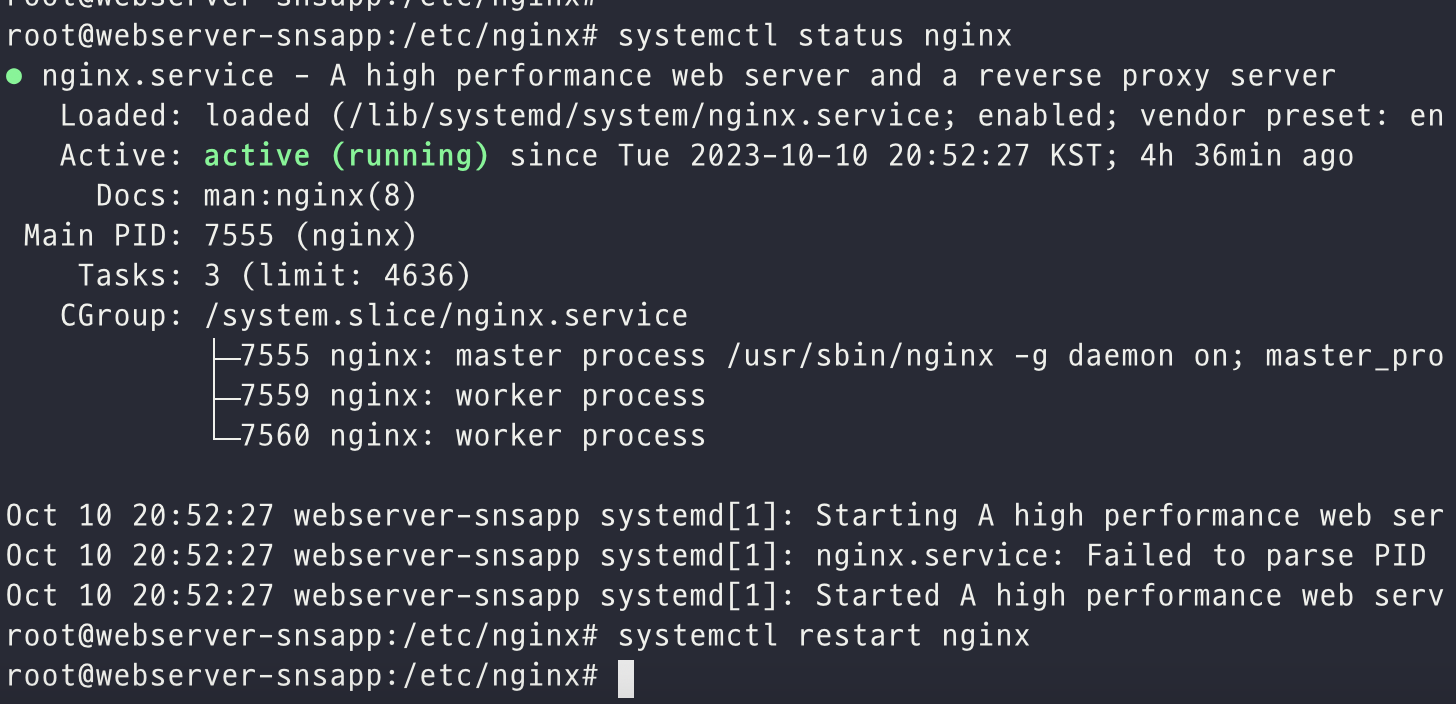
검은 배경에 흰 글씨뿐인 CLI에서 초롯빛의 active라고 표시된 nginx 활동 상태는 너무 감동이다....(난 F...)
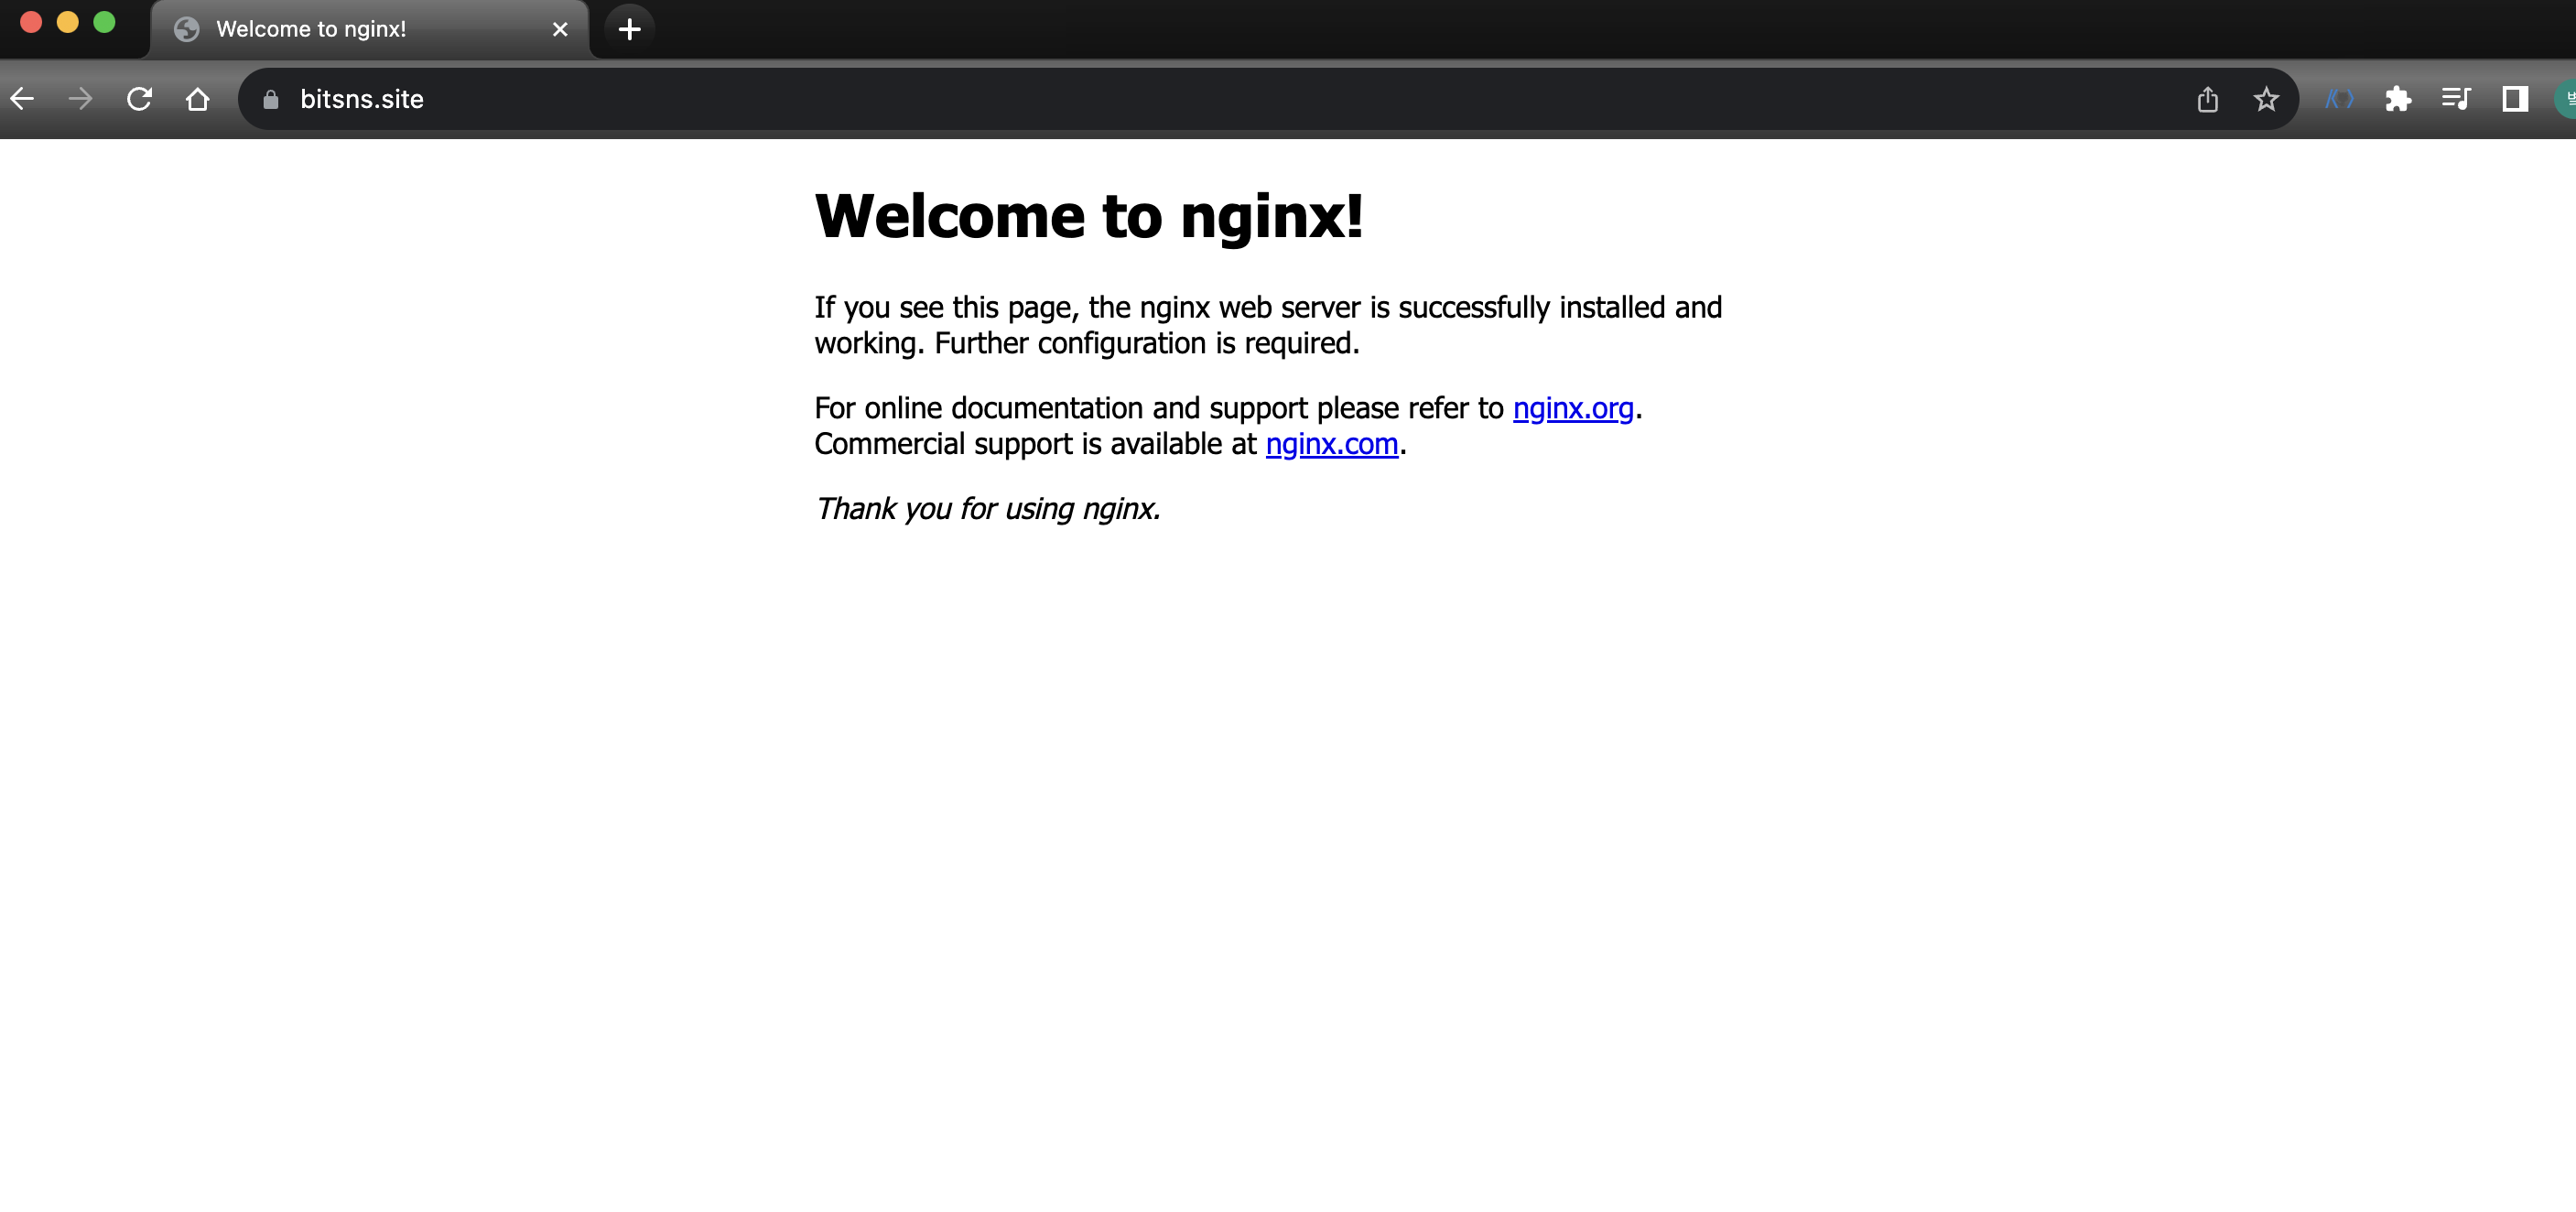
- 정상적으로 https에 서브 도메인 www를 달고 출력하기! 성공!
참고 사이트 :
- https://manvscloud.com/?p=1445 = [NCLOUD] LET’S ENCRYPT + CERTIFICATE MANAGER로 LOAD BALANCER에 인증서 적용하기
- https://happycloud-lee.tistory.com/238 = openssl로 SSL인증서 만들기와 Mac+Chrome에서 ERR_CERT_INVALID 에러 조치하기
- https://navercloudplatform.medium.com/%EC%9D%B4%EB%A0%87%EA%B2%8C-%EC%82%AC%EC%9A%A9%ED%95%98%EC%84%B8%EC%9A%94-lets-encrypt-%EB%AC%B4%EB%A3%8C-ssl-%EC%9D%B8%EC%A6%9D%EC%84%9C-%EB%B0%9C%EA%B8%89%EB%B6%80%ED%84%B0-%EB%93%B1%EB%A1%9D-%EA%B4%80%EB%A6%AC%EA%B9%8C%EC%A7%80-feat-certificate-manager-d259f469e83d = [이렇게 사용하세요!] Let’s Encrypt 무료 SSL 인증서 발급부터 등록, 관리까지 (feat. Certificate Manager)