1. Files.readAllBytes(...) (Java 7+)
import java.nio.file.Files;
import java.nio.file.Path;
import java.nio.file.Paths;

Path path = Paths.get("C:/data/file.bin");
byte[] data = Files.readAllBytes(path);
✔ 장점
- 한 줄로 끝남
- 간결하고 안정적
- NIO 기반이라 속도도 빠름
✔ 단점
- 대용량 파일은 메모리 폭발 위험 (모두 한 번에 읽음)
2. FileInputStream (기본 IO 방식)
import java.io.File;
import java.io.FileInputStream;
import java.io.ByteArrayOutputStream;

File file = new File("C:/data/file.bin");

try (FileInputStream fis = new FileInputStream(file);
     ByteArrayOutputStream buffer = new ByteArrayOutputStream()) {

    byte[] temp = new byte[1024];
    int readLen;

    while ((readLen = fis.read(temp)) != -1) {
        buffer.write(temp, 0, readLen);
    }

    byte[] data = buffer.toByteArray();  // 최종 결과
} catch (IOException e) {
    e.printStackTrace();
}
✔ 장점
- 대용량 처리에 안정적 (조각조각 읽기)
- 좀 더 유연하게 다룰 수 있음 (압축, 인코딩 등)
✔ 단점
- 코드가 좀 길어짐
| 상황 | 추천 방식 |
|---|---|
| 일반적인 작은 파일 (1~10MB 이하) | Files.readAllBytes() |
| 대용량, 스트리밍 기반 처리 | FileInputStream |
| 네트워크/업로드용 | InputStream 직접 전달도 고려 |
| 방식 | 한 줄 요약 |
|---|---|
Files.readAllBytes(...) | 간단하고 빠름, 소형 파일 |
FileInputStream | 커스텀 로직 가능, 대형 파일 안전 |
참고: byte[]를 DB에 넣거나 응답에 쓰기
// DB insert 시
vo.setFileData(data);  // byte[] 그대로 전달

// HTTP 응답
response.getOutputStream().write(data);
TODO : 로컬의 바이너리 파일을 읽어와 변환 후 디비 저장하기
현재 내 로컬환경 : Spring + eGov 3.6 / jdk 1.7
텍스트 파일이든, 결국 자바에서 읽는 건 byte[] 나 stream 형태로 다룸
난 위의 기본 IO 방식인 FileInputStream 기반으로 로컬 바이너리 파일을 읽어서 DB에 저장하는 스케줄러 로직을 만들거임
-> XML 설정 + Java 코드
흐름
- @Scheduled 로 주기적 실행
- filePath 경로에서 파일 목록 가져옴
- FileInputStream으로 바이트 배열로 읽음
- FileVO 객체 구성
- MyBatis DAO로 insert
- 처리 완료된 파일은 file.delete()로 삭제
- xml 에서 스케쥴러 설정 -> dispatcher설정 말고 common설정쪽에
- file.properties 설정
- new 파일 untitle로 지정 후 파일 디렉토리 입력 저장
file.upload.path=경로 - 이름변경하는 창이 다시뜰텐데 그때 확장자를 .properties로 변경해주면된다.
- 디비에저장할 VO클래스와 디비에서 테이블생성
- file_id에 입력될 pk 시퀀스 생성 - db insert시 getFileId 해와야함
CREATE SEQUENCE FILE_SEQ START WITH 1 INCREMENT BY 1;
- FileUtil 클래스 생성 (InputStream → byte[] 변환용 유틸)
public class FileUtil {
		// InputStream → byte[] 변환용
    public static byte[] readFileToBytes(File file) throws IOException {
        try (FileInputStream fis = new FileInputStream(file);
             ByteArrayOutputStream buffer = new ByteArrayOutputStream()) {

            byte[] temp = new byte[1024];
            int bytesRead;

            while ((bytesRead = fis.read(temp)) != -1) {
                buffer.write(temp, 0, bytesRead);
            }

            return buffer.toByteArray();
        }
    }
    // db 인서트 후 파일 이동 시키는 로직
    // 이동해야하는 이유 중복 방지
    public static boolean moveFile (File file, File targetDir) {
    	if(!targetDir.exists()) targetDir.mkdir(); 		// 디렉토리 없으면 생성하기
    	File dest = new File(targetDir, file.getName());
    	return file.renameTo(dest);
    }
}
- 스케쥴러 클래스 생성
@Component
public class Samplescheduler {
private static final Logger log = LogManager.getLogger(Samplescheduler.class);
@Autowired
private SqlSessionFactory sqlSessionFactory;
@Value("@{file.upload.path}")
private String filePath;
@Autowired
private FileService fileService;
@Scheduled(cron = "0 0/5 * * * ?") // 5분 주기
public void uploadBinaryFile() throws Exception {
//File 객체를 이용해서 파일이 존재하는지, 읽기 가능한지, 바이트로 읽을지 등을 처리
File dir = new File(filePath); // 경로 담는 객체
File succsessDir = new File(filePath + "/succsess"); //성공시 디렉토리
File failDir = new File(filePath + "/fail"); //실패시 디렉토리
if(!dir.isDirectory() || !dir.exists()) return;
File[] files =dir.listFiles(); // 파일 리스트 가져옴
if(files !=null){
for(File file : files) {
if(file.isFile()){
try{
// byte[] data = Files.readAllBytes(file.toPath());
byte[] data = FileUtil.readFileToByteArray(file);
log.info("처리중 파일 : " + file.getName());
FileVO vo = new FileVO();
// 시퀀스 받아오기
vo.setFileId(fileService.getFileId());
vo.setFileName(file.getName());
vo.setFileType("application/octet-stream"); // 이유
vo.setFileData(data);
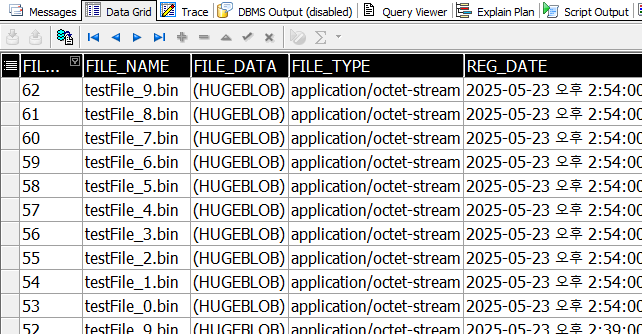
fileService.insertBinaryFile(vo);
/* 완료된파일 이동시키기
File dest = new File(file.getParent() + "/processed/" + file.getName());
file.renameTo(dest);
*/
// 저장 완료 후 파일 이동시킴
if(FileUtil.moveFile(file, succsessDir)) log.info("파일이동 성공" + file.getName());
else log.info("파일이동 실패" + file.getName());
} catch (Exception e) {
if(FileUtil.moveFile(file, failDir)) log.info("업로드실패로인한 파일 실패경로 이동" + file.getName());
}
}
}
}
}- service/dao(mapper)/ mapper.xml 생성
디비저장이 완료되면 새 디렉토리 만들어 거기에 파일을 옮겨줌
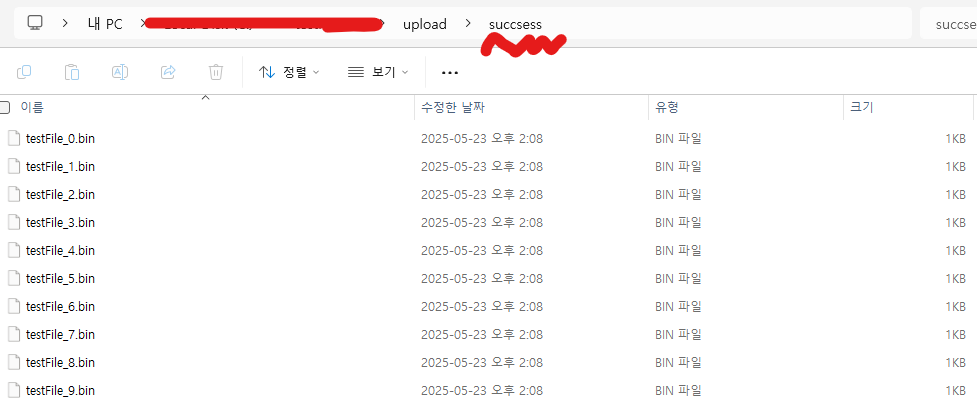
(테스트를많이해서 많이쌓임)
➡️ setFileType("application/octet-stream"); 이게 의미하는 건?
해당 파일의 MIME 타입(Multipurpose Internet Mail Extensions) 을 지정
- "application/octet-stream": "이진 데이터(binary data)" 라는 의미
- 이미지, 오디오, PDF처럼 정해진 포맷이 아닌 그냥 바이너리 데이터일 때 사용
- MIME 타입 중에서도 가장 일반적이고 범용적인 타입
| 확장자 | MIME 타입 |
|---|---|
.txt | text/plain |
.pdf | application/pdf |
.jpg | image/jpeg |
.png | image/png |
.zip | application/zip |
| 기타/불명 | application/octet-stream ← 디폴트 |
➡️ fileType 을 왜 지정하나?
- 나중에 다운로드할 때 Content-Type 헤더로 쓸 수 있음
-> response.setContentType(fileVO.getFileType())
- MIME 타입 따라 자동 실행되는 프로그램이 다름
-> ex: .pdf는 열리고, .zip은 다운로드됨
- REST API로 전송할 때도 유용
참고 : component-scan 설정시 너무 큰 범위로 잡으면 빈 중복이라고 에러가 떨어진다.
그 다음스텝
byte[] → MultipartFile, InputStream → File 역변환
DB 저장된 byte[]를 다시 파일로 쓰는 쪽
- file.properties 설정 다운로드 경로 추가
file.download.path=경로
- service/dao(mapper)/ mapper.xml 생성
스케쥴러 클래스 전문
package com.example.scheduler;

import java.io.File;
import java.io.FileOutputStream;
import java.util.List;

import org.apache.ibatis.session.SqlSession;
import org.apache.ibatis.session.SqlSessionFactory;
import org.apache.log4j.LogManager;
import org.apache.log4j.Logger;
import org.springframework.beans.factory.annotation.Autowired;
import org.springframework.beans.factory.annotation.Value;
import org.springframework.scheduling.annotation.Scheduled;
import org.springframework.stereotype.Component;

import com.example.file.service.FileService;
import com.example.file.vo.FileVO;
import com.example.utils.FileUtil;


@Component
public class Samplescheduler {

    private static final Logger log = LogManager.getLogger(Samplescheduler.class);

    @Autowired
    private SqlSessionFactory sqlSessionFactory;

    @Value("${file.upload.path}")
    private String filePath;

	@Value("${file.download.path}")
	private String downloadPath;

    @Autowired
    private FileService fileService;


    @Scheduled(cron = "0 0/3 * * * ?")  // 3분 주기
    public void uploadBinaryFile() throws Exception {
    	//File 객체를 이용해서 파일이 존재하는지, 읽기 가능한지, 바이트로 읽을지 등을 처리
    	File dir = new File(filePath);		// 경로 담는 객체
    	File succsessDir = new File(filePath + "/succsess");	//성공시 디렉토리
    	File failDir = new File(filePath + "/fail");			//실패시 디렉토리


	    	if(!dir.isDirectory() || !dir.exists()) return;

	    	File[] files =dir.listFiles(); // 파일 리스트 가져옴

	    	if(files !=null){
	    		for(File file : files) {
	    			if(file.isFile()){
	    				try{
		//    				byte[] data = Files.readAllBytes(file.toPath());
		    				byte[] data = FileUtil.readFileToByteArray(file);

		    				log.info("처리중 파일 : " + file.getName());

		    				FileVO vo = new FileVO();
		    				// 시퀀스 받아오기
		    				vo.setFileId(fileService.getFileId());
		    				vo.setFileName(file.getName());
		    				vo.setFileType("application/octet-stream");		// 퍼알의 MIME 타입지정 - 바이너리파일이라는뜻
		    				vo.setFileData(data);

		    				fileService.insertBinaryFile(vo);
		    				/* 완료된파일 이동시키기
		    				File dest = new File(file.getParent() + "/processed/" + file.getName());
		    				file.renameTo(dest);
		    				*/

		    				// 저장 완료 후 파일 이동시킴
		    				if(FileUtil.moveFile(file, succsessDir)) log.info("파일이동 성공" + file.getName());
		    				else log.info("파일이동 실패" + file.getName());

		    			} catch (Exception e) {
		    				e.printStackTrace();
			    			if(FileUtil.moveFile(file, failDir)) log.info("업로드실패로인한 파일 실패경로 이동" + file.getName());

			    		}
	    			}

	    		}

	    	}

    }


    @Scheduled(cron = "0 0/5 * * * ?")  // 5분 주기
    public void downLoadBinaryFile() throws Exception {

		List<FileVO> files =  fileService.selectBinaryFile();

		if(files !=null){
			for(FileVO vo : files){
				File target = new File(downloadPath,vo.getFileName());
				try(FileOutputStream fos = new FileOutputStream(target)) {
					fos.write(vo.getFileData());
					log.info("다운로드 완료"+target.getAbsolutePath());		//


				} catch (Exception e) {
					e.printStackTrace();
					log.info("다운로드 실패"+ vo.getFileName());
					// TODO: handle exception
				}

			}
		}
    }
}
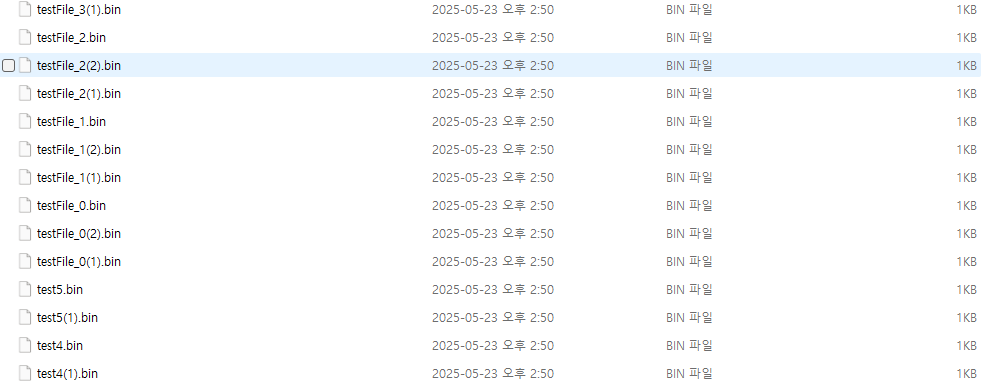
다음스텝 윈도우처럼 파일명 중복 회피
로컬(서버)에 다운받은 바이너리파일과 디비의 바이너리파일이 동일할때(이름으로 중복체크하기 덮어쓰는 방식 ㄴㄴ)
윈도우처럼 이름중복 회피
파일유틸 클래스 메서드 추가
    public static File getFileDupChk(File dir, String originNm){
    	File file = new File(dir,originNm);
    	if(file!=null){
	    	String name = originNm;
	    	String baseNm = name;
	    	String extension = "";

	    	// . 위치 찾음 솩장자때문에
	        int dotIndex = name.lastIndexOf('.');

	        // -1은 존재하지않을때, 즉 점 존재시 -- 확장자 있는경우만
	        if (dotIndex != -1) {
	            baseNm = name.substring(0, dotIndex);		//확장자제외
	            extension = name.substring(dotIndex); 		//확장자
	        }

	        int count = 1;

	        // 실제 저경로에 파일이 존재하는지 확인 존재유무체크
	        while (file.exists()) {
	            file = new File(dir, baseNm + "(" + count + ")" + extension);
	            count++;
	        }


    	}

    	return file;

    }
스케쥴러 수정
    @Scheduled(cron = "0 0/5 * * * ?")  // 5분 주기
    public void downLoadBinaryFile() throws Exception {

		List<FileVO> files =  fileService.selectBinaryFile();

		if(files !=null){
			for(FileVO vo : files){
//				File target = new File(downloadPath,vo.getFileName());
				File target = FileUtil.getFileDupChk(new File(downloadPath), vo.getFileName());
				try(FileOutputStream fos = new FileOutputStream(target)) {
					fos.write(vo.getFileData());
					log.info("다운로드 완료"+target.getAbsolutePath());		//


				} catch (Exception e) {
					e.printStackTrace();
					log.info("다운로드 실패"+ vo.getFileName());
					// TODO: handle exception
				}

			}
		}
    }