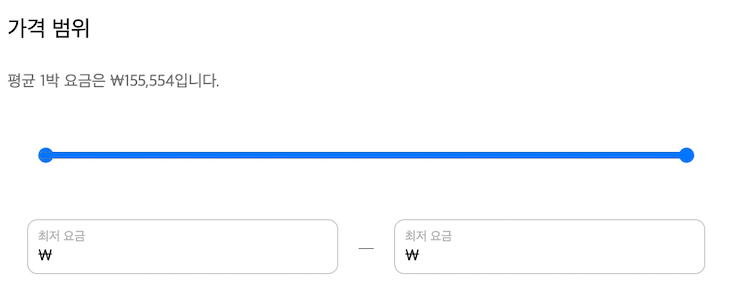
✅ 구현 목표
1. 양방향 range로 최소값, 최대값 구하기
2. 최소값이 최대값 넘지 않기(최대값도 마찬가지)
* 본 글은 스타일드 컴포넌트를 이용하였습니다. *
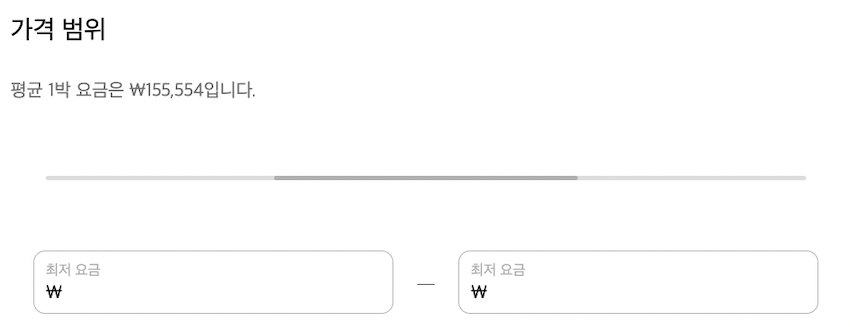
디자인적 div 막대 만들기
우선 기본 range의 디자인이 맘에 들지 않기 때문에 디자인적인 역할만 하는 div2개를 만든다.
<FilterPriceSlide>
  <FilterPriceSlideInner
    rangeMinPercent={rangeMinPercent}
    rangeMaxPercent={rangeMaxPercent}
  />
</FilterPriceSlide>
-------------------------------------------------------------------------------
const FilterPriceSlide = styled.div`
  position: relative;
  height: 4px;
  width: 650px;
  border-radius: 10px;
  background-color: #dddddd;
`;

const FilterPriceSlideInner = styled.div`
  position: absolute;
  left: 30%;
  right: 30%;
  height: 4px;
  border-radius: 10px;
  background-color: #b0b0b0;
`;-
FilterPriceSlide: 배경,FilterPriceSlideInner: 현재값을 나타내는 div 막대를 만든다. -
FilterPriceSlideInner즉 현재값 막대는 range의 값에 따라 움직여야 하기에 position을 absolute를 준다. -
최소값, 최대값에 따라 현재값 막대 길이가 달라지기 때문에 left, right 값을 나중에 받아올 예정이다.
양방향 range 만들기
- 우선 최소값, 최대값을 나타낼 range 2개를 만든다.
<FilterPriceRangeWrap>
  <FilterPriceRangeMin
    type="range"
  />
  <FilterPriceRangeMax
    type="range"
  />
</FilterPriceRangeWrap>
-------------------------------------------------------------------------------
const FilterPriceRangeWrap = styled.div``;

const FilterPriceRangeMin = styled.input``;

const FilterPriceRangeMax = styled(FilterPriceRangeMin)``;- div 막대와 같은 크기로 만든다.
- absolute로 2개의 range를 합쳐진거 처럼 보이게 만든다. (현재는 우측 range만 움직임)
- top을 줘서 div 막대를 가린다. (top을 빼면 뒤에 잘 있는 것을 확인할 수 있음)
const FilterPriceRangeWrap = styled.div`
	position: relative;
`;

const FilterPriceRangeMin = styled.input`
	position: absolute;
	top: -9px;
  	width: 100%;
`;

const FilterPriceRangeMax = styled(FilterPriceRangeMin)``;
ragne 디자인
막대 디자인
이제부터 잠시 range를 꾸며볼 것이다.
-webkit-appearance: none을 이용해 브라우저에서 제공하는 range 막대의 기본 속성을 제거한다.background: none으로 배경을 없애 뒤에 div 막대가 보이게 한다.


const FilterPriceRangeMin = styled.input`
  position: absolute;
  top: -9px;
  height: 7px;
  width: 100%;
	-webkit-appearance: none;
  background: none;
`;
버튼 디자인
버튼을 디자인 하기위해 &::-webkit-slider-thumb에 스타일을 줄 것이다.
-webkit-appearance: none로 브라우저에서 제공하는 기본 속성을 제거한다.- Css속성으로 원하는 디자인으로 만든다.

const FilterPriceRangeMin = styled.input`
  position: absolute;
  top: -9px;
  height: 7px;
  width: 100%;
	-webkit-appearance: none;
  background: none;

	&::-webkit-slider-thumb {
    height: 30px;
    width: 30px;
    border-radius: 50%;
    border: 2px solid #b0b0b0;
    background-color: white;
    -webkit-appearance: none;
  }
`;
이렇게 해서 range 디자인은 모두 마쳤다. 하지만 아직 오른쪽 range만 움직여서 양쪽 range 모두 움직이게 해야한다.
- 우선 range 자체에
pointer-events: none을 줘서 버튼을 비활성화 시킨다. - 버튼 자체에
pointer-events: auto를 줘서 비활성화 된 버튼을 다시 활성화 시킨다.
const FilterPriceRangeMin = styled.input`
	pointer-events: none;

	&::-webkit-slider-thumb {
		pointer-events: auto;
  }
`;
현재값 막대 div 움직이기
아직까지는 range를 움직여도 뒤의 div는 아무 반응을 하지 않는다.
설명에 앞서 우선 알고 가야할 개념은 HTML에선 input의 Value 지정은 단순한 초기값이라 수정이 가능하였다.
하지만 리액트의 JSX에선 value는 고정값이라 변하지가 않는다. 해결 방법은 onChange와 state를 이용해서 관리해야 한다는 점이다.

const [rangeMinValue, setRangeMinValue] = useState(fixedMinPrice);
const [rangeMaxValue, setRangeMaxValue] = useState(fixedMaxPrice);
const [rangeMinPercent, setRangeMinPercent] = useState(0);
const [rangeMaxPercent, setRangeMaxPercent] = useState(0);

const prcieRangeMinValueHandler = e => {
  setRangeMinValue(parseInt(e.target.value));
};

const prcieRangeMaxValueHandler = e => {
  setRangeMaxValue(parseInt(e.target.value));
};

const twoRangeHandler = () => {
  if (rangeMaxValue - rangeMinValue < priceGap) {
    setRangeMaxValue(rangeMinValue + priceGap);
    setRangeMinValue(rangeMaxValue - priceGap);
  } else {
    setRangeMinPercent((rangeMinValue / fixedMaxPrice) * 100);
    setRangeMaxPercent(100 - (rangeMaxValue / fixedMaxPrice) * 100);
  }
};
--------------------------------------------------------------------------------
<FilterPriceRangeMin
  type="range"
	min={fixedMinPrice}
  max={fixedMaxPrice - priceGap}
	step="1000"
  value={rangeMinValue}
  onChange={e => {
    prcieRangeMinValueHandler(e);
    twoRangeHandler();
  }}
/>
<FilterPriceRangeMax
  type="range"
	min={fixedMinPrice + priceGap}
	max={fixedMaxPrice}
	step="1000"
  value={rangeMaxValue}
  onChange={e => {
    prcieRangeMaxValueHandler(e);
    twoRangeHandler();
  }}
/>- onChagne를 이용해 움직일 때 마다 현재 값을 state에 set한다. (초기값은 이름에 맞게 최소, 최대값으로)
const [rangeMinValue, setRangeMinValue] = useState(fixedMinPrice);
const [rangeMaxValue, setRangeMaxValue] = useState(fixedMaxPrice);- 현재 값을 현재값 막대 div의 left, right 속성값을 %로 주기위해 백분율로 만든다.
- onChagne에 아래 함수를 넣어준다.
const twoRangeHandler = () => {
    setRangeMinPercent((rangeMinValue / fixedMaxPrice) * 100);
    setRangeMaxPercent(100 - (rangeMaxValue / fixedMaxPrice) * 100);
};- 최소값, 최대값을 백분율로 바꿔서 최소, 최대 퍼센트 state를 set한다.
- 그 값을 현재값 막대 div 속성 값으로 준다.
const FilterPriceSlideInner = styled.div`
  position: absolute;
  left: ${props => props.rangeMinPercent}%;
  right: ${props => props.rangeMaxPercent}%;
  height: 4px;
  border-radius: 10px;
  background-color: #b0b0b0;
`;
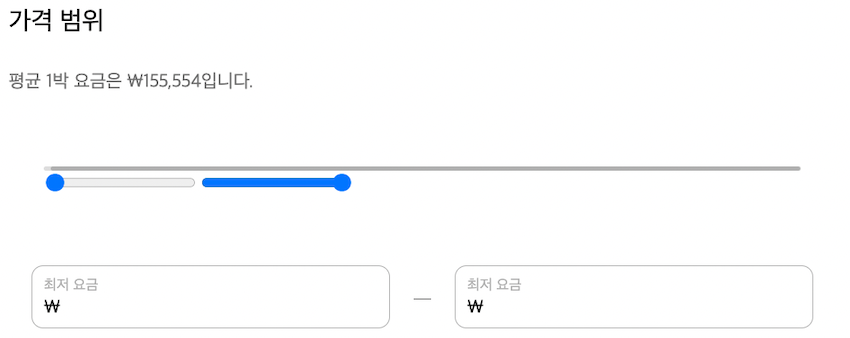
이제 일반적인 range 처럼 잘 움직이는 걸 볼 수 있다. 하지만 최소값이 최대값을 지나가는 걸 볼 수 있다.
이제 이 부분을 고칠 차례다.
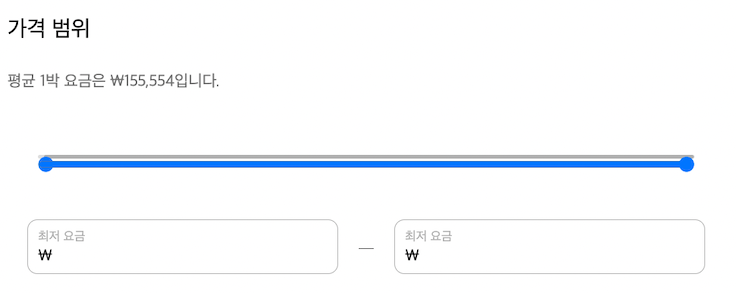
최소값, 최대값 지키기
최소값은 최대값보다 값이 클 수가 없고 최대값도 마찬가지 최소값 보다 작을 수 없다. 서로가 맞닿으면 서로 값을 바꿔줘야 한다.
- 최소값 range는 최대값 - 최소값이 가격격차 보다 작다면 최대값을 최소값 + 격차값으로 업데이트 한다.
- 최대값 range는 최대값 - 격차값으로 최소값을 줄인다.
const twoRangeHandler = () => {
    if (rangeMaxValue - rangeMinValue < priceGap) {
      setRangeMaxValue(rangeMinValue => rangeMinValue + priceGap);
      setRangeMinValue(rangeMaxValue => rangeMaxValue - priceGap);
    } else {
      setRangeMinPercent(() => (rangeMinValue / fixedMaxPrice) * 100);
      setRangeMaxPercent(() => 100 - (rangeMaxValue / fixedMaxPrice) * 100);
    }
  };
마치며
많은 글 들을 보며 힘겹게 완성하였다.
코드로도 상당히 많은 양인데 이걸 하나하나 정리하려고 하니 정말이지 막막했다.
하지만 이걸 정리하면 다음 부턴 절대 이걸로 고생할 일은 없을거 같아서 하나씩 만들어 가는 과정으로 정리를 해보았다.
혹시나 나와 같이 이런 기능이 필요한 분들 있으시다면 이 글이 꼭 도움이 되었으면 좋겠다.


오른쪽 버튼을 움직이면 왼쪽 버튼도 따라 움직이는 현상은 어떻게 해결하면 좋을까요??
priceGap 값은 어떻게 계산해야하는 건지 궁금합니다.