🎉클래스
🔷클래스 메서드
타입스크립트는 함수를 이해하는 것과 동일한 방식으로 메서드를 이해한다.
클래스 생성자는 매개변수와 관련하여 전형적인 클래스 메서드처럼 취급된다.
class Greeter {
  constructor(message: string) {
    console.log(`As I always say: ${message}!`);
  }
  greet(name: string) {
    console.log(`${name}, do your stuff!`);
  }
}

new Greeter("take chances, make mistakes, get messy");
new Greeter("take chances, make mistakes, get messy").greet("Miss Frizzle");

// Error: Expected 1 arguments, but got 0.
new Greeter();
// Error: Expected 1 arguments, but got 0.
new Greeter("take chances, make mistakes, get messy").greet();
🔷클래스 속성
타입스크립트에서 클래스의 속성을 읽거나 쓰려면 클래스에 명시적으로 선언해야 한다.
클래스 속성은 인터페이스와 동일한 구문을 사용해 선언한다.
class FieldTrip {
  destination: string;

  constructor(destination: string) {
    this.destination = destination;

    // Error: Property 'nonexistent' does not exist on type 'FieldTrip'.
    this.nonexistent = destination;
  }
}
🔸함수 속성
자바스크립트에는 클래스의 멤버를 호출 가능한 함수로 선언하는 두 가지 구문이 있다.
- 메서드 접근 방식
- 값이 함수인 속성을 선언하는 방식
메서드 접근 방식은 함수를 클래스 프로토타입에 할당하므로 모든 클래스 인스턴스는 동일한 함수 정의를 사용한다.
반면에 값이 함수인 속성을 선언하는 방식은 클래스의 인스턴스당 새로운 함수가 생성된다.
화살표 함수에서 this 스코프를 사용하면 클래스 인스턴스당 새로운 함수를 생성하는 시간과 메모리 비용 측면에서 유용할 수 있다.
아래는 자바스크립트 코드이다.
class WithMethod {
  myMethod() {}
}

class WithProperty {
  myProperty = () => {};
}

const result1 = new WithMethod().myMethod === new WithMethod().myMethod;
const result2 = new WithProperty().myProperty === new WithProperty().myProperty;

console.log(result1); // true
console.log(result2); // false
🔸초기화 검사
strictPropertyInitialization ( 엄격한 컴파일러 설정 ) 이 활성화된 상태에서 타입스크립트는 undefined 타입으로 선언된 각 속성이 생성자에서 할당되었는지 확인한다.
class WithValue {
  immediate = 0; // ok
  later: number; // ok, constructor에서 할당
  maybeUndefined: number | undefined; // ok, undefined가 되는 것이 허용됨

  constructor() {
    this.later = 1;
  }
}
확실하게 할당된 속성
클래스 생성자 다음에 클래스 속성을 의도적으로 할당하지 않는 경우가 있을 수도 있다.
엄격한 초기화 검사를 적용하고 싶지 않은 속성인 경우 이름 뒤에 ! 를 추가하면 검사가 비활성화된다.
이렇게 하면 타입스크립트에 속성에 처음 사용되기 전에 undefined 값이 할당된다.
class Activities {
  pending!: string[]; // ok
  initialize(pending: string[]) {
    this.pending = pending;
  }
  print() {
    console.log(this.pending);
  }
}

const activites = new Activities();
activites.print(); // undefined;
!어서션을 추가하여 타입 안정성을 줄이는 대신 클래스를 리팩터링해서 어서션이 더 이상 필요하지 않도록 설계하는게 권장된다.
🔸선택적 속성
class MissingInitializer{
  property?: string;
}
🔸읽기 전용 속성
readonly 로 선언된 속성은 선언된 위치 또는 생성자에서만 초기값을 할당할 수 있다.
이 속성은 클래스 내의 메서드를 포함한 다른 모든 위치에서 읽을 수만 있고, 쓸 수는 없다.
class MissingInitializer {
  readonly text: string;
  constructor(text: string) {
    this.text = "";
  }
  emphasize() {
    this.text += "!";
    // Error: Cannot assign to 'text' because it is a read-only property.
    //         'text' is declared but its value is never read.
  }
}
npm 패키지로 게시한 코드를 사용하는 외부인이
readonly제한자를 존중하지 않을 수 있다.
타입 검사를 하지않는 자바스크립트로 작성 중인 사용자라면 더욱 그렇다.
진짜베기 읽기 전용 보호가 필요하다면#private필드나get()메서드 사용을 고려하자.
타입스크립트는 읽기 전용 속성을 생성자가 아닌 선언된 위치에서 타입을 명시하지 않은 채 초기화 하면 원시 타입이 아닌 리터럴 타입으로 유추한다.
const 변수가 let 변수보다 더 좁은 타입을 갖는 것과 유사하다.
class MissingInitializer {
  readonly text = "bcd";
}

const missing = new MissingInitializer();
missing.text; // 타입: "bcd"
🔷타입으로서의 클래스
타입 시스템에서의 클래스는 선언이 런타임 값(클래스 자체)과 타입 애너테이션에서 사용할 수 있는 타입을 모두 생성한다는 점에서 상대적으로 독특하다.
class Teacher {
  sayHello() {
    console.log("hello");
  }
}

let teacher: Teacher;

teacher = new Teacher();
teacher = "Wahoo!"; // Error: Type 'string' is not assignable to type 'Teacher'.
타입스크립트는 클래스의 멤버와 그 타입을 동일하게 가지고 있는 모든 객체 타입을 해당 클래스에 할당할 수 있는 것으로 간주한다.
class SchoolBus {
  getAbilities() {
    return ["magic", "shapeshifting"];
  }
}

let bus: SchoolBus;

// ok
bus = new SchoolBus();
// ok
bus = {
  getAbilities: () => ["transmogrification"],
};

bus = {
  getAbilities: () => 123,
  // Error: Type 'number' is not assignable to type 'string[]'.
};
🔷클래스와 인터페이스
타입스크립트는 클래스 이름 뒤에 implements 키워드와 인터페이스 이름을 추가함으로써 클래스의 해당 인스턴스가 인터페이스를 준수한다고 선언할 수 있다.
이렇게 하면 클래스를 각 인터페이스에 할당할 수 있어야 함을 타입스크립트에 나타낸다.
타입 검사기에 의해 모든 불일치에 대해서 타입 오류가 발생한다.
interface Learner {
  name: string;
  study(hours: number): void;
}

class Student implements Learner {
  name: string;
  constructor(name: string) {
    this.name = name;
  }
  study(hours: number) {
    for (let i = 0; i < hours; i++) {
      console.log("...studying");
    }
  }
}

class Slacker implements Learner {}
// Error: Class 'Slacker' incorrectly implements interface 'Learner'.
//          Type 'Slacker' is missing the following properties from type 'Learner': name, study
타입스크립트는 인터페이스에서 클래스의 메서드 또는 속성 타입을 유추하지 않는다.
다음의 예제에서 타입스크립트는 타입 애너테이션을 지정하지 않는 한 hours 매개변수를 암시적 any로 간주한다.
interface Learner {
  name: string;
  study(hours: number): void;
}

class Student implements Learner {
  name;
  // Error: Member 'name' implicitly has an 'any' type.
  study(hours) {
    // Error: Parameter 'hours' implicitly has an 'any' type.
  }
}
인터페이스를 구현하는 것은 순전히 안정성 검사를 위해서이다.
그렇다고 전혀 다른 타입을 지정해도 오류가 발생하지 않는다는 것은 아니다.
타입을 지정하지 않으면 유추하지 않아서 any타입이 될 뿐이지 전혀 다른 타입을 넣으면 타입 에러가 발생한다.
interface Learner {
  name: string;
  study(hours: number): void;
}

class Student implements Learner {
  name = 1;
  // Error: Property 'name' in type 'Student' is not assignable to the same property in base type 'Learner'.
  //    Type 'number' is not assignable to type 'string'.
  study(hours = "abc") {
    // Error: Property 'study' in type 'Student' is not assignable to the same property in base type 'Learner'.
    //  Type '(hours?: string) => void' is not assignable to type '(hours: number) => void'.
    //  Types of parameters 'hours' and 'hours' are incompatible.
    //    Type 'number' is not assignable to type 'string'.
  }
}
🔸다중 인터페이스 구현
타입스크립트의 클래스는 다중 인터페이스를 구현해 선언할 수 있다.
클래스에 구현된 인터페이스 목록은 인터페이스 이름 사이에 쉼표를 넣고, 개수 제한 없이 인터페이스를 사용할 수 있다.
다음 두 클래스에서 모두 Graded 를 구현하려면 grades 속성을 가져야 하고, Reporter 를 구현하려면 report 메서드를 가져야 한다.
interface Graded {
  grades: number[];
}

interface Reporter {
  report(): string;
}

class ReportCard implements Graded, Reporter {
  grades: number[];
  constructor(grades: number[]) {
    this.grades = grades;
  }
  report() {
    return this.grades.join(", ");
  }
}

class Empty implements Graded, Reporter {}
// Error:
// Class 'Empty' incorrectly implements interface 'Graded'.
//   Property 'grades' is missing in type 'Empty' but required in type 'Graded'.
// Class 'Empty' incorrectly implements interface 'Reporter'.
//   Property 'report' is missing in type 'Empty' but required in type 'Reporter'.
두 개의 충돌하는 인터페이스를 구현하는 클래스를 선언하려고 하면 타입 오류가 발생한다.
interface AgeIsANumber {
  age: number;
}

interface AgeIsNotANumber {
  age: () => string;
}

class AsNumber implements AgeIsANumber, AgeIsNotANumber {
  age = 0;
  // Error:
  // Property 'age' in type 'AsNumber' is not assignable to the same property in base type 'AgeIsNotANumber'.
  //  Type 'number' is not assignable to type '() => string'.
}
class NotAsNumber implements AgeIsANumber, AgeIsNotANumber {
  age() {
    return "";
  }
  // Error:
  // Property 'age' in type 'NotAsNumber' is not assignable to the same property in base type 'AgeIsANumber'.
  //   Type '() => string' is not assignable to type 'number'.
}
🔷클래스 확장
타입스크립트는 다른 클래스를 확장하거나 하위 클래스를 만드는 자바스크립트 개념에 타입 검사를 추가한다.
class Teacher {
  teach() {
    console.log("The surest test of discipline is its absence.");
  }
}

class StudentTeacher extends Teacher {
  learn() {
    console.log("I cannot afford the luxury of a closed mind.");
  }
}
const teacher = new StudentTeacher();
teacher.teach(); // ok
teacher.learn(); // ok
🔸할당 가능성 확장
파생 인터페이스가 기본 인터페이스를 확장하는 것과 마찬가지로 하위 클래스도 기본 클래스의 멤버를 상속한다.
만약 기본 클래스에 하위 클래스가 가지고 있는 모든 멤버가 없으면 하위 클래스 타입에 부모 클래스타입을 할당할 수 없다.
부모 클래스 타입에 하위 클래스 타입을 할당할 수는 있다.
class Lesson {
  subject: string;
  constructor(subject: string) {
    this.subject = subject;
  }
}

class OnlineLesson extends Lesson {
  url: string;
  constructor(subject: string, url: string) {
    super(subject);
    this.url = url;
  }
}

let lesson: Lesson;
lesson = new Lesson("coding"); // ok
lesson = new OnlineLesson("coding", "oreilly.com"); // ok

let online: OnlineLesson;
online = new OnlineLesson("coding", "oreilly.com"); // ok
online = new Lesson("coding");
// Error: Property 'url' is missing in type 'Lesson' but required in type 'OnlineLesson'.
물론 위의 코드에서 lesson.url 와 같이 OnlineLesson 클래스에 정의된 속성에 접근하려 하면 타입에러가 발생한다.
타입스크립트의 구조적 타입에 따라 하위 클래스의 모든 멤버가 동일한 타입의 기본 클래스에 이미 존재하는 경우 기본 클래스의 인스턴스를 하위 클래스 대신 사용할 수 있다.
class PastGrades {
  grades: number[] = [];
}
class LabeledPastGrades extends PastGrades {
  label?: string;
}
let subClass: LabeledPastGrades;

subClass = new LabeledPastGrades(); // ok
subClass = new PastGrades(); // ok
🔸재정의된 생성자
자체 생성자가 없는 하위 클래스는 암묵적으로 기본 클래스의 생성자를 사용한다.
자체 생성자를 선언하면 super 키워드를 통해 기본 클래스의 생성자를 호출해야 한다.
타입스크립트의 타입 검사기는 기본 클래스의 생성자를 호출할 때 올바른 매개변수를 사용하는지 확인한다.
class GradeAnnouncer {
  message: string;
  constructor(grade: number) {
    this.message = grade >= 65 ? "Maybe next time..." : "You pass!";
  }
  print(){
    console.log(this.message);
  }
}
class PassingAnnouncer extends GradeAnnouncer {
  constructor() {
    super(100); // super, this 키워드 사용전에 부모 생성자를 호출해야함
    super.print();
    this.message;
  }
}
new PassingAnnouncer();
자바스크립트 규칙에 따르면 하위 클래스의 생성자는 this 또는 super 에 접근하기 전에 반드시 기본 클래스의 생성자를 호출해야 한다.
이를 위반하면 타입스크립트는 타입 오류를 보고한다.
class GradeAnnouncer {
  message: string;
  constructor(grade: number) {
    this.message = grade >= 65 ? "Maybe next time..." : "You pass!";
  }
}
class PassingAnnouncer extends GradeAnnouncer {
  constructor() {
    this; // Error: 'super' must be called before accessing 'this' in the constructor of a derived class.
    super(100);
  }
}
부모의 생성자 및 메서드를 호출 할때는
super.메서드를 사용하고 부모의 속성을 사용할 때는this.속성을 사용한다.
🔸재정의된 메서드
하위 클래스의 메서드가 기본 클래스의 메서드에 할당될 수 있는 한 하위 클래스는 기본 클래스와 동일한 이름으로 새 메서드를 다시 선언할 수 있다.
오버라이딩의 조건은 다음과 같다.
- 부모 클래스 method의 매개변수 타입은 하위 클래스 method의 매개변수 타입과 같거나 상위 타입이어야 한다.(단, 하위 클래스 method의 매개 변수 타입이 Any 타입이면 예외)
- 부모 클래스 method의 매개변수 개수가 하위 클래스 method의 매개변수 개수와 같거나 많아야 한다.(단, A 조건이 성립된다는 전제가 있어야 한다)
class GradeCounter{
  countGrades(grades: string[], letter: string){
    return grades.filter(grade=>grade === letter).length;
  }
}

class FailureCounter extends GradeCounter{
  countGrades(grades: string[]){ // 부모 클래스 메서드의 매개변수보다 개수가 하나 작다.
    return super.countGrades(grades, "f");
  }
}
부모 클래스의
countGrades메서드의 파라미터와 자식 클래스의countGrades메서드의 파라미터가 다르다.
이러한 경우, 엄밀히 따지면 오버라이딩이라고 할 수 없다.
대신에 자식 클래스에서 새로운 이름의 메서드를 구현하거나 부모 클래스의 메서드와 동일한 시그니처(파라미터)를 사용하여 오버라이딩하는 것이 좋다.
이를 위해 다음과 같은 방식을 선택할 수 있다.
1. 자식 클래스에서 새로운 메서드 이름 사용하기:class GradeCounter { countGrades(grades: string[], letter: string): number { return grades.filter((grade) => grade === letter).length; } } class FailureCounter extends GradeCounter { countFailures(grades: string[]): number { return super.countGrades(grades, "f"); } }
- 부모 클래스의 메서드 시그니처를 사용하여 오버라이딩하기:
class GradeCounter {
  countGrades(grades: string[], letter?: string): number {
    const targetLetter = letter || "f";
    return grades.filter((grade) => grade === targetLetter).length;
  }
}
class FailureCounter extends GradeCounter {
  countGrades(grades: string[]): number {
    return super.countGrades(grades);
  }
}
🔸재정의된 속성
하위 클래스는 기본 클래스의 타입과 호환되는 타입이라면, 같은 이름으로 기본 클래스의 속성을 명시적으로 다시 선언할 수 있다.
다시 말해, 하위 클래스에서 상위 클래스의 속성을 보다 구체적인 타입으로 정의할 수 있다.
대부분의 하위 클래스에서, 속성을 재선언할 때 보통 상위 클래스의 속성 타입을 더 좁은 범위의 유니온 타입으로 변경한다.
이렇게 하면 하위 클래스에 더 구체적이고 명확한 속성 타입을 정의할 수 있다.
다음의 grade 속성은 number | undefined 에서 number 로 재정의된다.
class Assignment {
  grade?: number;
}

class GradeAssignment extends Assignment {
  grade: number;
  constructor(grade: number) {
    super();
    this.grade = grade;
  }
}
속성의 유니언 타입의 허용된 값 집합을 확장할 수는 없다.
하위 클래스의 재정의된 속성 타입이 기본 클래스의 해당 속성 타입보다 더 넓은 범위를 나타내면 오류가 발생한다.(단, 하위 클래스의 속성이 any 타입인 경우는 제외)
🔷추상 클래스
때로는 일부 메서드의 구현을 선언하지 않고, 대신 하위 클래스가 해당 메서드를 제공할 것을 예상하고 기본 클래스를 만드는 방법이 유용할 수 있다.
abstract class School {
  readonly name: string;
  constructor(name: string) {
    this.name = name;
  }
  abstract getStudentTypes(): string[];
}

class Preschool extends School {
  getStudentTypes() {
    return ["preschooler"];
  }
}

class Absence extends School {}
// Error: Non-abstract class 'Absence' does not implement all abstract members of 'School'
구현이 없기 때문에 추상 클래스를 직접 인스턴스화 할 순 없다.
🔷멤버 접근성
자바스크립트에서는 클래스 멤버 이름 앞에 # 을 추가해 private 클래스 멤버임을 나타낸다.
타입스크립트의 멤버 접근성은 클래스 멤버의 선언 이름 앞에 다음 키워드 중 하나를 추가해 만든다.
- public ( 기본값 ): 모든 곳에서 누구나 접근 가능
- protected: 클래스 내부 또는 하위 클래스에서만 접근 가능
- private: 클래스 내부에서만 접근 가능
이러한 키워드는 순수하게 타입 시스템 내에 존재하므로 자바스크립트로 컴파일되면 제거된다.
class Base{
  isPublicImplicit = 0;
  public isPublicExplicit = 1;
  protected isProtected = 2;
  private isPrivate = 3;
  #truePrivate = 4;
}

class Subclass extends Base{
  example(){
    this.isPublicImplicit;  // ok
    this.isPublicExplicit;  // ok
    this.isProtected;       // ok
    this.isPrivate;         // Error: Property 'isPrivate' is private and only accessible within class 'Base'.
    this.#truePrivate       // Error: Property '#truePrivate' is not accessible outside class 'Base'
                            //        because it has a private identifier.
  }
}

new Subclass().isPublicImplicit;  // ok
new Subclass().isPublicExplicit;  // ok

new Subclass().isProtected;
// Error: Property 'isProtected' is protected and only accessible within class 'Base' and its subclasses.

new Subclass().isPrivate;
// Error: Property 'isPrivate' is private and only accessible within class 'Base'.
타입스크립트의 멤버 접근성은 타입 시스템에서만 존재하는 반면 자바스크립트의 private 선언은 런타임에도 존재한다는 점이 주요 차이점이다.
접근성 제한자는 readonly와 함께 표시할 수 있다.
class TwoKeywords {
  private readonly name: string;
  constructor() {
    this.name = "Anne Sullivan";
  }
  log() {
    console.log(this.name);
  }
}

const two = new TwoKeywords();

two.name;
// Error: Property 'name' is private and only accessible within class 'TwoKeywords'.
단, 자바스크립트의 # 키워드와 타입스크립트의 접근성 제한자를 함께 사용할 수는 없다.
🔸정적 필드 제한자
자바스크립트는 static 키워드를 사용해 클래스 자체에서 멤버를 선언한다.
타입스크립트는 static 키워드를 단독으로 사용하거나 readonly 와 접근성 키워드를 함께 사용할 수 있도록 지원한다.
class Question {
  protected static readonly answer = "bash";
  static log() {
    console.log(this.answer);
  }
}

Question.log(); // "bash"
🎂타입 제한자
🔷top 타입
이전 포스트에서 bottom 타입 개념을 언급했었다.
bottom 타입 개념은 가능한 값이 없고, 접근 불가능한 타입을 뜻한다.
반대의 개념도 존재한다.
top 타입은 시스템에서 가능한 모든 값을 나타내는 타입이다.
모든 다른 타입의 값은 타입이 top인 위치에 제공될 수 있다.
🔸any 다시 보기
any 타입은 모든 타입의 위치에 제공될 수 있다는 점에서 top 타입처럼 작동할 수 있다.
any 는 일반적으로 console.log 의 매개변수와 같이 모든 타입의 데이터를 받아들이는 위치에서 사용한다.
다만, any 는 타입스크립트가 해당 값에 대한 할당 가능성 또는 멤버에 대해 타입 검사를 수행하지 않도록 명시적으로 지시한다.
타입 검사를 건너뛰기 때문에 잠재적인 버그를 발생시킬 수 있다.
function raiseError(param:any){
  console.log(param.getName());
}

raiseError(["a", "b"]);
// runtime error: param.getName is not a function
어떤 값이든 될 수 있음을 나타내려면 unknown 타입이 훨씬 안전하다.
🔸unknown
unknown 타입과 any 타입의 주요 차이점으로는 타입스크립트는 unknown 타입의 값을 훨씬 더 제한적으로 취급한다는 점이다.
- 타입스크립트는 unknown 타입 값의 속성에 직접 접근할 수 없다. (값 자체는 접근 가능)
- top 타입인 unknown을 다른 구체적인(non-top) 타입으로 바로 할당할 수 없다.
let anytype: any;
anytype = { key: "value" };
anytype.key; // ok

let unknowntype: unknown;
unknowntype = { key: "value" };
unknowntype.key; // Error: 'unknowntype' is of type 'unknown'.

let anytypeValue: any;
anytypeValue = "Hello, world";
const stringtype1: string = anytypeValue;

let unknowntypeValue: unknown;
unknowntypeValue = "Hello, world";
const stringtype2: string = unknowntypeValue; // Error: Type 'unknown' is not assignable to type 'string'.
타입스크립트가 unknown 타입인 name 에 접근할 수 있는 유일한 방법은 instanceof 나 typeof 또는 타입 어서션을 사용하는 것처럼 값의 타입이 제한된 경우에 제한된 타입의 속성으로 접근하는 방법이다.
function greetComdianSafety(name: unknown) {
  if (typeof name === "string") {
    console.log(name.toUpperCase());
  } else {
    console.log("Well, I'm off.");
  }
}

greetComdianSafety("Betty White"); // "BETTY WHITE"
greetComdianSafety({}); // "Well, I'm off."
앞서 얘기한 두 가지 제한으로 인해 unknown 타입이 any 타입보다 훨씬 안전하다.
가능하다면 any 타입 대신 unknown 타입을 사용하길 추천한다.
🔷타입 서술어
instanceof 또는 typeof 와 같은 자바스크립트 구문을 이용해 타입을 좁히는 방법을 알아봤다.
만약 이러한 로직들을 함수로 감싸면 제 기능을 잃게 된다.
function isString(value: any) {
  if (typeof value === "string") return value;
  return false;
}

function processValue(value: any) {
  if (isString(value) || value == "") {
    // value가 string 타입인 경우
    console.log(value.toUpperCase());
  } else {
    // value가 string 타입이 아닌 경우, 오류가 표시되지 않음
    console.log(value.toUpperCase());
  }
}
isString 의 반환값인 value 에 커서를 대보자.

string 타입인 것을 확인할 수 있다.
그렇다면 processValue 에 if문 로직 안에 있는 value 는 string 타입일 것이다.
타입을 확인해 보자.
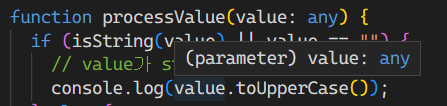
value 타입이 any 타입이다.
즉, 함수로 타입이 좁혀지지 않는다는 것을 확인할 수 있다.
타입스크립트에는 인수가 특정 타입인지 여부를 나타내기 위해 boolean 값을 반환하는 함수를 위한 특별한 구문이 있다.
이를 타입 서술어라 부르며 사용자 정의 타입 가드 ( user defined type guard ) 라고도 한다.
타입 서술어 ( Type Predicate ) 는 타입스크립트에서 특정 값의 타입을 좁히는 데 사용되는 조건 함수이다.
타입 서술어는 반환 타입이 parameterName is Type 형태로 작성된 된다.
타입 서술어는 주로 타입 가드 ( Type Guard ) 와 함께 사용되어 변수의 타입을 좁히는 데 활용된다.
타입 가드는 조건을 기반으로 변수의 타입을 추론하여 코드 블록 내에서 타입 안정성을 제공한다.
타입 서술어를 사용하여 함수 내부에서 조건을 확인하고 해당 변수의 타입을 확인할 수 있다.
function isString(value: any): value is string {
  return typeof value === "string" || value === "";
}

function processValue(value: any) {
  if (isString(value)) {
    // value가 string 타입인 경우
    console.log(value.toUpperCase());
  } else {
    // value가 string 타입이 아닌 경우
    console.log("Not a string");
  }
}

processValue("Hello"); // 출력: "HELLO"
processValue(123); // 출력: "Not a string"
위의 예시에서 isString 함수는 주어진 값의 타입이 string인지 확인하는 타입 서술어이다.
isString 함수의 반환 타입 앞에 value is string 형태로 작성되어 있다.
isString 함수를 사용하여 processValue 함수 내부에서 값을 처리할 때, 값의 타입을 확인하고 해당하는 동작을 수행한다.
타입 서술어를 사용하여 타입 가드를 정의하면, 타입스크립트는 해당 변수의 타입을 해당 서술어 조건에 따라 좁혀진 타입으로 인식한다.
이를 통해 타입 안정성을 유지하면서 코드를 작성할 수 있다.
타입 서술어는 단순히 boolean 값을 반환하는 것이 아니라 인수가 더 구체적인 타입임을 나타내는 것이라고 생각할 수 있다.
예를 들어, 어떤 인터페이스의 인스턴스로 알려진 객체가 더 구체적인 인터페이스의 인스턴스인지 검사하는데 사용된다.
interface Comedian{
  funny: boolean;
}
interface StandupComedian extends Comedian{
  routine: string;
}

function isStandupComedian(value: Comedian): value is StandupComedian {
  return 'routine' in value;
}
function processObject(value: Comedian){
  if(isStandupComedian(value)){
    value.routine; // 타입: value: StandupComedian
  }else{
    value.funny;   // 타입: value: Comedian
  }
}
또는 특정 타입뿐 아니라 해당 타입의 범위까지 제한할 수도 있다.
function isString(value: any): value is string {
  if (typeof value === "string" && value.length >= 1) return true;
  return false;
}

function processValue(value: any) {
  if (isString(value)) {
    // value가 string 타입인 경우, 그러나 빈 문자열은 제외
    console.log(value.toUpperCase());
  } else {
    // value가 string 타입이 아닌 경우, 그러나 빈 문자열은 포함
    console.log('any 타입');
  }
}
타입 서술어는 속성이나 값의 타입을 확인하는 것 이상을 수행해 잘못 사용하기 쉬우므로 가능하면 피하는 것이 좋다.
대부분은 간단한 타입 서술어만으로도 충분하다.
🔷타입 연산자
🔸keyof
자바스크립트 객체는 일반적으로 string 타입인 동적값을 사용하여 키를 구성한다.
타입 시스템에서 string 같은 포괄적인 원시 타입을 키로 사용하면 오류 보고를 표시한다.
interface Ratings {
  audience: number;
  critics: number;
}

function getRating(ratings: Ratings, key: string): number {
  return ratings[key];
  // Error:
//   Element implicitly has an 'any' type because expression of type 'string' can't be used to index type 'Ratings'.
//   No index signature with a parameter of type 'string' was found on type 'Ratings'.
}
허용되는 키를 위한 리터럴 유니언 타입을 사용하면 적절하게 키를 제한할 수 있다.
interface Ratings {
  audience: number;
  critics: number;
}

function getRating(ratings: Ratings, key: "audience" | "critics"): number {
  return ratings[key];
}
그러나 인터페이스에 수십 개 이상의 멤버가 있다면 리터럴 유니언 타입만으로 해결하기엔 너무 번거롭다.
대신 타입스크립트는 기존에 존재하는 타입을 사용하고, 해당 타입에 허용되는 모든 키의 조합을 반환하는 keyof 연산자를 제공한다.
interface Ratings {
  audience: number;
  critics: number;
}

function getRating(ratings: Ratings, key: keyof Ratings): number {
  return ratings[key]; // key: "audience" | "critices"
}
const ratings: Ratings = { audience: 66, critics: 84 };

getRating(ratings, "audience"); // ok

getRating(ratings, "not valid");
// Error: Argument of type '"not valid"' is not assignable to parameter of type 'keyof Ratings'.
keyof 연산자는 존재하는 타입의 키를 바탕으로 유니언 타입을 생성한다.
keyof 연산자는 피연산자로 타입을 제공받는다.
🔸typeof
타입스크립트에서 제공하는 또 다른 타입 연산자는 typeof 이다.
typeof 는 피연산자로 값을 제공받아 해당 값의 타입을 반환한다.
typeof 는 값의 타입을 수동으로 작성하는 것이 귀찮을 정도로 복잡한 경우에 사용하면 매우 유용하다.
const original = {
  medium: "movie",
  title: "Mean Girls",
};

let adaptation: typeof original;

if (Math.random() > 0.5) {
  adaptation = { ...original, medium: "play" };
} else {
  adaptation = { ...original, medium: 2 };
  // Error: Type 'number' is not assignable to type 'string'.
}
유의할 점은 런타임 typeof 연산자와 이름이 똑같다는 것이다.
타입스크립트의 typeof 연산자는 타입스크립트에서만 사용할 수 있으며 컴파일된 자바스크립트 코드에는 나타나지 않는다.
keyof typeof
typeof 는 값을 전달받아의 값의 타입을 반환하고 keyof 는 타입을 전달받아 타입의 키를 반환한다.
두 키워드를 함께 연결해 값에 허용된 키를 간결하게 검색할 수 있다.
const ratings = {
  imdb: 8.4,
  metacritic: 82,
};
function logRating(key: keyof typeof ratings) {
  console.log(ratings[key]); // 타입: key: "imdb" | "metacritic"
}
🔷타입 어서션
타입스크립트는 코드가 강력하게 타입화될 때 가장 잘 작동한다.
하지만 경우에 따라서는 불가능할 때도 있다.
예를 들어 JSON.parse 는 의도적으로 any를 반환한다.
특정한 값 타입을 반환해야 한다는 것을 타입 시스템에 알릴 수 있는 방법은 없다.
타입스크립트는 값의 타입에 대한 타입 시스템의 이해를 재정의 하기 위한 구문으로 타입 어서션 ( type assertion )을 제공한다.( 타입 캐스트라고도 부른다)
const rawData = '["grace", "frankie"]';

// 타입: any
JSON.parse(rawData);
// 타입: string[]
JSON.parse(rawData) as string[];
// 타입: [string, string]
JSON.parse(rawData) as [string, string];
// 타입: ["grace", "frankie"]
JSON.parse(rawData) as ["grace", "frankie"];
타입스크립트 모범 사례는 가능한 한 타입 어서션을 사용하지 않는 것이다.
코드가 완전히 타입화되고 어서션을 사용해 타입스크립트의 타입 이해를 방해할 필요가 없는 것이 가장 좋다.
그러나 유용하고 필요한 경우가 종종 있다.
🔸포착된 오류 타입 어서션
오류를 처리할 때 타입 어서션이 매우 유용할 수 있다.
코드 영역이 Error 클래스의 인스턴스를 발생시킬 거라 확신한다면 타입 어서션을 사용해 포착된 어서션을 오류로 처리할 수 있다.
try {
  // 오류를 발생시키는 코드
} catch (error) {
  console.warn("Oh no! ", (error as Error).message);
}
발생된 오류가 예상된 오류 타입인지를 확인하기 위해 instanceof 검사와 같은 타입 내로잉을 사용하는 것이 더욱 안전하다.
try {
  // 오류를 발생시키는 코드
} catch (error) {
  console.warn("Oh no! ", error instanceof Error ? error.message : error);
}
🔸non-null 어서션
타입 어서션이 유용한 또 하나의 경우가 있다.
실제로는 아니고 이론적으로만 null 또는 undefined 를 포함할 수 있는 변수에서 null 과 undefined 를 제거할 때 타입 어서션을 주로 사용한다.
타입스크립트에서는 너무 흔한 상황이라 이와 관련된 약어를 제공한다.
null 과 undefiend 를 제외한 값의 전체 타입을 작성하는 대신 ! 를 사용하면 된다.
// 타입 유추: Date | undefined
let maybeDate = Math.random() > 0.5 ? undefined : new Date();

// 타입이 Date라고 간주됨
let result = maybeDate as Date;
// 또는 이렇게 해도 같은 의미다.
let result2 = maybeDate!;
non-null 어서션은 값을 반환하거나 존재하지 않는 경우 undefined 를 반환하는 Map.get 과 같은 API에서 특히 유용하다.
const seasonCounts = new Map([
  ["I love lucy", "6"],
  ["The golden girls", "7"],
]);

// 타입: string | undefined
const maybeValue = seasonCounts.get("I love lucy");
console.log(maybeValue.toUpperCase()); // Error: 'maybeValue' is possibly 'undefined'.

// 타입 : string
const knownValue = seasonCounts.get("I love lucy")!;
console.log(knownValue.toUpperCase());
🔸타입 어서션 주의 사항
타입 어서션은 any 타입과 마찬가지로 타입 시스템에 필요한 하나의 도피 수단이다.
자주 사용하면 안되고, 사용하는 것이 안전하다고 확실히 확신할 때만 사용해야 한다.
어서션 vs 선언
변수 타입을 선언하기 위해 타입 애너테이션을 사용하는 것과 변수 타입을 변경하기 위해 타입 어서션을 사용하는 것 사이에는 차이가 있다.
초기값과 타입 애너테이션이 같이 있을 때 타입 검사기는 변수의 할당 가능성 검사를 수행한다.
그러나 타입 어서션은 타입 검사 중 일부를 건너뛰도록 명시적으로 지시한다.
interface Entertainer {
  acts: string[];
  name: string;
}

const declared: Entertainer = {
  // Error:
  // Property 'acts' is missing in type '{ name: string; }' but required in type 'Entertainer'.
  name: "Moms Mabley",
};

const asserted = {
  name: "Moms Mabley",
} as Entertainer;
// 타입은 허용되지만 런타임시 오류 발생

// 다음 구문은 런타임 시 정상적으로 작동하지 않음
declared.acts.join(", ");
asserted.acts.join(", ");
따라서 타입 애너테이션을 사용하거나 타입스크립트가 초기값에서 변수의 타입을 유추하도록 하는 것이 매우 바람직하다.
어서션 할당 가능성
타입스크립트는 타입 중 하나가 다른 타입에 할당 가능한 경우에만 두 타입 간의 타입 어서션을 허용한다.
let myValue = "Stella!" as number;
// Error:
// Conversion of type 'string' to type 'number' may be a mistake
// because neither type sufficiently overlaps with the other.
// If this was intentional, convert the expression to 'unknown' first.
as unknown as ... 와 같이 이중 타입 어서션을 사용하면 되긴 한다.
// 타입: number
let myValue = "Stella!" as unknown as number;
하지만 이는 코드를 잘못 짰다는 것을 의미한다.
그런데 위의 코드에 의문점이 있다.
interface Entertainer {
  acts: string[];
  name: string;
}
const asserted = {
  name: "Moms Mabley",
} as Entertainer;
// 타입은 허용되지만 런타임시 오류 발생
이 부분이다.
asserted 의 타입은 객체 리터럴 타입인 {name:string} 이다.
이 타입은 Entertainer 타입과 구조적으로 다르기 때문에 할당 가능하지 않다.
const asserted: Entertainer = {
  name: "Moms Mabley",
};
// Error: Property 'acts' is missing in type '{ name: string; }' but required in type 'Entertainer'.
그런데 왜 타입 어서션이 먹힐까?
타입 어서션 시스템은 객체 리터럴과 관련하여 다소 관대하게 처리한다.
타입 어서션을 사용할 때 객체 리터럴의 경우 타입스크립트가 타입 검사에서 몇 가지 예외를 인정한다.
타입스크립트는 개발자가 타입에 대한 정확한 정보를 알고있는 경우에만 타입 어서션을 사용할 것이라고 가정하며, 이로 인해 일부 상황에서 명시적으로 정의되지 않거나 누락된 속성이 있는 객체 리터럴을 대상 타입으로 어서션하는 것을 허용한다.
또한 위의 클래스 파트에서 부모 클래스가 자식 클래스와 구조적으로 동일하지 않다면 할당 가능성이 없다고 얘기했었다.
class Lesson {
  subject: string;
  constructor(subject: string) {
    this.subject = subject;
  }
}

class OnlineLesson extends Lesson {
  url: string;
  constructor(subject: string, url: string) {
    super(subject);
    this.url = url;
  }
}

let online: OnlineLesson;
online = new Lesson("coding");
// Error: Property 'url' is missing in type 'Lesson' but required in type 'OnlineLesson'.

// 타입어서션으로 타입 에러 삭제
online = new Lesson("coding") as OnlineLesson;
이런 경우도 타입어서션으로 강제로 부모타입을 자식 타입으로 변환시킬 수 있다.
부모 자식 관계에 있는 타입끼리는 타입 어셔선이 먹히기 때문이다.
단, 없는 속성에 접근하면 런타임 에러가 발생하므로 주의해야 한다.
🔷const 어서션
이전 배열 챕터에서 가변적인 배열 타입을 읽기 전용 튜플 타입으로 변경하는 as const 구문을 소개했었다.
const 어서션은 배열, 원시 타입, 값, 별칭 등 모든 값을 상수로 취급해야 함을 나타내는 데 사용한다.
특히 as const는 수신하는 모든 타입에 다음 세 가지 규칙을 적용한다.
- 배열은 가변 배열이 아니라 읽기 전용 튜플로 취급된다.
- 리터럴은 일반적인 원시 타입과 동등하지 않고 리터럴로 취급된다.
- 객체의 속성은 읽기 전용으로 간주된다.
첫 번째 경우는 앞서 살펴보았으니 두 번째, 세 번째 경우를 살펴보자.
🔸리터럴에서 원시 타입으로
타입 시스템이 리터럴 값을 일반적인 원시 타입이 아닌 특정 리터럴로 이해하는 것이 유용할 수 있다.
// 타입 : () => string
const getName = () => "Maria";
// 타입 : () => "Maria"
const getNameConst = () => "Maria" as const;
값의 특정 필드가 더 구체적인 리터럴 값을 갖도록 하는 것도 유용하다.
interface Joke {
  style: "story" | "one-liner";
}

function tellJoke(joke: Joke) {
  console.log(joke.style);
}

// 타입: { style: "story"; }
const narrowJoke = {
  style: "story" as const,
};
// 타입: { style: string; }
const wideObject = {
  style: "story",
};

tellJoke(narrowJoke);

tellJoke(wideObject);
// Error:
// Argument of type '{ style: string; }' is not assignable to parameter of type 'Joke'.
//   Types of property 'style' are incompatible.
//     Type 'string' is not assignable to type '"story" | "one-liner"'.
🔸읽기 전용 객체
객체 리터럴은 let 변수의 초기값이 확장되는 것과 동일한 방식으로 속성 타입을 확장한다.
하지만 나중에 특정 리터럴 타입이 필요한 위치에서 사용해야 할 때 잘 맞지 않을 수 있다.
그러나 as const를 사용해 값 리터럴을 어서션하면 유추된 타입이 가능한 한 구체적으로 전환된다.
모든 멤버 속성은 readonly가 되고, 리터럴은 일반적인 원시 타입 대신 고유한 리터럴 타입으로 간주되며, 배열은 읽기 전용 튜플이 된다.
// 타입: { movie: string; standup: string; }
const preferencesMutable = {
  movie: "maybe",
  standup: "yes",
};
// 타입: { readonly movie: "maybe"; readonly standup: "yes"; }
const preferencesReadonly = {
  movie: "maybe",
  standup: "yes",
} as const;
[참고] : 러닝 타입스크립트 (한빛 미디어)
