※본 글은 김영한님의 '자바 스프링 완전정복 시리즈' 강의를 바탕으로 작성한 글입니다.
싱글톤 방식이란 클래스의 인스턴스가 딱 1개만 생성되는 것을 보장하는 디자인 패턴입니다.
스프링 컨테이너는 기본적으로 빈을 싱글톤으로 관리하고, 실제로 대부분의 경우 싱글톤 방식이 필요하다고 합니다.
사용하는 이유
싱글톤 방식을 사용하는 이유는 단순합니다. 어차피 필요한 기능은 동일하다면, 여러 객체를 만드는 것보다 하나로 공유하는게 메모리를 절약하기 때문입니다.
구현 방식
싱글톤 방식을 구현하는 디자인 패턴이 존재하고 꽤 여러 방법이 존재한다고 합니다.(방식에 대해서는 생략하겠습니다.) 그러나 전통적인 구현 방식으로는 여러 문제점이 존재하여, 심지어는 안티패턴으로 취급하기도 합니다.
그러나 스프링 컨테이너는 key와 value 방식을 통해 싱글톤 방식을 구현하여, 메모리 절약이라는 장점만을 취하고 디자인 패턴을 통한 구현의 단점을 극복합니다.
어떠한 class(key)를 생성해달라고 스프링 컨테이너에 전달하면, 그에 맞는 value(생성한 1개의 인스턴스)를 반환해주는 방식입니다.
테스트
package hello.core.singleton;

import hello.core.AppConfig;
import hello.core.member.MemberService;
import org.assertj.core.api.Assertions;
import org.junit.jupiter.api.DisplayName;
import org.junit.jupiter.api.Test;
import org.springframework.context.ApplicationContext;
import org.springframework.context.annotation.AnnotationConfigApplicationContext;
import org.springframework.context.annotation.Bean;
import org.springframework.context.annotation.Configuration;

public class SingletonTest {

    @Test
    void singletonTest(){
        ApplicationContext ac = new AnnotationConfigApplicationContext(Config.class);

        Temp bean1 = ac.getBean(Temp.class);
        Temp bean2 = ac.getBean(Temp.class);

        bean1.print();
        bean2.print();

        Assertions.assertThat(bean1).isSameAs(bean2);
    }

    @Configuration
    static class Config{
        @Bean
        public Temp temp(){
            return new Temp();
        }
    }

    static class Temp{
        void print(){
            System.out.println(this);
        }
    }
}

테스트도 성공하고, 실제로 출력 결과를 봐도 같은 객체임을 확인할 수 있습니다.
주의 사항
- 특정 클라이언트에 의존적인 필드가 있으면 안된다.
- 가급적 읽기만 가능해야 한다. (특정 클라이언트가 변경할 수 있는 필드가 있으면 안된다.)
- 그러한 값들이 필요하다면 지역변수, 파라미터, ThreadLocal 등을 사용해야 한다
즉, 무상태로 설계해야 합니다.
예를 들어, 각 클라이언트 별로 메모를 남길 수 있도록 다음과 같이 Memo 클래스를 구현하고, 싱글톤 빈으로 등록한 경우를 가정해봅니다.
package hello.core.singleton;

import hello.core.AppConfig;
import hello.core.member.MemberService;
import org.assertj.core.api.Assertions;
import org.junit.jupiter.api.DisplayName;
import org.junit.jupiter.api.Test;
import org.springframework.context.ApplicationContext;
import org.springframework.context.annotation.AnnotationConfigApplicationContext;
import org.springframework.context.annotation.Bean;
import org.springframework.context.annotation.Configuration;

public class SingletonTest {

    @Test
    void singletonTest(){
        ApplicationContext ac = new AnnotationConfigApplicationContext(Config.class);

        Memo memo1 = ac.getBean(Memo.class);
        memo1.setMemo("메모1");
        Memo memo2 = ac.getBean(Memo.class);
        memo2.setMemo("메모2");

        System.out.println(memo1.getMemo());


    }

    @Configuration
    static class Config{
        @Bean
        public Memo memo(){
            return new Memo();
        }
    }

    static class Memo{
        private String memo;

        public String getMemo() {
            return memo;
        }

        public void setMemo(String memo) {
            this.memo = memo;
        }
    }
}
memo1.getMemo()의 출력 결과는 "메모2"가 될 것 입니다.
memo1을 사용하던 클라이언트 입장에서는 뜬금없이 다른 사람의 메모가 나온 것입니다.
만약 단순히 메모 수준이 아니라, 거래 등과 관련된 내용이라면 문제가 매우 심각해집니다.
어떻게 보면 당연한 얘기지만, 실무에서 가끔가다 이런 실수가 나오고, 이러한 타입의 오류는 매우 수습하기 어려움으로 조심해야 한다고 합니다.
@Configuration과 싱글톤
먼저 다음 코드를 자세히 살펴봅시다.
package hello.core.singleton;

import hello.core.AppConfig;
import hello.core.member.MemberService;
import org.assertj.core.api.Assertions;
import org.junit.jupiter.api.DisplayName;
import org.junit.jupiter.api.Test;
import org.springframework.context.ApplicationContext;
import org.springframework.context.annotation.AnnotationConfigApplicationContext;
import org.springframework.context.annotation.Bean;
import org.springframework.context.annotation.Configuration;

import java.util.LinkedList;
import java.util.List;

public class SingletonTest {
    @Test
    void singletonTest(){
        ApplicationContext ac = new AnnotationConfigApplicationContext(Config.class);

        FindService findService = ac.getBean(FindService.class);
        InsertService insertService = ac.getBean(InsertService.class);

        System.out.println(findService.getRepository());
        System.out.println(insertService.getRepository());

    }

    @Configuration
    static class Config{

        @Bean
        public FindService findService(){
            return new FindService(repository());
        }
        @Bean
        public InsertService insertService(){
            return new InsertService(repository());
        }

        @Bean
        public Repository repository(){
            return new Repository();
        }
    }

    static class FindService{
        private final Repository repository;

        FindService(Repository repository){
            this.repository = repository;
        }

        Repository getRepository(){
            return this.repository;
        }
    }

    static class InsertService{
        private final Repository repository;

        InsertService(Repository repository){
            this.repository = repository;
        }

        Repository getRepository(){
            return this.repository;
        }

    }

    static class Repository{
        List<Integer> list = new LinkedList<>();
    }
}
(1) FindService와 InsertService 모두 Repository에 의존
(2) Config에서 수동으로 의존 관계 주입
생성자에 repository()를 인자로 전달하여, 의존 관계를 주입하고 있습니다.
이때 아무리 스프링에서 빈을 싱글톤으로 관리한다고 해도, repository()는 new를 통해 Repository를 하나 생성하여 반환하는 메서드입니다.
그렇다면 FindService와 InsertService에 주입된 Repository의 객체는 서로 다를까요?
(3) 테스트 코드 실행 결과
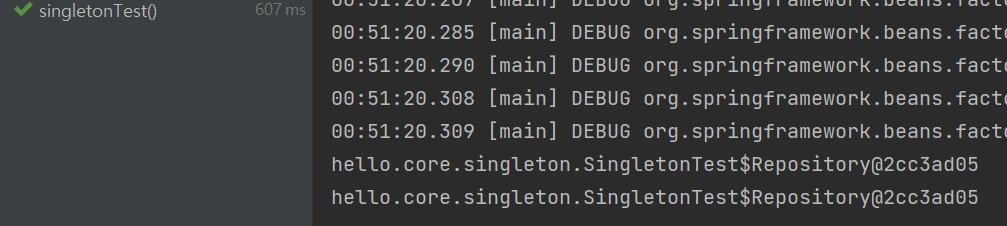
먼저 결과를 살펴보면, 정답은 '같은 객체이다.' 입니다.
사실, 코드상으로 살펴보면 new 자체가 호출되는 것은 어쩔 수 없기 때문에, 서로 달라야하는게 맞습니다.
같은 객체를 보장할 수 있었던 이유는 @Configuration 어노테이션이 바이트 코드를 조작하기 때문입니다.
정말 간단하게 비유하면 다음과 같이 코드를 변경한다고 볼 수 있습니다.
Repository repository(){
	if(이미 만든 객체가 존재하면){
    	이미 만든 객체를 반환
    }
    else{
    	조작하기 전의 repository()를 호출
    }
}
실제로 Config 타입의 빈을 찾아서 class 정보를 출력해보면 다음과 같이 출력됩니다.

'EnhancerBySpringCGLIB', 스프링에 의해 무언가 변경된 클래스가 조회되는 것을 확인할 수 있습니다.
