[구디아카데미]
✅ jquery에서 배열 조작
- each() 함수
-> jquery방식으로 Element를 가져와서 전체를 순회할 때 사용 - 기본 배열을 순회할 때 사용
-> $.each(배열, function(index, item){}) -> index번호, element 객체
    <div id="container">
        <ul>
            <li>item-1</li>
            <li>item-2</li>
            <li>item-3</li>
            <li>item-4</li>
        </ul>
        <button onclick="changeElement();">변경하기</button>
    </div>
    <script>
        const changeElement = () => {
            const lists = $("#container li");
            // console.log(lists);
            // lists.css("color", "magenta"); -> 전체 다 바뀜
            // console.log(lists[0]);
            lists.each(function (index, item) {
                console.log(index, item);
                $(item).css("backgroundColor", `rgb(120, 200, ${index * 50})`);
                // item -> 일반 Element : .css 속성 없음! -> .css속성은 jquery 형태로 사용가능
      			//  $()로 묶어서 jquery 형식으로 만들어줘야함
            });

            // 기본 배열에 대해서 적용이 가능하다
            const arrInt = [1, 2, 3, 4, 5, 6, 7, 8];
            $.each(arrInt, function(index, value){
                console.log(index, value);
            });
            for(let i of arrInt){
                console.log(i);
            }
            // arrInt.forEach
        }
    </script>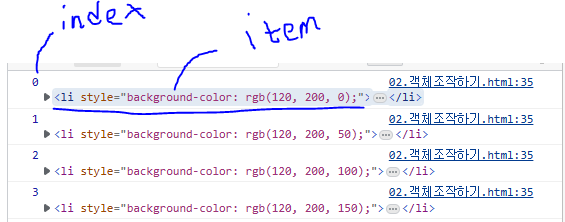
위 console.log(index, item); 의 출력결과는 그림과 같이
인덱스 번호와 element가 출력되는것을 볼 수 있다
✅ jquery에서 객체를 병합해주는 함수
- extend 명령어를 이용
    <button onclick="extendTest();">객체병합하기</button>
    <script>
        const extendTest=()=>{
            let obj = {name:"유병승", age:19};
            let obj2 = {items:[1,2,3,4], data:"test"};

            // ES6 전개연산자를 이용해서 객체를 합칠 수 있음
            let result = {...obj, ...obj2};
            console.log(result);
            // jQuery에서 병합하기(전개연산자를 이용하는게 더 나음)
            result = $.extend(obj, obj2);
            console.log(result);
        }
</script>
✅ 충돌 방지하기
- $를 사용하지 못할 경우 $를 대체하는 문자를 지정하는 것
- $.noConflict() 함수를 이용
    <script>
         const bs = $.noConflict();
        // $ 대신 bs로 써야함
    </script>
✅ jquery를 이용해서 태그 생성 (2가지)
- $("생성할태그") -> 이 방법이 많이 쓰임
- html()함수 이용 -> innerHTML에 값을 대입한 것과 동일
    <div id="inputTag">
        <input type="text" name="tag">
        <input type="text" name="content">
        <button onclick="createTag2();">태그생성</button>
        <!-- <div id="container"></div>에 넣기 -->
    </div>
    <script>
        const createTag2 = () => {
            // const tag = $("input[name=tag]")[0].value;
            const tag = $("input[name=tag]").val();
            // val(); 은 input의 value값 가져오는 함수
            // * val()함수 주의! 단일 값이 아닌 다중 값 가져올 때는 each 써서 값 하나씩 가져와야함
            const content = $("input[name=content]")[0].value;

            // $("<" + tag + ">" + content + "</" + tag + ">").appendTo($("div#container"));
            $(`<${tag}>`).text(content).appendTo($("div#container"));
        }
    </script>
✅ jquery를 이용해서 태그 생성 (2가지)
- 생성된 태그를 페이지에 연결해주는 함수
- 자식태그로 연결
append() 와 appendTo() 의 차이점
-> append : 앞에꺼에 뒤에껄 넣음 (앞이 부모역할)
-> appendTo : 뒤에꺼에 앞에껄 넣음 (뒤가 부모역할)
  append() || appendTo() : 맨 밑에 자식으로 추가하는 함수
prepend() || prepentTo() : 맨 위에 자식으로 추가하는 함수- 형제태그로 연결 = 같은레벨
  before() || insertBefore() : 같은 레벨에서 지정된 태그의 앞에 추가
after() || insertAfter() : 같은 레벨에서 지정된 태그의 뒤에 추가 <script>
const afterTest = () => {
const $p = $("<p>").text("찬금, 찬은, 찬동");
$("#container2").after($p);
}
const beforeTest = () => {
const $h4 = $("<h4>").text("이건 br태그");
$("#container2").before($h4);
const hr = $("<hr>")
hr.insertBefore($("#container2"));
}
const prependTest = () => {
const $p = $("<p>").text("이건 라디오태그임!");
$("#container2").prepend($p);
const $p1 = $("<p>").text("이건 h3태그임!");
$p1.prependTo($("#container2"));
// 앞뒤가 바뀔뿐
}
const appendTest = () => {
const $h3 = $("<h3>").text("점심 시간 즐겼나요?");
// append() : 앞(접근한) Element에 매개변수 Element를 자식으로 추가함
$("#container2").append($h3);
// appendTo() : 앞(접근한) Element에 매개변수 Element의 자식으로 추가함
const $h4 = $("<h4>").text("appendToTest");
$($h4).appendTo("#container2");
}
</script>
<script>
<div id="container3">
<p>나는 p태그</p>
<h4>나는 h4태그</h4>
</div>
<button onclick="moveTag();">움직이기</button>
<script>
const moveTag = () => { // 버튼 클릭시 문구가 위아래로 바뀜
$("#container3>*:first").appendTo($("#container3"));
}
</script>✅ 위치 이동시키기
- append, prepend, after, before 를 사용
	<script>
        const change=()=>{
            $("#imgcontainer>*:first").appendTo($("div#imgcontainer"));
        }
     </script>
✅ 태그를 복사 + 삭제
- 복사하기 -> $("선택자").clone(true|false)
-> true : 이벤트까지만 복사
-> false : 태그만 복사
-> default : false임
     <div id="clone-div">
        <div id="item1" class="item">
            <span>안녕</span>
        </div>
     </div>
     <button onclick="cloneTest();">복사하기</button>
     <script>
        const cloneTest=()=>{
            const $div=$("#item1").clone(true);  // clone 뒤에 디폴트값은 false임   true -> 이벤트까지 복사
            console.log($div);
            $("#clone-div").append($div);
        }

        //ready()
        $(()=>{
            $("#item1").click(e=>{
                console.log(e.target);
                $(e.target).css("backgroundColor","orangered"); // e.target -> 그 이벤트 대상의 엘리멘트가 나옴
            });
        })
     </script>
     <style>
        .item{
            width:100px;
            height:100px;
            display: inline-block;
            text-align: center;
            background-color: yellowgreen;
        }
        .item>span{
            font-size: 24px;
            font-weight: bolder;
            color: white;
        }
</style>- 삭제하기
    $("부모태그").empty() : 모든 자식 태그를 삭제
    $("지울태그").remove() : 해당 태그를 삭제(잘라내기 -> 삭제한 태그를 반환), 설정된 이벤트는 삭제
    $("지울태그").detach() : 해당 태그를 삭제(잘라내기), 설정된 이벤트는 유지
     <div id="uploadcontainer">
        <fieldset>
            <legend>첨부파일</legend>
            <table>
                <tr>
                    <td><input type="file" name="upload"></td>
                    <td style="text-align: right;">
                        <button onclick="fileAdd();">추가</button>
                        <button onclick="fileRemove(event);">삭제</button>
                                        <!-- event 로 지정되어있는 명령어 -> event가 발생한 태그를 갖고옴 -->
                    </td>
                </tr>
            </table>
        </fieldset>
     </div>
     <style>
        #uploadcontainer>table{
            width: 100%;
        }
     </style>
     <script>
        const fileAdd =()=>{
            const tr=$("#uploadcontainer tr:first").clone();  // clone 뒤에 디폴트값은 false임   true -> 이벤트까지 복사
            $("#uploadcontainer table").append(tr);
        }

        const fileRemove=(e)=>{
            console.log(e.target);
            // $(e.target.parentElement.parentElement).remove();
            $(e.target).parent().parent().remove();
        }
     </script>
우측 상단 햇님모양 클릭하셔서 무조건 야간모드로 봐주세요!!