
Skeleton UI

사용자에게 데이터가 로딩 중임을 알리는 대체 컴포넌트를 의미한다. 보통은 loading Spinner를 사용하기도 하는데 사용자에게 지루한 대기 시간을 줄이기 위해 Skeleton UI를 사용하기도 한다.
RN을 바탕으로 라이브러리 설치없이 Skeleton UI를 만들어 봤다.
Skeleton Item
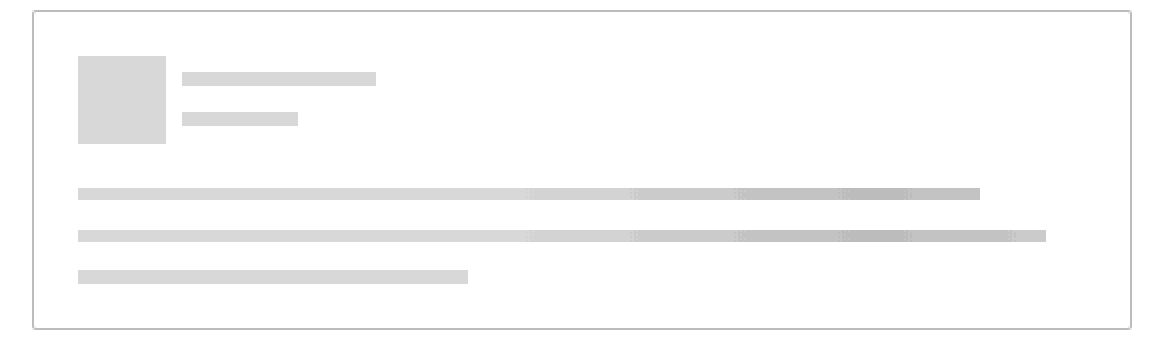
위 사진처럼 opacity가 0 -> 1 -> 0 루프 애니메이션이 적용되는 Item을 만들어야한다.
import { Animated, View } from "react-native";
import { styled } from "styled-components/native";
import React, { useEffect, useRef } from "react";

interface ItemProps {
  children: React.ReactNode;
}

const SkeletonItem = ({ children }: ItemProps) => {
  const animValue = useRef(new Animated.Value(0)).current;

  const interpolatedOpacity: Animated.AnimatedInterpolation<number> =
    animValue.interpolate({
      inputRange: [0, 0.75, 1],
      outputRange: [0, 0.75, 1],
    });

  useEffect(() => {
    Animated.loop(
      Animated.sequence([
        Animated.timing(animValue, {
          toValue: 1,
          duration: 1500,
          useNativeDriver: false,
        }),
        Animated.timing(animValue, {
          toValue: 0,
          duration: 1500,
          useNativeDriver: false,
        }),
      ])
    ).start();
  }, []);

  return (
    <Animated.View style={{ opacity: interpolatedOpacity }}>
      {children}
    </Animated.View>
  );
};

export default SkeletonItem;

export const SItem = styled.View`
  width: 100%;
  height: 16px;
  background-color: ${({ theme }) => theme.color.skeletonColor};
  overflow: hidden;
  border-radius: 8px;
`;
RN에서는 css의 애니메이션을 사용할 수 없다. (지원 X) 그래서 RN 내장 애니메이션 효과를 사용해야한다. Animation 공식문서에 따르면, Animated로 사용하고자하는 요소에 추가하면 된다. (
<Animated.ScrollVeiw/>,<Animated.View />
Deep dive into Animation
    Animated.loop(
      Animated.sequence([
        Animated.timing(animValue, {
          toValue: 1,
          duration: 1500,
          useNativeDriver: false,
        }),
        Animated.timing(animValue, {
          toValue: 0,
          duration: 1500,
          useNativeDriver: false,
        }),
      ])
    ).start();
처음엔 Animated.sequence를 사용하지 않고 Animated.loop만을 사용해 애니메이션을 만들었다. 그랬더니 Loop가 되기는 하지만 처음으로 돌아갈때 뚝뚝 끊기는 상황이 발생했다. 공식문서를 디깅하다가 sequence를 발견했다.
animValue: 0 -> 1 순차적으로 바뀌고 loop로 인해 다시 -> 0 -> 이러한 순서이다.
sequence()
static sequence(animations: CompositeAnimation[]): CompositeAnimation;
Starts an array of animations in order, waiting for each to complete before starting the next. If the current running animation is stopped, no following animations will be started.
*retreived from Docs of RN
  const interpolatedOpacity: Animated.AnimatedInterpolation<number> =
    animValue.interpolate({
      inputRange: [0, 0.75, 1],
      outputRange: [0, 0.75, 1],
    });
opacity가 서서히 채워지는 걸 구현하기 위해서 interpolate()을 사용했다. (Css의 keyframe {0% 50% 100%}을 생각하면 쉽다.)
이제 애니메이션 효과가 적용된 작은 박스들이 준비가 되었다. 다음으로 작은 박스들을 담을 컨데이터를 만들어야한다.
Skeleton Container
const FolderSkeleton = () => {
  return (
      <Wrapper>
        <SkeletonItem>
          <Title />
        </SkeletonItem>
      </Wrapper>
  );
};


const Wrapper = styled.View`
  padding: 0 20px;
  margin: 10px 0;
`;

// SItem을 상속받아 height나 width를 변경하여 사용한다.
const Title = styled(SItem)`
  height: 20px;
`;
이제 큰 박스 하나가 만들어졌다.
근데 이 큰박스 하나가 아니라 여러개 필요한 경우에는? 새 배열을 만들어 사용하면 된다.
const FolderSkeleton = () => {
  return (
    <View>
      {new Array(6).fill("").map((_, idx) => (
        <Wrapper key={idx}>
          <SkeletonItem>
            <Title />
          </SkeletonItem>
        </Wrapper>
      ))}
    </View>
  );
};
Skeleton Frame
매번 배열을 만들어 사용하기엔 너무 번거로우니까 재사용성을 위해 배열을 만드는 컴포넌트를 따로 만들어봤다.
const SkeletonFrame = ({ children, quantity }: ISkeletonFrameProps) => {
  return (
    <View>
      {new Array(quantity).fill("").map((_, idx) => (
        <View key={idx}>{children}</View>
      ))}
    </View>
  );
};

export default SkeletonFrame;
// FolderSkeleton

const FolderSkeleton = () => {
  return (
    <SkeletonFrame quantity={6}>
      <Wrapper>
        <SkeletonItem>
          <Title />
        </SkeletonItem>
      </Wrapper>
    </SkeletonFrame>
  );
};
// NoteSkeleton
const NoteSkeleton = () => {
const ITEMS = [
{ id: 1, component: <Title /> },
{ id: 2, component: <Date /> },
{ id: 3, component: <FolderName /> },
];
return (
<SkeletonFrame quantity={6}>
<Wrapper>
{ITEMS.map((item) => (
<SkeletonItem key={item.id}>{item.component}</SkeletonItem>
))}
</Wrapper>
</SkeletonFrame>
);
};
export default NoteSkeleton;
const Wrapper = styled.View`
background-color: ${({ theme }) => theme.color.container};
margin: 10px 20px;
padding: 20px;
border-radius: 20px;
display: flex;
flex-direction: column;
gap: 10px;
`;
const Title = styled(SItem)`
height: 16px;
`;
const Date = styled(SItem)`
width: 20%;
height: 12px;
`;
const FolderName = styled(SItem)`
width: 10%;
height: 12px;
`;
Result

Reference