Mellanox Connect X-'n' Performance Test Using DPDK-Pktgen
Before heading into the performance test for VMs using SR-IOV, we had to make a baseline performance test between the two host servers; JY and B1.
1. Initial Test
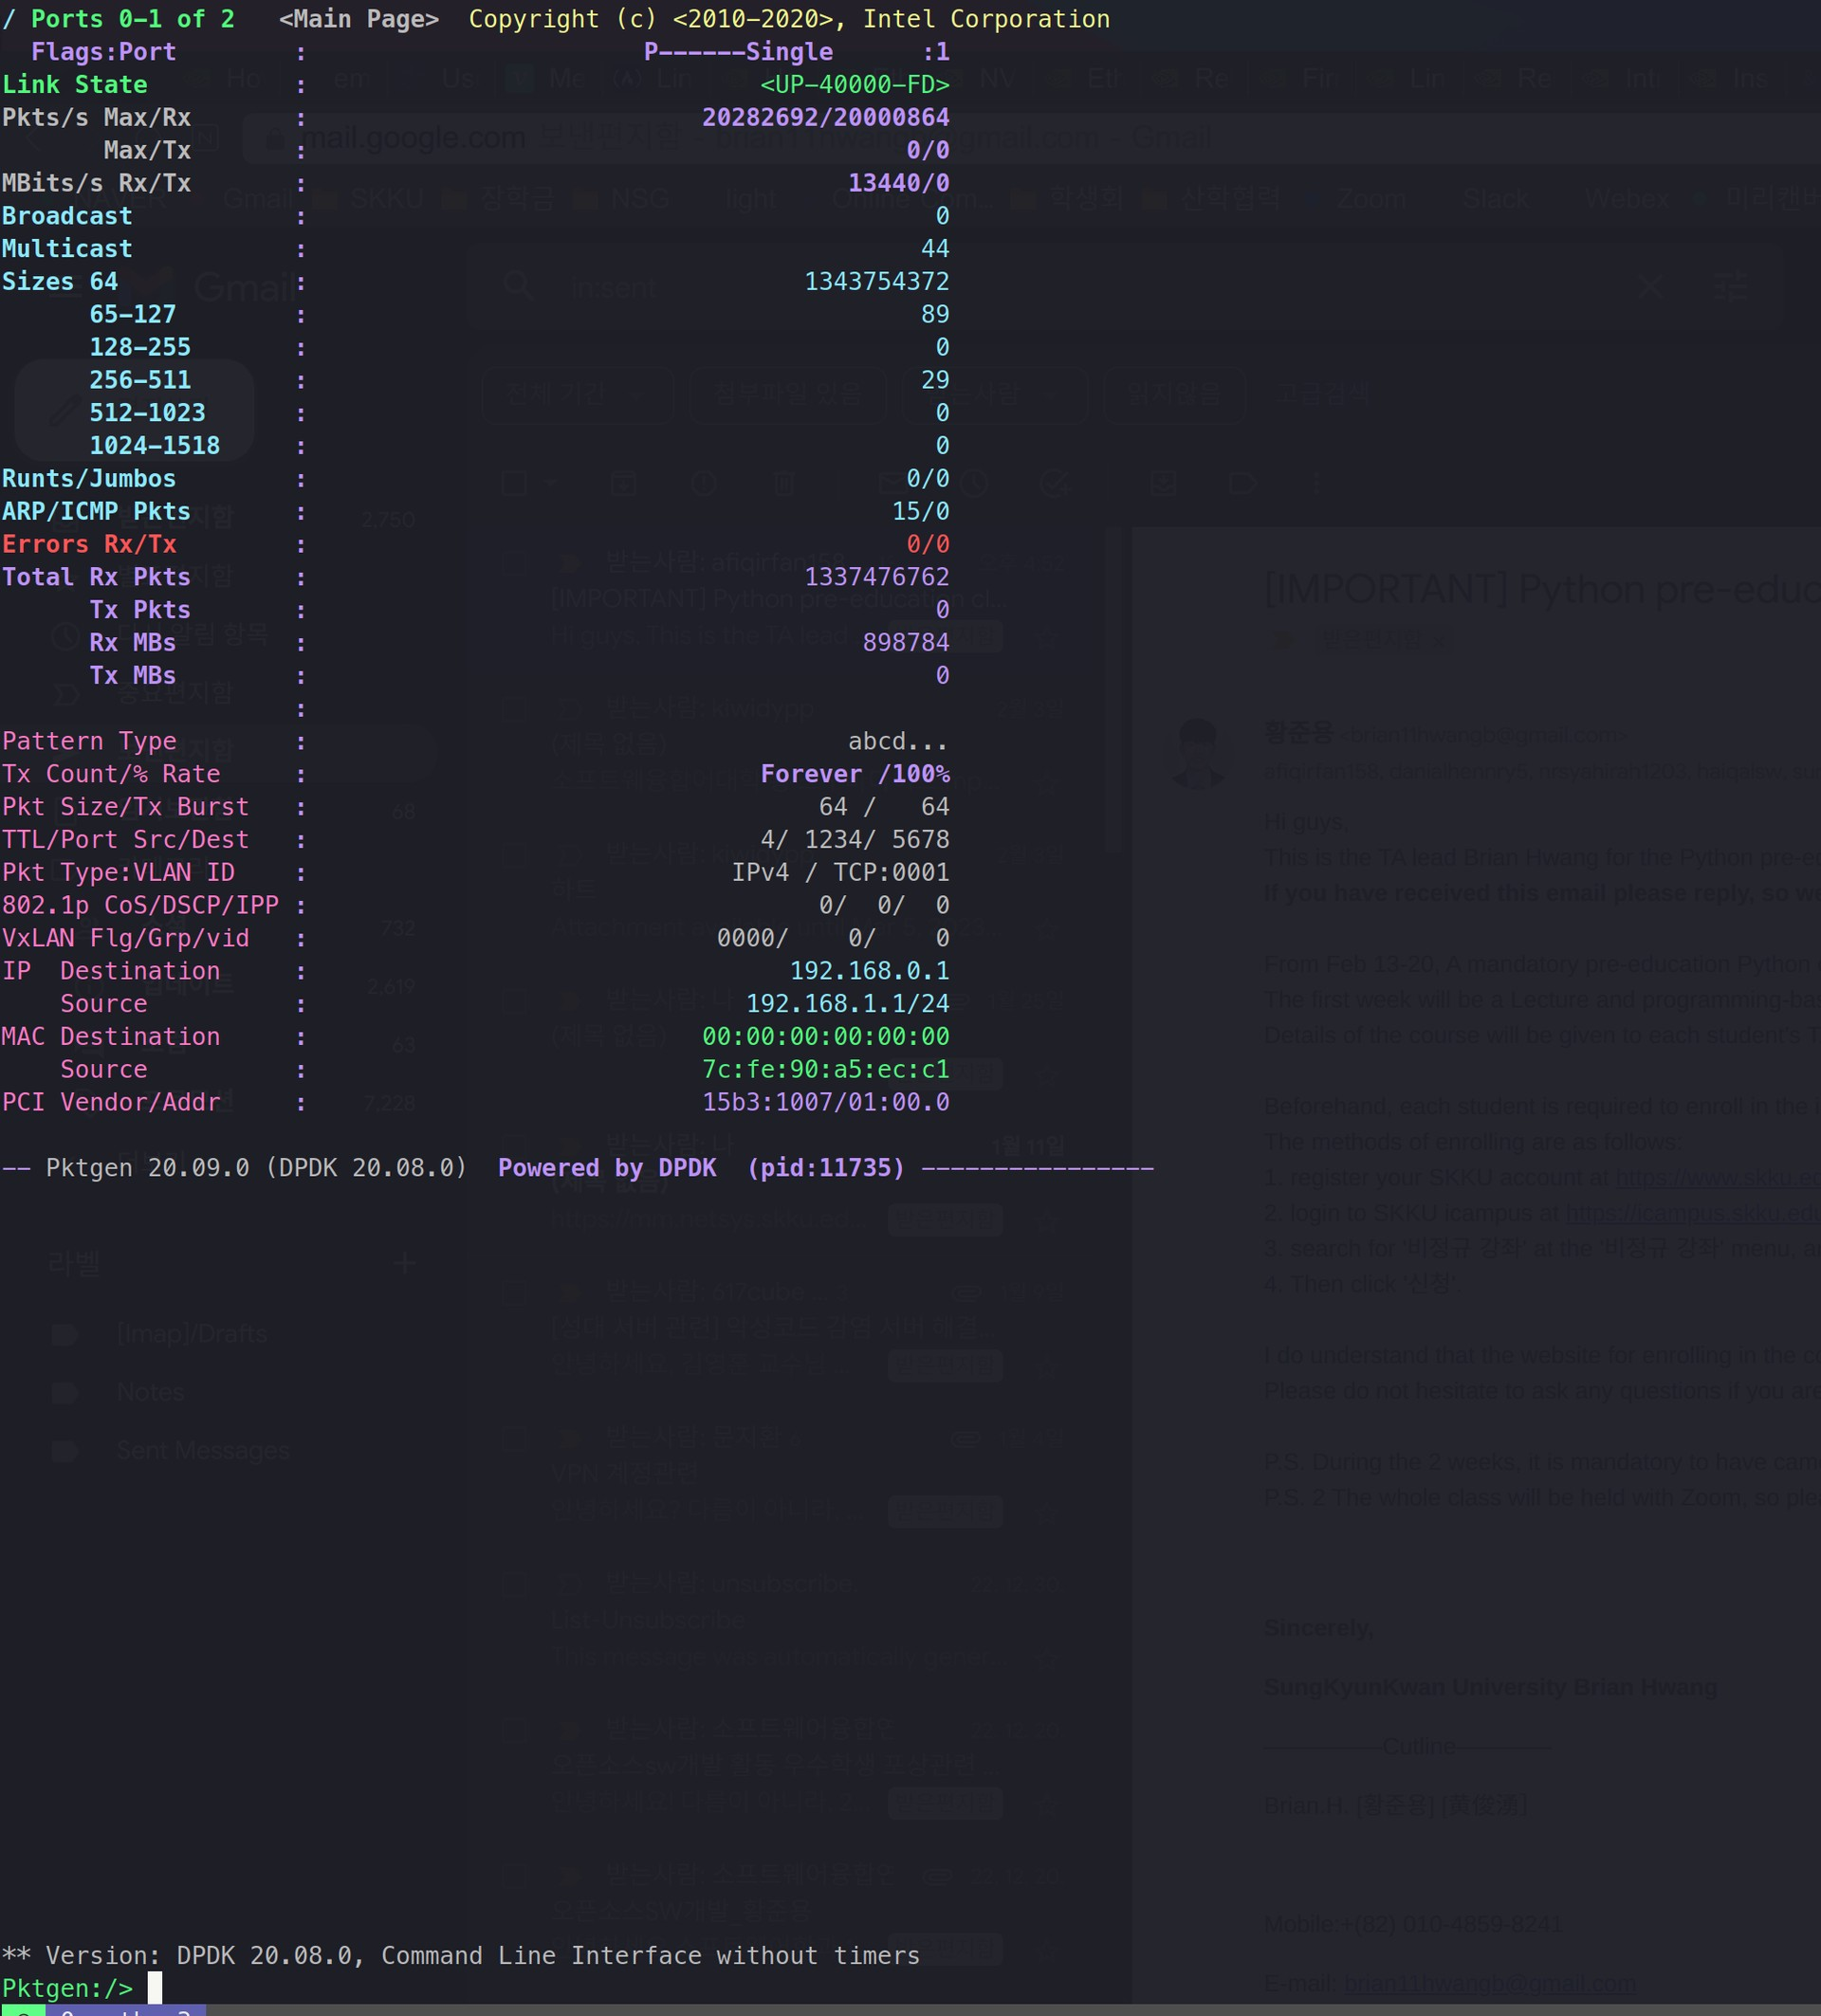
When testing out the first test, we have found the following performance:
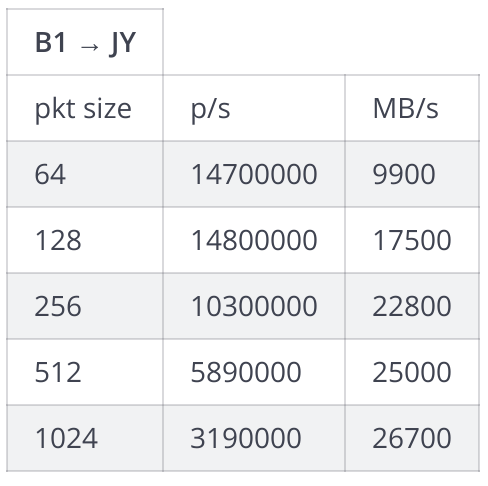
B1(host) -> JY
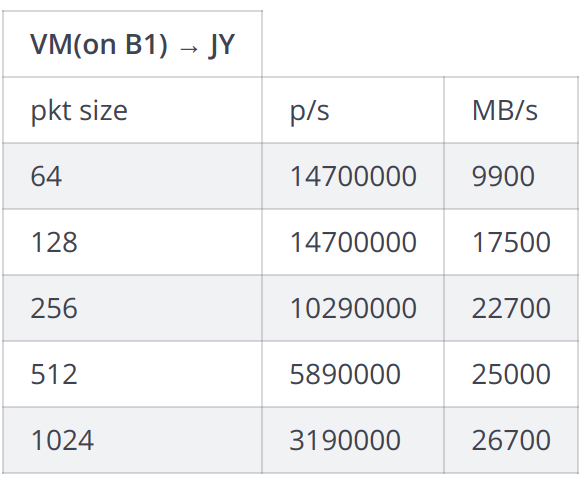
VM(on B1) -> JY
From this we were able to spot 2 things:
1. Performance did not vary much with the B1 and VM
-> this told us that we have successfully managed to set the SR-IOV (No performance gap)
2. Performance was much lower than expected. With 64bytes packet, 14.7Mpps was shown, which only showed 9.4Gbps which was lower than 25% of the line rate.
To understand why DPDK was not fully utilized, we tried to use iperf to see the throughput. And from the image below, we were able to see that the throughput itself was blocked somewhere between 25.5Gb/s.

From this, we were able to speculate that the problem was either a driver problem or a physical NIC problem.
2. PCIe Lane change
The mellanox Connect X-3 is known to require PCIe x8 lane. Yet, from the motherboard manufacturer, we was able to find the followings:
To fully utilize the 8 lane for the Connect X-3 NIC, we changed the PCIe spot for the graphics card.


This should be enough lane.
Then we were able to have the following outcome:

We have seen that 37.8Gbits/sec was seen, and for the nature of iperf(slower than DPDK), we were able to declare this as a line rate.
Then, we started to go back to DPDK-pktgen and experiment the performance.
We found that host and VM showed similar results.
for 256byte and above, it mostly was able to fill the line rate of 40G.
Yet, for 64 and 128 byte packets, the rate was still low.
Without no speculations, we tried to change the connectX-3 to connectX-5 NIC card.
3. Connect X-3 to Connect X-5
After changing the NIC card to Connect x-5, the driver needed to be reinstalled.
3.1 Reinstalling Driver
# Download Driver
wget https://content.mellanox.com/ofed/MLNX_EN-5.8-1.1.2.1/mlnx-en-5.8-1.1.2.1-ubuntu18.04-x86_64.iso

#Mount Driver
sudo mkdir /mnt/iso
mount -o loop /share/MLNX_OFED_LINUX-4.2-1.0.0.0-ubuntu16.04-x86_64.iso /mnt/iso
cd /mnt/iso

# Install Driver
sudo ./mlnxofedinstall --dpdk --upstream-libs --enable-sriov --force --without-neohost-backend
Note that --hypervisor command did not work with the new driver. Also, the driver installation failed due kernel verison. Thus I had to downgrade the driver version.
3.2 Downgrade Kernel Version
From the NVDIA documentation, the target kernel version was:

Thus I downgraded the kernel to 4.15.0-20-generic following the steps from "How to Downgrade kernel version".
I was able to successfully downgrade the version

3.3 Retry Reinstalling Driver
After downgrading the kernel, I was able to sucessfully install the driver:
# Install Driver
sudo ./mlnxofedinstall --dpdk --upstream-libs --enable-sriov --force --without-neohost-backend
#reboot
sudo /etc/init.d/openibd restart
reboot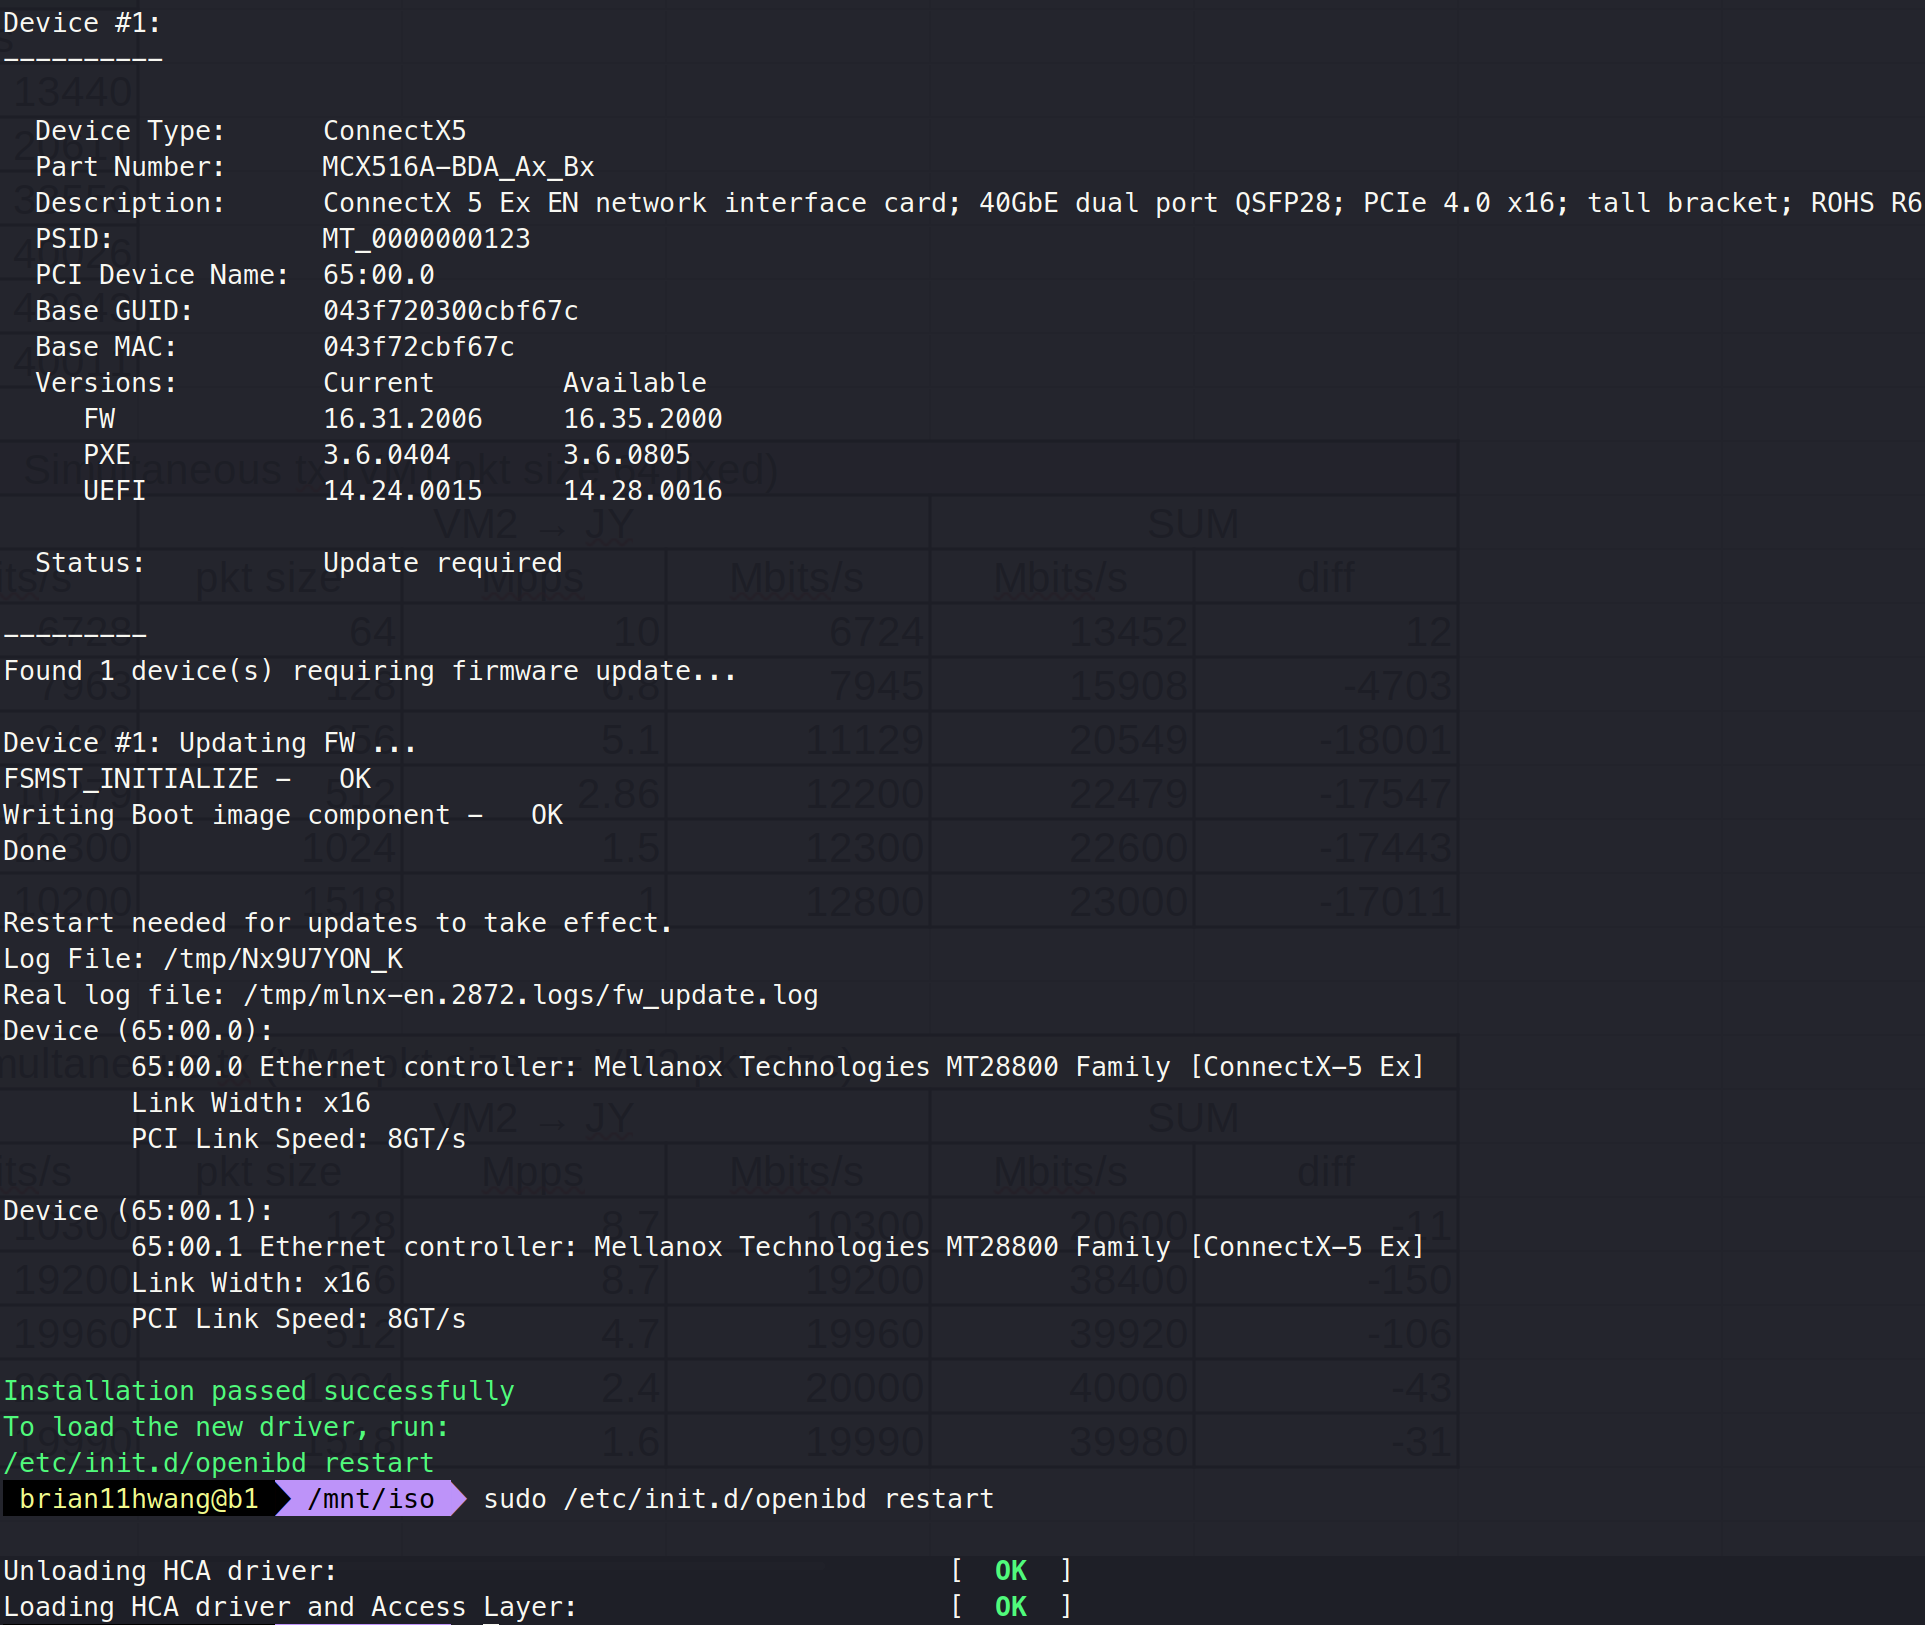
Now, I was ready to rerun the test.
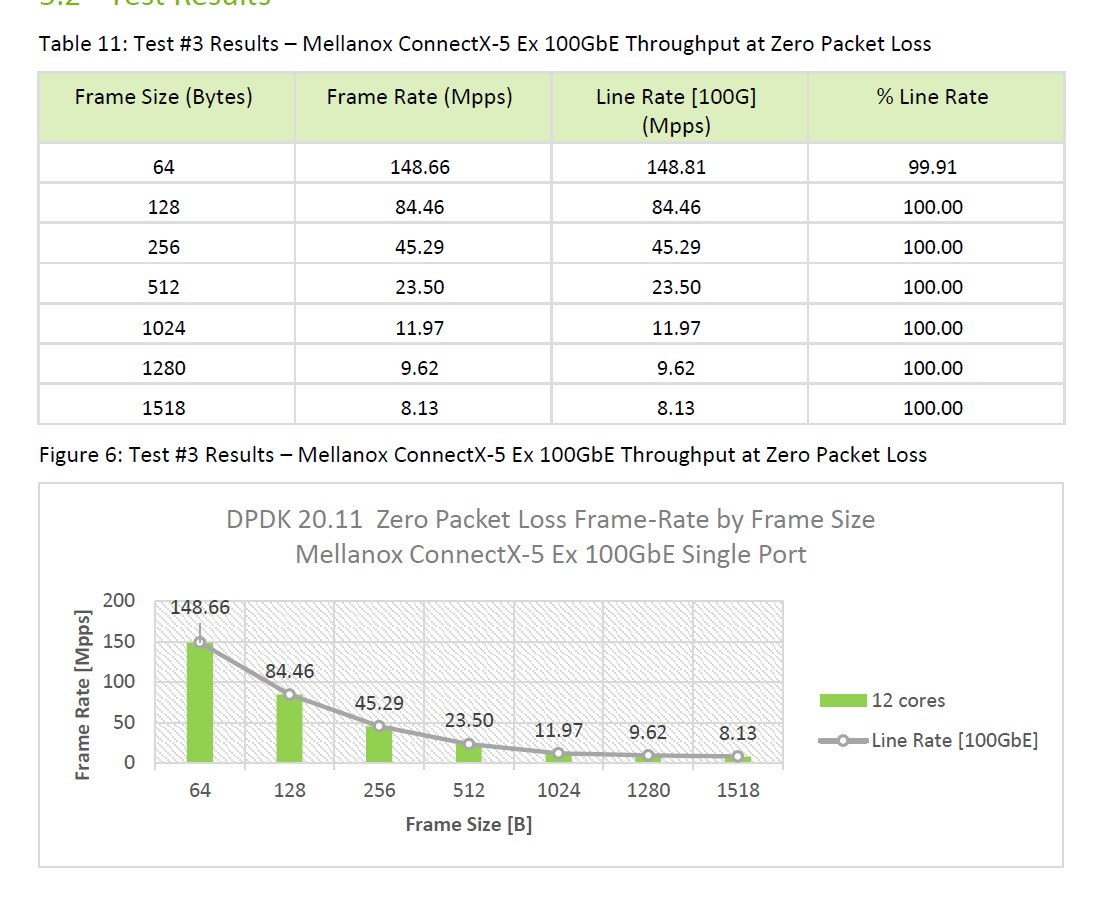
According to the Mellanox dpdk performance report almost the line rate should show at Mellanox ConnectX-5
--> Same result
4. Disable Flow Control
Next, I have tried to follow the follwing answer:
Why does DPDK + mellanox connectx5 process 128B packets much faster than other sizes packets, when ruuning an I/O intensive application?
With all the commands operated, I was able to see the following performance:
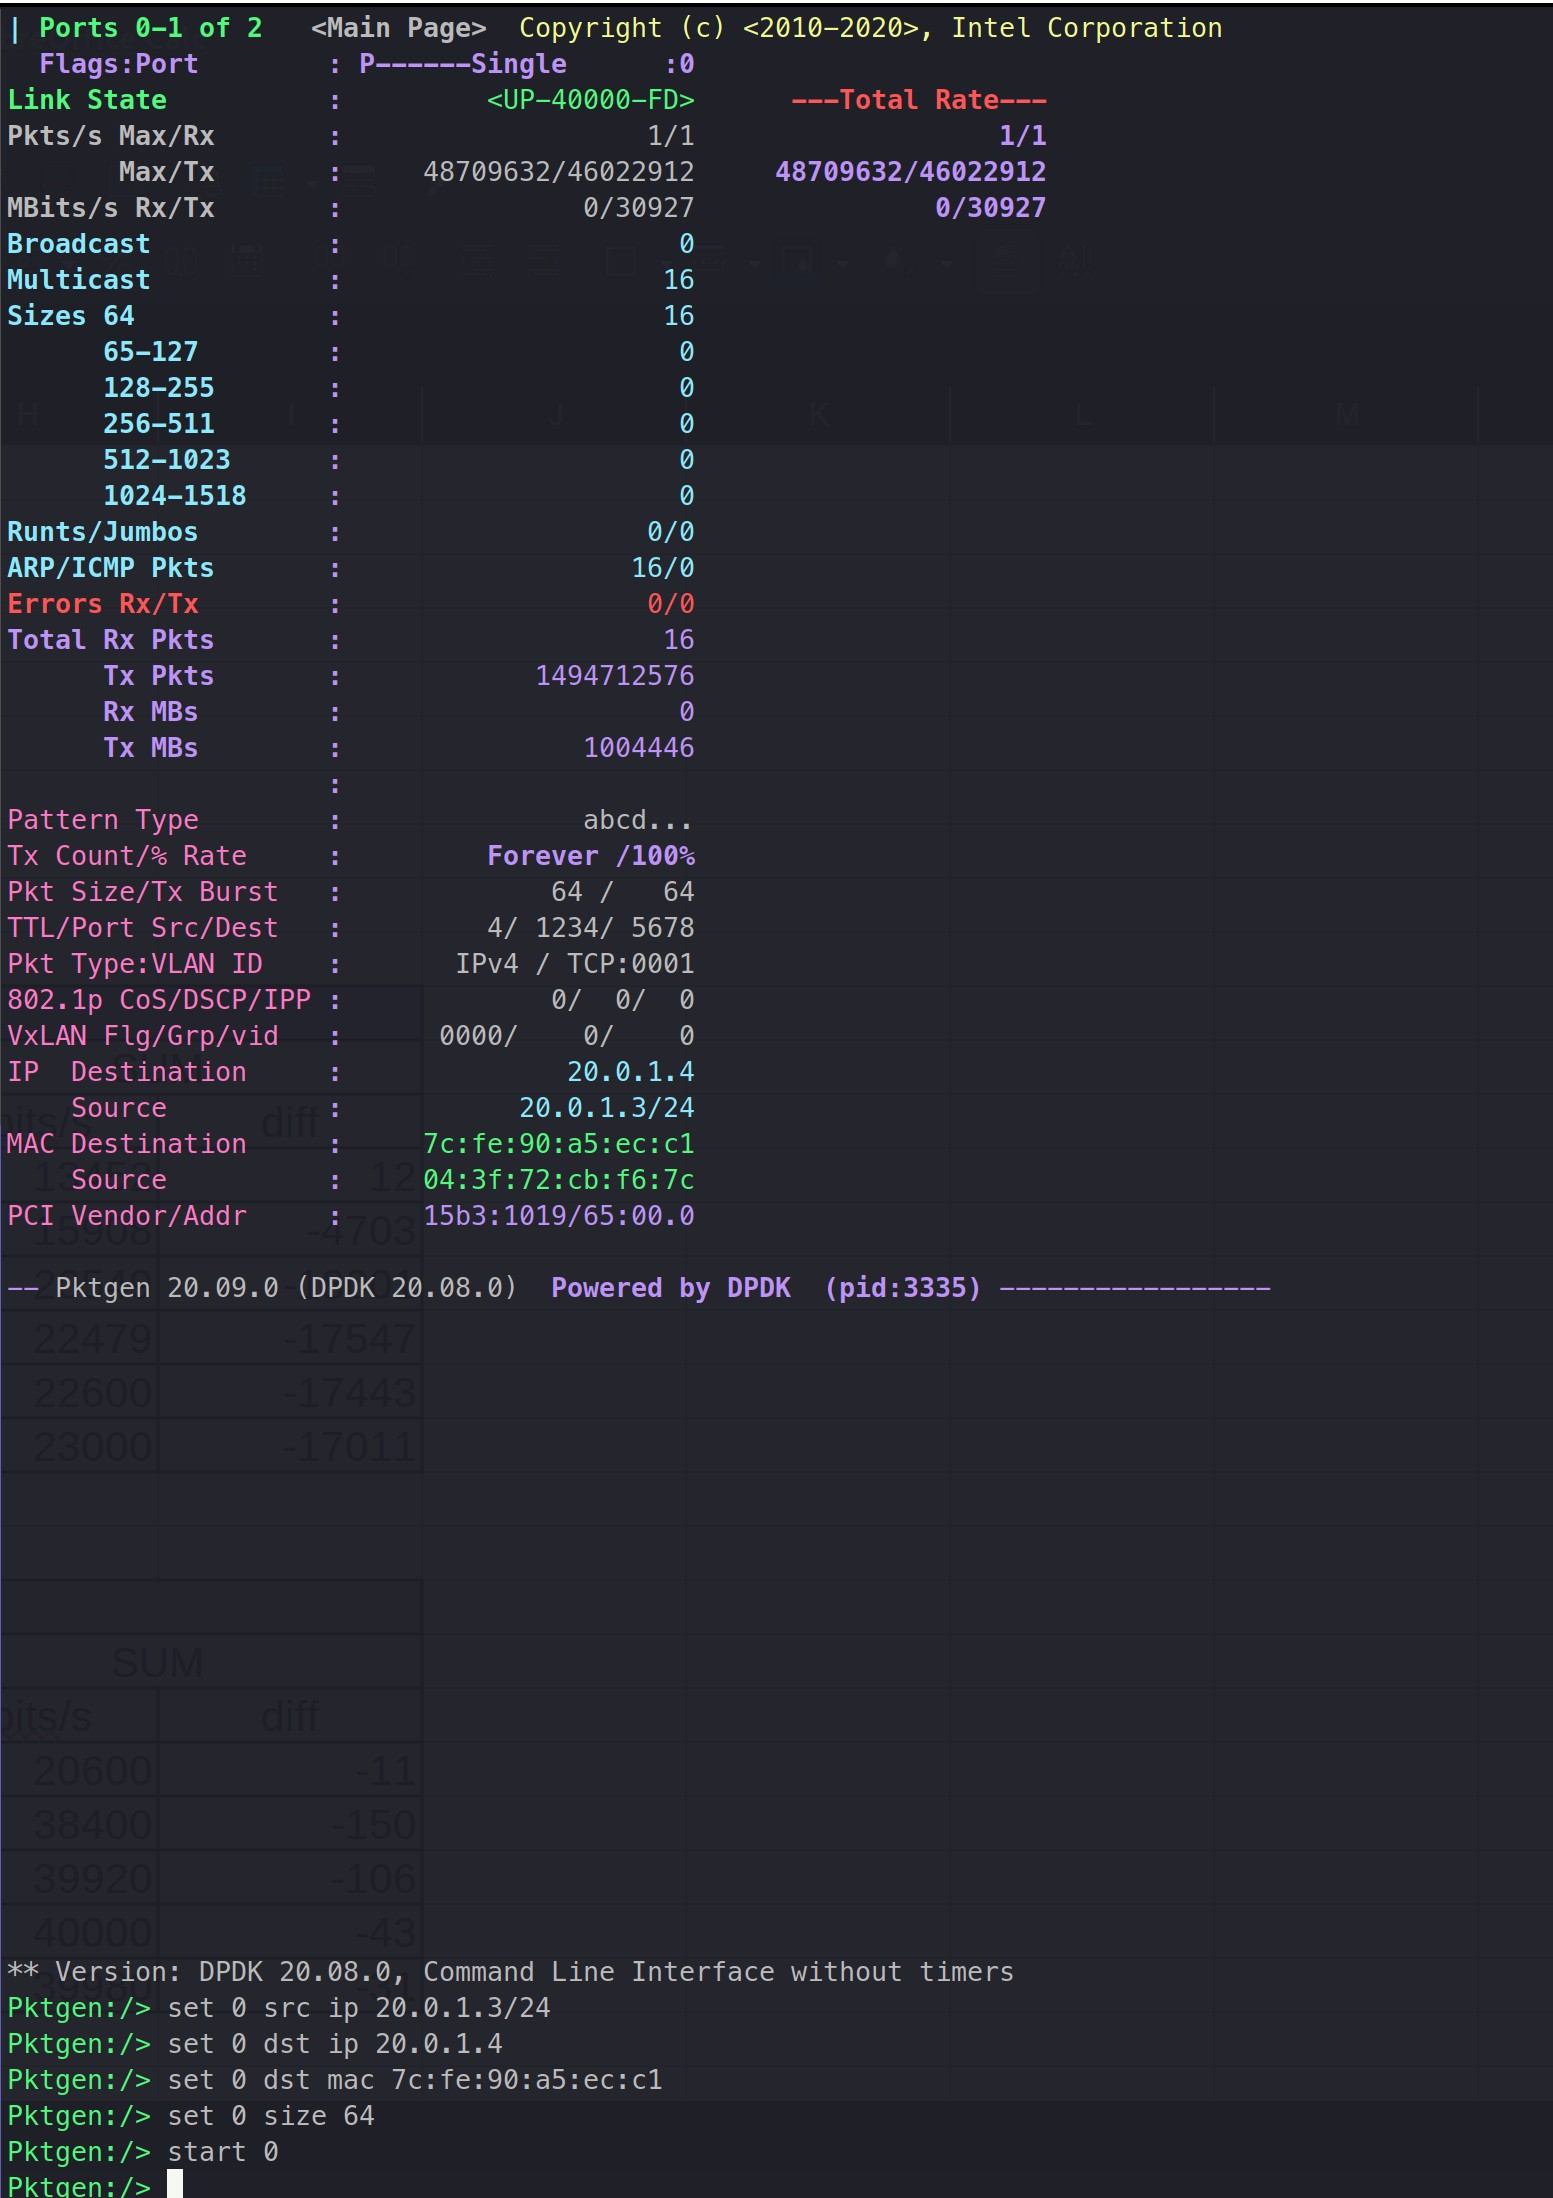
Almost the line rate was reached with 64byte packets!
After going through all the commands, I was able to see that the command that made this work was :
ethtool -A [NIC] rx off tx off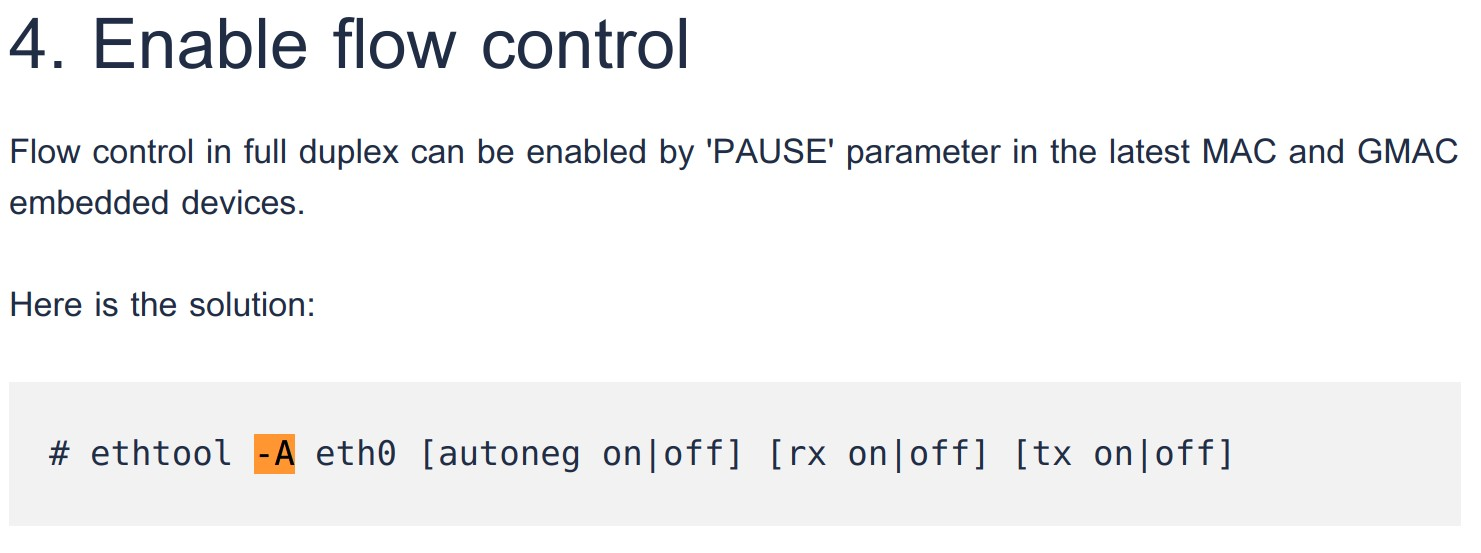
The whole performance loss was due flow control. Yet, this still did not perform maximum line rate.
4.1 Why Flow Control off gains performance advantage
5. Set hugepage size to 1G
For a better performance, I have tried to changed the hugepage size to 1G.
- Check Current default hugepage size
grep Hugepagesize: /proc/meminfo
$Hugepagesize: 2048 kB- Edit and update GRUB
/etc/default/grub
#Add at the back
GRUB_CMDLINE_LINUX_DEFAULT="default_hugepagesz=1G hugepagesz=1G hugepages=4"

##update GRUB
sudo update-grub- reboot
- set hugepage
echo 4 > /sys/kernel/mm/hugepages/hugepages-1048576kB/nr_hugepage
Then, I was able to get the following result.
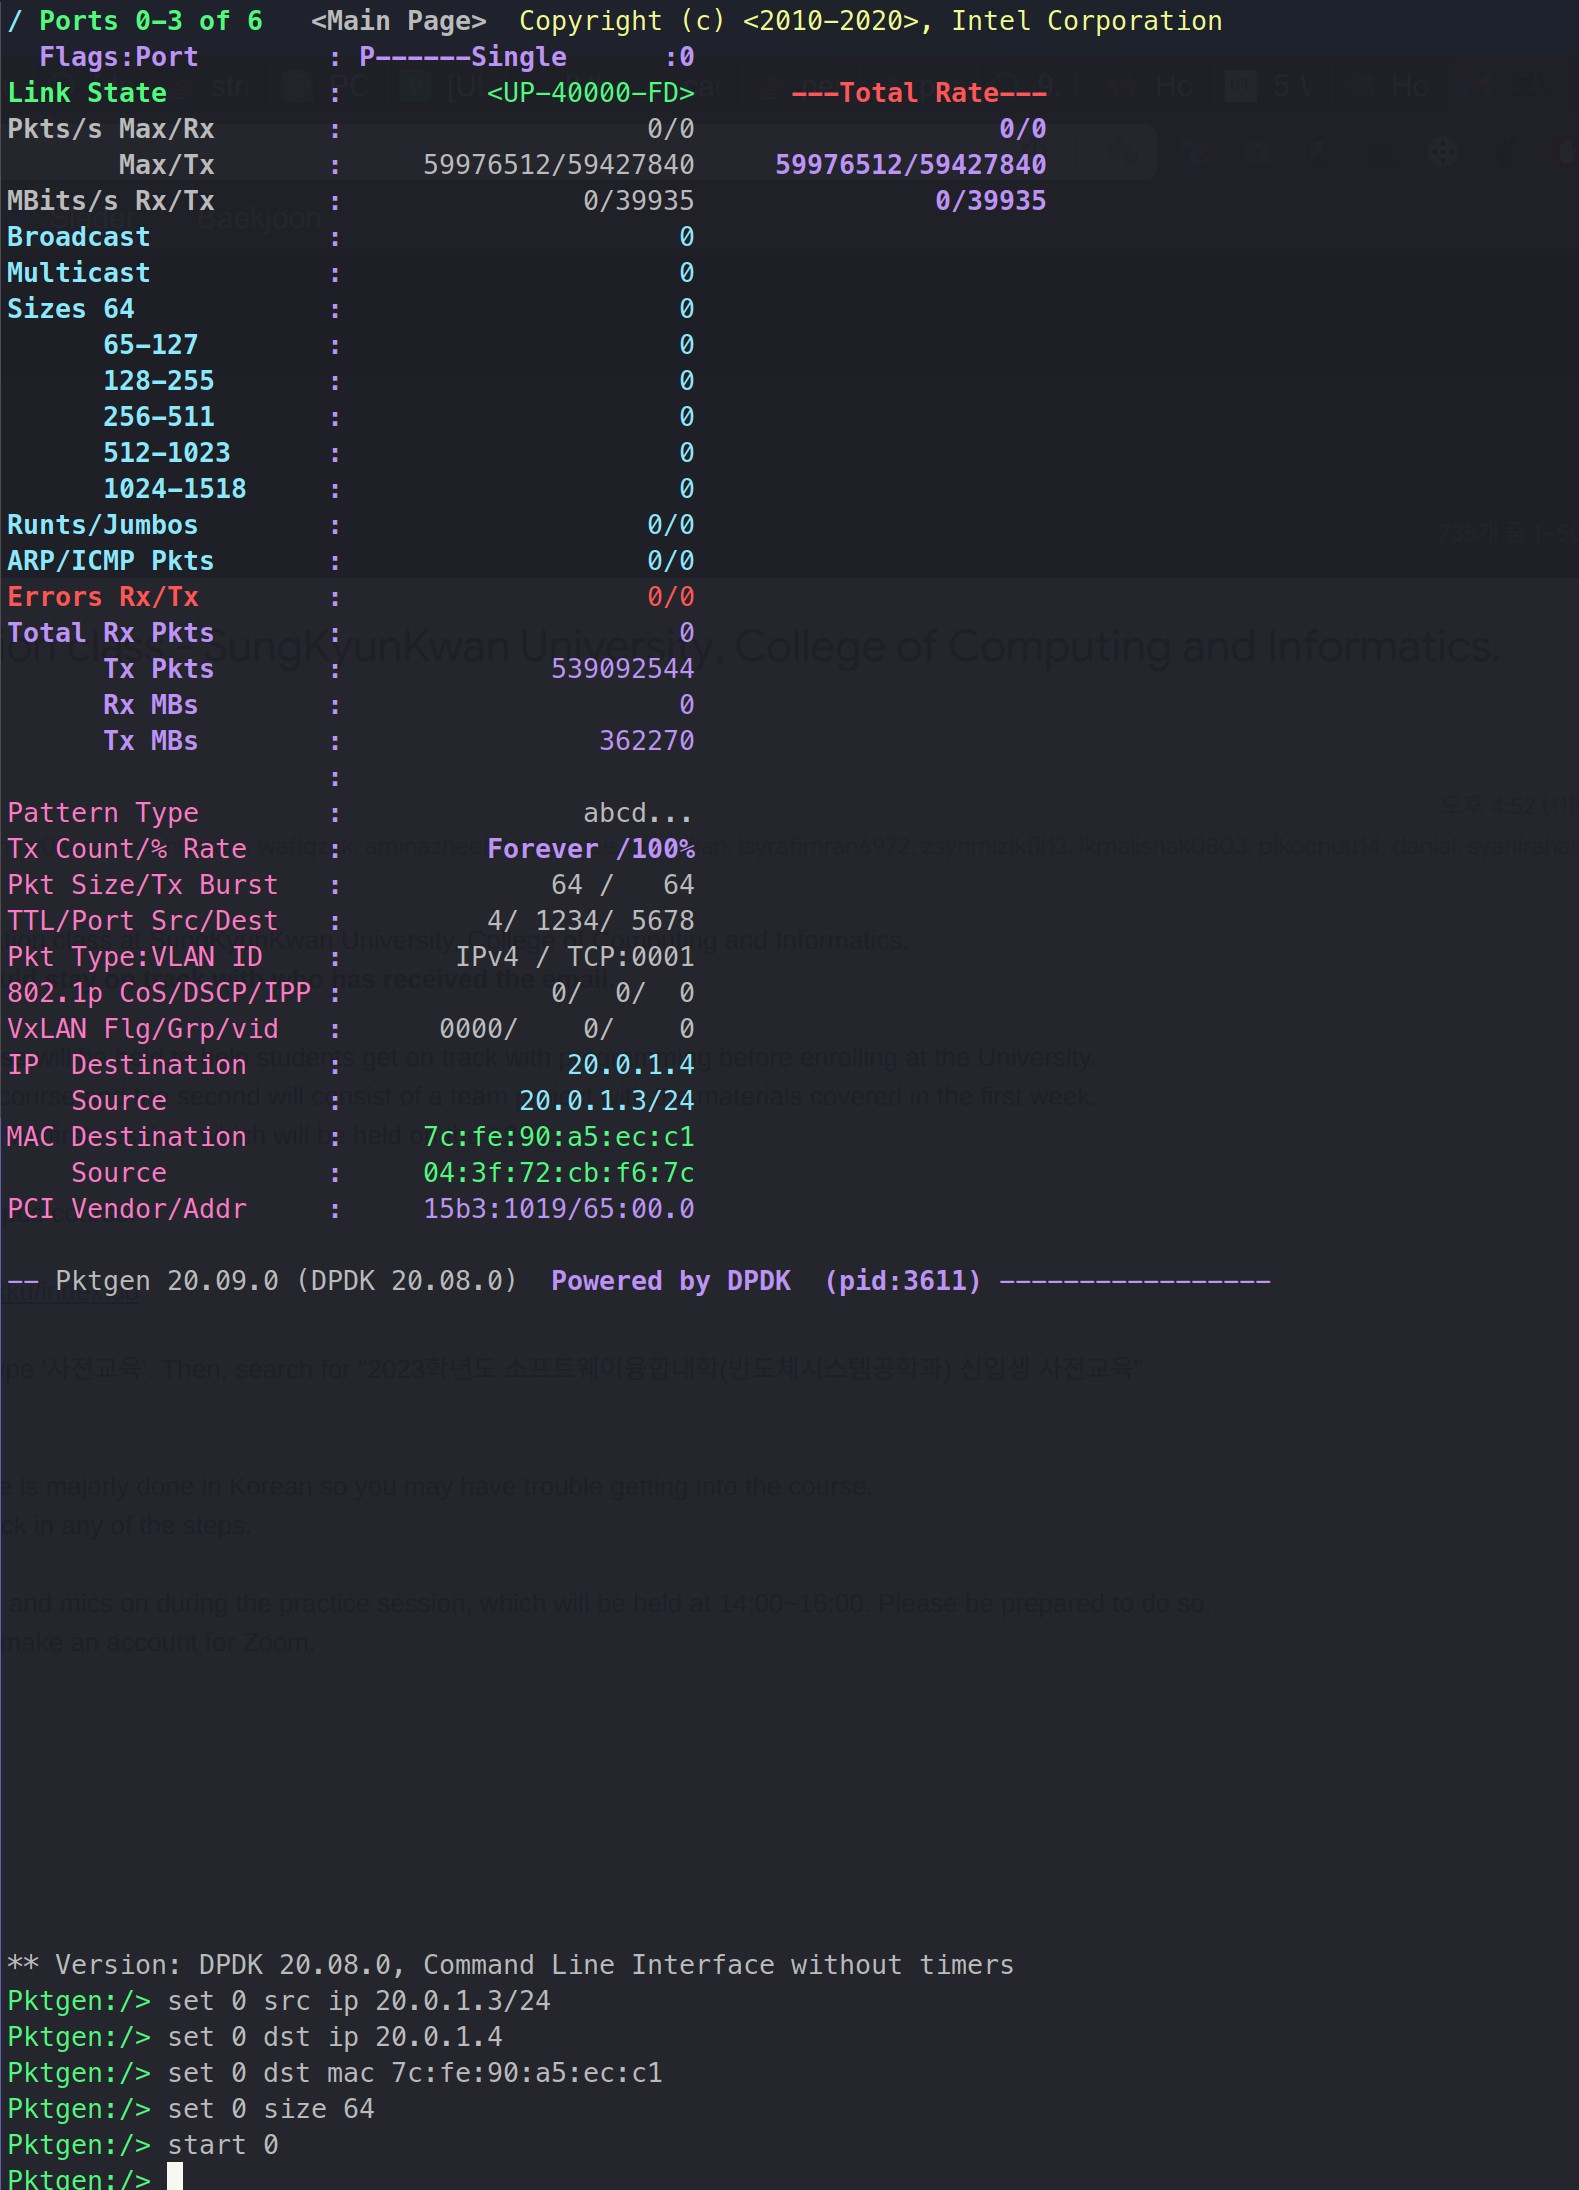
With 64byte packtes, This is the line rate!
However, another major problem ocurred, which was that rx performance was not good enough to endure the tx performance.