
기존 프로젝트에 Jetpack Compose 추가
기존 앱의 RecyclerView는 상당한 보일러 플레이트 코드가 발생합니다. 그렇기 때문에 Jetpack Compose의 LazyColumn을 통하여 리스트를 구성하면 같은 성능에 더 적은 코드로 리사이클러뷰를 만들 수 있습니다.
이번에는 ComposeView를 사용하여 기존 앱 구성요소에 jetpack Compose를 적용시키는 법을 같이 알아볼까 합니다.
개발 환경 설정
1.정확한 Android 스튜디오 버전 설치
Jetpack Compose로 최적의 환경에서 개발하려면 Android Studio 버전에 맞는 Gradle 플러그인을 구성해야 합니다.
buildscript {
    ...
    dependencies {
        classpath "com.android.tools.build:gradle:7.0.0"
        ...
    }
}
2. Kotlin 구성
프로젝트에서 Kotlin 1.6.10을 사용하는지 확인합니다.
plugins {
    id 'kotlin-android'
}
Gradle 구성
아래와 같이 최소 Sdk 버전을 21로 하고 Jetpack Compose 사용을 설정해줘야 합니다.
android {
    defaultConfig {
        ...
        minSdkVersion 21
    }

    buildFeatures {
        // Enables Jetpack Compose for this module
        compose true
    }
    ...

    // Set both the Java and Kotlin compilers to target Java 8.
    compileOptions {
        sourceCompatibility JavaVersion.VERSION_1_8
        targetCompatibility JavaVersion.VERSION_1_8
    }
    kotlinOptions {
        jvmTarget = "1.8"
    }

    composeOptions {
        kotlinCompilerExtensionVersion '1.1.1'
    }
}
Gradle 종속항목 추가
Jetpack Compose 빌드에 필요한 종속항목을 골라서 추가하시면 됩니다.
dependencies {
    // Integration with activities
    implementation 'androidx.activity:activity-compose:1.4.0'
    // Compose Material Design
    implementation 'androidx.compose.material:material:1.1.1'
    // Animations
    implementation 'androidx.compose.animation:animation:1.1.1'
    // Tooling support (Previews, etc.)
    implementation 'androidx.compose.ui:ui-tooling:1.1.1'
    // Integration with ViewModels
    implementation 'androidx.lifecycle:lifecycle-viewmodel-compose:2.4.1'
    // UI Tests
    androidTestImplementation 'androidx.compose.ui:ui-test-junit4:1.1.1'

    // When using a MDC theme
    implementation "com.google.android.material:compose-theme-adapter:1.1.1"

    // When using a AppCompat theme
    implementation "com.google.accompanist:accompanist-appcompat-theme:0.16.0"
}
Compose 이전 시작
jetpack compose를 적용시키고자 하는 레이아웃 XML 파일에 다음과 같이 ComposeView를 추가합니다. 저같은 경우에는 일기장 리스트를 구현하기 위해 fragment 안에 추가하였습니다.
<androidx.compose.ui.platform.ComposeView
  android:id="@+id/composeView"
  android:layout_width="match_parent"
  android:layout_height="0dp"
  app:layout_constraintEnd_toEndOf="parent"
  app:layout_constraintStart_toStartOf="parent"
  app:layout_constraintTop_toBottomOf="@+id/constraintLayout"
  app:layout_constraintBottom_toBottomOf="parent" />
그 다음에는 해당 앱 구성요소 파일에서 ComposeView를 바인딩하고 Compose 콘텐츠를 추가하면 됩니다.
binding.composeView.setContent {
    AppCompatTheme {
        val data = viewModel.filteredList.observeAsState()

        LazyColumn {
            data.value?.let { diaryList ->
                items(diaryList.size) { i ->
                    CardLayout(
                        diary = diaryList[i],
                        Modifier
                            .fillMaxWidth()
                            .padding(all = 8.dp)
                            .clickable(enabled = true) {
                                deleteContent(diaryList[i])
                            }
                    )
                }
            }

        }

    }
}

// Card Layout
@Composable
fun CardLayout(diary: Diary, modifier: Modifier) {
    Card(
        modifier = modifier,
        elevation = 5.dp,
    ) {
        Column {
            Text(text = diary.date)
            Row {
                AsyncImage(
                    model = diary.profile,
                    contentDescription = "image",
                    modifier = Modifier
                        .widthIn(min = 0.dp, max = 150.dp)
                        .padding(5.dp)
                )
                Column {
                    Text(
                        text = diary.contents.toString(),
                        style = MaterialTheme.typography.h5,
                        color = Color.Black
                    )
                }
            }
            Row(
                Modifier.fillMaxWidth(),
                horizontalArrangement = Arrangement.End
            ) {
                Text(
                    text = diary.location.toString(),
                    color = Color.Gray,
                    style = MaterialTheme.typography.overline
                )
                Text(
                    text = diary.where.toString(),
                    color = Color.Gray,
                    style = MaterialTheme.typography.overline
                )
            }
        }


    }
}
결과
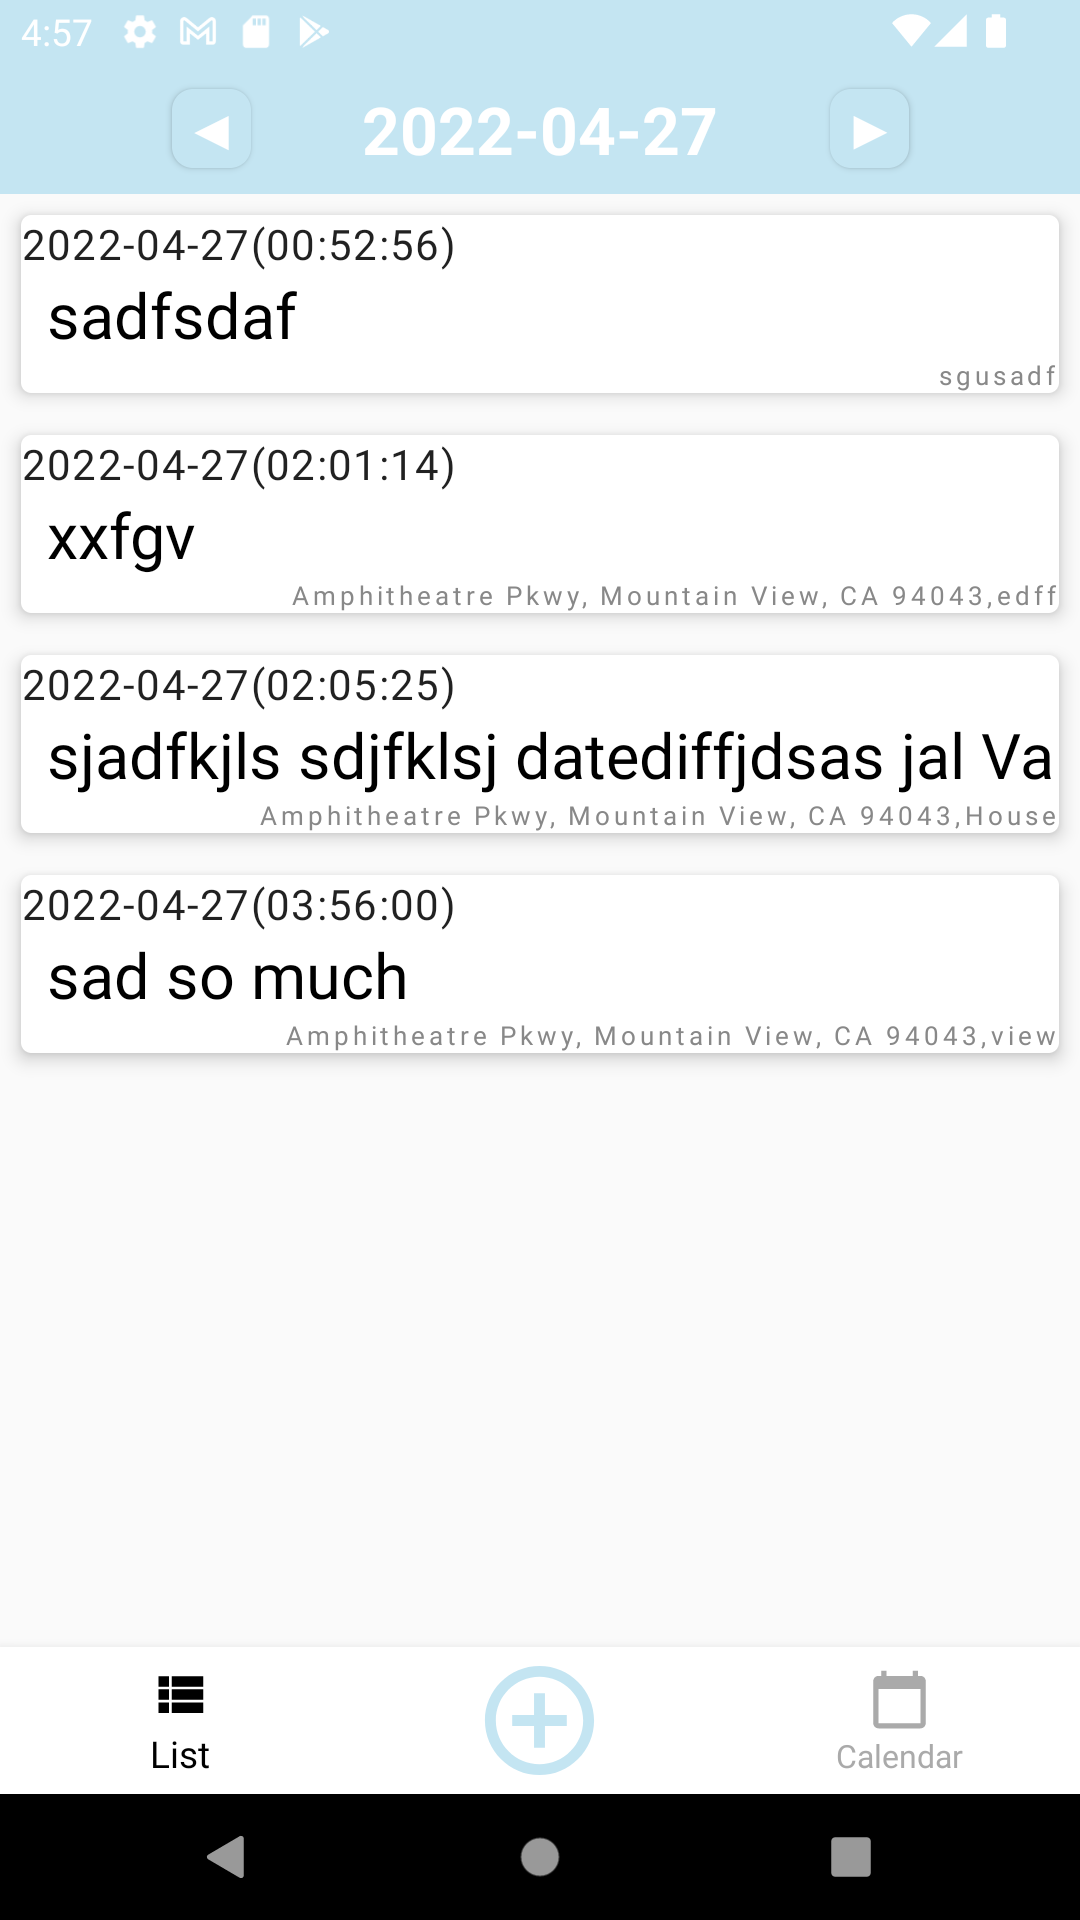 사진과 같이 Compose 콘텐츠가 잘 동작하는 것을 확인하실 수 있습니다.
요즘 어떻게 지내냐는 친구의 말에 '코드'로 대답했습니다.