오늘은 다시 자바~!
03.2 클래스 사용법 : 메서드를 분류하기
클래스 문법의 또 다른 용도는 유지보수하기 좋게 메서드를 분류하는 것이다.
클래스 문법 2가지 용도
① 데이터 타입을 만드는 거
② 메서드 분류
int 타입 : 4 byte 메모리
float 타입 : 4 byte 메모리
new int[] : 4 byte 메모리 여러 개. 같은 int 메모리를 여러 개.
우리가 원하는 건 복합 데이터
‐ 연락처 : 이름, 이메일, 전화번호
‐ 책 : 제목(String), 페이지수(int), 출판일(Date)
같은 타입의 데이터로만 표현 불가능
다양한 타입이 하나의 덩어리로 묶여서 다뤄져야 됨
자바에서 제공하는 타입이 아님
똑같은 책이어도 도서관에서 책을 다룰 때랑 서점에서 책을 다룰 때는 다름
서점은 판매가격이 있어야 됨
만드는 프로그램이 무엇이냐에 따라서 책에 대한 정보가 다름
이걸 자바에서 다 만들어 놓을 수 없음
메모리 구조를 미리 다 설계해 놓을 수 없으니까
당신들이 필요할 때마다 스스로 메모리 설계해서 써!
내가 메모리 설계하는 거
class Book {
  String title;
  int page;
  Date publishingDate;
  int price;
}

new Book();
애플리케이션에서 다루는 데이터에 맞춰서 메모리를 설계할 때 쓰는 문법이 클래스
애플리케이션에서 다루는 데이터에 맞는 그 메모리를 설계할 때 사용하는 문법
애플리케이션에서 다루는 데이터에 맞춰서 메모리를 설계하는 문법
서점 : Book, Author, Publisher, Order, Delivery
쇼핑몰: Product, Seller, Order, Cart
그 어플리케이션에 다루는 데이터에 맞춰서 거기에 맞는 메모리를 설계할 때 사용하는 문법이 클래스
Contact 라는 클래스가 그런 용도
메서드를 분류하는 용도로도 클래스를 쓴다
코드를 기능 단위로 묶은 게 function
다시 function을 관리하기 좋게 묶은 게 class
다시 class를 관리하기 좋게 묶은 게 package
결국에는 유지보수를 더 쉽게 하자고 만든 문법들
오늘은 메서드 분류하는 법!
ContactController
UML(Unified Modeling Language) : 통합된 표기법
분석/설계에 대한 내용을 글과 그림으로 표현한 것
판매자 - 물건
고객- 주문
택배회사 - 배송
실체가 있는 걸 컴퓨터에서 다뤄야 됨
현실세계에 대해서 생각한 바를 글/그림으로 표현을 하는 거
현실세계를 추상화시킨다.
주문은 order
물건은 product
글과 그림으로 추상화시킨다.
이 과정을 모델링이라고 한다.
글과 그림으로 표현하는 거 모델화 추상화
현실세계를 글과 그림으로 표현하는 거
글과 그림으로 추상화시킨 거
개념으로 표현
모델링할 때 이왕이면 통합된 방법의 규칙에 따라
그래서 등장한 게 UML(Unified Modeling Language)
컴퓨터에서 실행할 수 있게 코드로 바꾸는 거 → 프로그래밍 = 구현(implementing)
고객, 분석가 → 현실세계를 정리를 해서 추상화를 시킨다
분석가, 설계자 → 글과 그림으로 추상화 (모델링)
개발자 → 코딩
UML : 분석가, 설계자가 모델링할 때 사용하는 문법
UML Class Diagram : 클래스를 사각형으로 표현하고 맨 위에 클래스 이름을 둔다
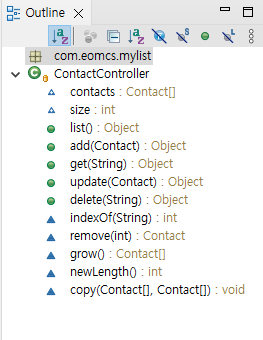
메서드를 분류하는 이유
① 연락처 관련 작업 요청을 처리하는 메서드 = 업무 관련 메서드
list(), add(), update(), get(), delete()
② 배열을 다루는 메서드
grow(), indexOf(), remove(), newLength(), copy()
⟹ 한 개의 클래스에 여러 역할을 수행하는 메서드가 있다.
⟹ 다른 클래스에 동일한 일을 하는 메서드가 중복될 가능성이 높다.
(수십년을 거쳐서 개발자들이 경험한 사실.. 중복될 가능성이 높아지더라!)
⟹ 개선 ▸ 한 클래스가 한 가지 역할만 담당하는 것이 유지보수에 좋다.
(이론 X 수십년간의 경험!)
경험적 기술 모음 ⟹ Design Patterns
Patterns (경험으로 얻은 기술)
GRASP 패턴
High Cohesion
ContactController
list(), add(), update(), get(), delete()
일부러 자바에서 제공하는 클래스 이름이랑 똑같이 만들어서 이해하기 좋게
ArrayList
grow(), indexOf(), remove(), newLength(), copy(), contacts: Contact[]
1단계 - 배열을 다루는 메서드를 별도의 클래스로 분류한다.
com.eomcs.mylist.ArrayList 클래스 생성
ContactController에서 배열을 다루는 메서드를 가져온다.
com.eomcs.mylist.ContactController 변경
앞에 static 붙이기
package com.eomcs.mylist;

public class ArrayList {
  static Contact[] contacts = new Contact[5];
  static int size = 0;
}
같은 클래스에 있으니까 굳이 앞에 ArrayList 안 붙여도 됨
package com.eomcs.mylist;

public class ArrayList {
  static Contact[] contacts = new Contact[5];
  static int size = 0;

  // 기능:
  // - 이메일로 연락처 정보를 찾는다.
  // - 찾은 연락처의 배열 인덱스를 리턴한다.
  //
  static int indexOf(String email) {
    for (int i = 0; i < size; i++) {
      Contact contact = contacts[i];
      if (contact.email.equals(email)) {
        return i;
      }
    }
    return -1;
  }

  // 기능:
  // - 배열에서 지정한 항목을 삭제한다.
  //
  static Contact remove(int index) {
    Contact old = contacts[index];
    for (int i = index + 1; i < size; i++) {
      contacts[i-1] = contacts[i]; // 한 칸씩 앞으로 당긴다
    }
    size--;
    return old;
  }

  // 기능:
  // - 배열의 크기를 늘린다.
  // - 기존 배열의 값을 복사해온다.
  //
  static Contact[] grow() {
    Contact[] arr = new Contact[newLength()];
    copy(contacts, arr);
    return arr;
  }

  // 기능:
  // - 주어진 배열에 대해 50% 증가시킨 새 배열의 길이를 알려준다.
  static int newLength() {
    return contacts.length + (contacts.length >> 1);
  }

  // 기능:
  // - 배열을 복사한다.
  //
  static void copy(Contact[] source, Contact[] target) {
    // 개발자가 잘못 사용할 것을 대비하여 다음 코드를 추가한다.
    // 즉 target 배열이 source 배열보다 작을 경우 target 배열 크기만큼만 복사한다.
    int length = source.length;
    if (target.length < source.length) {
      length = target.length;
    }
    for (int i = 0; i < length; i++) {
      target[i] = source[i];
    }
  }
}
package com.eomcs.mylist;
import org.springframework.web.bind.annotation.RequestMapping;
import org.springframework.web.bind.annotation.RestController;
@RestController
// 이 클래스가 클라이언트 요청 처리 담당자임을 표시한다.
// 이 표시(애노테이션)가 붙어있어야만 스프링 부트가 인식한다.
public class ContactController {
@RequestMapping("/contact/list")
public Object list() {
Contact[] arr = new Contact[ArrayList.size]; // 배열에 저장된 값만 복사할 새 배열을 만든다.
for (int i = 0; i < ArrayList.size; i++) {
arr[i] = ArrayList.contacts[i]; // 전에 배열에서 값이 들어 있는 항목만 복사한다.
}
return arr; // 복사한 항목들을 담고 있는 새 배열을 리턴한다.
};
@RequestMapping("/contact/add")
public Object add(Contact contact) {
System.out.println(contact);
if (ArrayList.size == ArrayList.contacts.length) { // 배열이 꽉 찼다면,
ArrayList.contacts = ArrayList.grow(); // 메서드 이름에서 해당 코드에 대한 설명을 짐작할 수 있다.
}
ArrayList.contacts[ArrayList.size++] = contact;
return ArrayList.size;
}
@RequestMapping("/contact/get")
public Object get(String email) {
int index = ArrayList.indexOf(email);
if (index == -1) {
return "";
}
return ArrayList.contacts[index];
}
@RequestMapping("/contact/update")
public Object update(Contact contact) {
int index = ArrayList.indexOf(contact.email);
if (index == -1) {
return 0;
}
ArrayList.contacts[index] = contact;
return 1;
}
@RequestMapping("/contact/delete")
public Object delete(String email) {
int index = ArrayList.indexOf(email);
if (index == -1) {
return 0;
}
ArrayList.remove(index); // 메서드 이름으로 코드의 의미를 짐작할 수 있다. 이것이 메서드로 분리하는 이유이다.
return 1;
}
}배열을 다루는 코드를 뜯어내어 옮긴다
2단계 - 코드 정리
com.eomcs.mylist.ContactController 변경
‐ list() 변경: 저장된 목록을 가져오는 코드를 ArrayList.toArray()로 옮긴다.
‐ add() 변경: 배열에 항목을 추가하고, 배열의 크기를 늘리는 코드를 ArrayList.add()로 옮긴다.
‐ update() 변경: 배열에서 특정 항목을 다른 값으로 교체하는 코드를 ArrayList.set()으로 옮긴다.
com.eomcs.mylist.ArrayList 변경
‐ toArray() 추가: 배열에 저장된 항목들을 꺼내 새 배열에 담아 리턴한다.
‐ add() 추가: 배열에 항목을 추가한다.
‐ set() 추가: 배열의 특정 위치의 값을 변경한다.
ContactController은 클라이언트 요청을 다루는 역할을 한다.
클라이언트 요청이 들어왔을 때 호출되는 메서드
urls.py 같은 건가..
  // 기능:
  // - 배열의 특정 위치의 값을 변경한다.
  // - 리턴 값은 변경하기 전에 저장되어 있던 값이다. 쓰든지 말든지. 안 쓰면 말고.
  //
  static Contact set(int index, Contact contact) {
    if (index < 0 || index >= size) {   // 값이 저장된 위치가 무효한 인덱스라면
      return null;
    }
    Contact old = contacts[index];
    contacts[index] = contact;
    return old;
} @RequestMapping("/contact/update")
public Object update(Contact contact) {
int index = ArrayList.indexOf(contact.email);
if (index == -1) {
return 0;
}
return ArrayList.set(index, contact) == null ? 0 : 1;
}GRASP(General Responsibility Assignment Software Patterns)
GRASP 패턴의 High Cohesion(높은 응집력=전문화) 설계 기법
GRASP
1. High Cohesion
2. Low Coupling
3. Information Expert
이렇게 3개 기억하기
다양한 타입의 객체 주소를 받을 수 있는 레퍼런스 변수를 활용하기
1단계 - ToDoList 요청을 처리할 REST API를 만든다.
com.eomcs.mylist.Todo 클래스 생성
해야 할 일 데이터를 저장할 수 있는 메모리를 설계한다.
Todo 데이터 타입을 정의한다.
TodoController 클래스 생성
ContactController를 복사해서 변경한다.
다형성
ContactController - ArrayList
연락처 목록은 ArrayList를 통해서 관리
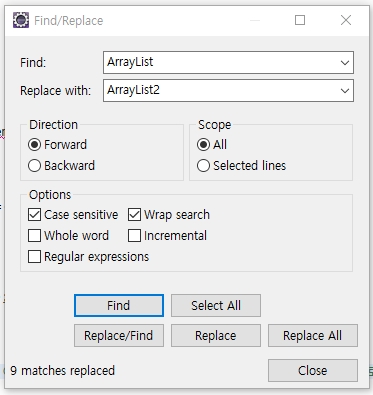
TodoController - ArrayList2
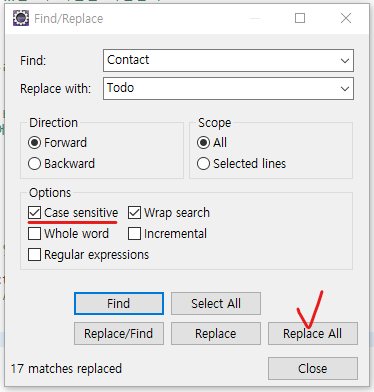
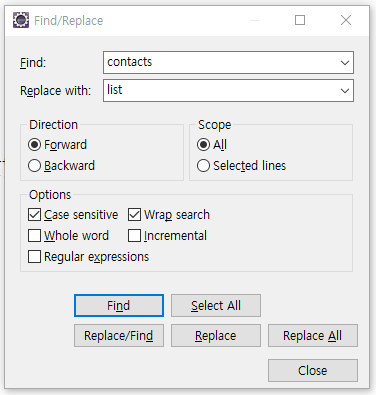
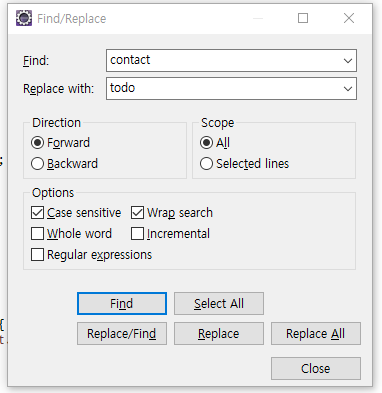
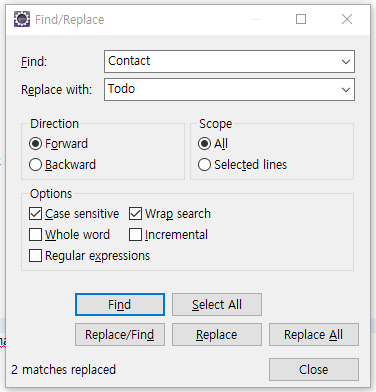
Contact에서 Ctrl + F
indexOf() 지우기
update에서 0 1 리턴하는 건
프론트엔드쪽에 알려주려고 리턴하는 거
프론트엔드 개발 실습
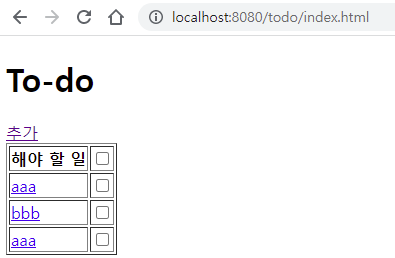
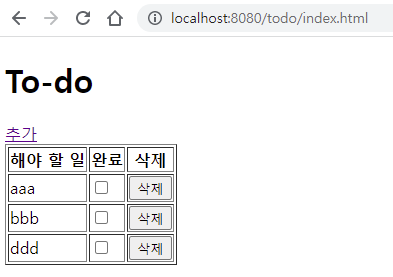
1단계 - TodoList 목록 출력 화면을 만든다.
/index.html 변경
‐ /todo/index.html 생성
/contact/index.html을 복사해서 변경한다.
/todo/form.html 생성
/contact/form.html을 복사해서 변경한다.
<li><a href="todo/index.html">해야 할 일</a></li>클래스에 프로퍼티가 없다고 뜸
필드(field)와 프로퍼티(property)
get⋯() 메소드
속성 값을 확인할 때 사용하는 메소드를 게터(getter)라고 부른다.
set⋯() 메소드
속성에 값을 지정할 때 사용하는 메소드를 세터(setter)라고 부른다.
get이름() {return 값}
set이름(value) {}
프로퍼티(property) = getter/setter = 변수의 값을 꺼내고 설정하는 메소드
메서드명이 get 또는 set으로 시작
class Todo {
  String title; // 필드(field)
  boolean done; // 필드(field)
}
void setTitle(String t) {
this.title = t;
}
String getTitle() {
return this.title;
}
void setDone(boolean d) {
this.done;
}
boolean getDone() {
return this.done;
}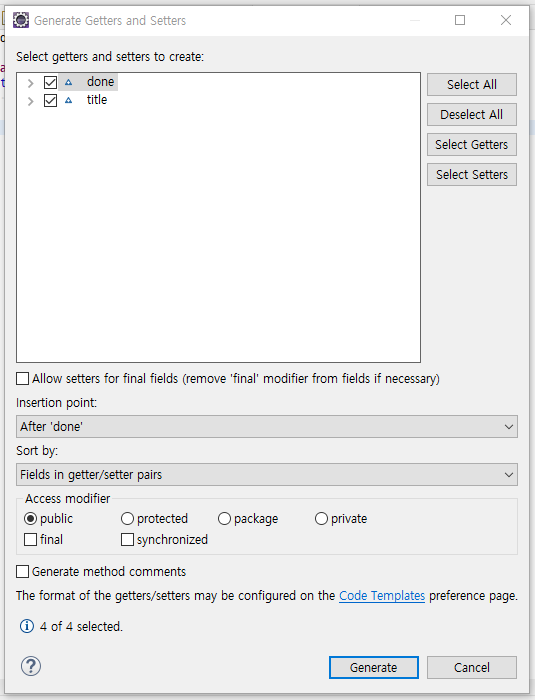
package com.eomcs.mylist;

public class Todo {
  String title;
  boolean done;

  @Override
  public String toString() {
    return "Todo [title=" + title + ", done=" + done + "]";
  }

  public String getTitle() {
    return title;
  }
  public void setTitle(String title) {
    this.title = title;
  }
  public boolean isDone() {
    return done;
  }
  public void setDone(boolean done) {
    this.done = done;
  }
}
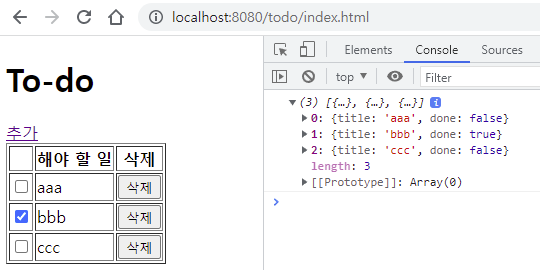
  fetch("/todo/list")
    .then(function(response) {
      return response.json();
    })
    .then(function(todoList) {
      console.log(todoList);
      for (var i = 0; i < todoList.length; i++) {
        var tr = document.createElement("tr");
        tr.innerHTML = `<td><a href="view.html?index=${i}">${todoList[i].title}</a></td>
        <td><input type="checkbox"></td>`;
        tbody.appendChild(tr);
      }
    });
얘네는 상세보기가 필요 없음
view.html이 필요 없음
tr.innerHTML = `<td><a href="#">${todoList[i].title}</a></td>onclick="return false"
tr.innerHTML = `<td><a href="#" onclick="return false">${todoList[i].title}</a></td>그냥 a 태그 지움
tr.innerHTML = `<td>${todoList[i].title}</td>
<td><input type="checkbox"></td>`;
백엔드에 상세보기 필요없다고 전달한다
/todo/get을 지운다
삭제 버튼 눌렀을 때 서버에 요청해서 목록에서 사라지게 하고 서버에서 다시 데이터 받아서 목록에서 사라지게
var buttons = document.querySelector("button");얘를 실행할 당시에 버튼이 없다
버블링 이용하기!
tbody에 이벤트 등록하기
버블 단계에서 부모 태그에 등록된 리스너를 호출한다.
버튼의 부모 td, td의 부모 tr, tr의 부모 tbody
tbody 자식 태그 아무거나 클릭해도 리스너가 호출되어버림
조건을 걸어야 됨
var tbody = document.querySelector("#x-todo-table tbody")
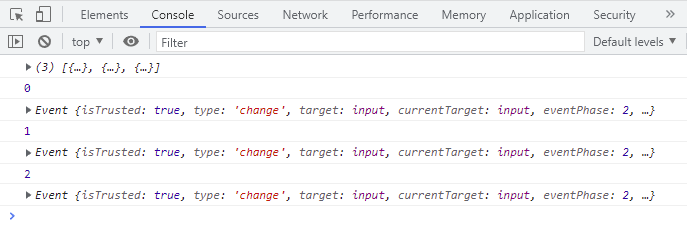
tbody.onclick = function(e) {
console.log(e.target);
};버튼을 눌렀을 때만 리스너가 호출되게 하고 싶음
삭제 버튼을 클릭 했을 때 호출될 리스너 등록하기
⇒ 삭제 버튼은 동적으로 생성된다.
⇒ 따라서 부모 태그에 리스너를 등록해야 한다.
localName
  tbody.onclick = function(e) {
    console.log(e.target.localName);
    if (e.target.localName == "button") {
      console.log("okok!!")
    };
}; tbody.onclick = function(e) {
// if (e.target.localName == "button") {
if (e.target instanceof HTMLButtonElement) {
console.log("okok!!2")
};
};4교시 시작
삭제 버튼이 처음부터 존재하는 버튼이 아니라 tr 태그를 만들면서 생성됨
버튼들의 부모 태그에 리스너를 등록한다
세 번째 파라미터 없이 리스너를 등록하면 타겟 단계, 버블 단계에서 호출된다
버블 단계를 이용한다!
자식 태그를 아무거나 눌러도 리스너가 호출되어버림
조건문 사용해서 e.target.localName이 button인 경우에만 리스너 호출
html은 대소문자를 구분하지 않는다
자바스크립트는 대소문자를 구분한다
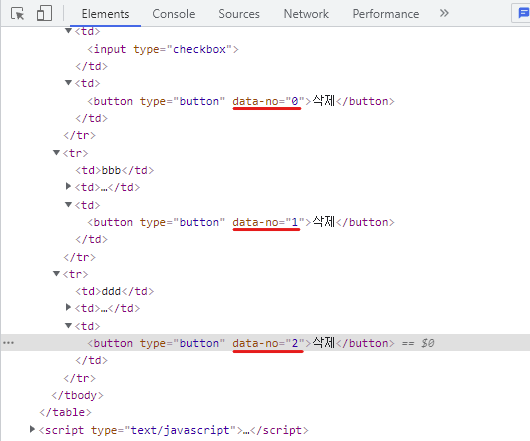
클릭한 버튼이 어떤 버튼인지?
no 이라는 attribute가 원래 존재하는 속성일 수도 있음
내가 임의로 추가하는 속성과 원래 속성이 충돌이 안 일어나려면
data- 접두어를 붙여야 됨
custom data attributes
<td><button type="button" data-no="${i}">삭제</td>`;버튼을 눌렀는데 이게 어떤 todo의 버튼인지 구분하기 위해서 data-no 속성 추가
  tbody.onclick = function(e) {
    // if (e.target.localName == "button") {
    if (e.target instanceof HTMLButtonElement) {
      console.log(e.target.getAttribute("data-no"));
    };
  };
서버에 삭제 요청
/contact/view.html에서 delete 부분 복사하기
서버에 응답이 왔을 때 호출될 메서드
json 형태로 가공해서 리턴된 값을 받는 함수
location.reload(); ← refresh
Location.reload() 메서드는 새로고침 버튼처럼 현재 리소스를 다시 불러옵니다.
  var tbody = document.querySelector("#x-todo-table tbody")

  // 삭제 버튼을 클릭 했을 때 호출될 리스너 등록하기
  // => 삭제 버튼은 동적으로 생성된다.
  // => 따라서 부모 태그에 리스너를 등록해야 한다.
  tbody.onclick = function(e) {
    // if (e.target.localName == "button") {
    if (e.target instanceof HTMLButtonElement) {
      var no = e.target.getAttribute("data-no");
      fetch(`/todo/delete?index=${no}`)
        .then(function(response) {
          return response.json();
        })
        .then(function(result) {
          console.log(result);
          if (result == 0) {
            window.alert("삭제하지 못했습니다!");
          } else {
            location.reload();
          }
        })
    };
  };

  fetch("/todo/list")
    .then(function(response) {
      return response.json();
    })
    .then(function(todoList) {
      console.log(todoList);
      for (var i = 0; i < todoList.length; i++) {
        var tr = document.createElement("tr");
        tr.innerHTML = `<td>${todoList[i].title}</td>
        <td><button type="button" data-no="${i}">삭제</td>`;
        tbody.appendChild(tr);
      }
    });
삭제 버튼 누르면 삭제 잘 됨
삭제 버튼에 리스너 등록하기II
<button type="button" onclick="deleteTodo(${i})"> var tbody = document.querySelector("#x-todo-table tbody")
fetch("/todo/list")
.then(function(response) {
return response.json();
})
.then(function(todoList) {
console.log(todoList);
for (var i = 0; i < todoList.length; i++) {
var tr = document.createElement("tr");
tr.innerHTML = `<td>${todoList[i].title}</td>
<td><button type="button"token interpolation">${i})">삭제</td>`;
tbody.appendChild(tr);
}
});
function deleteTodo(no) {
console.log(no);
fetch(`/todo/delete?index=${no}`)
.then(function(response) {
return response.json();
})
.then(function(result) {
console.log(result);
if (result == 0) {
window.alert("삭제하지 못했습니다!");
} else {
location.reload();
}
})
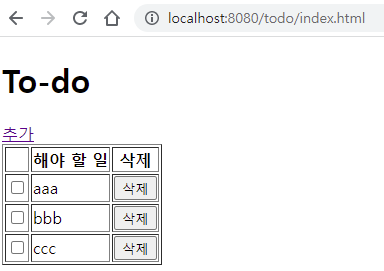
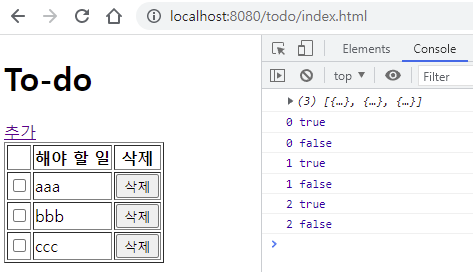
}3단계 - Todo 체크 기능 추가
/todo/index.html 변경
onchange
  fetch("/todo/list")
    .then(function(response) {
      return response.json();
    })
    .then(function(todoList) {
      console.log(todoList);
      for (var i = 0; i < todoList.length; i++) {
        var tr = document.createElement("tr");
        tr.innerHTML = `<td><input type="checkbox"></td>
        <td>${todoList[i].title}</td>
        <td><button type="button"token interpolation">${i})">삭제</td>`;
        tbody.appendChild(tr);
      }
}); fetch("/todo/list")
.then(function(response) {
return response.json();
})
.then(function(todoList) {
console.log(todoList);
for (var i = 0; i < todoList.length; i++) {
var tr = document.createElement("tr");
tr.innerHTML = `<td><input type="checkbox"></td>
<td>${todoList[i].title}</td>
<td><button type="button"token interpolation">${i})">삭제</td>`;
tbody.appendChild(tr);
}
});tr.innerHTML = `<td><input type="checkbox" onchange="checkTodo(${i}, event)"></td> function checkTodo(no, state) {
console.log(no);
console.log(state);
}
tr.innerHTML = `<td><input type="checkbox" onchange="checkTodo(${i}, event.target.checked)"></td> function checkTodo(no, checked) {
console.log(no, checked);
}
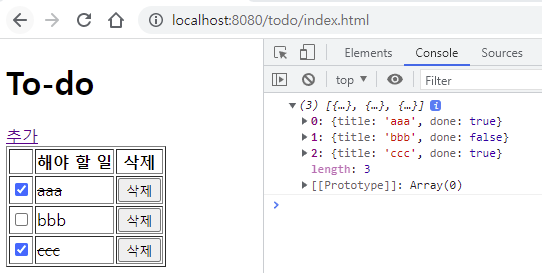
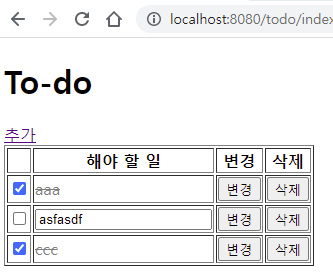
체크 박스를 선택할 때 제목에 취소선 출력하기
취소선은 텍스트를 찾아야 됨
취소선 그리려면 텍스트를 알아내야 됨
가장 쉬운 방법이 선택한 체크박스 부모를 알아내서
텍스트에 id 부여
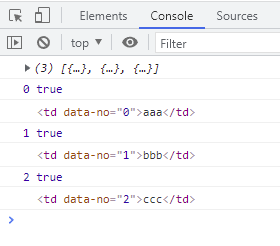
<td data-no="${i}">${todoList[i].title}</td>document.querySelector(`tbody td[data-no="${no}"]`) function checkTodo(no, checked) {
console.log(no, checked);
var titleTd = document.querySelector(`tbody td[data-no="${no}"]`);
console.log(titleTd);
}
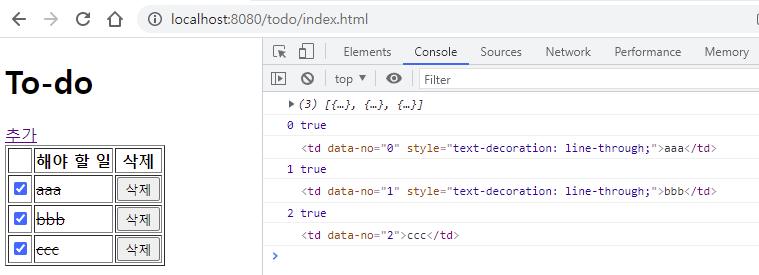
    function checkTodo(no, checked) {
      console.log(no, checked);
      var titleTd = document.querySelector(`tbody td[data-no="${no}"]`);
      console.log(titleTd);
      titleTd.style["text-decoration"] = "line-through";
    }
체크를 해제하면 취소선을 원상복구 해야 됨
이거 토글
    function checkTodo(no, checked) {
      console.log(no, checked);
      var titleTd = document.querySelector(`tbody td[data-no="${no}"]`);
      if (checked) {
        titleTd.style["text-decoration"] = "line-through";
      } else {
        titleTd.style["text-decoration"] = "none";
      }
    }
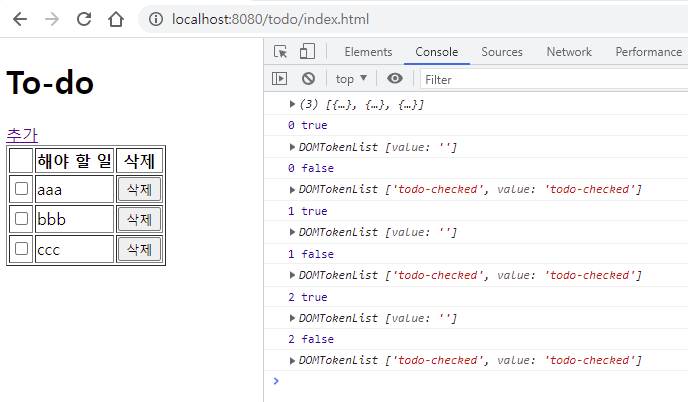
console.log(titleTd.classList); <style>
.todo-checked {
text-decoration: line-through;
}
</style> function checkTodo(no, checked) {
console.log(no, checked);
var titleTd = document.querySelector(`tbody td[data-no="${no}"]`);
console.log(titleTd.classList);
if (checked) {
titleTd.classList.add("todo-checked");
} else {
titleTd.classList.remove("todo-checked");
}
}
태그의 style을 제어할 때 CSS property 값으로 직접 제어하지 않고 이름으로 제어한다.
부트스트랩이 이렇다
그룹에 가입시킨다
체크박스를 서버의 REST API와 연동하기
    function checkTodo(no, checked) {
      console.log(no, checked);
      fetch(`/todo/check?index=${no}&done=${checked}`)
      .then(function(response) {
        return response.json();
      })
      .then(function(result) {
        console.log(result);
        if (result == 0) {
          window.alert("변경하지 못했습니다!");
        } else {
          var titleTd = document.querySelector(`tbody td[data-no="${no}"]`);
          // console.log(titleTd.classList);
          if (checked) {
            titleTd.classList.add("todo-checked");
          } else {
            titleTd.classList.remove("todo-checked");
          }
        }
      });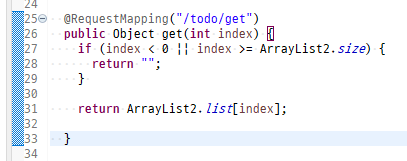
} @RequestMapping("/todo/check")
public Object check(int index, boolean done) {
if (index < 0 || index >= ArrayList2.size) {
return 0; // 인덱스가 무효해서 설정하지 못했다.
}
ArrayList2.list[index].done = done;
return 1; // 해당 항목의 상태를 변경했다.
}해당 인덱스가 유효하지 않으면 return 0
유효하면 return 1
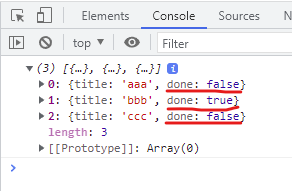
서버에서 받아 온 데이터의 상태에 따라 체크상자의 UI를 처리한다.
fetch("/todo/list")
.then(function(response) {
return response.json();
})
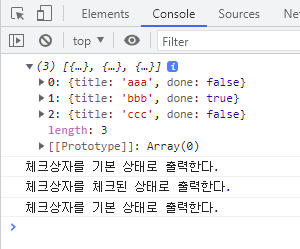
.then(function(todoList) {
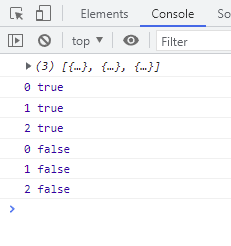
console.log(todoList);
for (var i = 0; i < todoList.length; i++) {
var tr = document.createElement("tr");
if (todoList[i].done) {
console.log("체크상자를 체크된 상태로 출력한다.");
} else {
console.log("체크상자를 기본 상태로 출력한다.")
}
tr.innerHTML = `<td><input type="checkbox"token interpolation">${i}, event.target.checked)"></td>
<td data-no="${i}">${todoList[i].title}</td>
<td><button type="button"token interpolation">${i})">삭제</td>`;
tbody.appendChild(tr);
}
});
  fetch("/todo/list")
    .then(function(response) {
      return response.json();
    })
    .then(function(todoList) {
      console.log(todoList);
      for (var i = 0; i < todoList.length; i++) {
        var tr = document.createElement("tr");
        var titleTdOption = "";
        if (todoList[i].done) {
          titleTdOption = "checked";
        }
        tr.innerHTML = `<td><input type="checkbox" ${titleTdOption}token interpolation">${i}, event.target.checked)"></td>
        <td data-no="${i}">${todoList[i].title}</td>
        <td><button type="button"token interpolation">${i})">삭제</td>`;
        tbody.appendChild(tr);
      }
    });
  fetch("/todo/list")
    .then(function(response) {
      return response.json();
    })
    .then(function(todoList) {
      console.log(todoList);
      for (var i = 0; i < todoList.length; i++) {
        var tr = document.createElement("tr");
        var checkedOption = "";
        var titleTdOption = "";
        if (todoList[i].done) {
          checkedOption = "checked";
          titleTdOption = "class='todo-checked'";
        }
        tr.innerHTML = `<td><input type="checkbox" ${checkedOption}token interpolation">${i}, event.target.checked)"></td>
        <td data-no="${i}" ${titleTdOption}>${todoList[i].title}</td>
        <td><button type="button"token interpolation">${i})">삭제</td>`;
        tbody.appendChild(tr);
      }
    });
<style>
.todo-checked {
text-decoration: line-through;
color: gray;
}
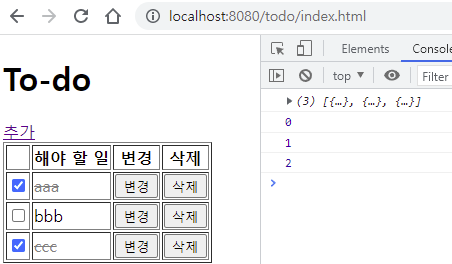
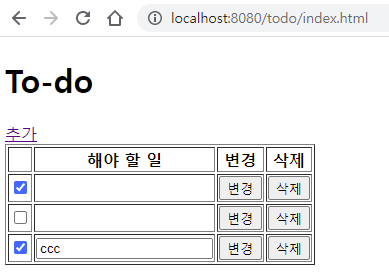
</style>4단계 - Todo 제목을 변경한다.
/todo/index.html 변경
    <tr>
      <th></th>
      <th>해야 할 일</th>
      <th>변경</th>
      <th>삭제</th>
</tr><td><button type="button" onclick="updateTodo(${i})">변경</td> function updateTodo(no) {
console.log(no);
}
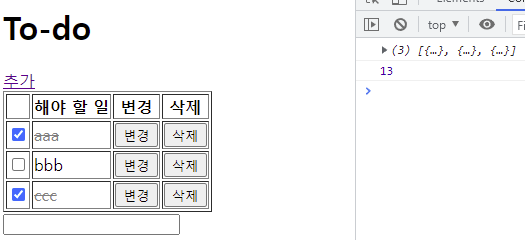
변경 버튼을 누르면 UI를 편집 모드로 전환한다.
<input type="text" id="x-title-input">
<script type="text/javascript">
var titleInput = document.querySelector("#x-title-input");<input type="text" id="x-title-input">
<script type="text/javascript">
var titleInput = document.querySelector("#x-title-input");
titleInput.style["display"] = "none";function updateTodo(no) {
var titleTd = document.querySelector(`tbody td[data-no="${no}"]`);
titleInput.value = titleTd.innerHTML;
}// titleInput.style["display"] = "none";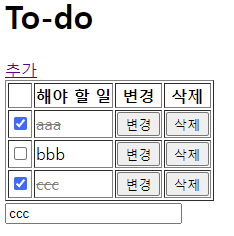
변경 버튼을 누르면 선택된 Todo의 제목을 외부에 만든 input 상자에 출력한다.
변경 버튼을 누르면 Todo 제목 자리에 입력 상자를 넣는다.
<input type="text" id="x-title-input">var titleInput = document.querySelector("#x-title-input");function updateTodo(no) {
var titleTd = document.querySelector(`tbody td[data-no="${no}"]`);
titleInput.value = titleTd.innerHTML;
titleTd.innerHTML = "";
titleTd.appendChild(titleInput);
}
문제가 있음
변경 버튼을 누르는 순간
포커스를 잃어버리기 전에 현재 들어 있는 걸 그 자리에 놓는다..?
지워진 상태로 그대로 있으면 안 됨
조건을 붙여야 됨
다른 Todo 항목을 선택할 때 Todo 제목을 원래 상태로 되돌린다.
HTMLTableCellElement
https://developer.mozilla.org/en-US/docs/Web/API/HTMLTableCellElement
테이블의 셀(<th>, <td>) 요소를 다루는 인터페이스이다.
HTMLTableCellElement 인터페이스는 HTML 문서에서 표 셀(헤더 또는 데이터 셀)의 레이아웃 및 표시를 조작하기 위한 특수 속성 및 메소드(일반 HTMLElement 인터페이스 외에 상속에 의해 사용 가능함)를 제공합니다.
HTMLTableDataCellElement
table data → td
현재 부모가 td면 이동하기 전에 원상태로 복원한다.
var titleInput = document.querySelector("#x-title-input");function updateTodo(no) {
var titleTd = document.querySelector(`tbody td[data-no="${no}"]`);
if (titleInput.parentNode instanceof HTMLTableCellElement) {
console.log("현재 편집된 값을 취소하고 이동한다.")
return;
}
titleInput.value = titleTd.innerHTML;
titleTd.innerHTML = "";
titleTd.appendChild(titleInput);
}function updateTodo(no) {
var titleTd = document.querySelector(`tbody td[data-no="${no}"]`);
// input 상자가 이미 todo 항목에 출력된 상태라면
// 다른 todo 항목으로 이동하기 전에 현재 todo 항목을 원상태로 만든다.
if (titleInput.parentNode instanceof HTMLTableCellElement) {
titleInput.parentNode.innerHTML = titleInput.value;
}
titleInput.value = titleTd.innerHTML;
titleTd.innerHTML = "";
titleTd.appendChild(titleInput);
}todo 항목이 원상태로 된다.
titleInput.parentNode.innerHTML = titleInput.value;
근데 이 방법 단점이 titleInput에서 내용 바꾸면 그대로 반영됨
엔터 쳐야 바뀌어야 되는데...
조금 더 정교하게 만들어보자
td의 innerHTML을 직접 통제하지 않고 다른 방식으로 해보자
span 태그를 사용하여 Todo 제목의 출력을 제어한다.
화면에 영향을 끼치지 않으면서 콘텐츠의 일부를 컨트롤 할 때 쓰는 방법
⇒ span 태그
span 태그 추가하기
<td data-no="${i}" ${titleTdOption}><span>${todoList[i].title}</span></td>var titleSpan = titleTd.querySelector("span");
titleSpan.style["display"] = "none";
span 태그를 화면에서 감춘다
titleInput.value = titleSpan.innerHTML;
화면에서 감춘 titleSpan에 있는 innerHTML을 titleInput 박스에 집어넣는다.
titleTd.appendChild(titleInput);
titleInput 박스를 titleTd에 집어넣는다.
입력 상자를 td의 자식으로 집어넣는다.
    function updateTodo(no) {
      var titleTd = document.querySelector(`tbody td[data-no="${no}"]`);
      var titleSpan = titleTd.querySelector("span");
      titleSpan.style["display"] = "none";
      titleInput.value = titleSpan.innerHTML;
      titleTd.appendChild(titleInput);
}titleInput의 부모 태그가 body가 아니라HTMLTableCellElement 라면
span 태그의 display를 none에서 다시 바꿔서 화면에 출력되게 한다.
    function updateTodo(no) {
      // 현재 Todo 항목을 편집중인 상태에서 변경 버튼을 눌렀다면
      if (titleInput.parentNode instanceof HTMLTableCellElement) {
        // 다른 항목을 편집하기 위해 이동하기 전에 편집 전의 상태로 되돌린다.
        titleInput.parentNode.querySelector("span").style["display"] = "";
      }
      var titleTd = document.querySelector(`tbody td[data-no="${no}"]`);
      var titleSpan = titleTd.querySelector("span");
      titleSpan.style["display"] = "none";
      titleInput.value = titleSpan.innerHTML;
      titleTd.appendChild(titleInput);
    }
이것이 바로 span 태그 활용 방법이다.
td에 들어 있는 text를 컨트롤 할 때 바로 컨트롤하는 게 아니라 td 전체를 다루지 않고 이런 방식으로 한다.
span 태그는 UI에 영향을 끼치지 않는다.
div 태그는 화면에 영향을 끼친다.
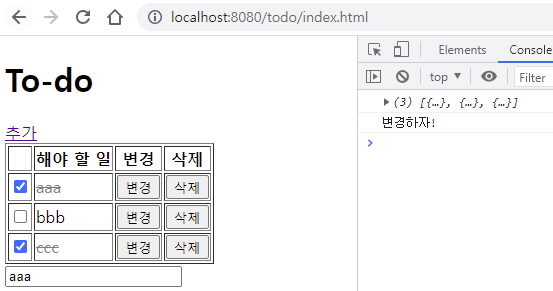
Todo 입력 상자에 keyup 이벤트 리스너를 등록한다.
편집을 하고 엔터를 치면 서버에 보내는 작업
html input enter key event 검색
var titleInput = document.querySelector("#x-title-input");titleInput.onkeyup = function(e) {
console.log(e.keyCode);
};keyCode : 이벤트 속성 이름. 입력한 키를 나타내는 숫자
onkeypress : 키 누르고 있으니까 이벤트 계속 발생함
onkeyup 쓰는 걸로
만약 이 코드가 13이라면 (엔터를 쳤다면)
& titleInput에 value가 빈 문자열이 아니라면
    titleInput.onkeyup = function(e) {
      if (e.keyCode == 13 && titleInput.value != "") {
        console.log("변경하자!")
      }
    };
하나 더! span 태그의 값과 titleInput에 입력된 값이 달라야 한다.
var originTitle = titleInput.parentNode.querySelector("span").innerHTML;titleInput.onkeyup = function(e) {
var originTitle = titleInput.parentNode.querySelector("span").innerHTML;
if (e.keyCode == 13 && titleInput.value != "" && originTitle != titleInput.value) {
console.log("변경하자!")
}
};자바는 존재하지 않는 변수명을 쓰면 난리남
"use strict" 추가하기
윈도우에 origin이라는 변수가 있나봄
titleInput.onkeyup = function(e) {
  var originTitle = titleInput.parentNode.querySelector("span").innerHTML;
  if (e.keyCode == 13 && titleInput.value != "" && originTitle != titleInput.value) {
    console.log("변경하자!")
  }
};Todo 제목을 변경한 후 엔터 키를 쳤을 때 서버에 보낸다.
deleteTodo 복사해오기
fetch(`/todo/delete?index=${no}`)
  .then(function(response) {
    return response.json();
  })
  .then(function(result) {
    console.log(result);
    if (result == 0) {
      window.alert("삭제하지 못했습니다!");
    } else {
      location.reload();
    }
})fetch(`/todo/update?index=${no}&title=${titleInput.value}`)var no = titleInput.parentNode.getAttribute("data-no");
titleInput.onkeyup = function(e) {
  var no = titleInput.parentNode.getAttribute("data-no");
  var originTitle = titleInput.parentNode.querySelector("span").innerHTML;
  if (e.keyCode == 13 && titleInput.value != "" && originTitle != titleInput.value) {
    fetch(`/todo/update?index=${no}&title=${titleInput.value}`)
      .then(function(response) {
        return response.json();
      })
      .then(function(result) {
        if (result == 0) {
          window.alert("변경하지 못했습니다!");
        } else {
          console.log("변경했습니다!")
        }
      });
  }
};
새로고침 해보면 변경되어 있음
td의 span 태그 내용을 바꾼다
titleInput.parentNode.querySelector("span").innerHTML = titleInput.value;
변경된 span 태그를 다시 보여준다
titleInput.parentNode.querySelector("span").style["display"] = "";
변경했으면 현재 input 박스를 감춰야 됨
titleInput.style["display"] = "none";
body의 막내 자식 태그로 다시 되돌린다
document.body.appendChild(titleInput);
titleInput.onkeyup = function(e) {
  var no = titleInput.parentNode.getAttribute("data-no");
  var originTitle = titleInput.parentNode.querySelector("span").innerHTML;
  if (e.keyCode == 13 && titleInput.value != "" && originTitle != titleInput.value) {
    fetch(`/todo/update?index=${no}&title=${titleInput.value}`)
      .then(function(response) {
        return response.json();
      })
      .then(function(result) {
        if (result == 0) {
          window.alert("변경하지 못했습니다!");
        } else {
          console.log("변경했습니다!")
          titleInput.parentNode.querySelector("span").innerHTML = titleInput.value;
          titleInput.parentNode.querySelector("span").style["display"] = "";
          titleInput.style["display"] = "none";
          document.body.appendChild(titleInput);
        }
      });
  }
};
index-17.html 완성시켜보기
updateTodo에 titleInput.style["display"] = ""; 추가하니까 됨