# 시작하는말
LB에 대한 내용은 노션에 잘 정리해놓았다. 옆팀에서 급하게 LB 라운드로빈 테스트 환경을 만들어 달라고 부탁하여 가장 간단하게 구축할 수 있는 방법으로 nginx를 사용하기로 했다.
# docker image 사용(비추)
docker환경으로 구성하면 더 깔끔할 것 같다.
(다하고 나서 느낀거지만 로컬에 볼륨 매핑을 하지 않으면 컨테이너 종료시 초기화 되는 것이 참 그렇다.)
# nginx image 다운로드
docker image pull nginx

# nginx image 컨테이너로 8080 로컬 포트에 포워딩 하여 올리기
docker run -p 8080:80 nginx
config 파일 수정위해 컨테이너에 접근해야 하고, 에디터를 추가로 설치해야 한다. vim은 몇백 mb이므로 vi나 nano를 설치한다. vi는 이상하게도 버그가 많아서 nano로 선택했다.
# nginx 컨테이너에 bash 접근하여 내부 config를 수정
docker exec -it <컨테이너ID> bash

# editor 설치
apt-get update
apt-get install nano

# config 수정
nano etc/nginx/conf.d/default.conf
수정 전 원본 config파일
server {
    listen       80;
    listen  [::]:80;
    server_name  localhost;

    #access_log  /var/log/nginx/host.access.log  main;

    location / {
        root   /usr/share/nginx/html;
        index  index.html index.htm;
    }
...
수정 방법, 로그 관리위한 수정내용은 모두 뺐다. 최소한의 수정으로 기능을 가능하게 끔 한다.
upstream port 뒤에 weight=숫자 를 써주면 비율로 트래픽을 조절할 수 있다.
upstream <upstream이름> {
	server <host1>:<port1>;
    server <host2>:<port2>;
}

server {
	```
    proxy_pass http://<upstream이름>;
수정 후 config파일
upstream gos {
server host.docker.internal:3001;
server host.docker.internal:3002;
}
server {
listen 80;
listen [::]:80;
server_name localhost;
#access_log /var/log/nginx/host.access.log main;
location / {
root /usr/share/nginx/html;
index index.html index.htm;
proxy_pass http://gos;
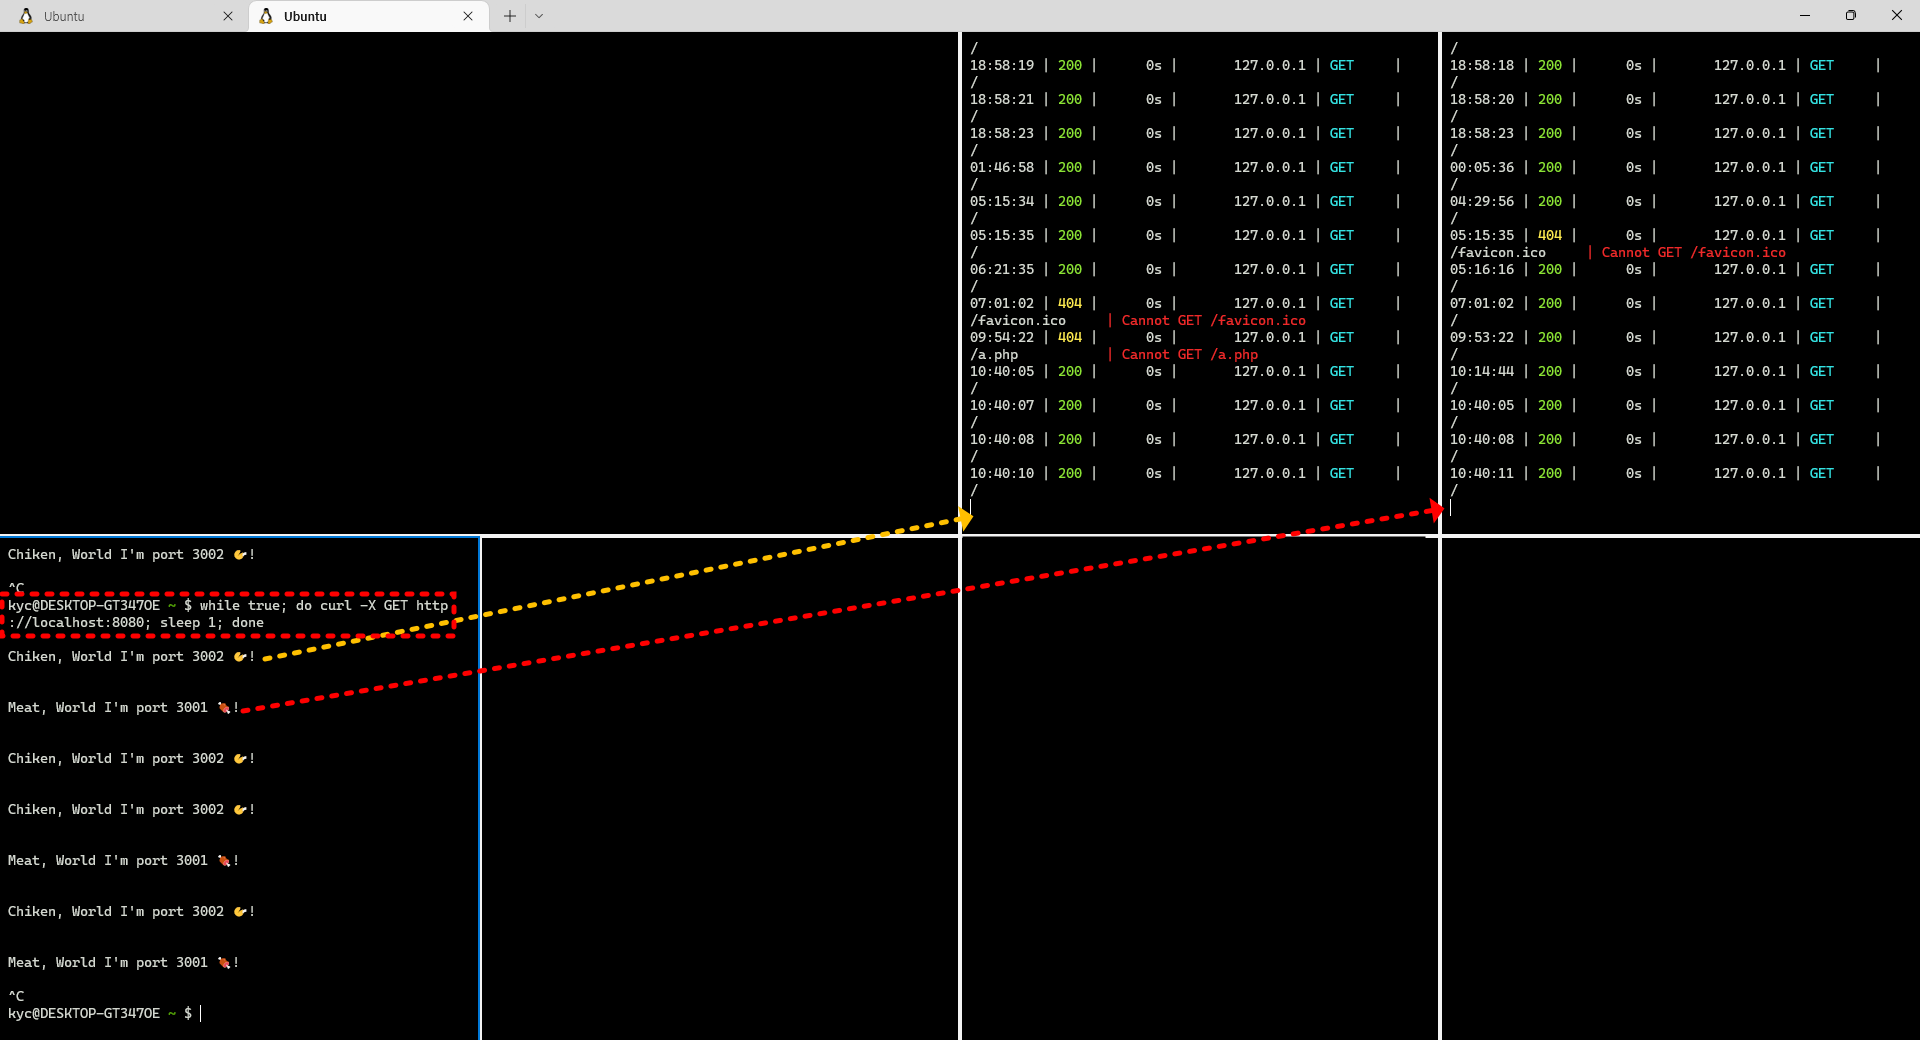
}이렇게 한 후에 curl 방식으로 테스트를 해보면 사진과 같이 잘 작동하는 것을 볼 수 있다.
## docker image 마무리
매핑하는 방법을 몰라 매번 설정을 해줘야 하는 부분이 매우 비효율 적이었다.
분명 방법이 있을 것이라 생각한다. cli에서 -v옵션을 사용한다던지, Dockerfile을 구성해 사용하는 방법이 떠오른다.
우선은 익숙하지 않은 docker라 매핑없이 poc 완성 후, Test-bed에 구성을 따로 해줘야 하는데, 또 그때 가서 작업하기에는 매우 귀찮았다.
그래서 docker-compose.yaml 파일을 사용한 방식으로 변경하기로 했다.
이미 테스트 가능한 것은 확인했기 때문에 docker-compose화만 하면 될 것 같다.
# docker-compose사용
아래와 같이 작성하였다. 한가지 확실하게 해결못한 문제가 있는데, 볼륨에 대한 문제다.
아래 설명하고 있지만, 찾아본 결론은 로컬 dir을 컨테이너에 주입하는 것이다.
docker-compose.yaml
version: "3.3"

services:
  nginx:
    image: nginx
    container_name: nginx
    restart: always
    ports:
      - 8080:80
    volumes:
      - ./nginx/config:/etc/nginx/conf.d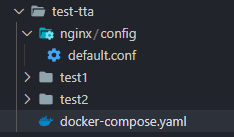
코드와 같이 볼륨 설정을 해놓으면 좌측의 local 디렉토리를 기준으로 우측의 컨테이너에 디렉토리가 생성된다.
다시 말하면 로컬의 /nginx/config 디렉토리에는 아무것도 없기 때문에 컨테이너의 /etc/nginx/conf.d 디렉토리에 원래는 존재해야 하는 default.cof파일이 덮어씌어져서 아무것도 안남게 된다.
결론은 수정하고 싶은 파일을 먼저 복사해 가지고 나와 볼륨위치에 넣어놓아야 한다.
# 사용할 이미지를 올린다. docker imgae 방식은
docker up -p 8080:80 nginx
# docker-compose 방식은
docker-compose up -d

# 원하는 파일을 복사한다.
# docker cp <컨테이너ID>:<컨테이너경로> <로컬경로>
docker cp 45566d7a8025:/etc/nginx/conf.d/default.conf ./nginx/config

# 파일을 수정하고, docker를 다시 올린다.
docker-compose up -d
해결방법도 같이 제시하고 있다.
https://stackoverflow.com/questions/42395748/docker-compose-volume-is-empty-even-from-initializeThe problem is that you're expecting files from the Container to be mounted on your host.
This is not the way it works: it's the other way around:
Docker mounts your host folder in the container folder you specify. If you go inside the container, you will see that where there were supposed to be the init files, there will be nothing (or whatever was in your host folder(s)), and you can write a file in the folder and it will show up on your host.
Your best bet to get the init files and modify them for your container is to:
Create a container without mounting the folders (original container data will be there)
Run the container (the container will have the files in the right place from the installation of nginx etc...) docker run <image>Copy the files out of the container with docker cp
<container>:<container_folder>/* <host_folder>
Now you have the 'original' files from the container init on your host.
Modify the files as needed for the container.
Run the container mounting your host folders with the new files in them.
(중략)...