Android MDC 102 : Material Structure 와 Layout
포스팅 주제
- top app bar
- card view로 이루어진 gridLayout
1. Top App Bar
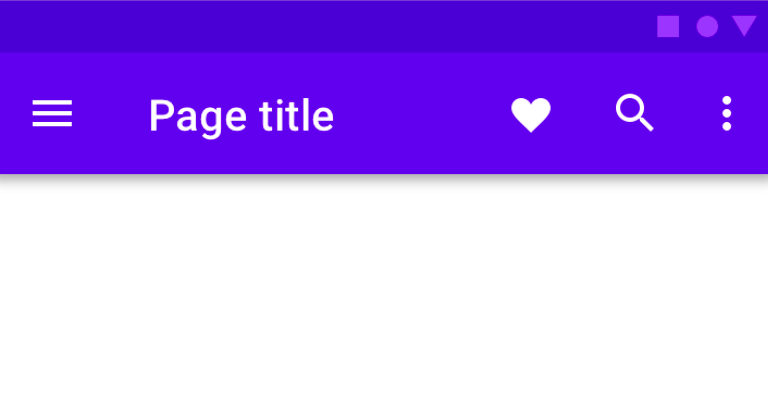
Top App Bar는 app의 상단에 위치하는 bar로 화면의 정보와 작업을 나타낸다.

MDC Top app bar는 아래의 코드를 xml에 추가하여 사용할 수 있다
<com.google.android.material.appbar.AppBarLayout
       android:layout_width="match_parent"
       android:layout_height="wrap_content">

       <androidx.appcompat.widget.Toolbar
           android:id="@+id/app_bar"
           style="@style/Widget.Shrine.Toolbar"
           android:layout_width="match_parent"
           android:layout_height="?attr/actionBarSize"
           app:navigationIcon="@drawable/shr_menu"
           app:title="@string/shr_app_name" />
   </com.google.android.material.appbar.AppBarLayout>
이후 fragment의 onCreateView에서 setSupportActionBar를 통해 app bar를 지정해주면 된다.
override fun onCreateView(
       inflater: LayoutInflater, container: ViewGroup?, savedInstanceState: Bundle?): View? {
   // Inflate the layout for this fragment with the ProductGrid theme
   val view = inflater.inflate(R.layout.shr_product_grid_fragment, container, false)

   // Set up the toolbar.
   (activity as AppCompatActivity).setSupportActionBar(view.app_bar)

   return view;
}
다음으로는 Top App Bar 우측에 보이는 여러 작업 메뉴를 등록해야 한다. 만들어 놓은 작업 메뉴를 onCreateOptionMenu함수에서 등록한다.
override fun onCreateOptionsMenu(menu: Menu, menuInflater: MenuInflater) {
   menuInflater.inflate(R.menu.shr_toolbar_menu, menu)
   super.onCreateOptionsMenu(menu, menuInflater)
}
마지막으로 fragment의 onCreate에 setHasOptionsMenu를 추가한다.
override fun onCreate(savedInstanceState: Bundle?) {
   super.onCreate(savedInstanceState)
   setHasOptionsMenu(true)
}
이제 성공적으로 Top App Bar가 나타난다.

2. Grid Layout
GridLayout은 RecyclerView로 이루어지며 Card View는 MDC 102 강의에 나타나 있다. 핵심적인 부분인 ViewAdapter가 어떻게 작동하는지 보고 fragment에서 ViewAdapter를 어떻게 사용하는지 살펴보자
class ProductCardRecyclerViewAdapter(private val productList: List<ProductEntry>) : RecyclerView.Adapter<ProductCardViewHolder>() {

    override fun onCreateViewHolder(parent: ViewGroup, viewType: Int): ProductCardViewHolder {
        val layoutView = LayoutInflater.from(parent.context).inflate(R.layout.shr_product_card, parent, false)
        return ProductCardViewHolder(layoutView)
    }

    override fun onBindViewHolder(holder: ProductCardViewHolder, position: Int) {
        if(position < productList.size) {
            val product = productList[position]
            holder.productTitle.text = product.title
            holder.productPrice.text = product.price
            ImageRequester.setImageFromUrl(holder.productImage, product.url)
        }
    }

    override fun getItemCount(): Int {
        return productList.size
    }
}-
onCreateViewHolder
ProductCardViewHolder를 만든다. -
onBindViewHolder
특정 위치에 어떤 ProductCarViewHolder가 위치해야 하는지를 결정한다. 또한 해당 viewHolder의 image, title, price를 데이터 맞게 넣어준다. -
getImageCount
전체 product 개수를 반환한다.
이제 fragment에서 어떻게 gridlayout을 만드는지 살펴보자
override fun onCreateView(
       inflater: LayoutInflater, container: ViewGroup?, savedInstanceState: Bundle?): View? {
   // Inflate the layout for this fragment with the ProductGrid theme
   val view = inflater.inflate(R.layout.shr_product_grid_fragment, container, false)

   // Set up the RecyclerView
   view.recycler_view.setHasFixedSize(true)
   view.recycler_view.layoutManager = GridLayoutManager(context, 2, RecyclerView.VERTICAL, false)
   val adapter = ProductCardRecyclerViewAdapter(
           ProductEntry.initProductEntryList(resources))
   view.recycler_view.adapter = adapter
   val largePadding = resources.getDimensionPixelSize(R.dimen.shr_product_grid_spacing)
   val smallPadding = resources.getDimensionPixelSize(R.dimen.shr_product_grid_spacing_small)
   view.recycler_view.addItemDecoration(ProductGridItemDecoration(largePadding, smallPadding))

   return view;
}-
view.recycler_view.setHasFixedSize(true)
recyclerView에 아이템을 추가하거나 제거할 때 레이아웃의 너비 혹은 높이가 바뀔 수 있다. 그러면 다시 View를 그려야 하기 때문에 리소스가 많이 소비된다. 이를 방지하기 위해 setHasFixedSize를 true로 세팅한다. -
GridLayoutManager(context, 2, RecyclerView.VERTICAL, false)
2개의 Column를 가지는 GridLayoutManager을 만든다. -
view.recycler_view.addItemDecoration(ProductGridItemDecoration(largePadding, smallPadding))
RecyclerView의 각 child를 정의해 놓은 ProductGridItemDecoration에 맞게 꾸민다.
[참고자료]