개요
이전 포스팅에서는 테라폼을 사용하여 단일 서버를 배포하였다.
하지만 실제 운영 환경에서 서버가 하나 뿐인 경우는 거의 없다. 단일 장애점을 피하기 위해 단일 서버가 아닌 서버 클러스터를 구성하여 트래픽을 분산시키고, 트래픽 양에 따라 클러스터 크기를 늘리거나 줄여야 한다.
AWS에서는 오토스케일링 그룹(Auto Scaling Group, ASG)를 사용하면 EC2 인스턴스 클러스터 시작, 각 인스턴스 상태 모니터링, 실패한 인스턴스 교체, 로드에 따른 클러스터 사이즈 조정 등 많은 작업을 자동으로 처리할 수 있다.
본 포스팅에서는 테라폼을 사용하여 ASG 뿐만아니라 사용자 VPC, 보안그룹(SG), EC2, ELB를 배포하는 과정을 진행한다.
실습
VPC 배포
-
신규 디렉터리 생성 및 이동
mkdir my-vpc-ec2-asg
cd my-vpc-ec2-asg
-
VPC 생성
cat <<EOT > vpc.tf
provider "aws" {
  region  = "ap-northeast-2"
}

resource "aws_vpc" "myvpc" {
  cidr_block       = "10.10.0.0/16"

  tags = {
    Name = "jinju-tf-study-vpc"
  }
}
EOT
jinju-tf-study-vpc라는 이름을 가진 VPC를 서울 리전에 배포한다.
CIDR은 10.10.0.0./16으로 설정하였다.# 배포 terraform init terraform plan && terraform apply -auto-approve terraform state list # CLI를 통한 VPC 확인 방법 export AWS_PAGER="" aws ec2 describe-vpcs | jq aws ec2 describe-vpcs --output yaml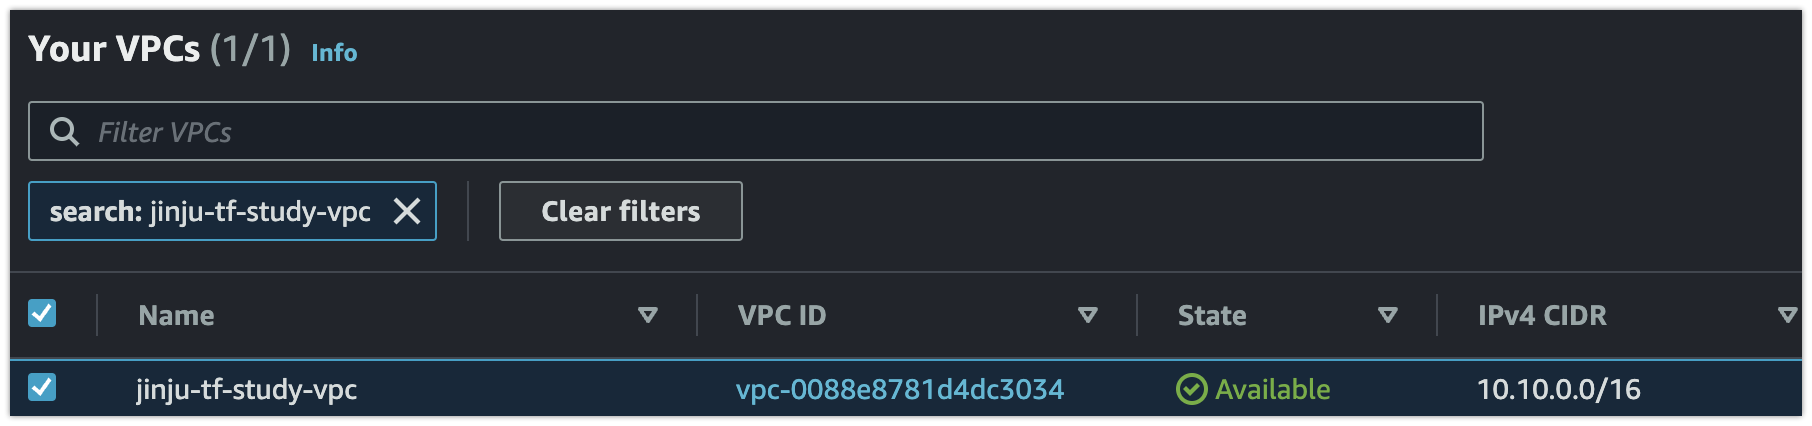 콘솔에서도 생성된 VPC를 확인할 수 있다.
 -
생성한 VPC DNS 옵션 수정
VPC에 DNS를 설정하려면 DNS 호스트 이름과 DNS 확인이 모두 VPC에서 활성화되었는지 확인해야 한다.
즉, VPC 네트워크 속성enableDnsHostnames및enableDnsSupport는true로 설정되어 있어야 한다. (기본 값은 False)cat <<EOT > vpc.tf provider "aws" { region = "ap-northeast-2" } resource "aws_vpc" "myvpc" { cidr_block = "10.10.0.0/16" enable_dns_hostnames = true tags = { Name = "jinju-tf-study-vpc" } } EOT# 배포 terraform plan && terraform apply -auto-approve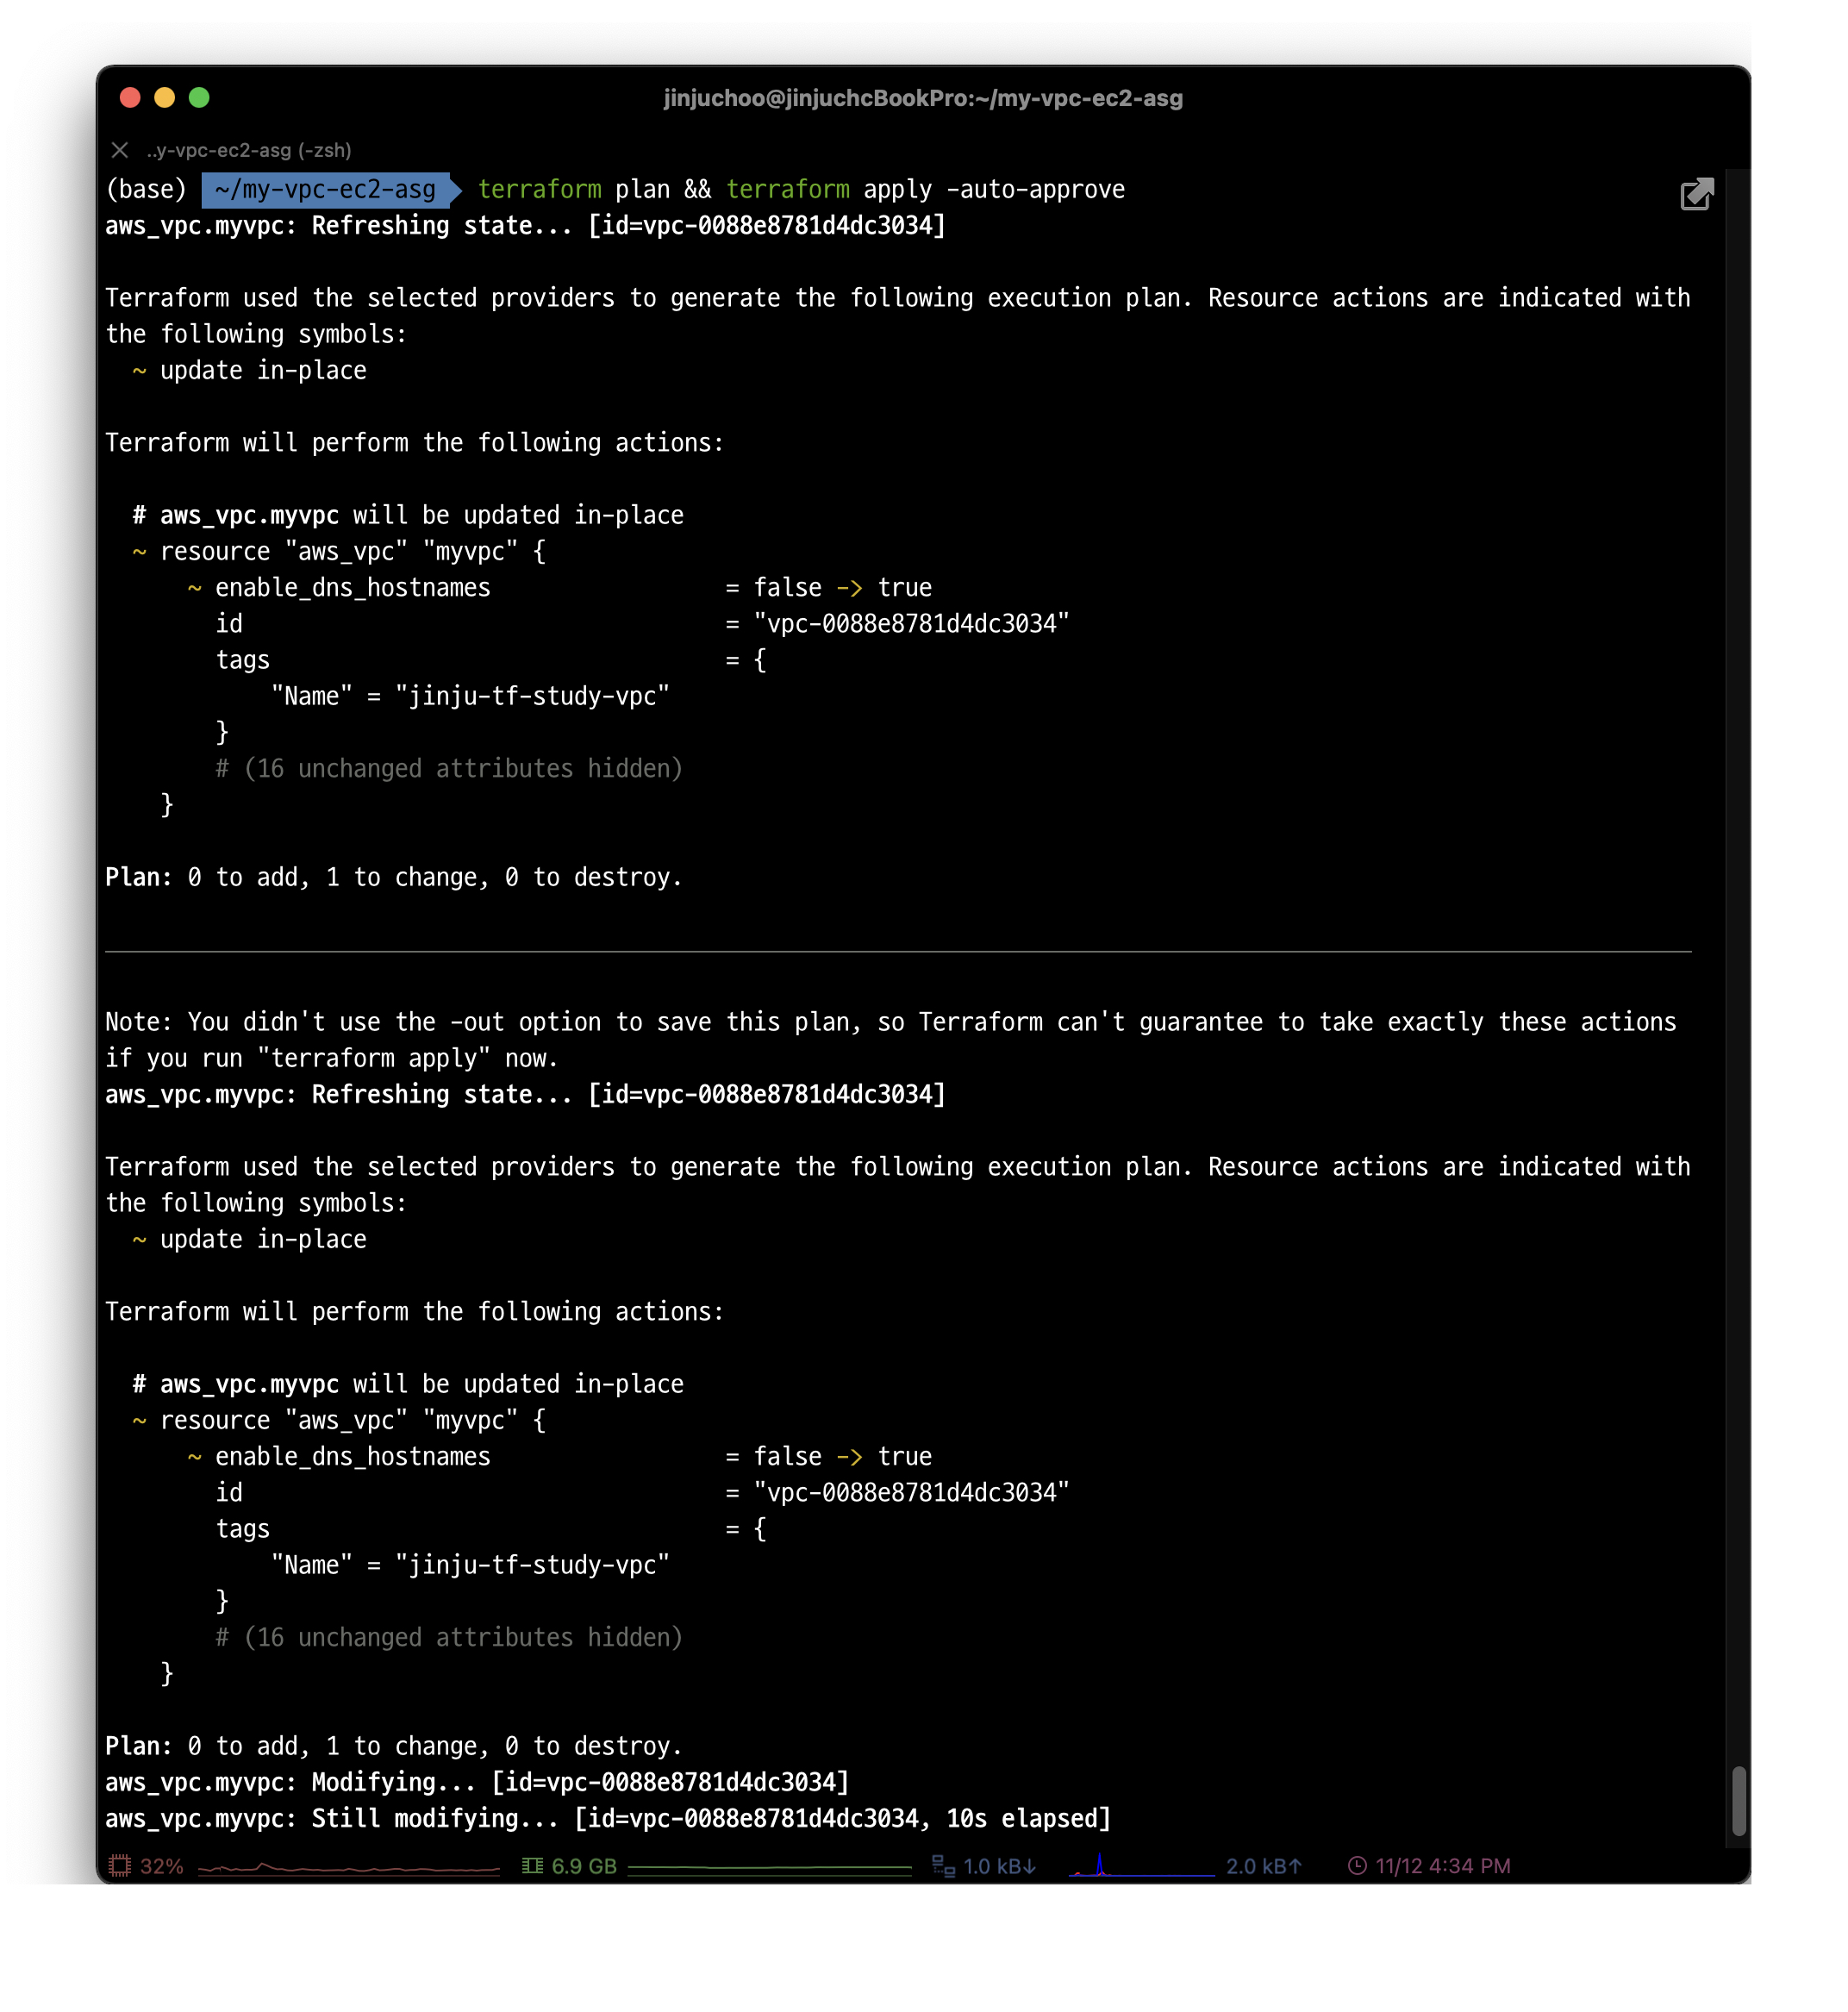 두 개의 변경 사항이 정상적으로 반영되어 수정되었다.
 -
서브넷 2개 추가 생성
cat <<EOT > vpc.tf provider "aws" { region = "ap-northeast-2" } resource "aws_vpc" "myvpc" { cidr_block = "10.10.0.0/16" enable_dns_support = true enable_dns_hostnames = true tags = { Name = "jinju-tf-study-vpc" } } resource "aws_subnet" "mysubnet1" { vpc_id = aws_vpc.myvpc.id cidr_block = "10.10.1.0/24" availability_zone = "ap-northeast-2a" tags = { Name = "jinju-tf-study-subnet1" } } resource "aws_subnet" "mysubnet2" { vpc_id = aws_vpc.myvpc.id cidr_block = "10.10.2.0/24" availability_zone = "ap-northeast-2c" tags = { Name = "jinju-tf-study-subnet2" } } EOT# 배포 terraform plan && terraform apply -auto-approve terraform state list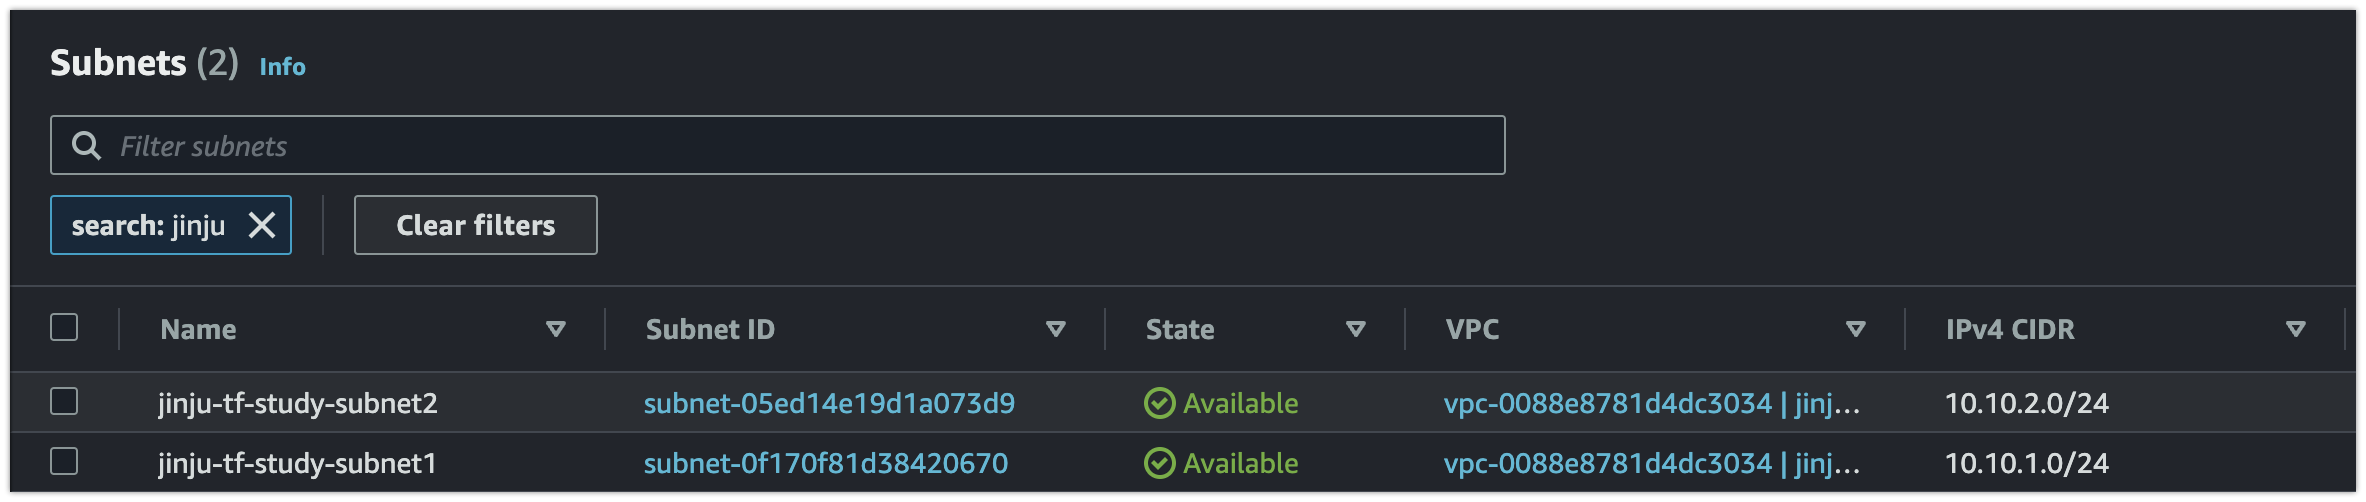
-
인터넷 통신을 위한 igw 생성
cat <<EOT > vpc.tf provider "aws" { region = "ap-northeast-2" } resource "aws_vpc" "myvpc" { cidr_block = "10.10.0.0/16" enable_dns_support = true enable_dns_hostnames = true tags = { Name = "jinju-tf-study-vpc" } } resource "aws_subnet" "mysubnet1" { vpc_id = aws_vpc.myvpc.id cidr_block = "10.10.1.0/24" availability_zone = "ap-northeast-2a" tags = { Name = "jinju-tf-study-subnet1" } } resource "aws_subnet" "mysubnet2" { vpc_id = aws_vpc.myvpc.id cidr_block = "10.10.2.0/24" availability_zone = "ap-northeast-2c" tags = { Name = "jinju-tf-study-subnet2" } } resource "aws_internet_gateway" "myigw" { vpc_id = aws_vpc.myvpc.id tags = { Name = "jinju-tf-study-igw" } } EOT# 배포 terraform plan && terraform apply -auto-approve terraform state list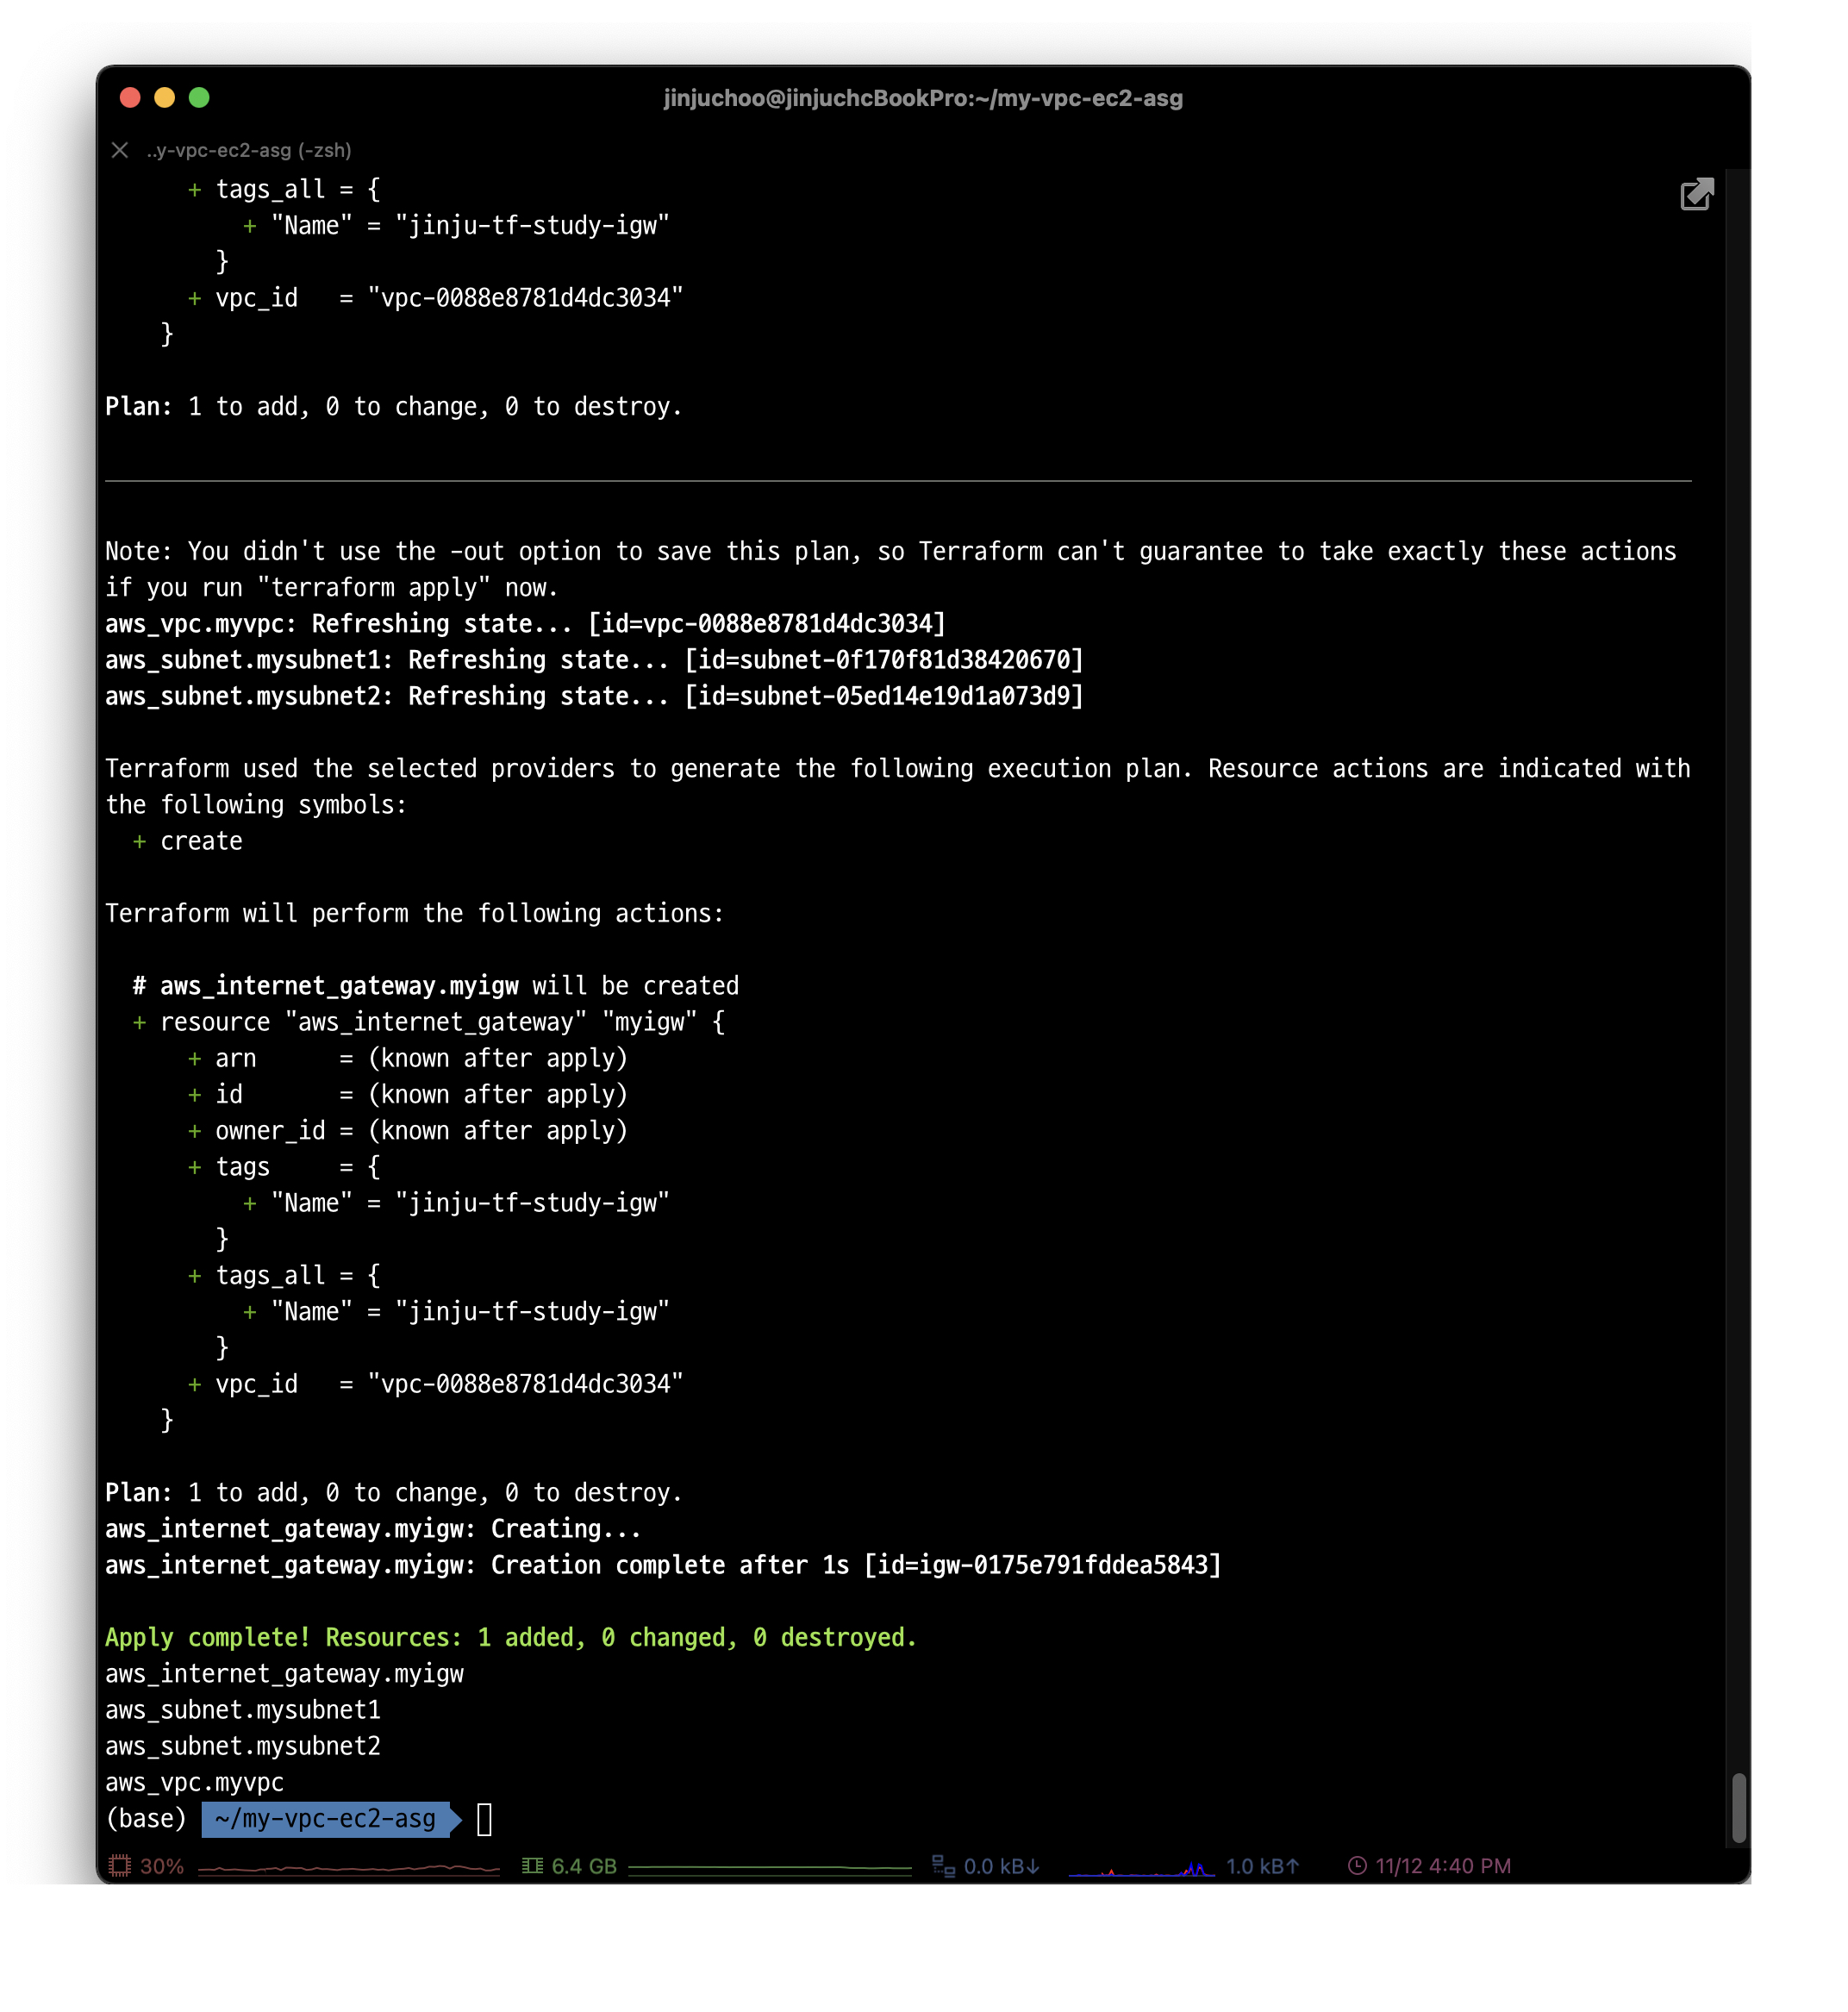

-
라우팅 테이블 구성
cat <<EOT > vpc.tf provider "aws" { region = "ap-northeast-2" } resource "aws_vpc" "myvpc" { cidr_block = "10.10.0.0/16" enable_dns_support = true enable_dns_hostnames = true tags = { Name = "jinju-tf-study-vpc" } } resource "aws_subnet" "mysubnet1" { vpc_id = aws_vpc.myvpc.id cidr_block = "10.10.1.0/24" availability_zone = "ap-northeast-2a" tags = { Name = "jinju-tf-study-subnet1" } } resource "aws_subnet" "mysubnet2" { vpc_id = aws_vpc.myvpc.id cidr_block = "10.10.2.0/24" availability_zone = "ap-northeast-2c" tags = { Name = "jinju-tf-study-subnet2" } } resource "aws_internet_gateway" "myigw" { vpc_id = aws_vpc.myvpc.id tags = { Name = "jinju-tf-study-igw" } } resource "aws_route_table" "myrt" { vpc_id = aws_vpc.myvpc.id tags = { Name = "jinju-tf-study-rt" } } resource "aws_route_table_association" "myrtassociation1" { subnet_id = aws_subnet.mysubnet1.id route_table_id = aws_route_table.myrt.id } resource "aws_route_table_association" "myrtassociation2" { subnet_id = aws_subnet.mysubnet2.id route_table_id = aws_route_table.myrt.id } resource "aws_route" "mydefaultroute" { route_table_id = aws_route_table.myrt.id destination_cidr_block = "0.0.0.0/0" gateway_id = aws_internet_gateway.myigw.id } EOTRoute table은 여러 서브넷에서 동시에 사용할 수 있으며, 이렇게 연결하는 작업을 Association 이라고 한다. 먼저 생성한 두 개의 서브넷과의 연결을 위해 aws_route_table_association을 사용하였다.
# 배포 terraform plan && terraform apply -auto-approve terraform state list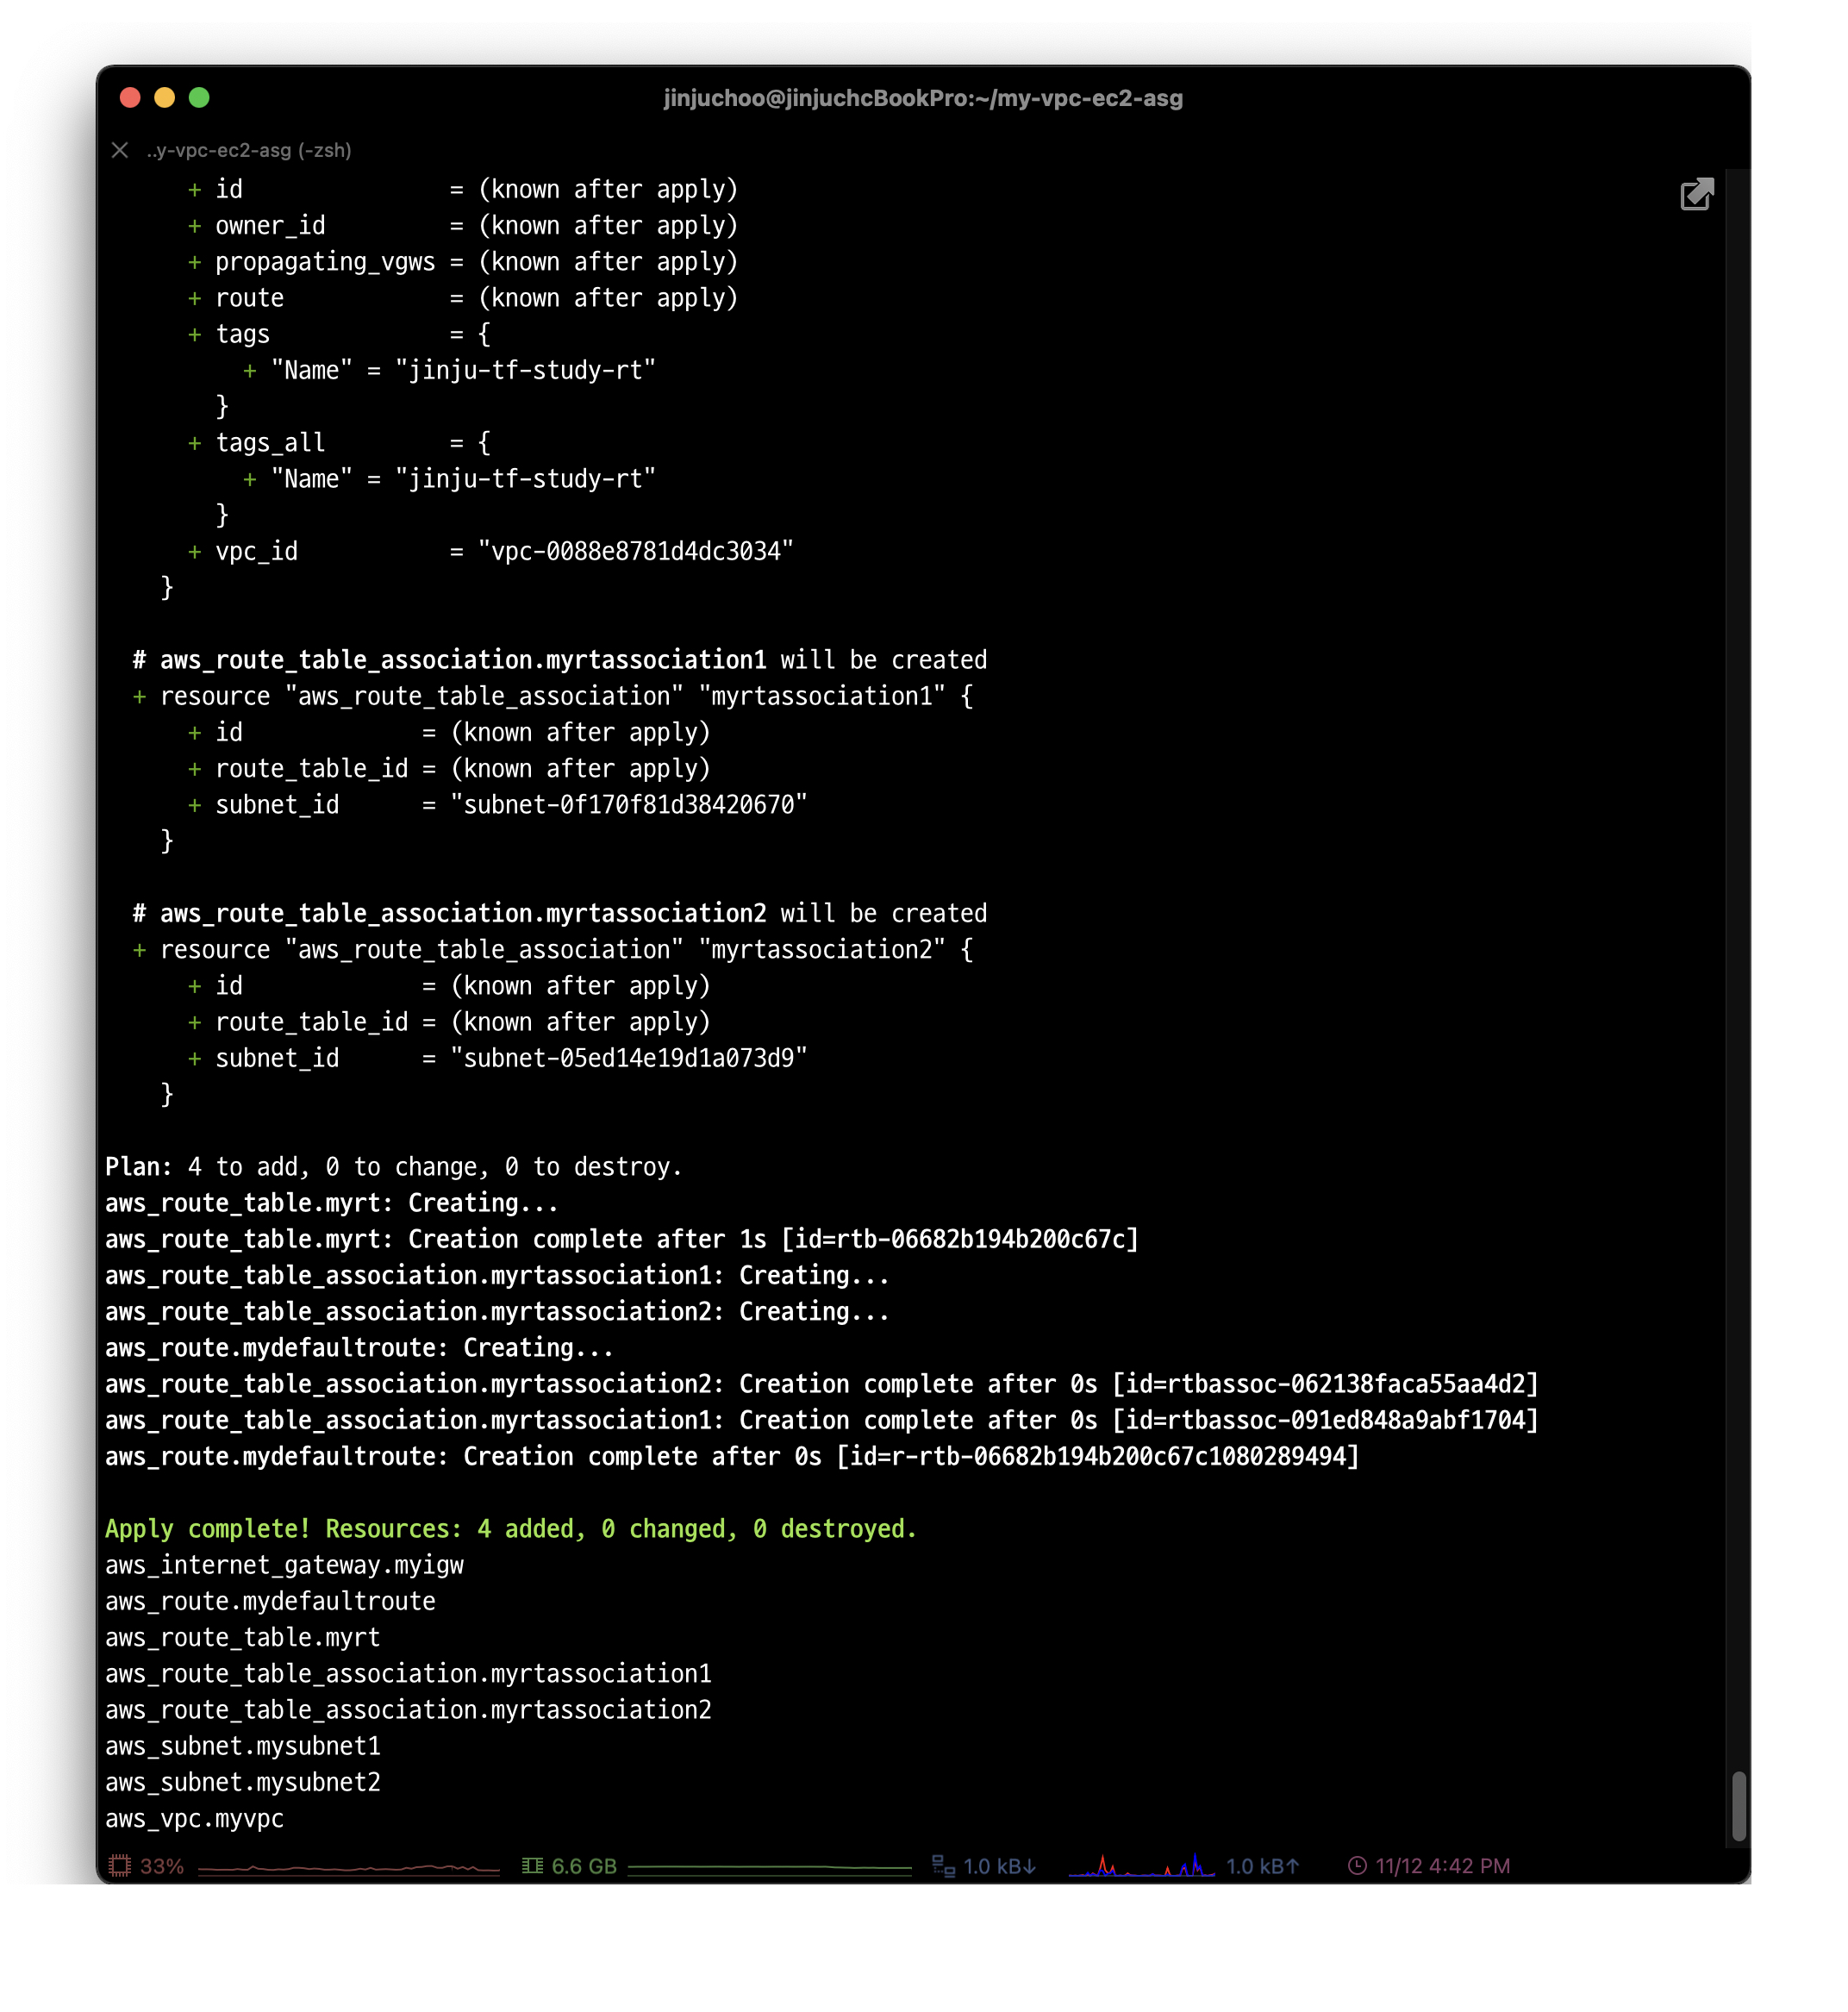
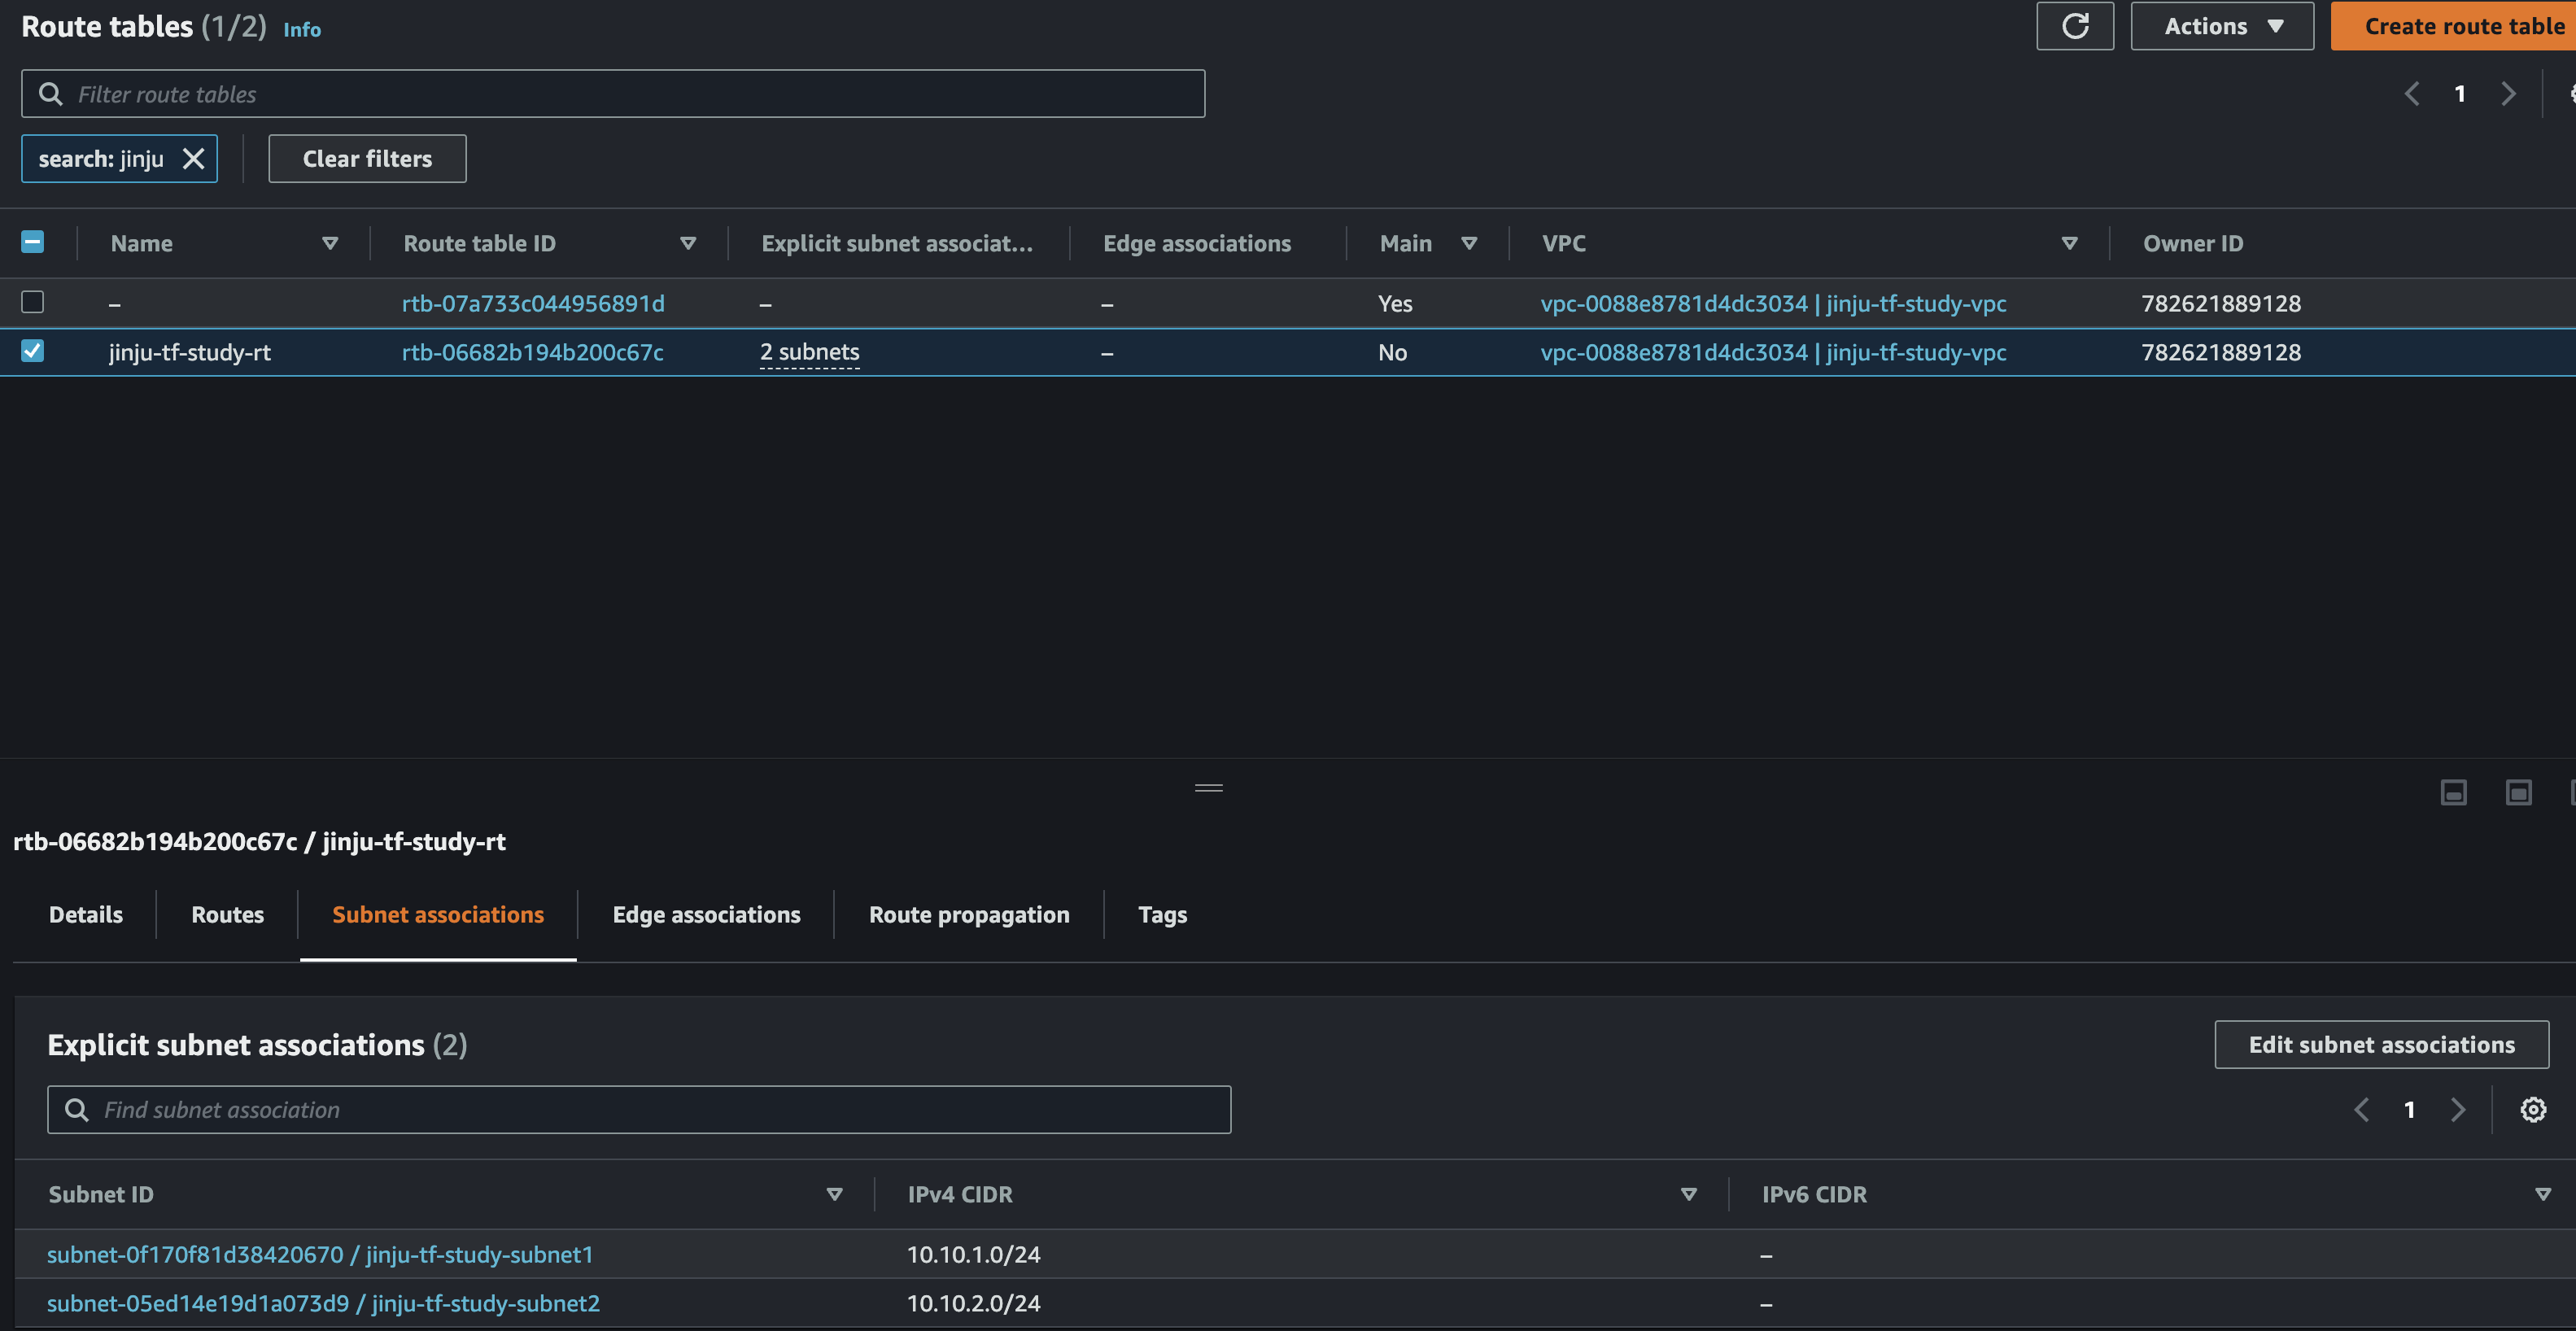 라우팅 테이블이 정상적으로 생성되었고, 두 개의 서브넷과도 잘 연결되어 있는 것을 확인할 수 있다.
보안그룹 배포
-
보안그룹 생성
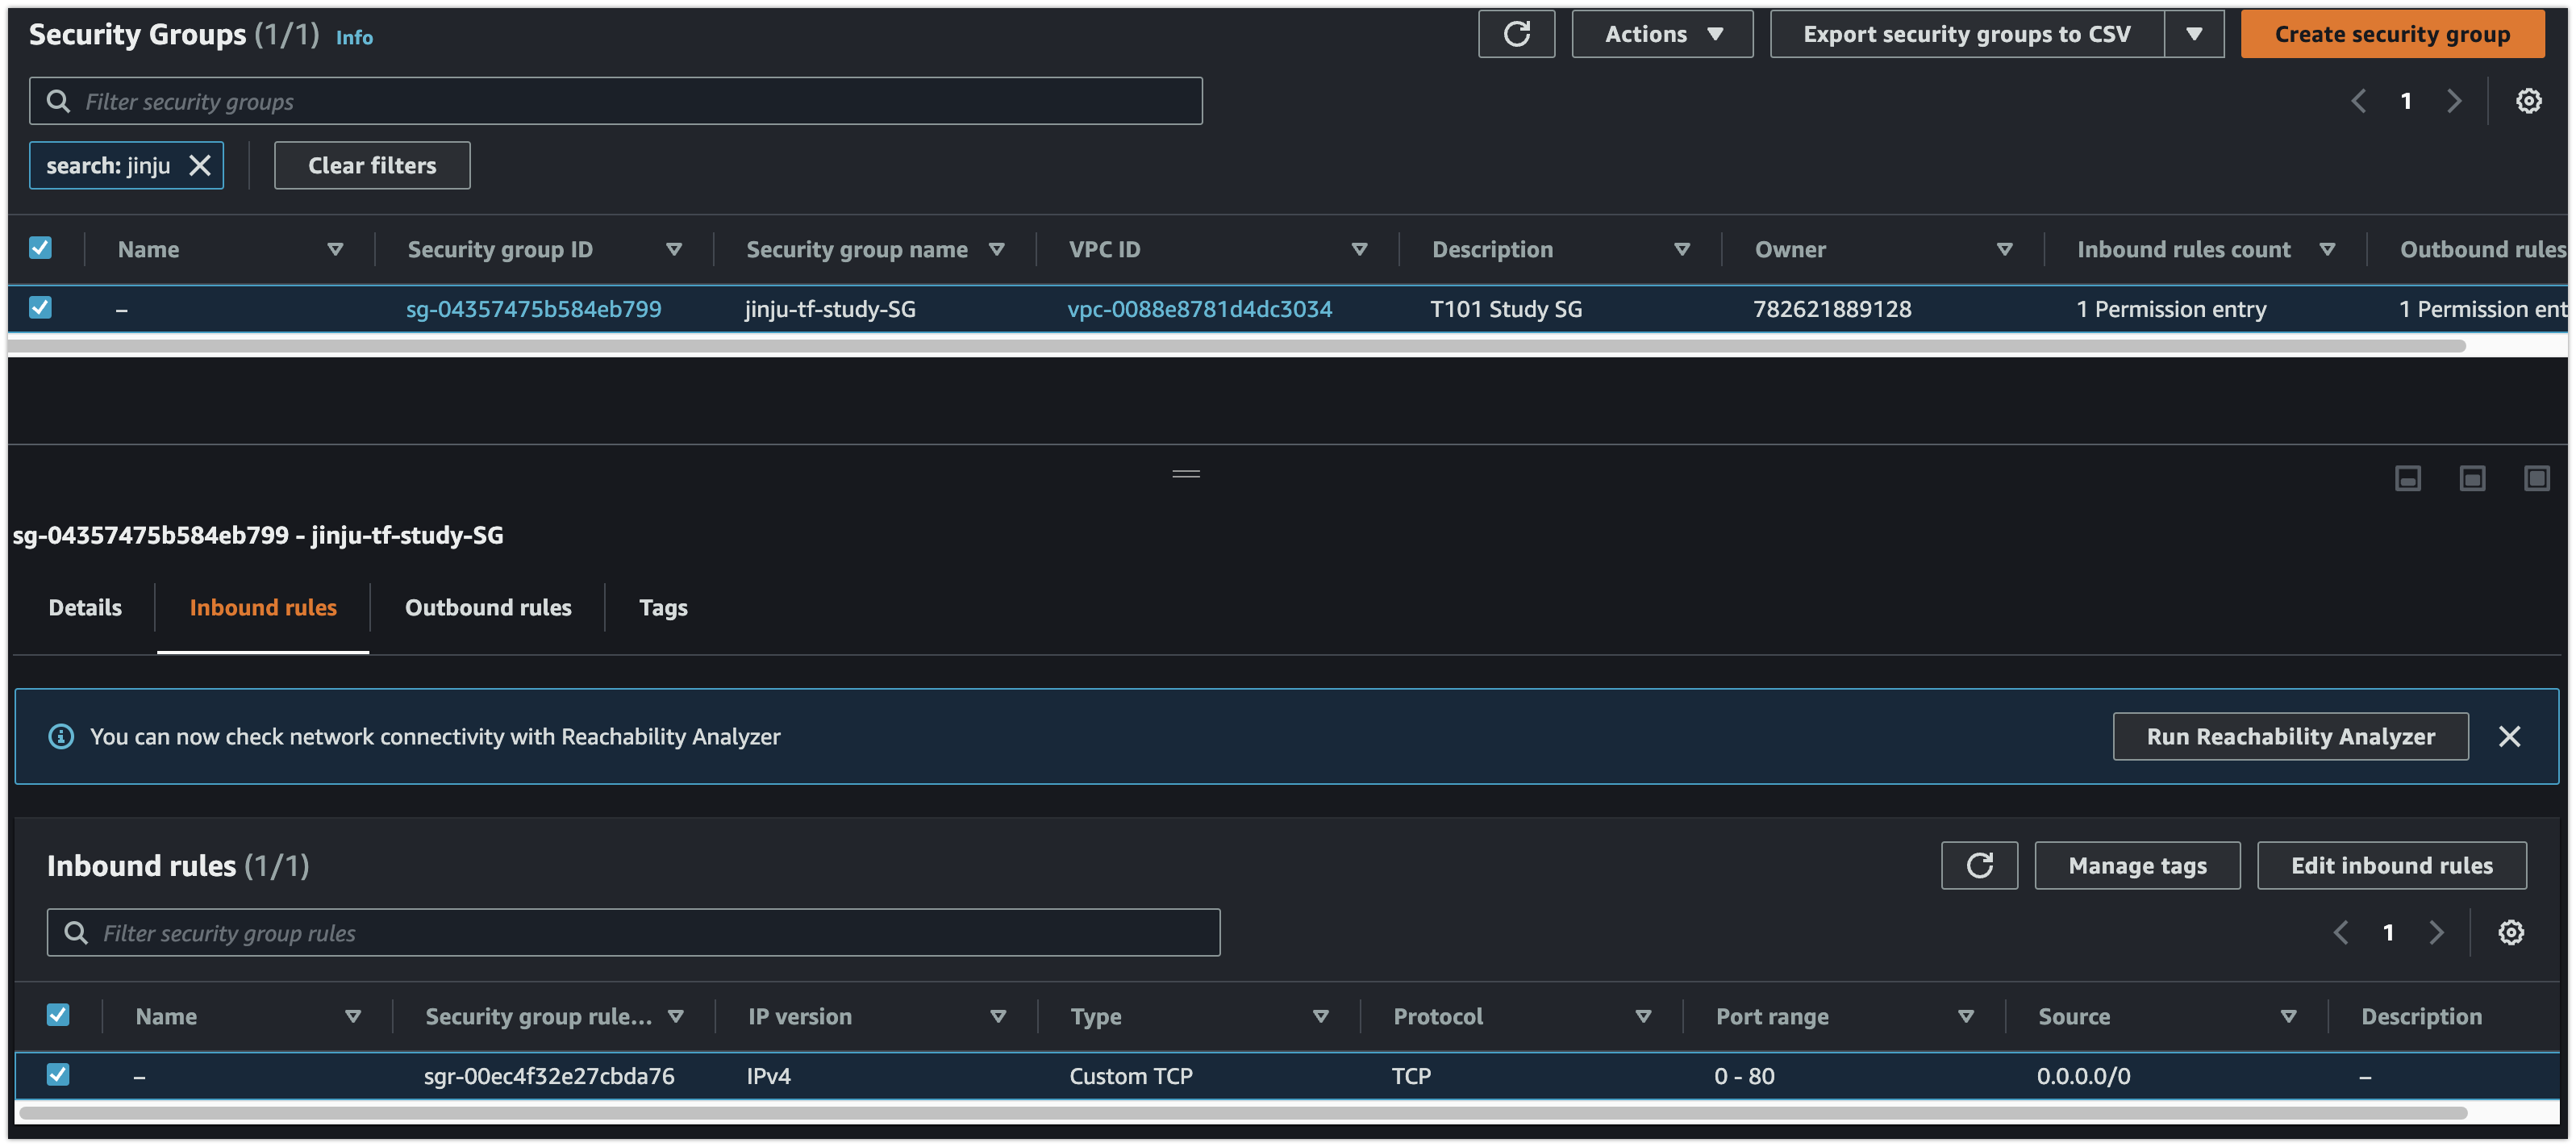
cat <<EOT > sg.tf resource "aws_security_group" "mysg" { vpc_id = aws_vpc.myvpc.id name = "jinju-tf-study-SG" description = "T101 Study SG" } resource "aws_security_group_rule" "mysginbound" { type = "ingress" from_port = 0 to_port = 80 protocol = "tcp" cidr_blocks = ["0.0.0.0/0"] security_group_id = aws_security_group.mysg.id } resource "aws_security_group_rule" "mysgoutbound" { type = "egress" from_port = 0 to_port = 0 protocol = "-1" cidr_blocks = ["0.0.0.0/0"] security_group_id = aws_security_group.mysg.id } EOT# 배포 terraform plan && terraform apply -auto-approve terraform state list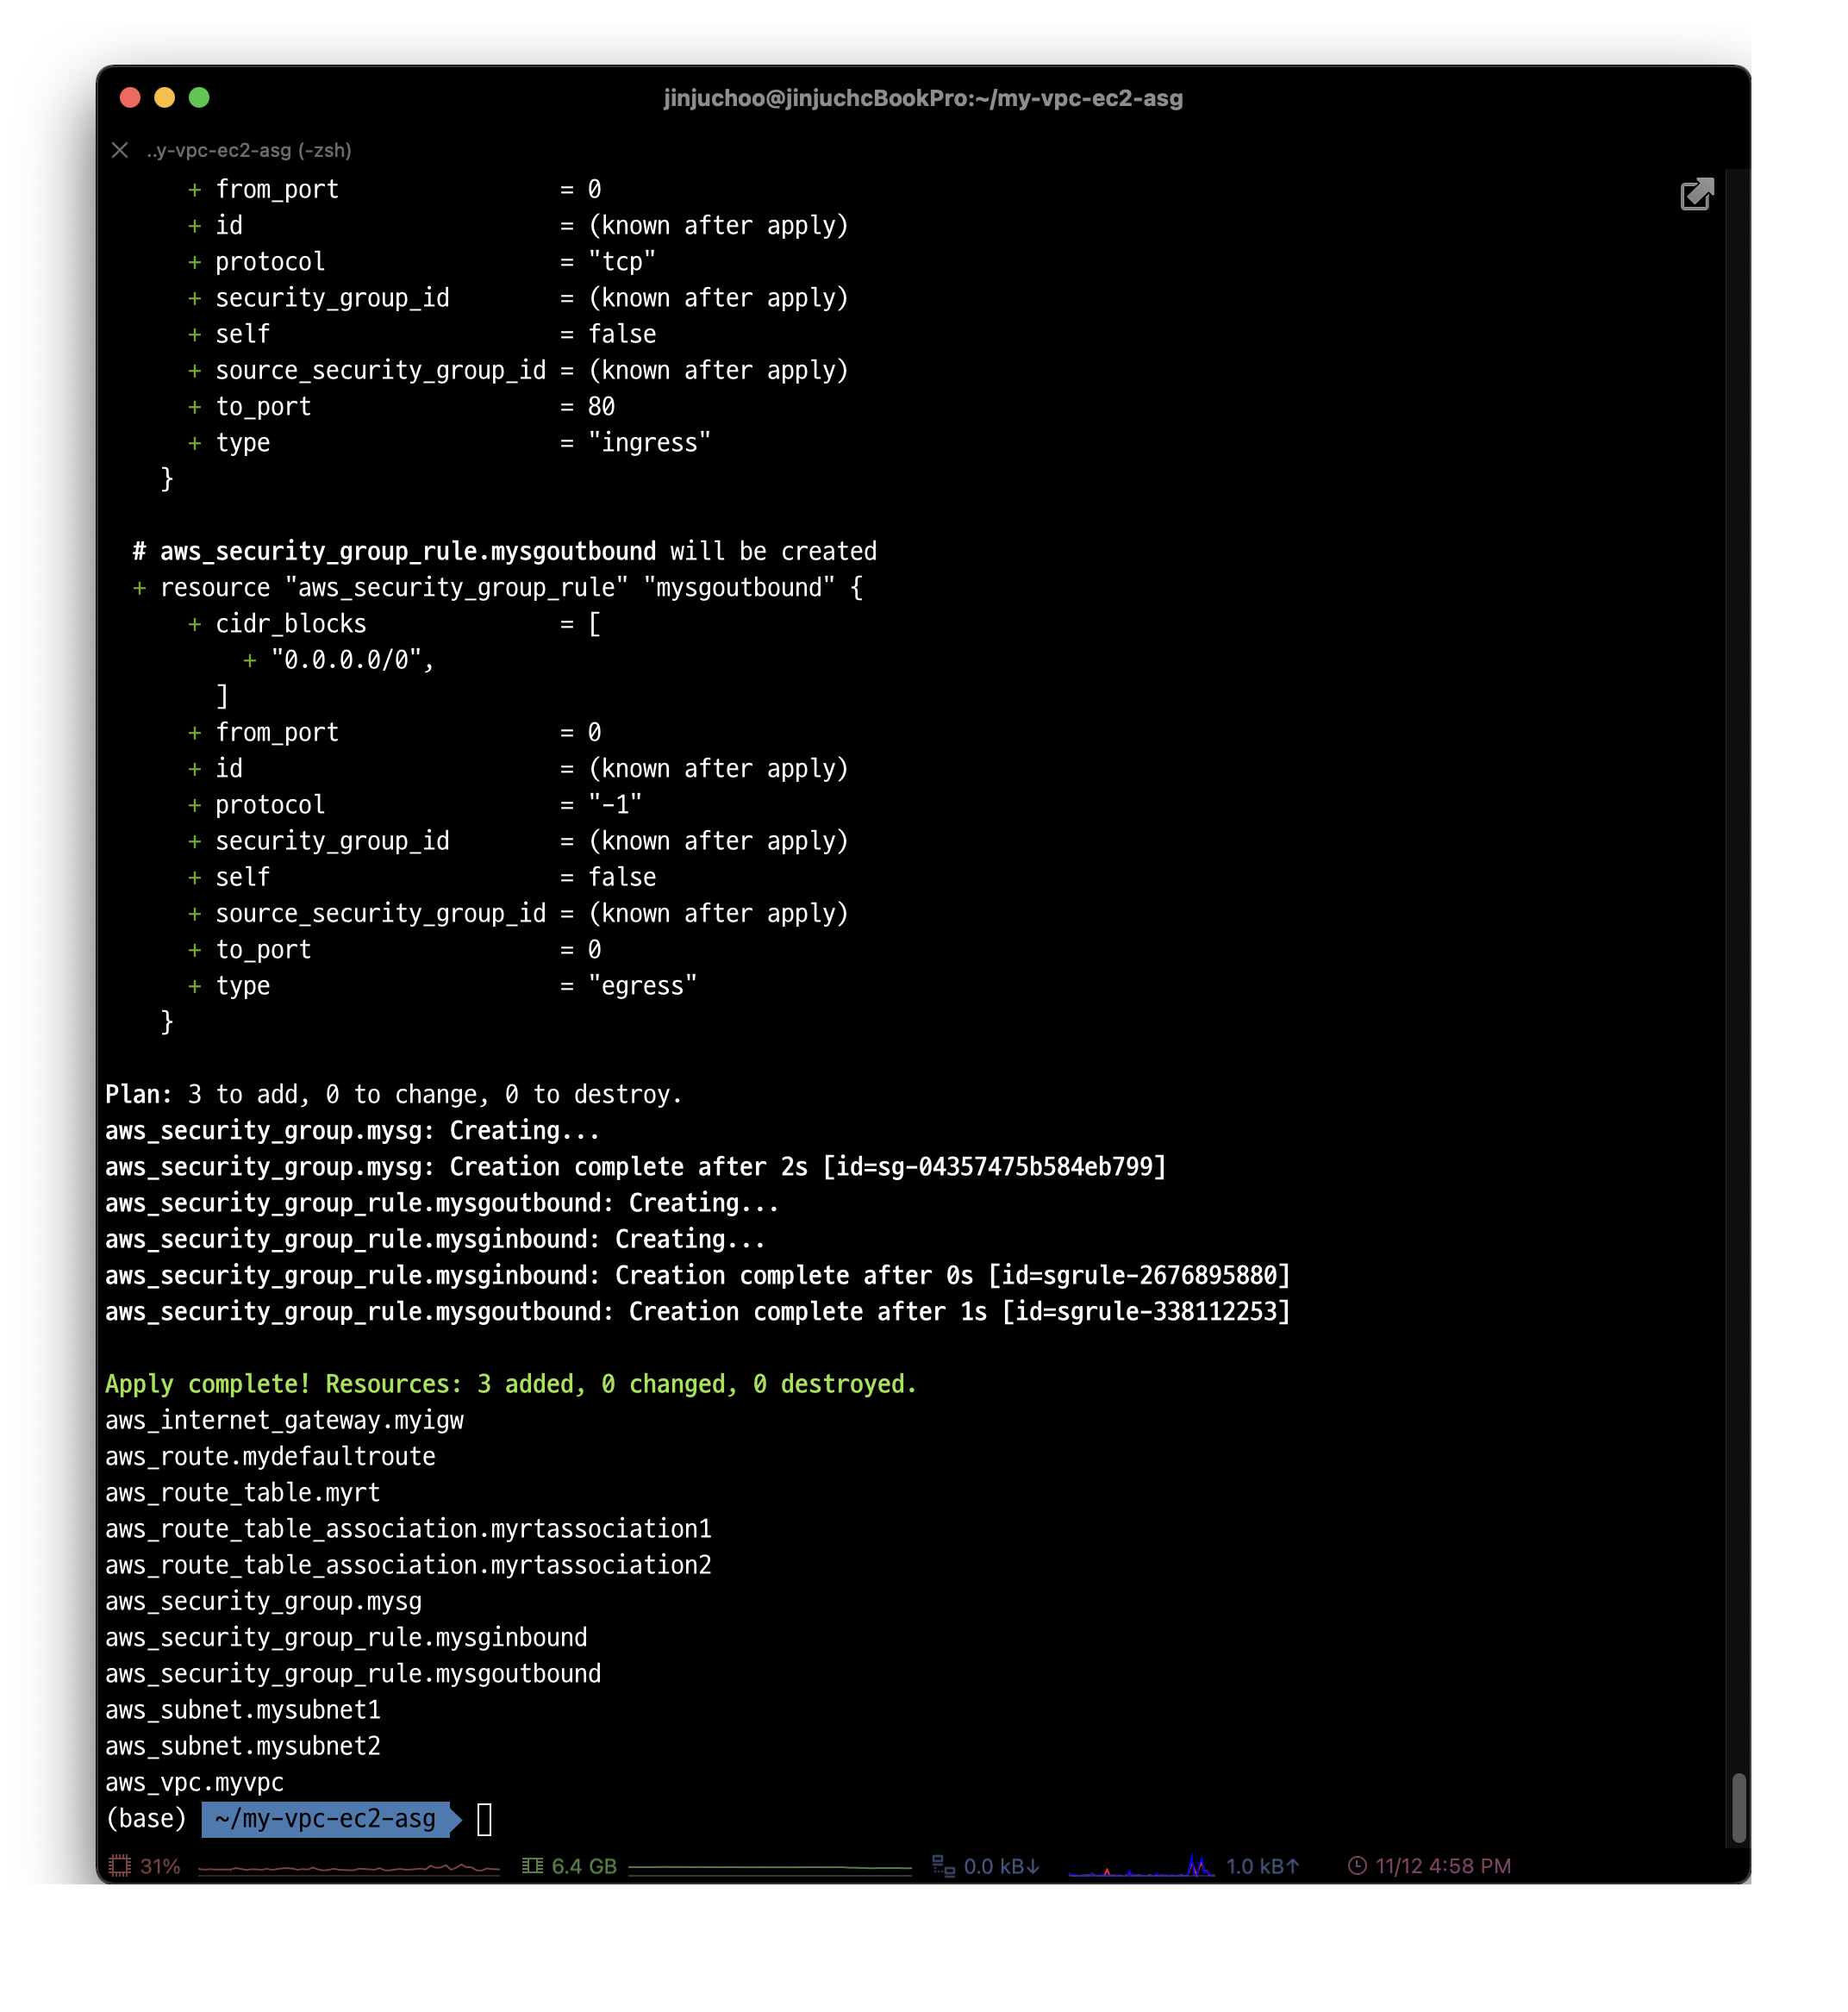
EC2 배포
-
EC2 생성
cat <<EOT > ec2.tf data "aws_ami" "my_amazonlinux2" { most_recent = true filter { name = "owner-alias" values = ["amazon"] } filter { name = "name" values = ["amzn2-ami-hvm-*-x86_64-ebs"] } owners = ["amazon"] } resource "aws_instance" "myec2" { depends_on = [ aws_internet_gateway.myigw ] ami = data.aws_ami.my_amazonlinux2.id associate_public_ip_address = true instance_type = "t2.micro" vpc_security_group_ids = ["\${aws_security_group.mysg.id}"] subnet_id = aws_subnet.mysubnet1.id user_data = <<-EOF #!/bin/bash wget https://busybox.net/downloads/binaries/1.31.0-defconfig-multiarch-musl/busybox-x86_64 mv busybox-x86_64 busybox chmod +x busybox RZAZ=\$(curl http://169.254.169.254/latest/meta-data/placement/availability-zone-id) IID=\$(curl 169.254.169.254/latest/meta-data/instance-id) LIP=\$(curl 169.254.169.254/latest/meta-data/local-ipv4) echo "<h1>RegionAz(\$RZAZ) : Instance ID(\$IID) : Private IP(\$LIP) : Web Server</h1>" > index.html nohup ./busybox httpd -f -p 80 & EOF user_data_replace_on_change = true tags = { Name = "jinju-tf-study-ec2" } } output "myec2_public_ip" { value = aws_instance.myec2.public_ip description = "The public IP of the Instance" } EOT# EC2 확인 terraform plan && terraform apply -auto-approve terraform state list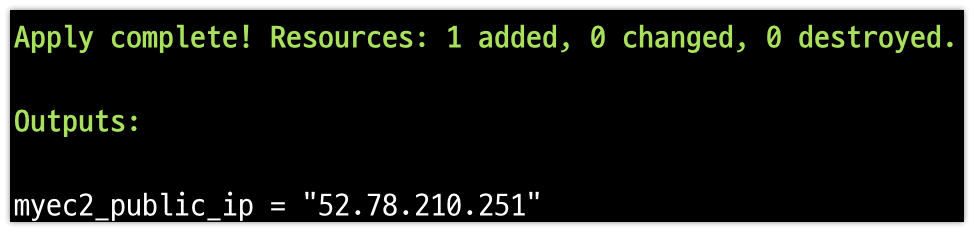
 Outputs에 출력된 퍼블릭 IP를 대상으로 curl 명령어를 실행하였고, 정상적으로 웹 서버에 접근할 수 있었다.
 -
EC2 삭제
rm -f ec2.tf ; terraform apply -auto-approve
오토 스케일링 그룹 배포
만약 테라폼 실습 이전에 콘솔에서 클릭하여 수동으로 오토스케일링 그룹을 생성해본 적이 없다면, 과정 이해를 위해 반드시 해당 경험 후 계속 진행하기를 추천한다 - 참고
-
오토 스케일링 그룹 배포
cat <<EOT > asg.tf data "aws_ami" "my_amazonlinux2" { most_recent = true filter { name = "owner-alias" values = ["amazon"] } filter { name = "name" values = ["amzn2-ami-hvm-*-x86_64-ebs"] } owners = ["amazon"] } resource "aws_launch_configuration" "mylauchconfig" { name_prefix = "jinju-lauchconfig-" image_id = data.aws_ami.my_amazonlinux2.id instance_type = "t2.micro" security_groups = [aws_security_group.mysg.id] associate_public_ip_address = true user_data = <<-EOF #!/bin/bash wget https://busybox.net/downloads/binaries/1.31.0-defconfig-multiarch-musl/busybox-x86_64 mv busybox-x86_64 busybox chmod +x busybox RZAZ=\$(curl http://169.254.169.254/latest/meta-data/placement/availability-zone-id) IID=\$(curl 169.254.169.254/latest/meta-data/instance-id) LIP=\$(curl 169.254.169.254/latest/meta-data/local-ipv4) echo "<h1>RegionAz(\$RZAZ) : Instance ID(\$IID) : Private IP(\$LIP) : Web Server</h1>" > index.html nohup ./busybox httpd -f -p 80 & EOF # Required when using a launch configuration with an auto scaling group. lifecycle { create_before_destroy = true } } resource "aws_autoscaling_group" "myasg" { name = "myasg" launch_configuration = aws_launch_configuration.mylauchconfig.name vpc_zone_identifier = [aws_subnet.mysubnet1.id, aws_subnet.mysubnet2.id] min_size = 2 max_size = 10 tag { key = "Name" value = "terraform-asg" propagate_at_launch = true } } EOT코드 내용을 자세히 살펴보자.
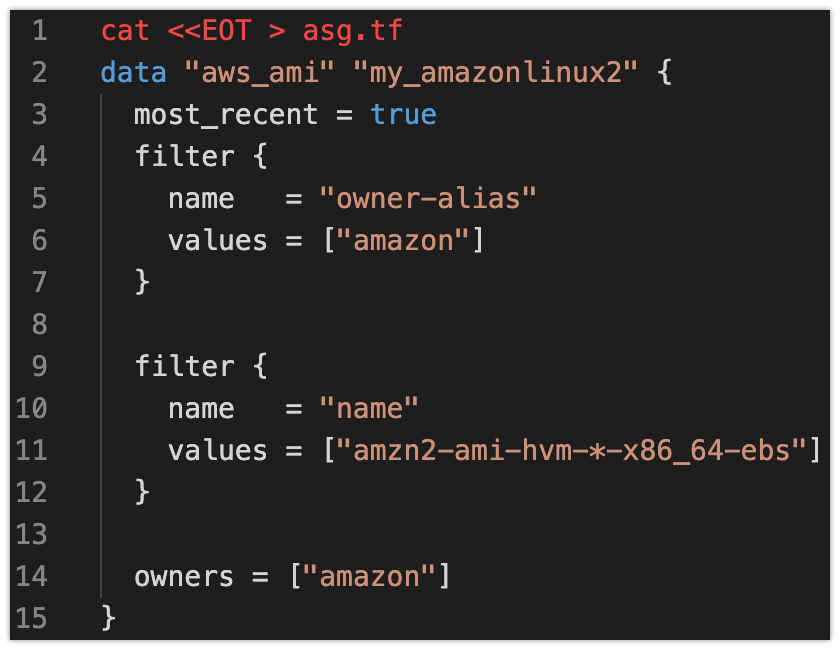 위 코드는 data 소스를 사용하여 AWS에서 filter 값과 일치하는 aws_ami를 불러오는 내용이다.
3번 라인이 most_recent = true 이므로 항상 최신 이미지를 불러온다.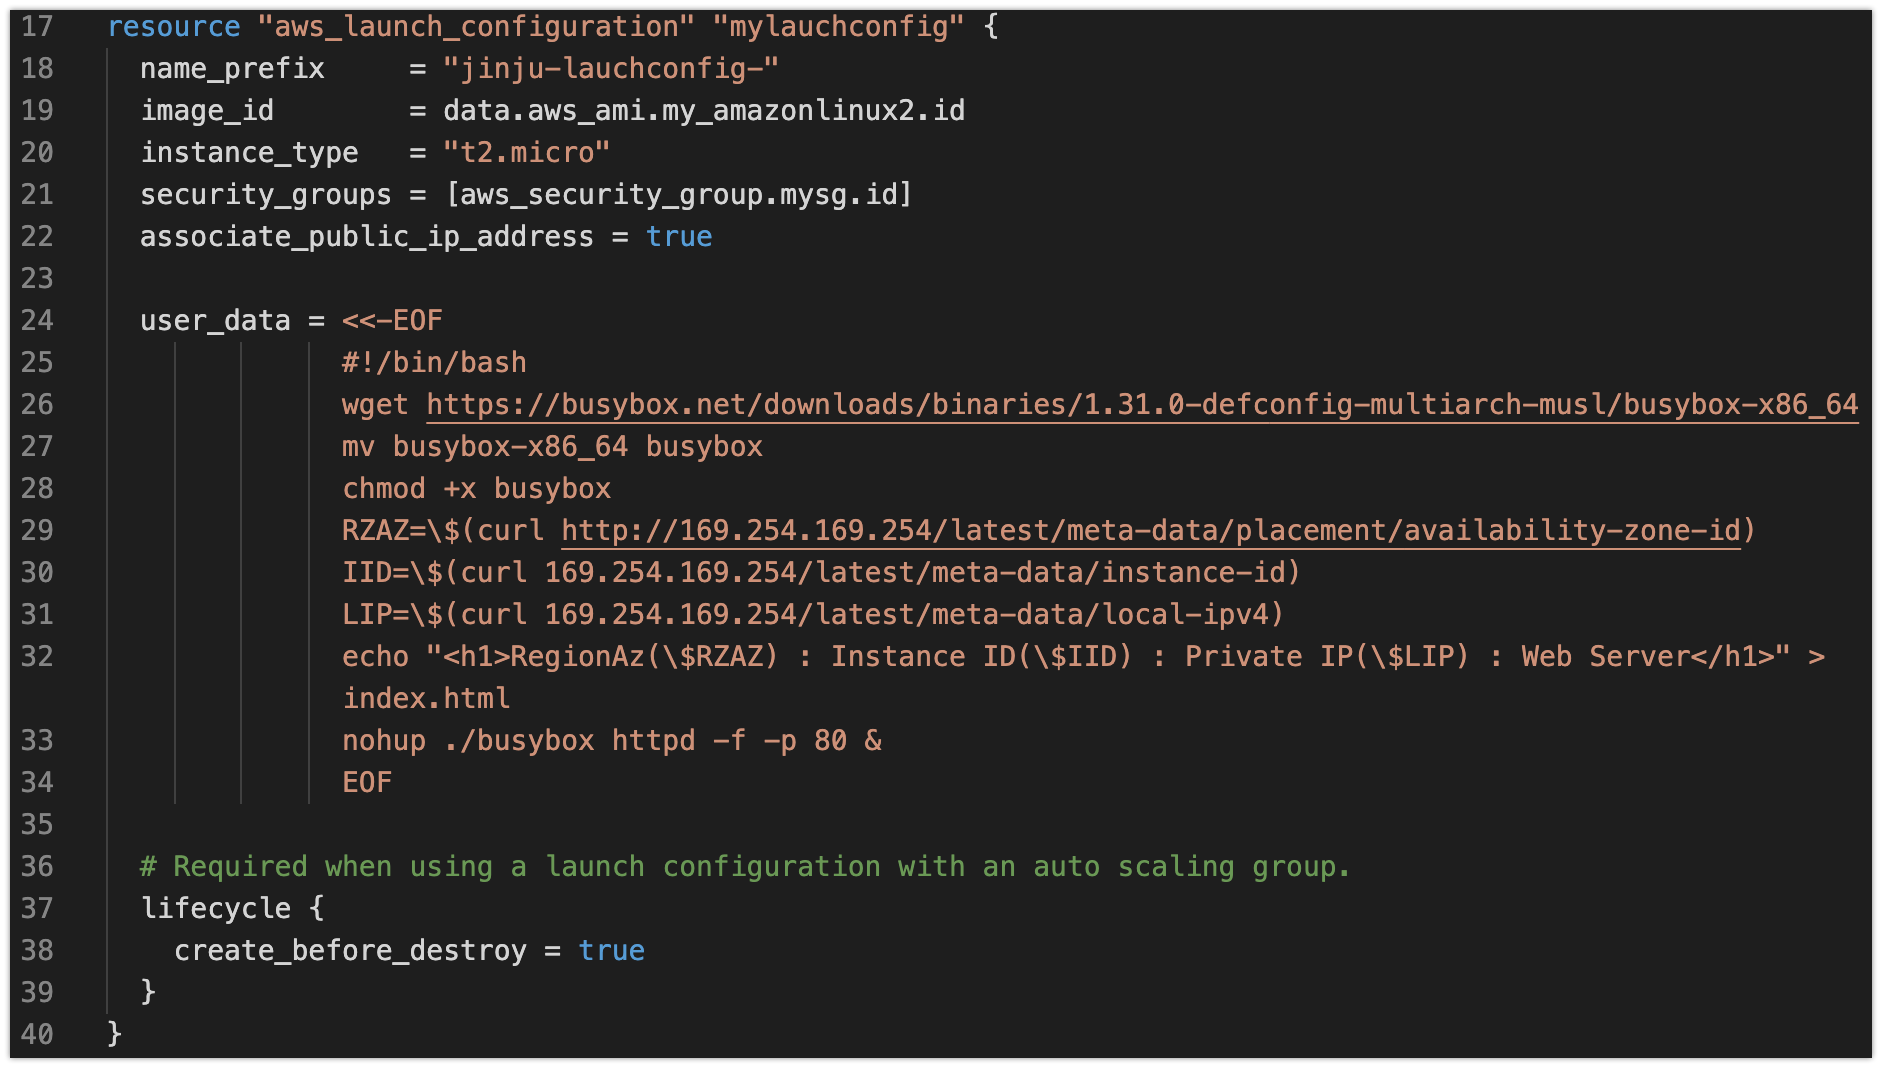 위 코드는 오토 스케일링 그룹 생성을 위한 첫 단계인 시작 구성(Launch configuration)을 생성하는 내용이다.
특히 19번 라인을 보면, 위에서 먼저 세팅한 data 소스를 사용하는 것을 볼 수 있다.
또한 37번 라인의 수명주기(lifecycle) 설정을 통해 테라폼에서 리소스 교체 순서를 반대로 하여 교체 리소스를 먼저 생성하고(이전 리소스를 가리키고 있던 참조를 업데이트하여 교체한 리소스를 가리킴) 기존 리소스를 삭제하도록 한다.
이와 같은 수명주기 설정이 필요한 이유는, ASG은 시작 구성 정보를 참고하여 인스턴스를 생성하는 데 시작 구성은 변경이 불가능하기 때문에 시작 구성의 매개 변수를 변경하면 테라폼이 이를 대체하려고 하기 때문이다.
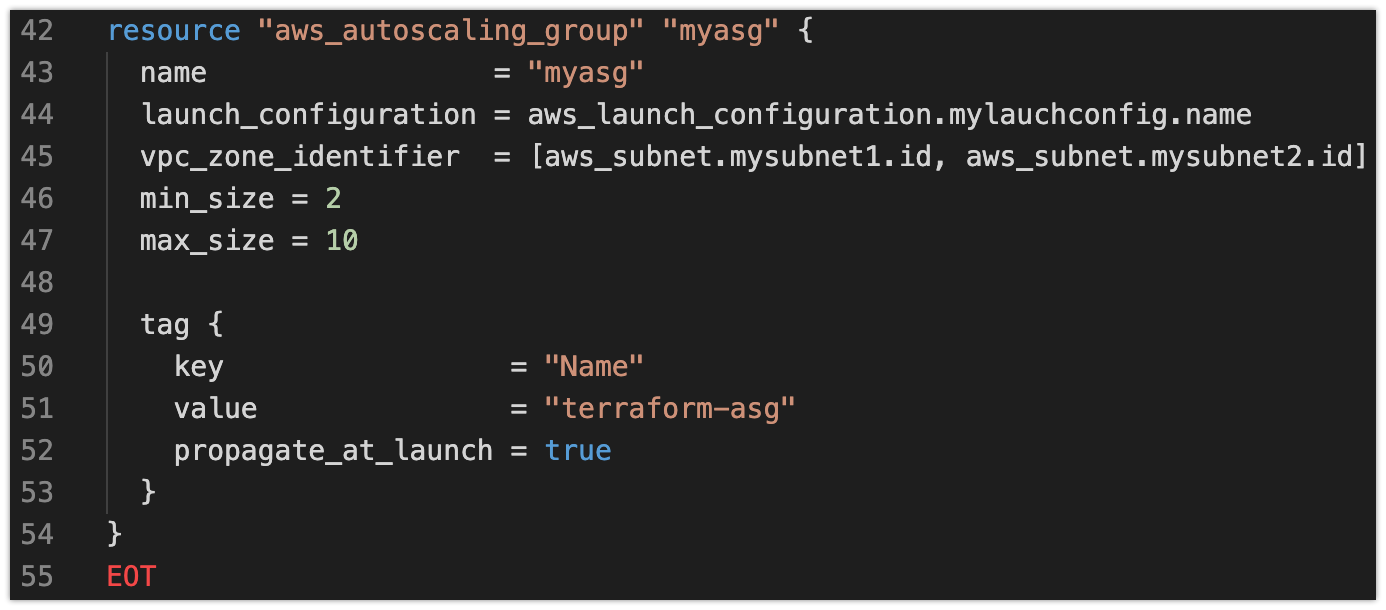 이제 aws_autoscaling_group 리소스를 사용하여 ASG자체를 생성할 수 있다.
# 배포
terraform plan && terraform apply -auto-approve
terraform state list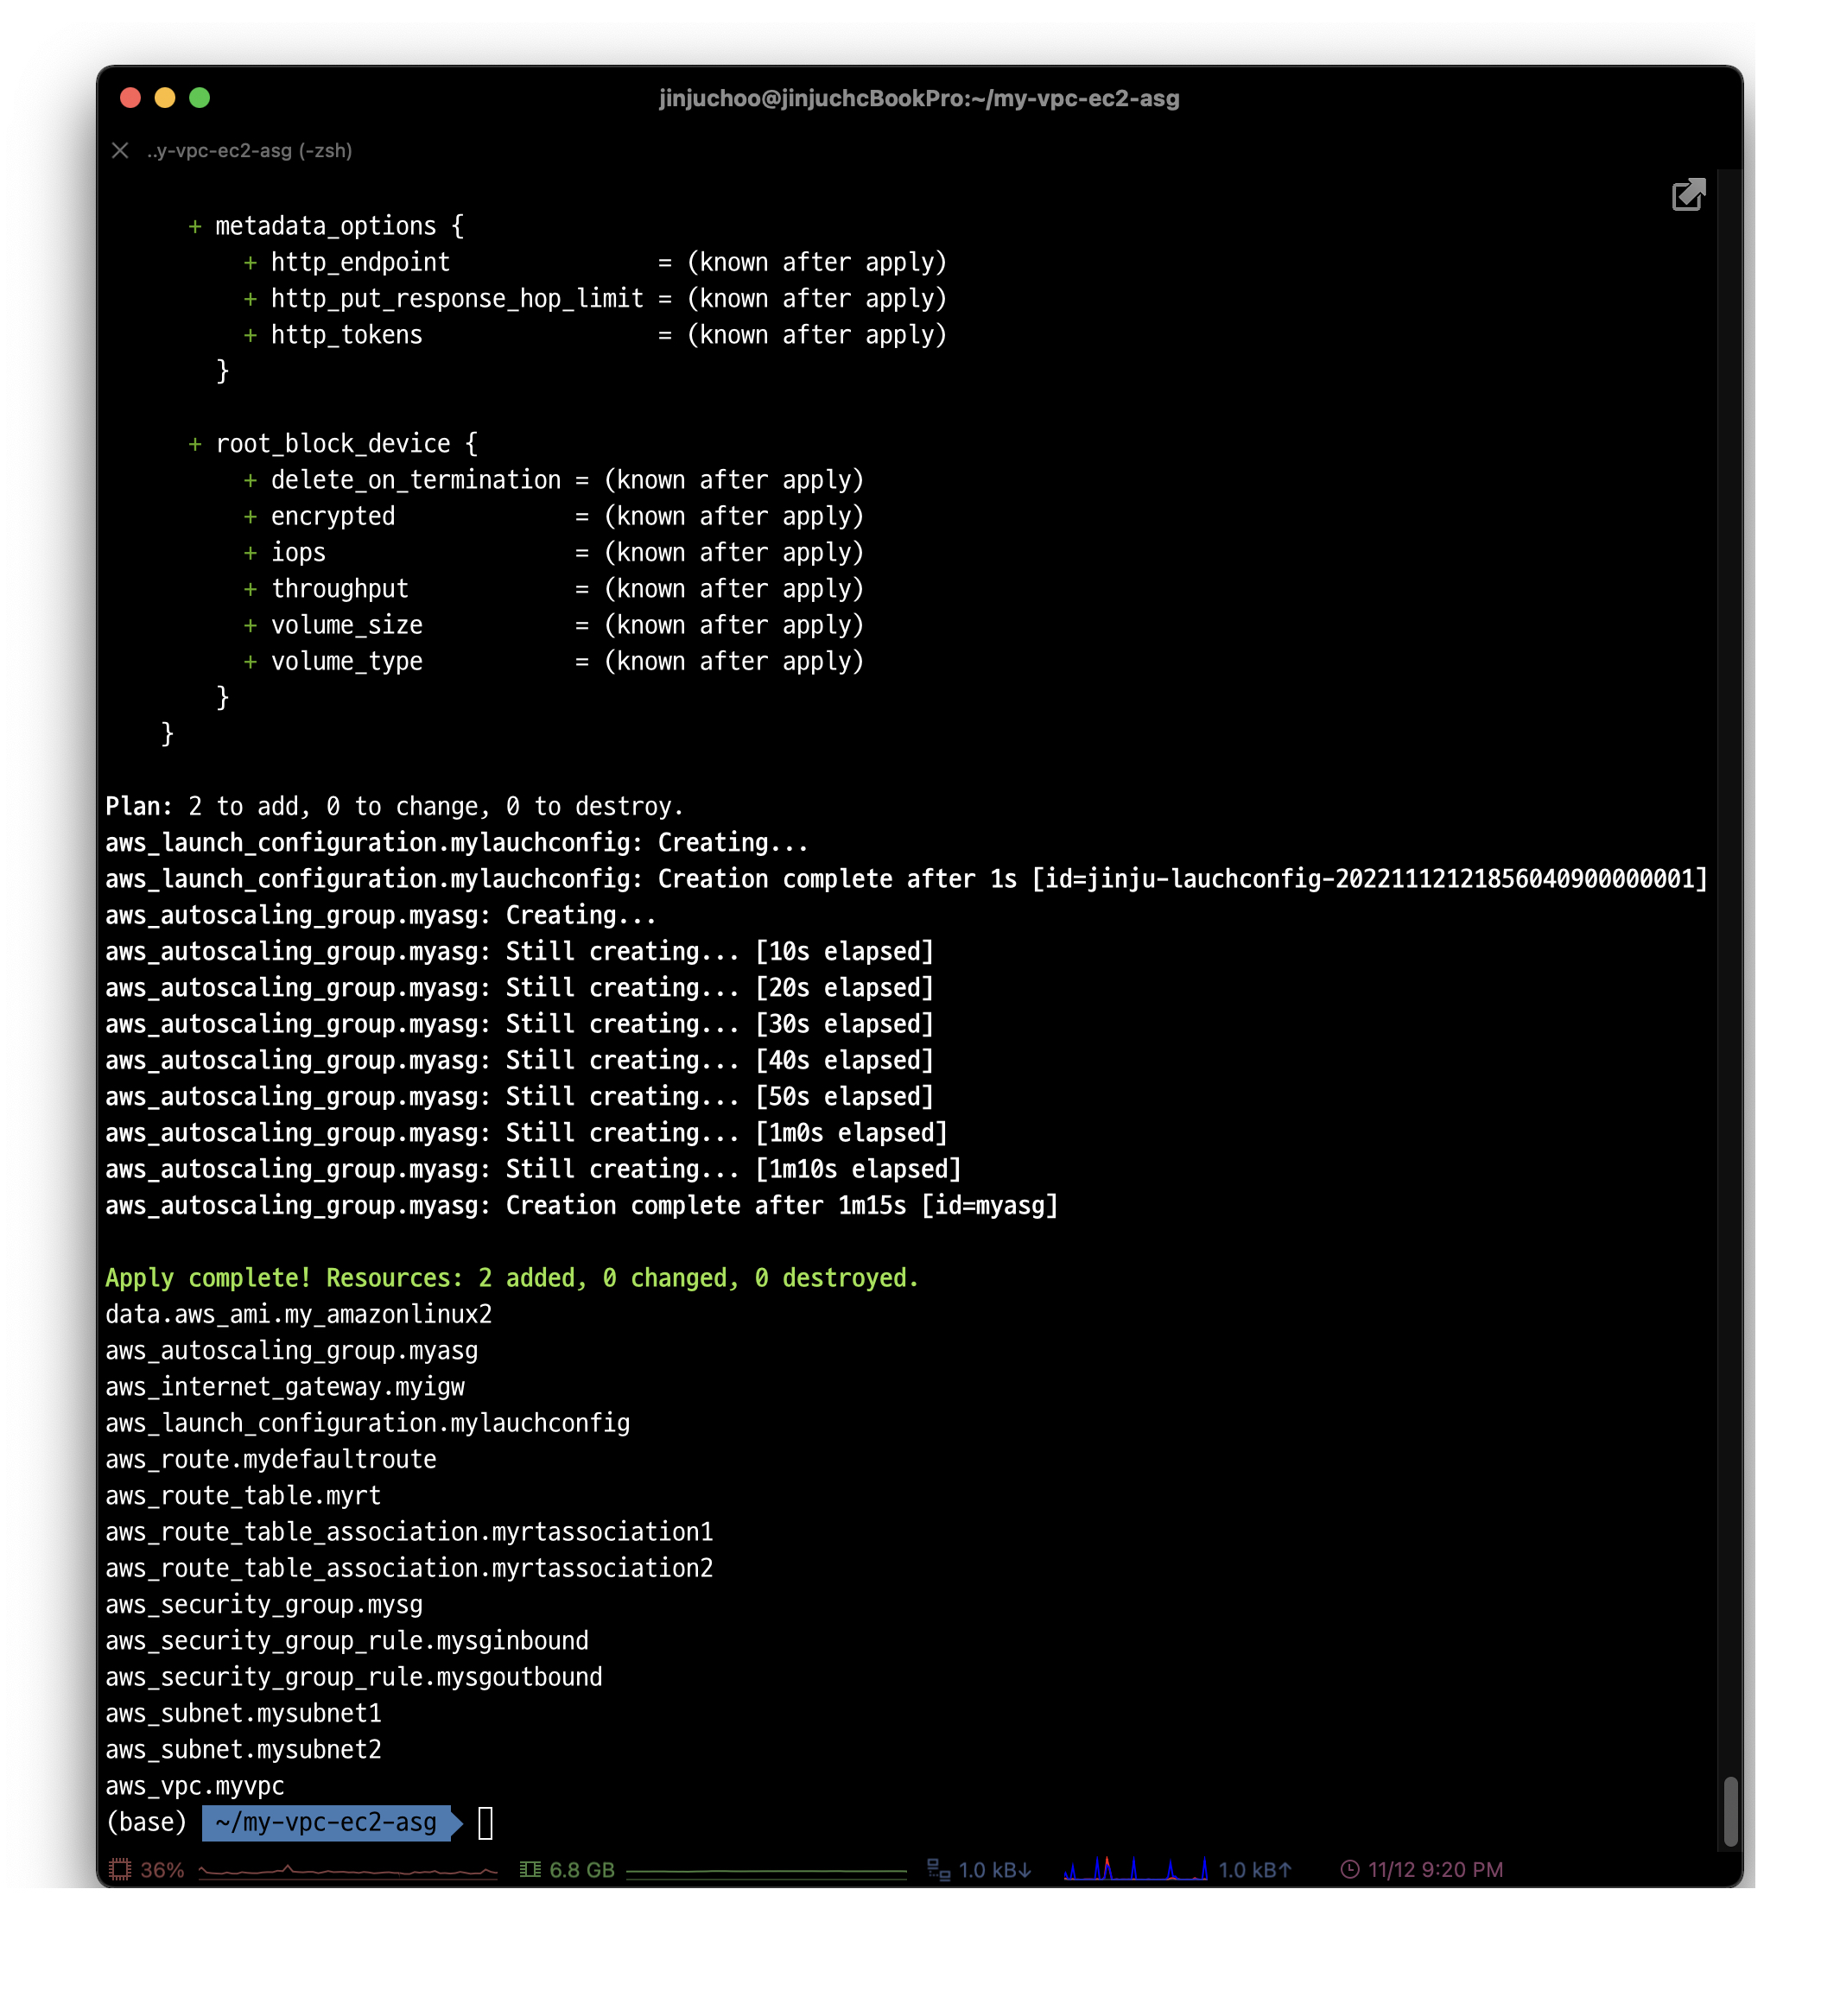
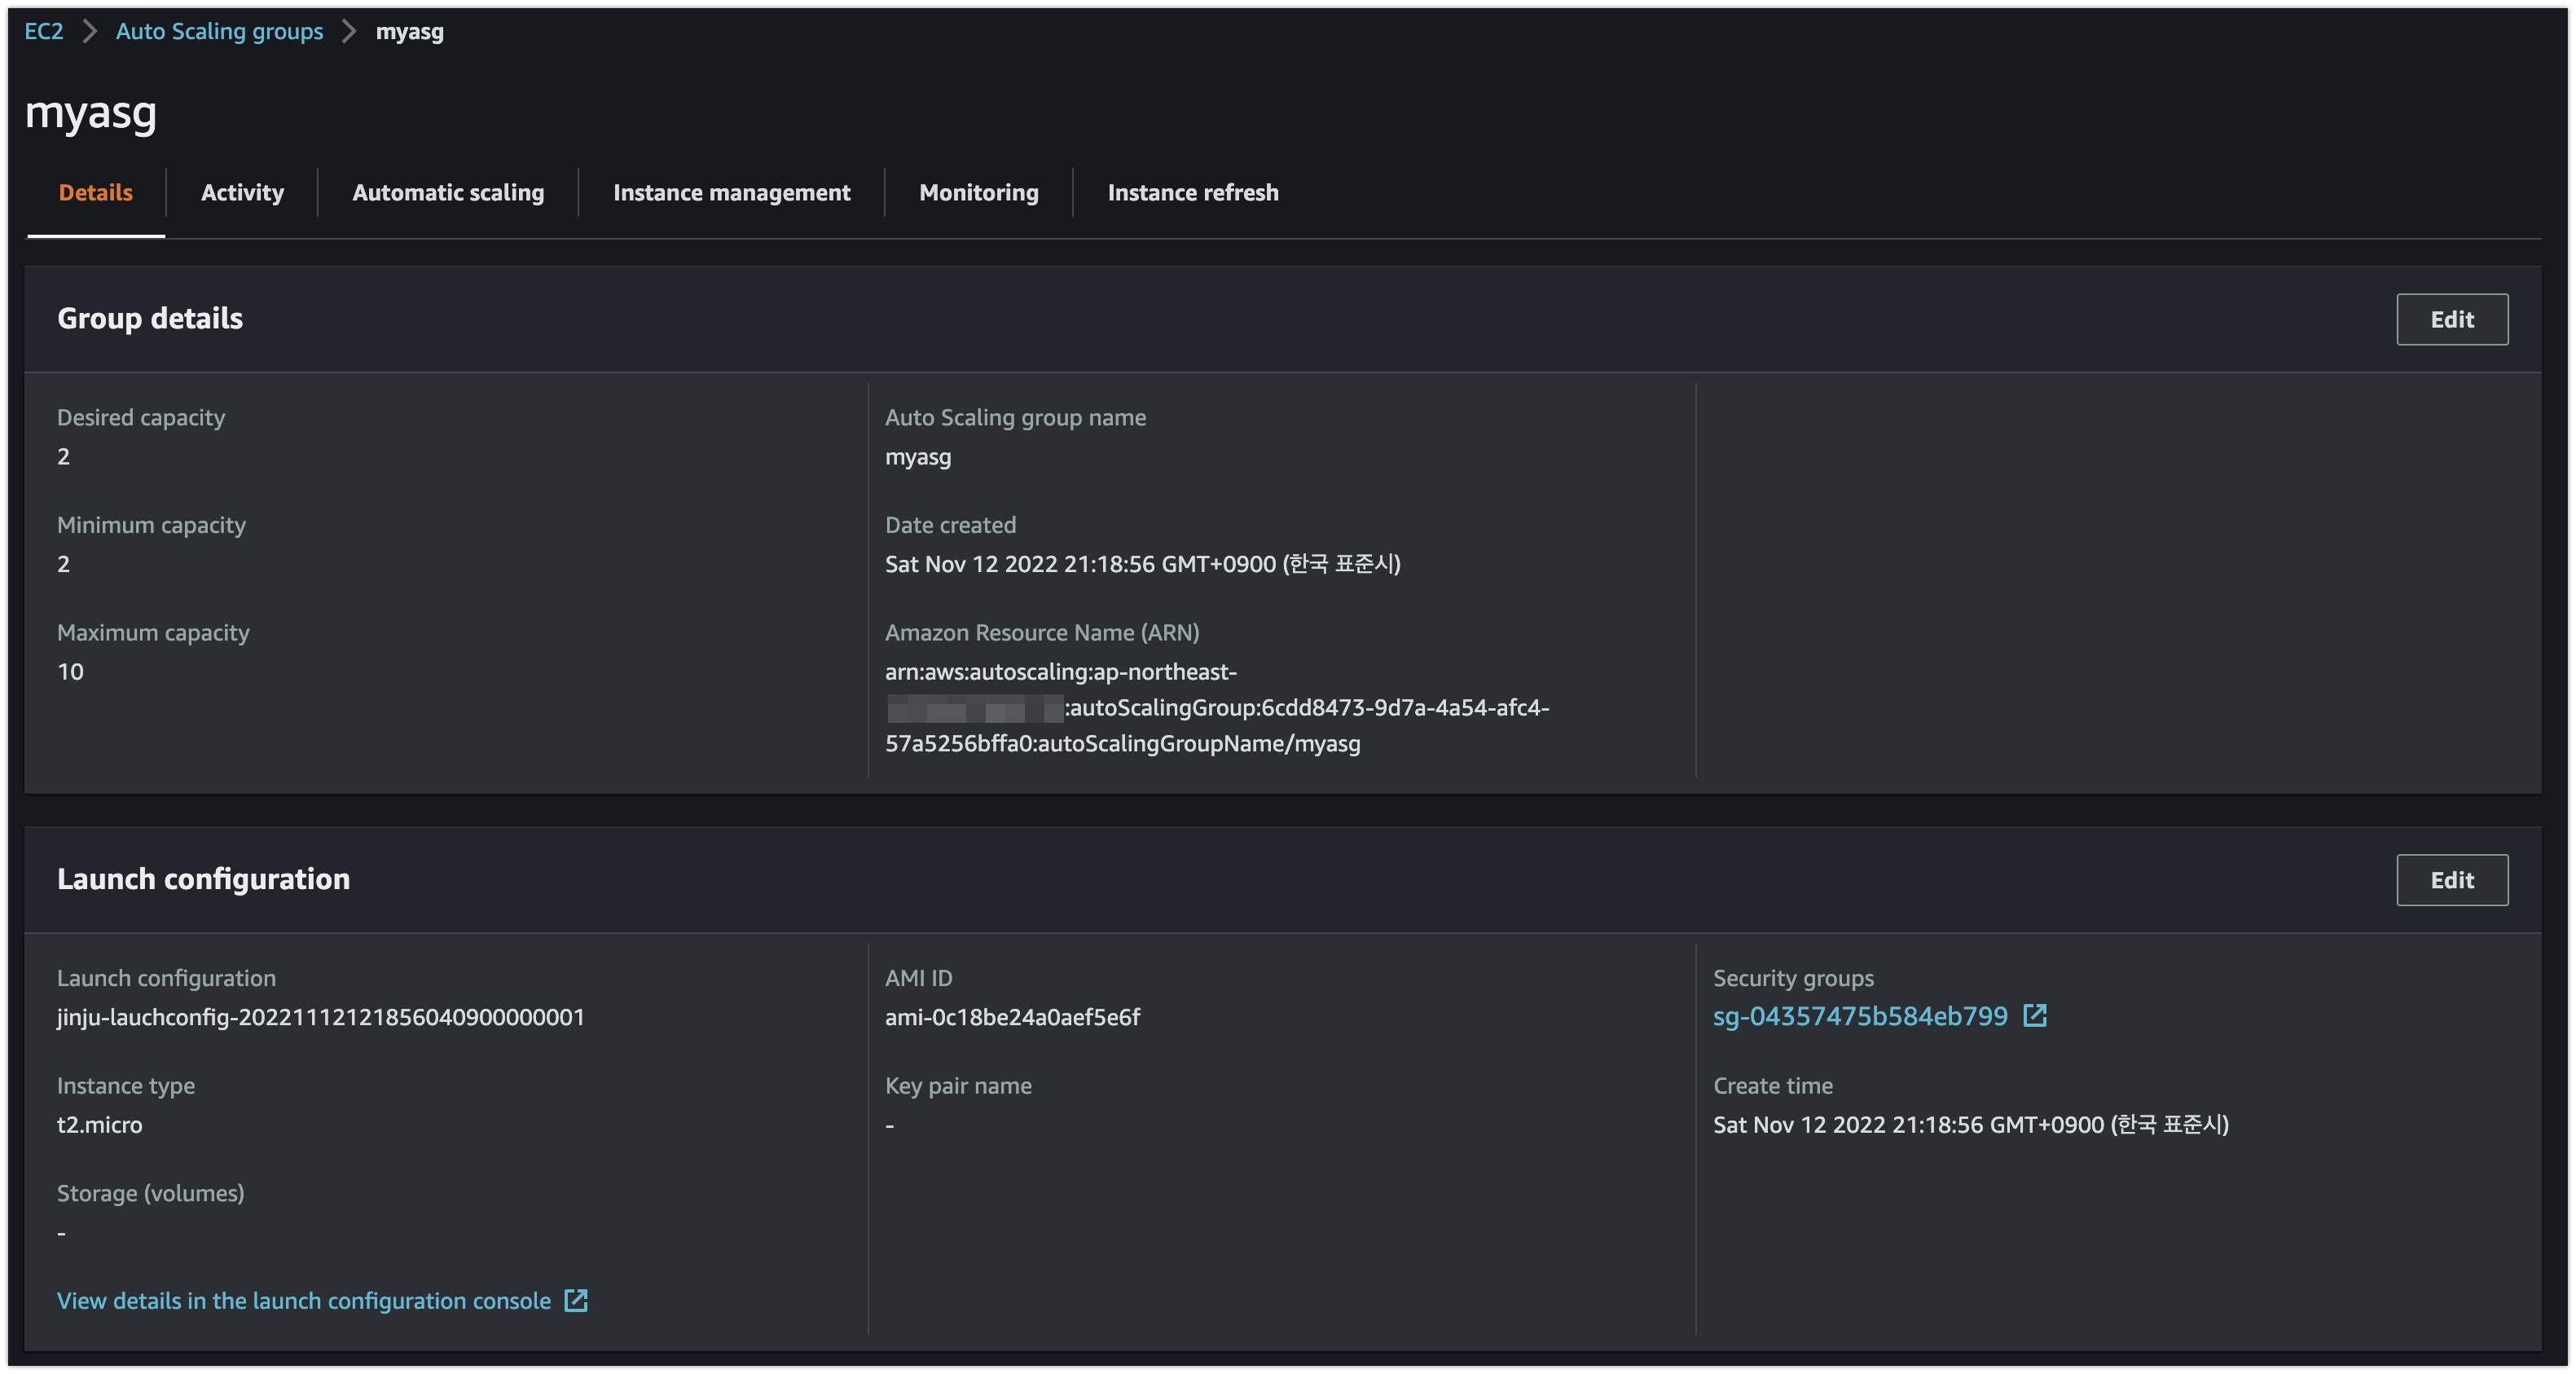 콘솔에서도 정의한 오토 스케일링 그룹이 정상적으로 생성된 것을 확인할 수 있다.
# curl 접속 확인 IP1=<EC2 1번 Public IP> IP2=<EC2 2번 Public IP> echo "$IP1 - WebSrv" ; curl -s $IP1 ; echo ; echo "$IP2 - WebSrv" ; curl -s $IP2 ; echo -
AWS 관리 콘솔 : ASG 시작 구성, AS 그룹 확인
# ASG 시작 구성, AS 그룹 정보 확인
aws autoscaling describe-auto-scaling-groups --auto-scaling-group-names myasg| jq
aws autoscaling describe-scaling-activities --auto-scaling-group-name myasg | jq
로드밸런서 배포
-
ALB 생성
cat <<EOT > alb.tf
resource "aws_lb" "myalb" {
  name               = "jinju-tf-study-alb"
  load_balancer_type = "application"
  subnets            = [aws_subnet.mysubnet1.id, aws_subnet.mysubnet2.id]
  security_groups = [aws_security_group.mysg.id]

  tags = {
    Name = "jinju-tf-study-alb"
  }
}

output "myalb_dns" {
  value       = aws_lb.myalb.dns_name
  description = "The DNS Address of the ALB"
}

EOT
# 배포(약간의 시간 소요) terraform plan && terraform apply -auto-approve terraform state listsubnets 매개 변수는 이전에 생성하여 연결한 서브넷 2개를 사용하도록 구성하였다.
-
ALB의 리스너 생성: 기본 HTTP 포트인 80번 포트를 수신하고, 리스너 규칙과 일치하지 않는 요청에 대해 기본 응답으로 404 페이지를 리턴하도록 구성.
cat <<EOT > alb.tf
resource "aws_lb" "myalb" {
  name               = "t101-alb"
  load_balancer_type = "application"
  subnets            = [aws_subnet.mysubnet1.id, aws_subnet.mysubnet2.id]
  security_groups = [aws_security_group.mysg.id]

  tags = {
    Name = "jinju-tf-study-alb"
  }
}

resource "aws_lb_listener" "myhttp" {
  load_balancer_arn = aws_lb.myalb.arn
  port              = 80
  protocol          = "HTTP"

  # By default, return a simple 404 page
  default_action {
    type = "fixed-response"

    fixed_response {
      content_type = "text/plain"
      message_body = "404: page not found - TF Study"
      status_code  = 404
    }
  }
}

output "myalb_dns" {
  value       = aws_lb.myalb.dns_name
  description = "The DNS Address of the ALB"
}
EOT
# 배포 terraform plan && terraform apply -auto-approve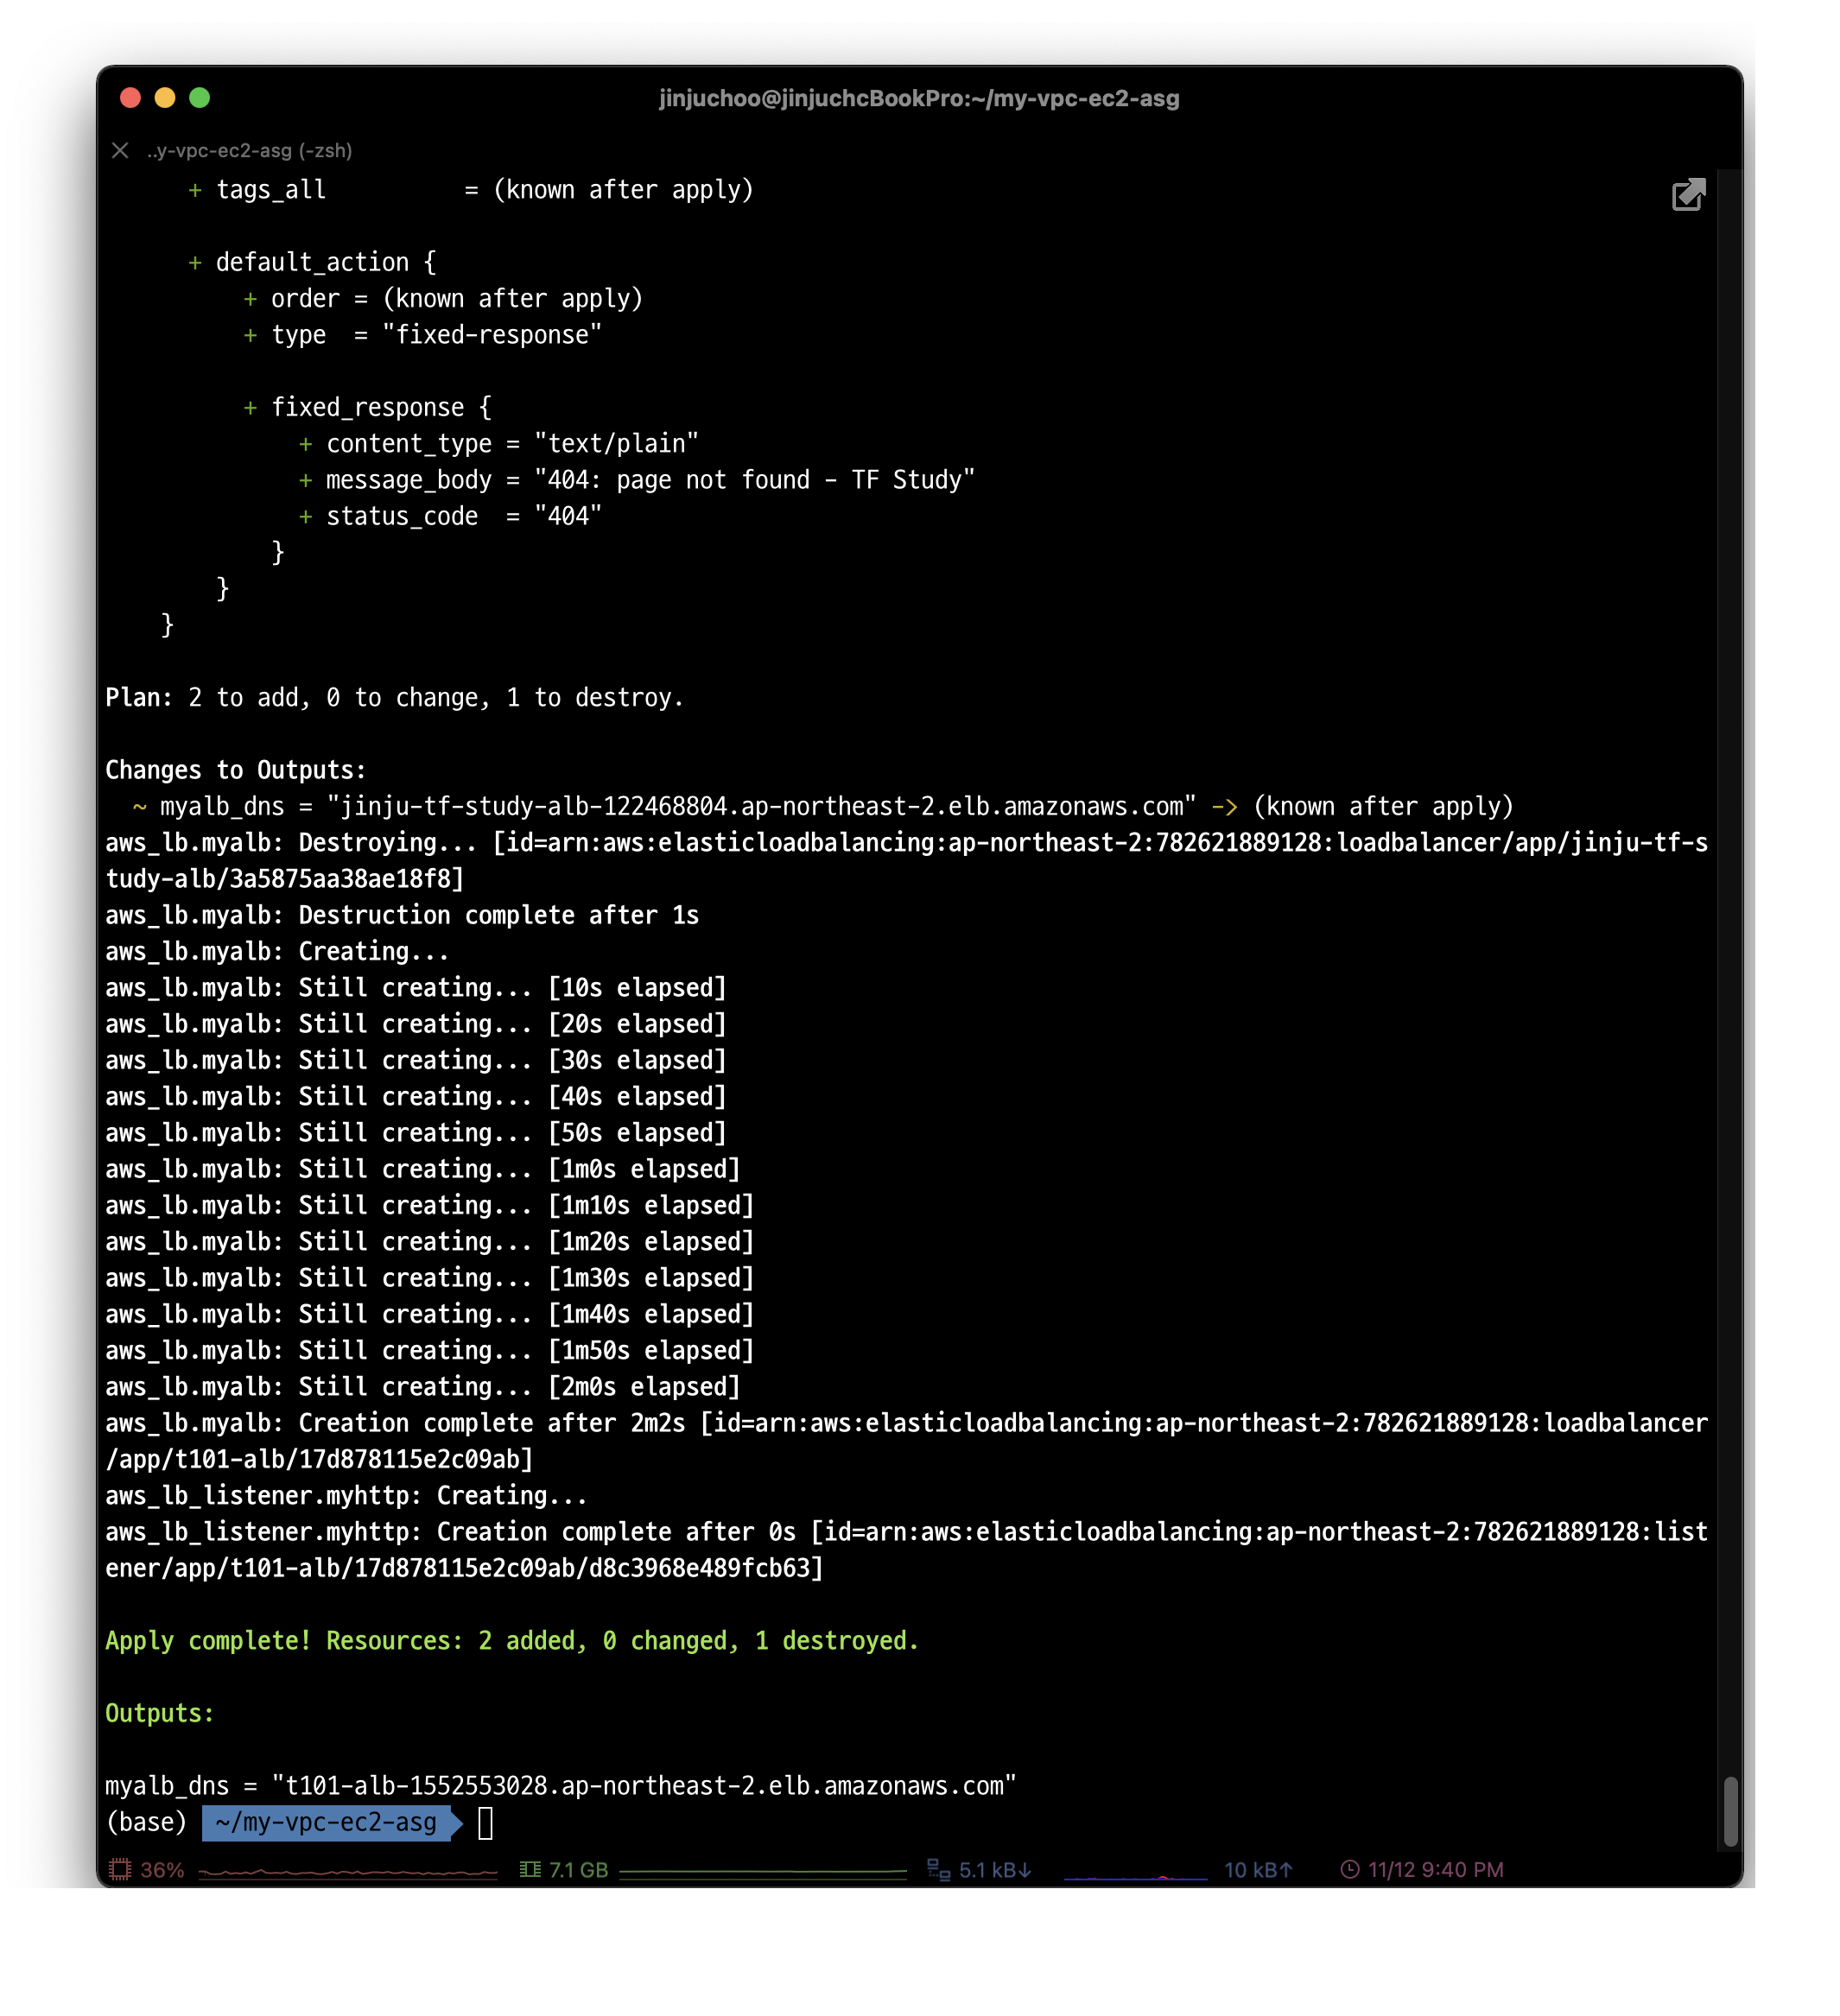
-
ASG 대상 보안 그룹 생성: ALB를 포함한 모든 AWS 리소스는 들어오는 트래픽 또는 나가는 트래픽을 허용하지 않음으로 새 보안 그룹을 생성해야 한다.
cat <<EOT > alb.tf resource "aws_lb" "myalb" { name = "t101-alb" load_balancer_type = "application" subnets = [aws_subnet.mysubnet1.id, aws_subnet.mysubnet2.id] security_groups = [aws_security_group.mysg.id] tags = { Name = "jinju-tf-study-alb" } } resource "aws_lb_listener" "myhttp" { load_balancer_arn = aws_lb.myalb.arn port = 80 protocol = "HTTP" # By default, return a simple 404 page default_action { type = "fixed-response" fixed_response { content_type = "text/plain" message_body = "404: page not found - TF Study" status_code = 404 } } } resource "aws_lb_target_group" "myalbtg" { name = "jinju-tf-alb-tg" port = 80 protocol = "HTTP" vpc_id = aws_vpc.myvpc.id health_check { path = "/" protocol = "HTTP" matcher = "200-299" interval = 5 timeout = 3 healthy_threshold = 2 unhealthy_threshold = 2 } } output "myalb_dns" { value = aws_lb.myalb.dns_name description = "The DNS Address of the ALB" } EOT# 배포 terraform plan && terraform apply -auto-approve -
ALB + ASG 연동: 대상 그룹은 어느 EC2 인스턴스에 요청을 보내야 할지 어떻게 알 수 있을까?
ASG와 ALB를 통합하는 이점을 활용하면 원하는 설정을 할 수 있다.cat <<EOT > asg.tf data "aws_ami" "my_amazonlinux2" { most_recent = true filter { name = "owner-alias" values = ["amazon"] } filter { name = "name" values = ["amzn2-ami-hvm-*-x86_64-ebs"] } owners = ["amazon"] } resource "aws_launch_configuration" "mylauchconfig" { name_prefix = "jinju-lauchconfig-" image_id = data.aws_ami.my_amazonlinux2.id instance_type = "t2.micro" security_groups = [aws_security_group.mysg.id] associate_public_ip_address = true user_data = <<-EOF #!/bin/bash wget https://busybox.net/downloads/binaries/1.31.0-defconfig-multiarch-musl/busybox-x86_64 mv busybox-x86_64 busybox chmod +x busybox RZAZ=\$(curl http://169.254.169.254/latest/meta-data/placement/availability-zone-id) IID=\$(curl 169.254.169.254/latest/meta-data/instance-id) LIP=\$(curl 169.254.169.254/latest/meta-data/local-ipv4) echo "<h1>RegionAz(\$RZAZ) : Instance ID(\$IID) : Private IP(\$LIP) : Web Server</h1>" > index.html nohup ./busybox httpd -f -p 80 & EOF # Required when using a launch configuration with an auto scaling group. lifecycle { create_before_destroy = true } } resource "aws_autoscaling_group" "myasg" { name = "myasg" launch_configuration = aws_launch_configuration.mylauchconfig.name vpc_zone_identifier = [aws_subnet.mysubnet1.id, aws_subnet.mysubnet2.id] min_size = 2 max_size = 10 health_check_type = "ELB" target_group_arns = [aws_lb_target_group.myalbtg.arn] tag { key = "Name" value = "terraform-asg" propagate_at_launch = true } } EOT이전에 작성한 aws_autoscaling_group 리소스 코드의 target_group_arn 인수를 설정하여 새 대상 그룹을 지정한다.
이 때 health_check_type도 'ELB'로 설정하여 대상 그룹의 인스턴스가 비정상일 경우 자동으로 인스턴스를 교체하도록 지시할 수 있다.cat <<EOT > alb.tf resource "aws_lb" "myalb" { name = "t101-alb" load_balancer_type = "application" subnets = [aws_subnet.mysubnet1.id, aws_subnet.mysubnet2.id] security_groups = [aws_security_group.mysg.id] tags = { Name = "jinju-tf-study-alb" } } resource "aws_lb_listener" "myhttp" { load_balancer_arn = aws_lb.myalb.arn port = 80 protocol = "HTTP" # By default, return a simple 404 page default_action { type = "fixed-response" fixed_response { content_type = "text/plain" message_body = "404: page not found - TF Study" status_code = 404 } } } resource "aws_lb_target_group" "myalbtg" { name = "jinju-tf-alb-tg" port = 80 protocol = "HTTP" vpc_id = aws_vpc.myvpc.id health_check { path = "/" protocol = "HTTP" matcher = "200-299" interval = 5 timeout = 3 healthy_threshold = 2 unhealthy_threshold = 2 } } resource "aws_lb_listener_rule" "myalbrule" { listener_arn = aws_lb_listener.myhttp.arn priority = 100 condition { path_pattern { values = ["*"] } } action { type = "forward" target_group_arn = aws_lb_target_group.myalbtg.arn } } output "myalb_dns" { value = aws_lb.myalb.dns_name description = "The DNS Address of the ALB" } EOT마지막으로 alb.tf 파일에 aws_lb_listener_rule 리소스를 사용해 리스너 규칙을 생성하여 연결한다.
# 배포 terraform plan && terraform apply -auto-approve # ALB DNS주소로 curl 접속 확인 ALBDNS=$(terraform output -raw myalb_dns) for i in {1..100}; do curl -s http://$ALBDNS/ ; done | sort | uniq -c | sort -nr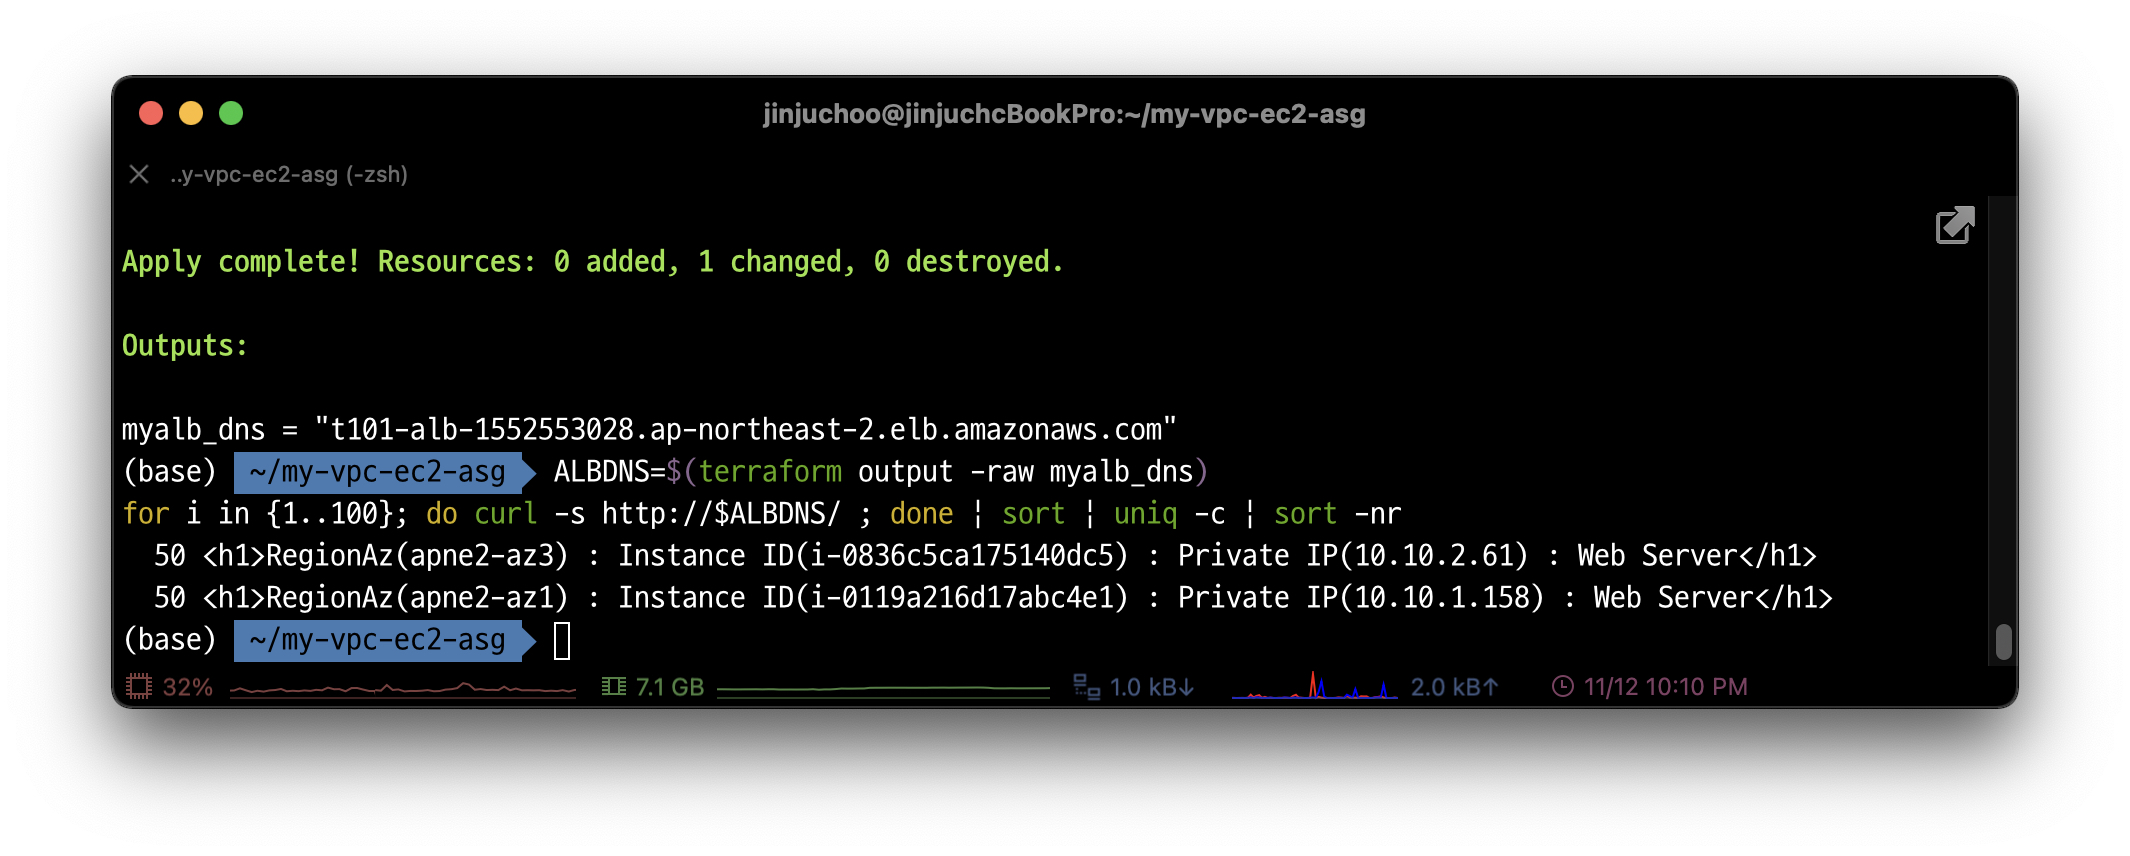 배포 성공 후 출력된 ALB DNS 주소로 curl 접속 테스트. 이 또한 성공이다.
리소스 삭제
- 목표한 실습을 완수하였으니 테라폼으로 생성한 리소스를 지우자.
terraform destroy -auto-approve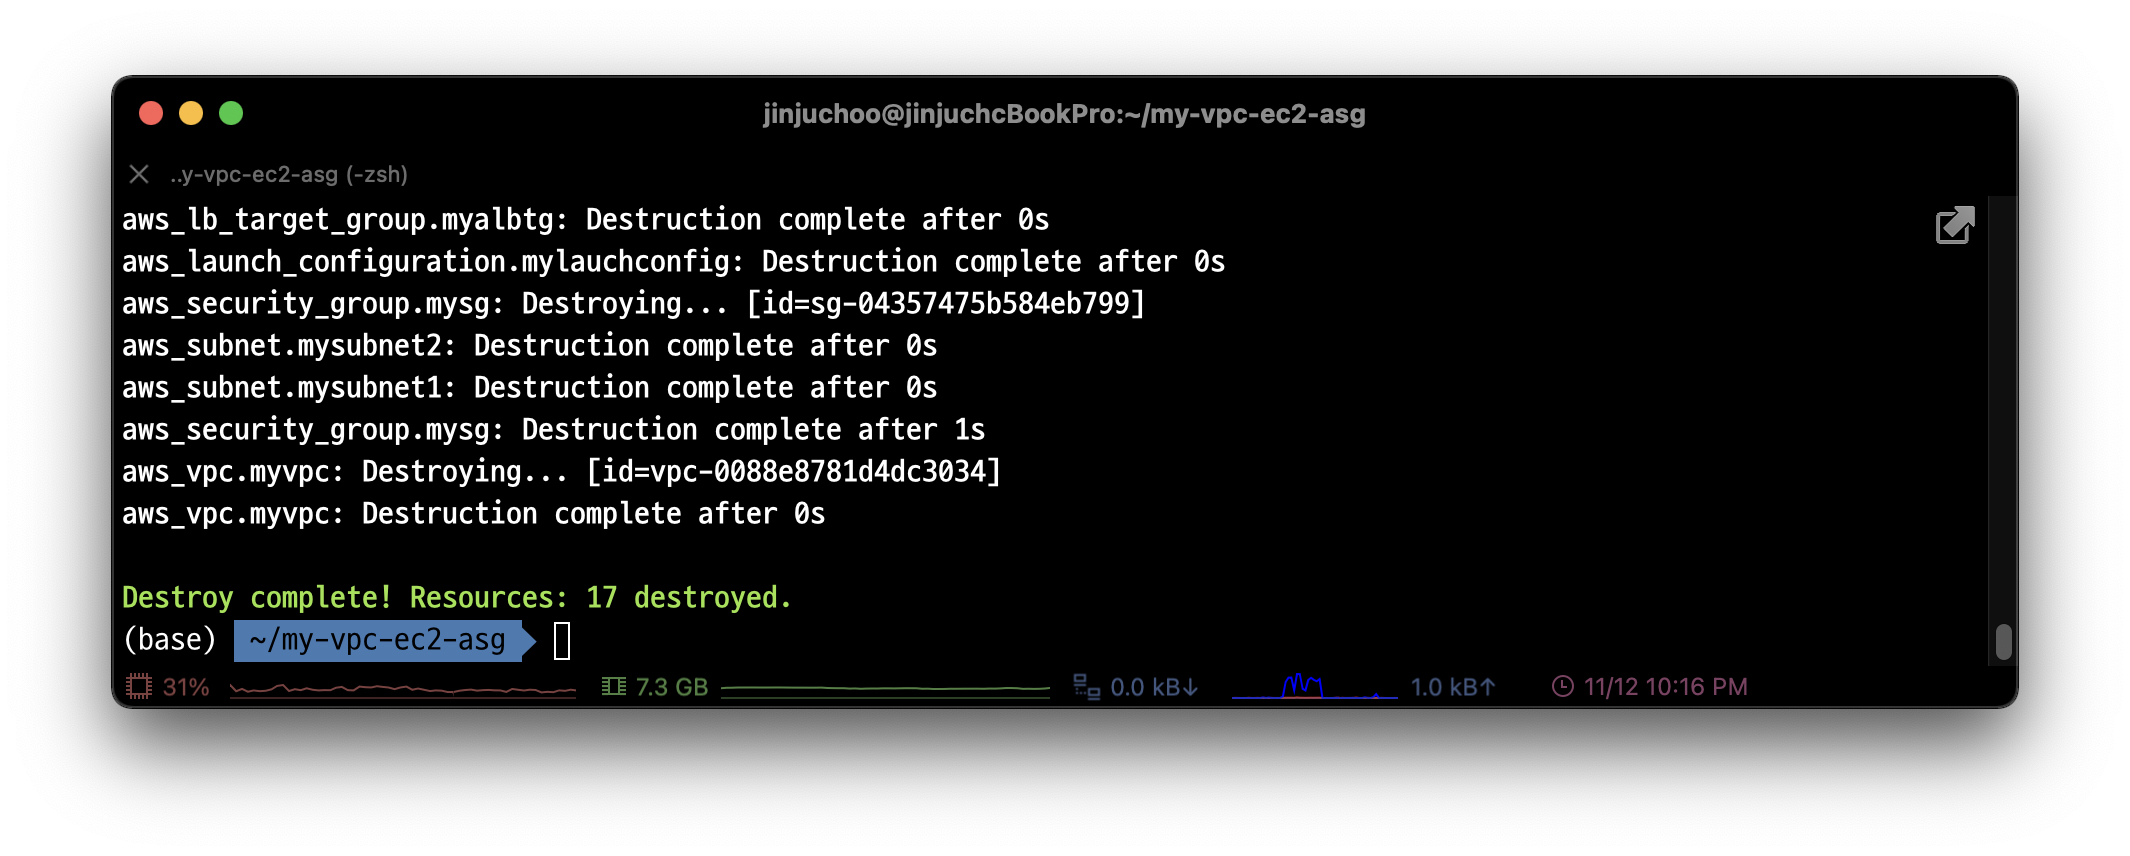
확실히 직전 포스팅 보다는 난이도가 있는 내용이었다.
그래도 작동하는 복잡한 코드를 가지고 노니 점점 더 테며드는 기분이 든다. 마참내- 즐겁다!