바닐라 자바스크립트로 SPA 만들기
바닐라 자바스크립트로 영화검색 페이지를 만들어 보던 중, 리액트 처럼 SPA(Single Page Application)방식의 Route를 구현해 보려 합니다.
기준 요소 생성
<!DOCTYPE html>
<html lang="en">
<head>
<meta charset="UTF-8" />
<meta http-equiv="X-UA-Compatible" content="IE=edge" />
<meta name="viewport" content="width=device-width, initial-scale=1.0" />
<script src="./src/main.js" type="module" defer></script>
<title>영화검색</title>
</head>
<body>
<header>
<figure>
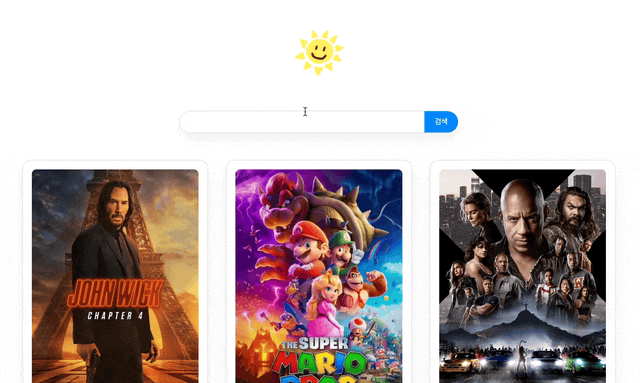
<img class="main-logo" src="assets/images/logo.png" width="100" alt="햇님 로고" />
</figure>
</header>
<div id="root"></div>
</body>
</html>먼저 index.html에 페이지에 따른 요소를 갈아끼울 기준 요소를 만들어 줍니다. 이 root에 요소를 그려줄 예정입니다.
이렇게 기존과 달리 하나의 html 파일을 통해 다른 페이지를 제공할 수 있게 됩니다.
라우트 생성
하나의 html 파일을 통해 여러 페이지를 제공하기에, 그 조작은 모두 자바스크립트로 이루어 집니다.
// routes.js
import { DetailPage } from "./pages/DetailPage.js";
import { HomePage } from "./pages/HomePage.js";

export const routes = {
  "/": new HomePage(),
  "/detail": new DetailPage()
};

export const renderPage = async (pathname, cache) => {
  const page = routes[pathname];
  page.render(cache);
};

export const navigate = to => {
  const historyChangeEvent = new CustomEvent("history", {
    detail: { to }
  });

  dispatchEvent(historyChangeEvent);
};

export const connectRoute = () => {
  window.addEventListener("history", ({ detail: { to } }) => {
    if (to === location.pathname) {
      history.replaceState(null, "", to);
    } else {
      history.pushState(null, "", to);
    }

    renderPage(to.split("?")[0]);
  });

  window.addEventListener("popstate", () => {
    renderPage(location.pathname, true);
  });

  renderPage(location.pathname);
};
전체적인 route의 코드는 이렇습니다.
여기서 routes와 renderPage는 뒤에 Page부분 코드의 이해가 필요해 여기서는 아직 다루지 않겠습니다.
export const navigate = to => {
  const historyChangeEvent = new CustomEvent("history", {
    detail: { to }
  });

  dispatchEvent(historyChangeEvent);
};
먼저 페이지를 이동할 때 호출할 navigate입니다.
이 함수를 통해 실질적으로 페이지를 이동하게 되며 history라는 CustomEvent를 통해 페이지를 이동할 것이라고 알립니다.
export const connectRoute = () => {
  window.addEventListener("history", ({ detail: { to } }) => {
    if (to === location.pathname) {
      history.replaceState(null, "", to);
    } else {
      history.pushState(null, "", to);
    }

    renderPage(to.split("?")[0]);
  });

  window.addEventListener("popstate", () => {
    renderPage(location.pathname, true);
  });

  renderPage(location.pathname);
};
이 connectRoute를 main.js에서 호출함으로써 라우팅이 가능해 집니다.
history이벤트를 감지해 history객체에 누적시켜주는 역할을 하고 있습니다.
보통 사용자가 페이지를 이동하면 아래와 같은 상황이 연출될 것 입니다.
-
상세페이지에서 홈버튼을 통해 메인페이지로 이동 후 뒤로가기 버튼
상세페이지 → 메인페이지 → 뒤로가기 → 상세페이지 -
상세페이지에서 홈버튼을 통해 메인으로 이동 후, 홈버튼을 한번 더 클릭 후 뒤로가기
상세페이지 → 메인페이지 → 메인페이지 → 뒤로가기 → 메인페이지
1번의 경우 문제가 없으나, 2번의 경우, 같은 페이지에 있음에도 history를 기록하게 되면 뒤로가기 버튼을 클릭 시, 다시 메인페이지로 돌아가게 됩니다.
그렇기에 현재 url과 같은 url로의 이동할 경우, replace속성을 통해 기록하지 않고 있습니다.
페이지 생성
이제 라우팅 구현이 끝났으니, 실질적으로 렌더링을 담당할 페이지를 생성해야 합니다. 그 중 모든 페이지에서 공통적으로 필요한 정보를 가진 Page를 만들어 보겠습니다.
기준페이지
// Page.js
export class Page {
  constructor(content, cache = {}) {
    this.renderContent = content;
    this.cache = cache;
    this.rootElement = document.querySelector("#root");

    window.addEventListener("history", () => this.caching());
  }

  async onFinally() {}

  async onRender() {}

  async render(withCache = false) {
    const cacheData = this.cache[location.pathname];

    if (withCache && cacheData) {
      this.rootElement.innerHTML = cacheData;
    } else {
      this.rootElement.innerHTML = this.renderContent;

      await this.onRender();
    }

    await this.onFinally();
  }

  caching() {
    this.cache[location.pathname] = this.rootElement.innerHTML;
  }
}
먼저 캐시가 왜 필요했는지에 대한 부분은 아래에서 따로 다루겠습니다.
Page에 구성 요소는 아래와 같습니다.
- renderContent : 초기 렌더링할
html요소 입니다. - rootElement :
renderContent를 렌더링할 기준(root) 요소 입니다. - render : 실질적으로 렌더링을 발생시키는 함수 입니다.
- onRender : 렌더링이 발생한 후 실행되는 함수 입니다.
- onFinally : 캐싱 여부와 상관 없이 무조건 실행되는 함수 입니다.
위와 같은 구조로 되어있으며, 각 페이지에서는 renderContent를 통해 초기 html을 구성하며, onRender와 onFinally를 overriding하여 렌더링 이후에 fetch된 데이터를 렌더링 할 수 있게 됩니다.
홈페이지
// HomePage.js
export class HomePage extends Page {
  constructor() {
    super(`
        <form class="search-form">
          <input class="search-box" />
          <button>검색</button>
        </form>

        <main>
          <ul class="movie-list"></ul>
        </main>
    `);
  }

  // ...생략

  async onRender() {
    const popularMovieList = await getPopularMovieList();
    this.renderMovieList(popularMovieList);
  }

  onFinally() {
	// ...생략

    const movieList = document.querySelector(".movie-list");
    movieList.addEventListener("click", ({ target }) => {
      const movieItem = target.closest("li");

      movieItem && navigate(`/detail?movieId=${movieItem.id}`);
    });
  }
}HomePage에서 Page를 상속받아 실제로 사용하고 있는 모습 입니다.
constructor를 통해 초기 html를 할당하고 있으며, onRender를 통해 데이터 fetch후 영화 목록들을 렌더링 하고 있습니다.
그리고 마지막으로 onFinally를 통해 모든 렌더링이 끝나면 영화 아이템 요소들을 클릭하면 detail페이지로 이동하게끔 이벤트를 연결해 주었습니다.
캐싱이 필요한 이유
먼저 영화검색을 한 후, 영화의 카드를 클릭해 상세페이지로 진입하게 됩니다. 그 후 뒤로가기 동작을 했을 때, 제가 원한 동작은 스크롤 위치와 검색 결과가 유지되는 결과를 바랬습니다.
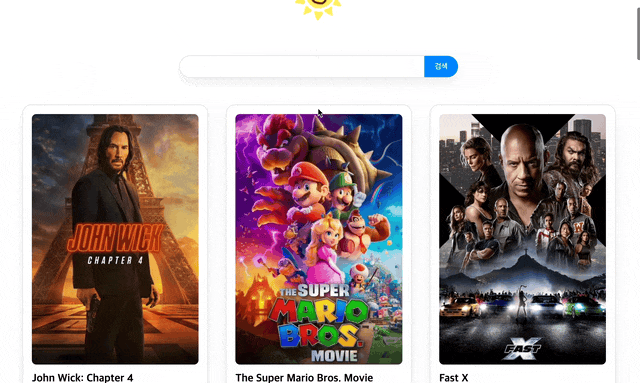
캐싱을 적용시켜 데이터가 복원되는 모습입니다.
뒤로가기 동작을 했을 때, 데이터를 유지시키기 위해 캐싱기능을 만들었으며, 데이터를 캐싱 함으로써 재검색을 위해 API를 호출시킬 필요도 없어졌기에 서버에도 좋고 유저에게도 편리한 서비르를 제공할 수 있게 되었습니다.