Web Application
- 화면 -> Front-End(HTML,CSS,JS..) => Web Site (Static Document)
- 서비스 -> Program(Servlet,JSP..) => 서비스 작성 (Dynamic Document)
클라이언트 - 브라우저를 통해 요청을 하는 컴퓨터
서버 - 클라이언트의 요청을 받는 컴퓨터, 요청은 브라우저를 통해 전달됨
웹 개발을 위해 공부해야 할 기술
-
Front-End
I. HTML(화면의 구조), CSS(스타일), JS(이벤터)
II. JQuery: JavaScript 라이브러리
III. Bootstrap: Front-End Framework (HTML, CSS, JQuery)
IV. Angular | React | Vue.js: Progressive Front-End Framework -
Back-End
I. Servlet, JSP
II. Spring Framework (DI, AOP, Spring JDBC, Spring MVC)
Tomcat 서버 설치 및 실행
-
Tomcat 설치
Apache Tomcat 웹사이트
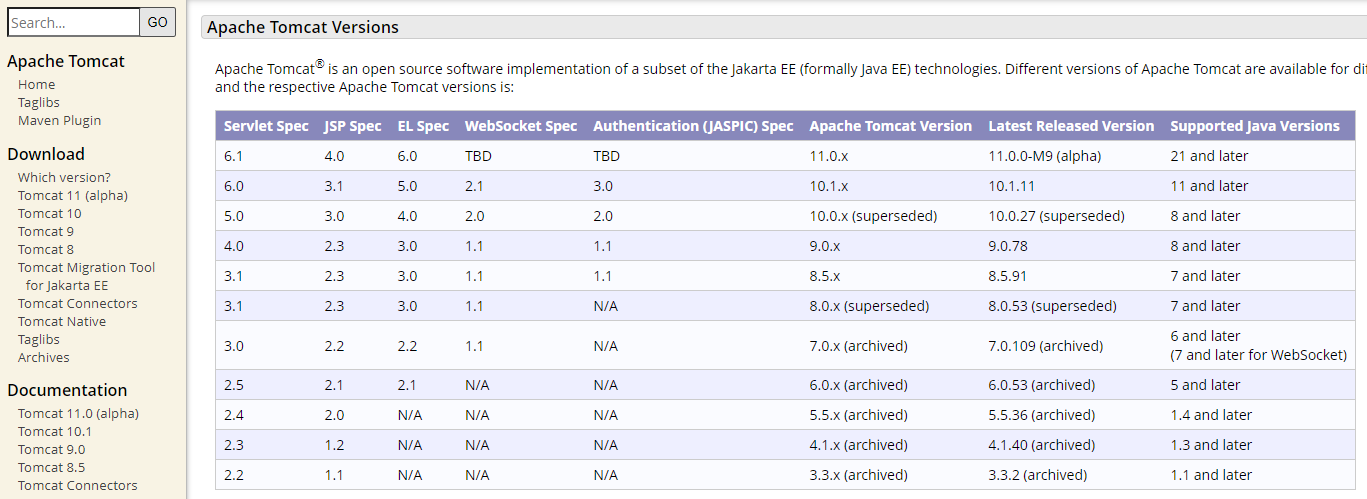
Spec에 맞는 Version 설치 -
IDE(Eclipse)와 Tomcat 서버 연동
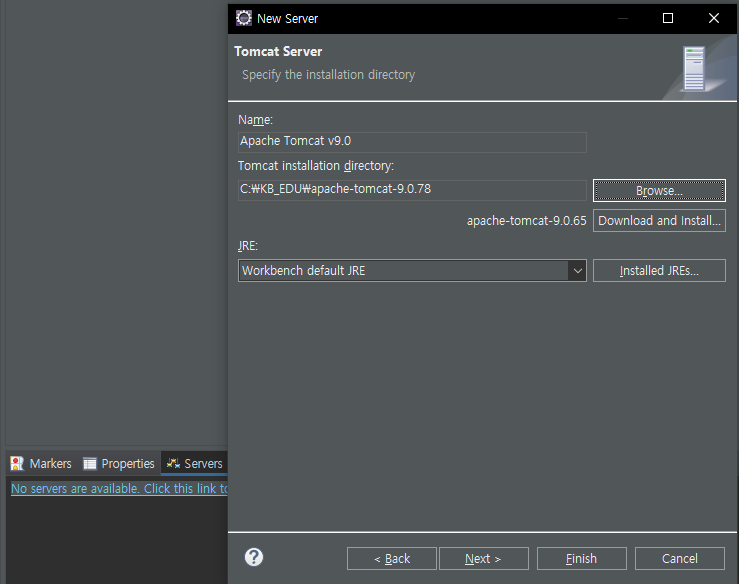
-
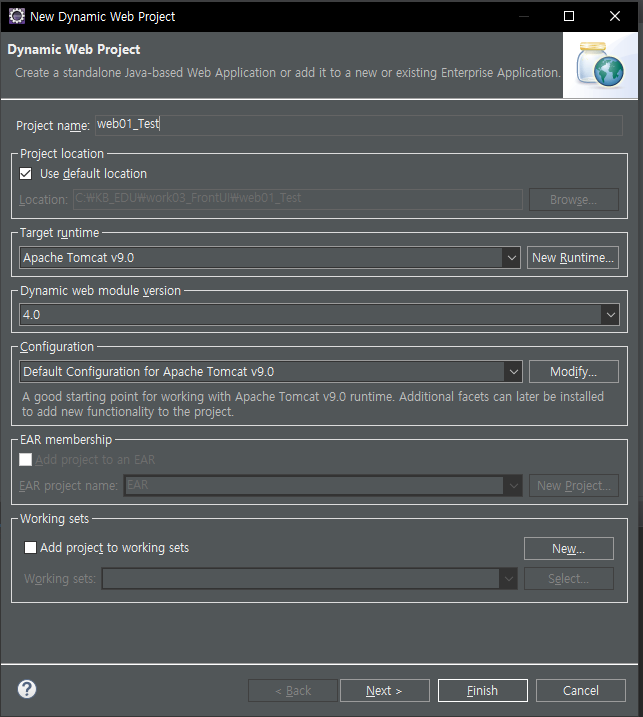
Dynamic Web Project 생성
- src/main/java -> Program (Dynamic Document)
- webapp -> html, css, js (Static Document)
HTTP 웹 아키텍쳐
웹 서버의 역할
클라이언트는 서버에 서비스를 요청한다
서비스: 서버에 존재하는 파일
- 모든 요청을 받는다.
- 요청이 Static Document인지 Dynamic Document인지 판별한다.
- SD 요청인 경우 파일을 직접 찾아서 응답한다. (Response)
- DD 요청인 경우 요청을 Container에게 넘긴다.
WAS
WAS == Web Server + Container
- 모든 요청은 웹 서버를 통해서 들어오고, 모든 응답은 웹 서버를 통해서 나간다.
- 단, DD(Program)은 웹 서버가 처리할 수 없고 Container로 넘긴다.
- WAS는 Web Server+Container를 의미하기도 하고, Container만을 의미하기도 한다.
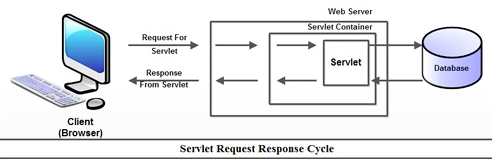
클라이언트가 Dynamic Document(Program)를 요청 -> 웹 서버는 요청을 Container로 넘김 -> Container에서의 DB 접근 -> 클라이언트로의 응답은 요청과 마찬가지로 웹 서버를 통해 이루어짐

Web Server와 Container를 따로 둔 경우
정적인 문서 작성, 요청, 응답까지의 순서
- 개발자가 ~~.html 파일을 작성
- 서버 가동
- 작성된 파일이 들어있는 프로젝트 단위를 직접 서버 안으로 배포
Tomcat 서버 홈 > webapps > 프로젝트 단위로 저장 - 요청 진행
브라우저로 요청http://127.0.0.1: 8888/context_path/test.htmlhttp - 통신 프로토콜
127.0.0.1 - IP 주소
8888 - 포트 번호
context_path - 프로젝트 단위
test.html - 정적인 문서
2~4번까지의 모든 작업을 이클립스가 대신 서비스 해준다.
현업에서는 이클립스가 안 해준다.
(http: 브라우저와 서버 간 통신 프로토콜, jdbc: 서버와 DB 간 통신 프로토콜)
- test.html
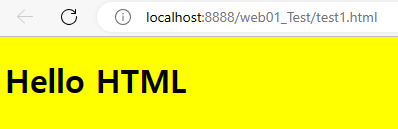
- 웹 브라우저에서 확인한 Static Document
HTML
Tag 종류
- Blocking Tag
- Inline Tag
HTML Element
<start tag> content </end tag>
<h1> Hello HTML </h1>
HTML(+CSS+JavaScript) 간단한 예시
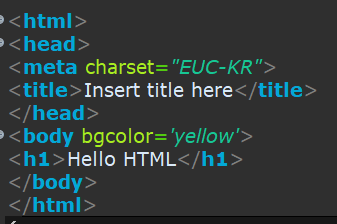
<!DOCTYPE html>
<html>
<head>
	<meta charset="UTF-8">
	<title>Insert title here</title>
	<script>
		function push(){
			alert("버튼이 눌러졌어요!");
		}
	</script>
	<style>
	/* 전체 화면의 가로 사이즈를 지정...body 태크를 선택자로 지정 */
	body {
		width: 700px;
		height: 600px;
		margin: 0 auto;
	}
	#order {
		float: left;
		width: 300px;
	}
	#unorder {
		float: right;
		width: 300px;
	}
	#header {
		color: tomato;
		margin-left: 150px;
	}
	#order, #unorder {
		background-color: gray;
		border: 1px solid black;
	}
	</style>
</head>
<body>
	<div id="header">
		<h1>This is heading 1</h1>
		<h2>This is heading 2</h2>
		<h3>This is heading 3</h3>
	</div>
	<div id="order">
		<p>Order List</p>
		<p>순번을 가지는 목록 리스트</p>
		<p>Blocking Tag</p>
		<ol>
			<li><a href='http://java.sun.com'>JAVA</a></li>
			<li>PYTHON</li>
			<li><a href='http://www.w3schools.com'>HTML</a></li>
			<li>VUE.JS</li>
		</ol>
	</div>
	<div id="unorder">
		<p>UnOrder List</p>
		<p>순번을 가지지 않는 목록 리스트</p>
		<p>Blocking Tag</p>
		<ul>
			<li><a href='http://java.sun.com'>JAVA</a></li>
			<li>PYTHON</li>
			<li><a href='http://www.w3schools.com'>HTML</a></li>
			<li>VUE.JS</li>
		</ul>
	</div>
	<hr>
	<!-- 버튼 클릭하면 팝업창 하나 뜨도록 작성 -->
	<button onclick="push()">눌러주세요</button>
</body>
</html>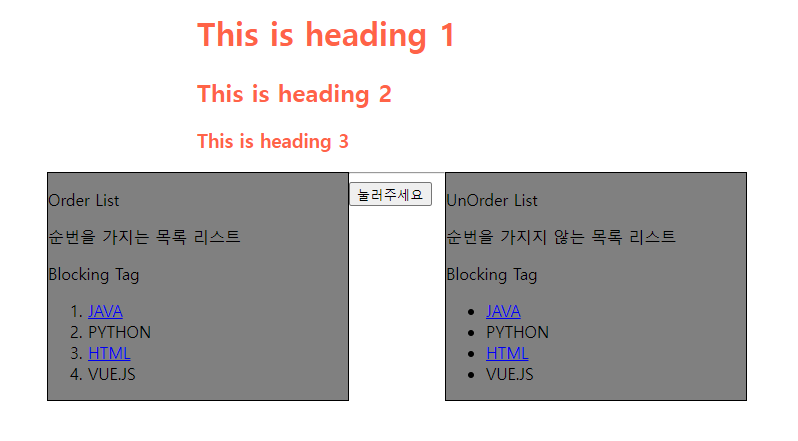
Form Tag
Input type - submit
- form 안에서 사용
- form 태그는 반드시 action 속성을 가진다.
- action 값으로는 요청을 처리할 페이지가 들어간다.
- form에 입력된 모든 값을 action에 등록된 페이지로 전송하는 버튼
HTML Input Types
<body>
<h2>FORM TAGS...</h2>
<!-- 다양한 입력 양식을 다 감싸는 태그 -->
<form action="#">
	<fieldset>
		<legend>KB Form...</legend>
			ID : <input type="text" name="id"> <br>
			PASS: <input type="password" name="pass"> <br><br>
			<hr>
			<input type="radio" name="gender" value="Female">여자
			<input type="radio" name="gender" value="Male">남자
			<br><br>
			<hr>
			TODAY : <input type="date" name="date"><br><br>
			NUMBER: <input type="number" name="number"><br><br>
			Guset Memo :
			<textarea rows="5" cols="50">
				intro memo...
			</textarea>
			<input type="submit" value="SEND">
	</fieldset>
</form>
</body>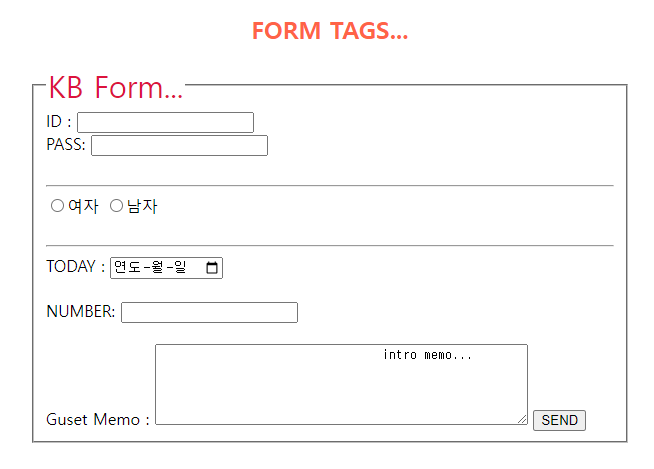
HTML Tables
Table 구성요소
- thead
- tbody
- tfoot
HTML 코드
<!DOCTYPE html>
<html>
<head>
<meta charset="UTF-8">
<title>Insert title here</title>
<style>
	table {
		width: 600px;
		margin: 0 auto;
		border: 1px solid black;
	}
	table, th, tr, td {
		border: 1px solid black;
		border-collapse: collapse;
	}
	h2, p {
		text-align: center;
	}
	td {
		text-align: center;
	}
	h2 {
		color: crimson;
	}
	th {
		color: tomato;
	}
	tr:nth-child(even) {
		background-color:#dddddd;
	}
	table>tbody>tr:HOVER {
		background-color: pink;
	}
</style>
</head>
<body>
<h2>A basic HTML table</h2>
<table>
	<thead>
	  <tr>
	    <th>Company</th>
	    <th>Contact</th>
	    <th>Country</th>
	  </tr>
	</thead>
	<tbody>
	  <tr>
	    <td>Alfreds Futterkiste</td>
	    <td>Maria Anders</td>
	    <td>Germany</td>
	  </tr>
	  <tr>
	    <td>Centro comercial Moctezuma</td>
	    <td>Francisco Chang</td>
	    <td>Mexico</td>
	  </tr>
	  <tr>
	    <td>Centro comercial Moctezuma</td>
	    <td>Francisco Chang</td>
	    <td>Mexico</td>
	  </tr>
	  <tr>
	    <td>Centro comercial Moctezuma1</td>
	    <td>Francisco Chang1</td>
	    <td>Mexico1</td>
	  </tr>
	</tbody>
	<tfoot>
		<tr>
			<td colspan="3">To understand the example better...</td>
		</tr>
	</tfoot>
</table>
</body>
</html>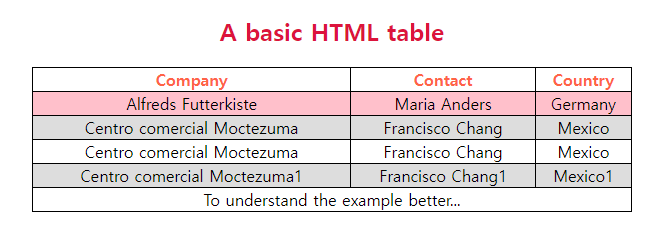
div VS span
둘 다 영역을 구분하는 역할을 한다는 공통점
- div: blocking tag
- span: inline tag
Reference


개발자로서 성장하는 데 큰 도움이 된 글이었습니다. 감사합니다.