WAF를 통해 ALB의 보안을 강화하는 것이 목적이다.
이번 실습에는 WAF로 ALB 보안을 강화한다.
총 8개의 Step을 통해 실습을 진행한다.
Step 1. vpc 생성
Step 2. 보안그룹 생성
Step 3. Launch Template 생성
Step 4. ALB 생성
Step 5. Auto Scaling 생성
Step 6. waf 생성
Step 7. cloudwatch
Step 8. kinesis Firehose
Step 1. vpc 생성
다음 코드를 활용하여 VPC를 생성해주도록 한다.
Parameters:
EnvironmentName:
Description: An environment name that is prefixed to resource names
Type: String
Default: 'demo'
VpcCIDR:
Description: Please enter the IP range (CIDR notation) for this VPC
Type: String
Default: 10.0.0.0/16
PublicSubnet1CIDR:
Description: Please enter the IP range (CIDR notation) for the public subnet in the first Availability Zone
Type: String
Default: 10.0.10.0/24
PublicSubnet2CIDR:
Description: Please enter the IP range (CIDR notation) for the public subnet in the second Availability Zone
Type: String
Default: 10.0.11.0/24
PrivateSubnet1CIDR:
Description: Please enter the IP range (CIDR notation) for the private subnet in the first Availability Zone
Type: String
Default: 10.0.20.0/24
PrivateSubnet2CIDR:
Description: Please enter the IP range (CIDR notation) for the private subnet in the second Availability Zone
Type: String
Default: 10.0.21.0/24
Resources:
VPC:
Type: AWS::EC2::VPC
Properties:
CidrBlock: !Ref VpcCIDR
EnableDnsSupport: true
EnableDnsHostnames: true
Tags:
- Key: Name
Value: !Sub ${EnvironmentName}-vpc
InternetGateway:
Type: AWS::EC2::InternetGateway
Properties:
Tags:
- Key: Name
Value: !Ref EnvironmentName
InternetGatewayAttachment:
Type: AWS::EC2::VPCGatewayAttachment
Properties:
InternetGatewayId: !Ref InternetGateway
VpcId: !Ref VPC
PublicSubnet1:
Type: AWS::EC2::Subnet
Properties:
VpcId: !Ref VPC
AvailabilityZone: !Select [ 0, !GetAZs '' ]
CidrBlock: !Ref PublicSubnet1CIDR
MapPublicIpOnLaunch: true
Tags:
- Key: Name
Value: !Sub ${EnvironmentName}-public-a
PublicSubnet2:
Type: AWS::EC2::Subnet
Properties:
VpcId: !Ref VPC
AvailabilityZone: !Select [ 2, !GetAZs '' ]
CidrBlock: !Ref PublicSubnet2CIDR
MapPublicIpOnLaunch: true
Tags:
- Key: Name
Value: !Sub ${EnvironmentName}-public-c
PrivateSubnet1:
Type: AWS::EC2::Subnet
Properties:
VpcId: !Ref VPC
AvailabilityZone: !Select [ 0, !GetAZs '' ]
CidrBlock: !Ref PrivateSubnet1CIDR
MapPublicIpOnLaunch: false
Tags:
- Key: Name
Value: !Sub ${EnvironmentName}-private-a
PrivateSubnet2:
Type: AWS::EC2::Subnet
Properties:
VpcId: !Ref VPC
AvailabilityZone: !Select [ 2, !GetAZs '' ]
CidrBlock: !Ref PrivateSubnet2CIDR
MapPublicIpOnLaunch: false
Tags:
- Key: Name
Value: !Sub ${EnvironmentName}-private-c
NatGateway1EIP:
Type: AWS::EC2::EIP
DependsOn: InternetGatewayAttachment
Properties:
Domain: vpc
NatGateway2EIP:
Type: AWS::EC2::EIP
DependsOn: InternetGatewayAttachment
Properties:
Domain: vpc
NatGateway1:
Type: AWS::EC2::NatGateway
Properties:
AllocationId: !GetAtt NatGateway1EIP.AllocationId
SubnetId: !Ref PublicSubnet1
NatGateway2:
Type: AWS::EC2::NatGateway
Properties:
AllocationId: !GetAtt NatGateway2EIP.AllocationId
SubnetId: !Ref PublicSubnet2
PublicRouteTable:
Type: AWS::EC2::RouteTable
Properties:
VpcId: !Ref VPC
Tags:
- Key: Name
Value: !Sub ${EnvironmentName}-public-rt
DefaultPublicRoute:
Type: AWS::EC2::Route
DependsOn: InternetGatewayAttachment
Properties:
RouteTableId: !Ref PublicRouteTable
DestinationCidrBlock: 0.0.0.0/0
GatewayId: !Ref InternetGateway
PublicSubnet1RouteTableAssociation:
Type: AWS::EC2::SubnetRouteTableAssociation
Properties:
RouteTableId: !Ref PublicRouteTable
SubnetId: !Ref PublicSubnet1
PublicSubnet2RouteTableAssociation:
Type: AWS::EC2::SubnetRouteTableAssociation
Properties:
RouteTableId: !Ref PublicRouteTable
SubnetId: !Ref PublicSubnet2
PrivateRouteTable1:
Type: AWS::EC2::RouteTable
Properties:
VpcId: !Ref VPC
Tags:
- Key: Name
Value: !Sub ${EnvironmentName}-private-a-rt
DefaultPrivateRoute1:
Type: AWS::EC2::Route
Properties:
RouteTableId: !Ref PrivateRouteTable1
DestinationCidrBlock: 0.0.0.0/0
NatGatewayId: !Ref NatGateway1
PrivateSubnet1RouteTableAssociation:
Type: AWS::EC2::SubnetRouteTableAssociation
Properties:
RouteTableId: !Ref PrivateRouteTable1
SubnetId: !Ref PrivateSubnet1
PrivateRouteTable2:
Type: AWS::EC2::RouteTable
Properties:
VpcId: !Ref VPC
Tags:
- Key: Name
Value: !Sub ${EnvironmentName}-private-c-rt
DefaultPrivateRoute2:
Type: AWS::EC2::Route
Properties:
RouteTableId: !Ref PrivateRouteTable2
DestinationCidrBlock: 0.0.0.0/0
NatGatewayId: !Ref NatGateway2
PrivateSubnet2RouteTableAssociation:
Type: AWS::EC2::SubnetRouteTableAssociation
Properties:
RouteTableId: !Ref PrivateRouteTable2
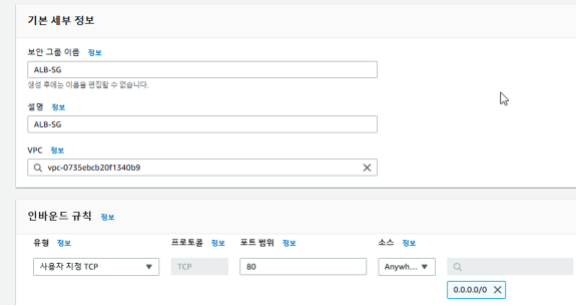
SubnetId: !Ref PrivateSubnet2Step 2. 보안그룹 생성
아래 링크로 접속하여 보안그룹을 하나 생성해주도록 한다.
https://console.aws.amazon.com/ec2
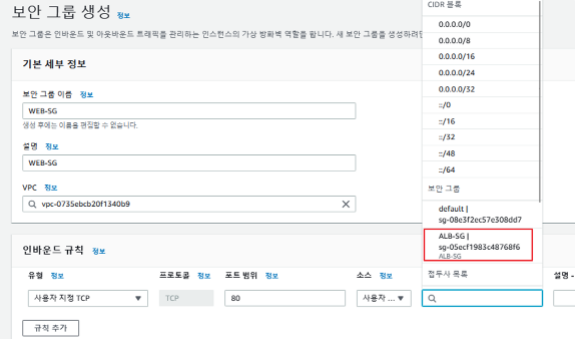
ALB-SG 생성 (80번을 통해서 ALB에 접속할 수 있음)
WEB-SG 생성
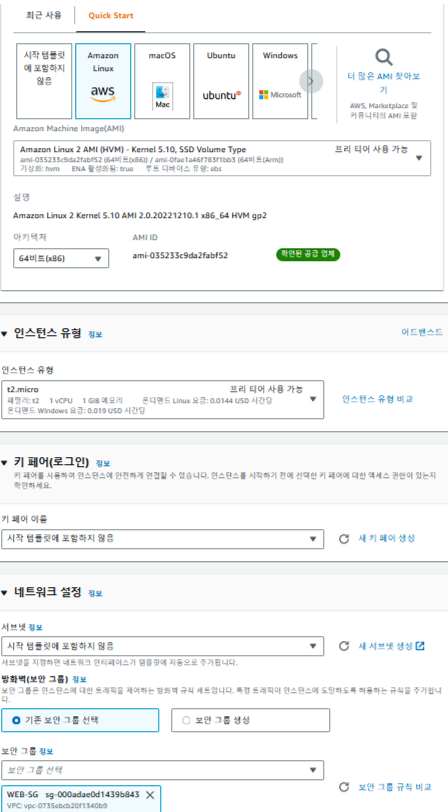
Step 3. Launch Template 생성
https://console.aws.amazon.com/ec2 에 접속하여
EC2 > 시작 템플릿 > 시작 템플릿 생성에 들어가준다.
template 이름을 start_template으로 지정해준다.
사진과 같이 구성한다.
→ amazon linux2 AMI
→ t2.micro
→ WEB-SG
사용자 데이터에 다음을 입력하고 시작 템플릿을 생성한다.
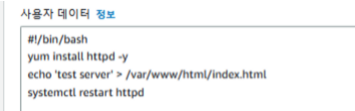
#!/bin/bash
yum install httpd -y
echo 'test server' > /var/www/html/index.html
systemctl restart httpd
Step 4. ALB 생성
https://console.aws.amazon.com/ec2 에서 진행한다.
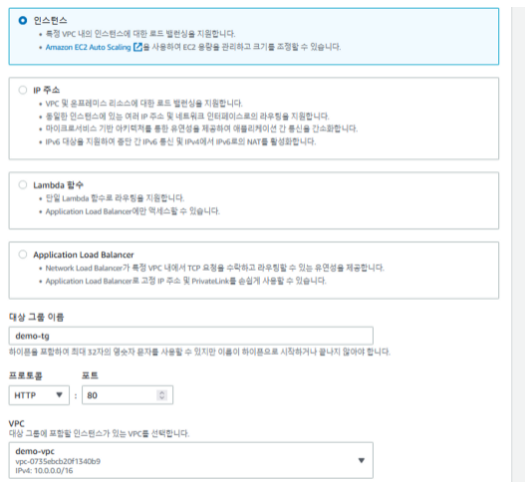
먼저 대상그룹을 생성해 주어야 한다.
demo-tg로 지정하고 생성한다.
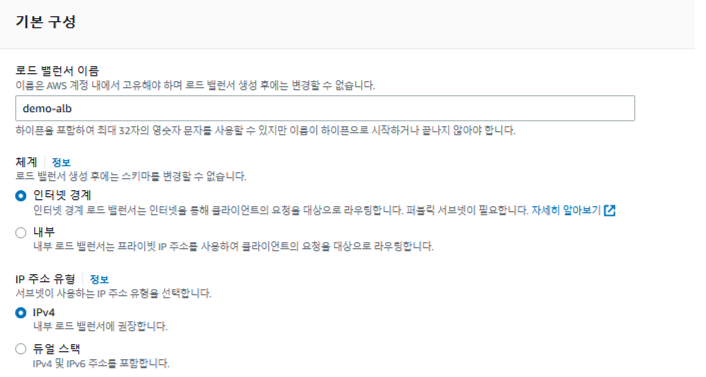
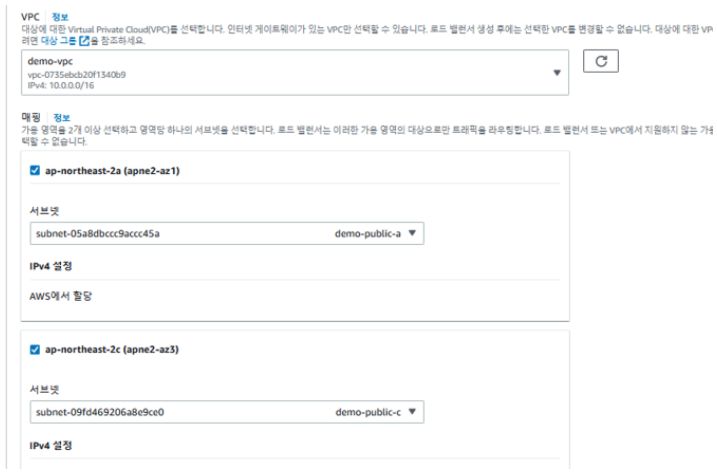
이제 로드벨런서를 생성해준다.
로드벨런서 유형에는 Application Load Balancer를 선택해준다.

로드벨런서 이름: demo-alb
체계: 인터넷 경계
IP 주소유형: IPv4
네트워크 매핑에는 퍼블릭 서브넷들을 선택해준다.
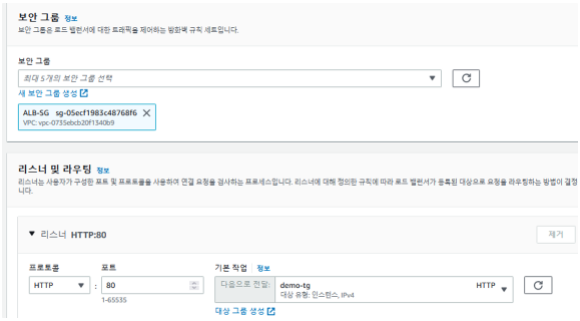
보안그룹은 ALB-SG를 선택하고 대상그룹은 방금 생성한거 선택해준다.
Step 5. Auto Scaling 생성
https://console.aws.amazon.com/ec2 콘솔에서 Auto Scaling을 생성하도록 한다.
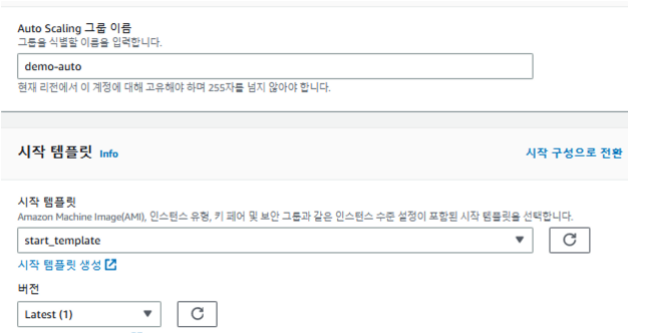
먼저 EC2 > Auto Scaling 그룹 > Auto Scaling 그룹 생성에서 진행한다.
이름을 demo-auto로 지정하고 최신버전으로 실행시킨다.
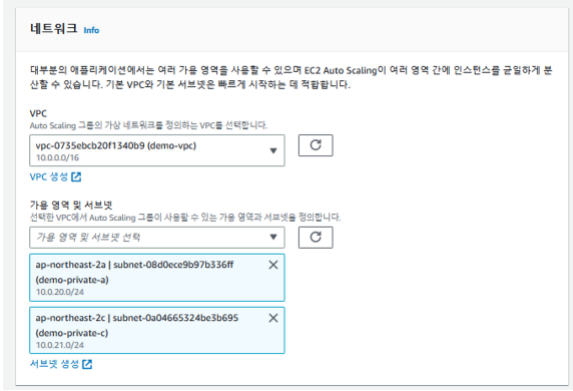
네트워크는 프라이빗 서브넷들을 선택해준다.
로드벨런서에 연결해준다.

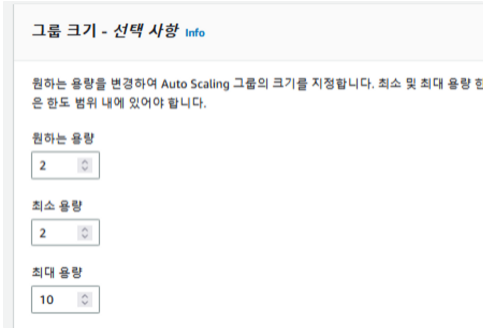
이제 그룹 크기를 최소 2 최대 10으로 지정한 후,
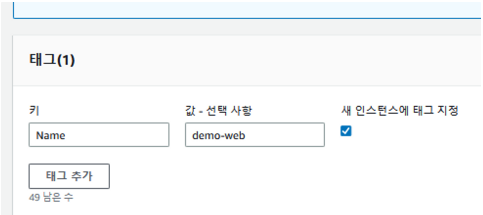
생성된 인스턴스의 tag가 demo-ec2가 되도록 태그도 지정해준다. 이후 생성해준다.
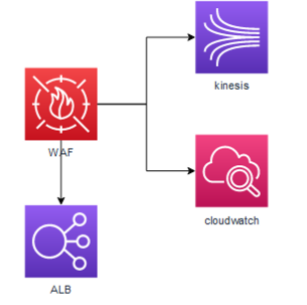
Step 6. waf 생성
다음 링크를 통해 waf를 생성해주도록 한다.
https://console.aws.amazon.com/wafv2 에 접속한다.
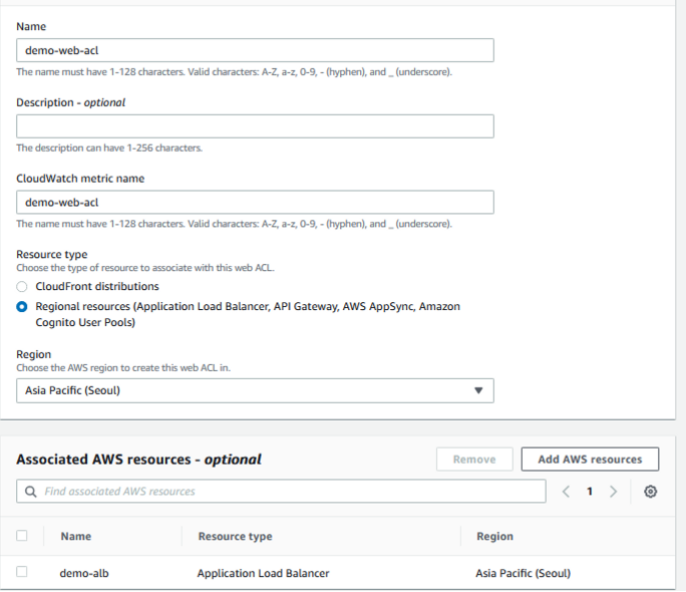
AWS WAF > Web ACLs > Create web ACL에 들어가서 web ACL을 생성한다.
이름을 demo-web-acl로 지정해준다.
Resource type는 아래를 선택한다. ( Cloudfront를 통한 배포가 아니기 때문 )
Region: ap-northeast-2
AWS resource에 생성하였던 ALB를 선택해 주도록 한다.
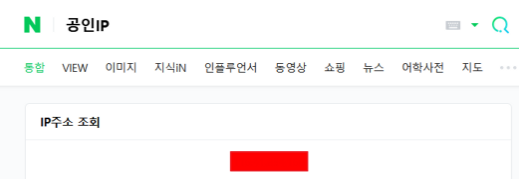
다음 링크에 들어가서 공인 IP를 확인한다.
https://search.naver.com/search.naver?where=nexearch&sm=top_hty&fbm=0&ie=utf8&query=공인IP
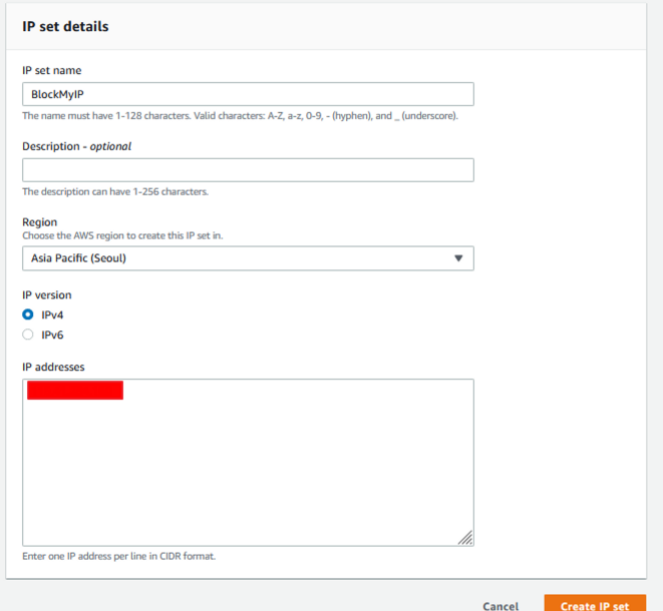
AWS WAF > IP sets > Create IP set 본인 IP에는 꼭 /32를 붙여주어야 한다.
AWS WAF > Rule groups > Create rule group

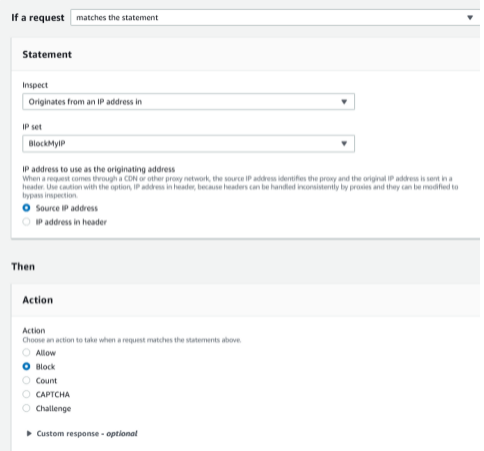
규칙이 하나이기 때문에 그대로 생성해준다.
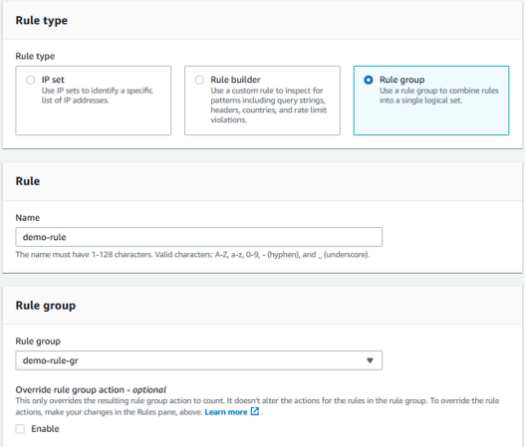
AWS WAF > Web ACLs > demo-web-acl > Add rule
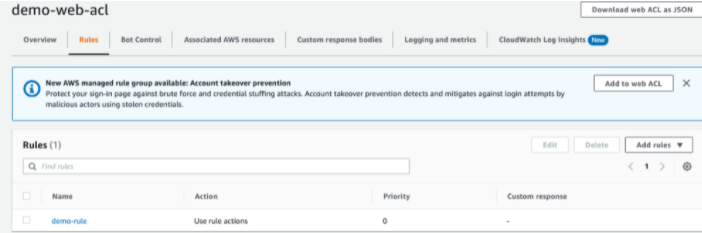
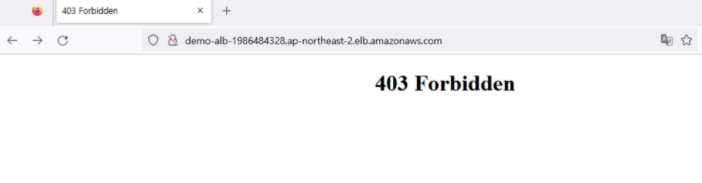
접속 테스트
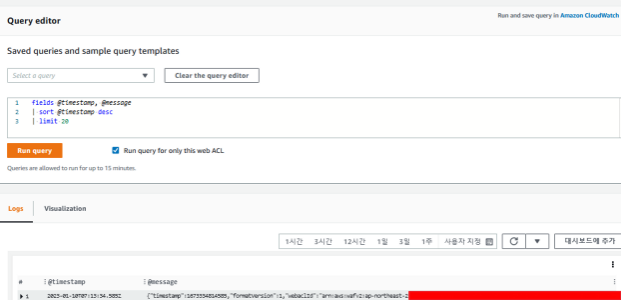
Step 7. cloudwatch
https://console.aws.amazon.com/wafv2 에 접속한다.
AWS WAF > Web ACLs > demo-web-acl > CloudWatch Log Insights New
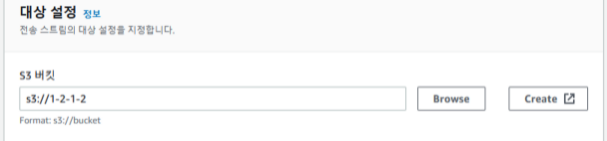
Step 8. kinesis Firehose
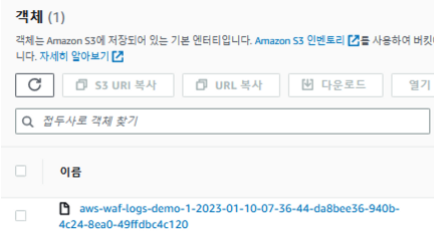
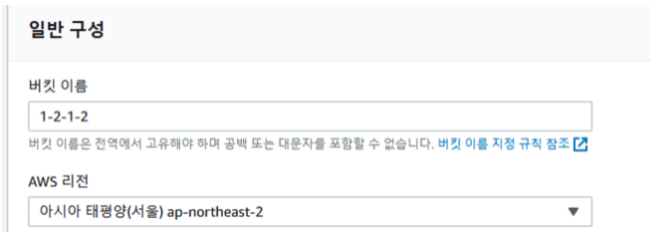
https://console.aws.amazon.com/s3 에 접속해준다.
Amazon S3 > 버킷 > 버킷 만들기
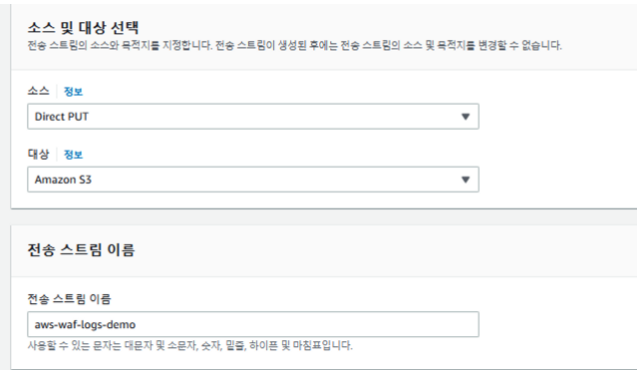
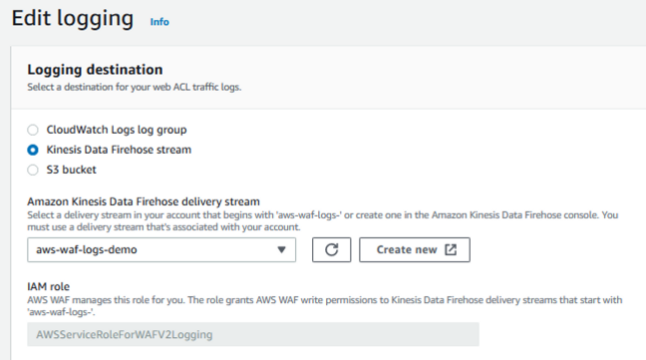
https://console.aws.amazon.com/firehose에 접속하여 kinesis firehose를 생성해주도록 한다.
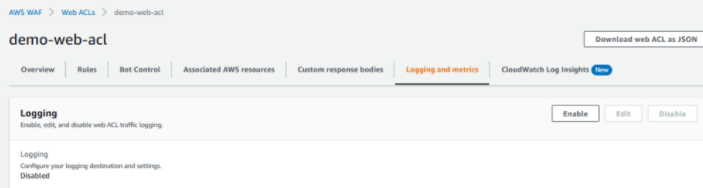
AWS WAF > Web ACLs > demo-web-acl > Enable logging
버킷 확인