🐸
지난 글에서 APNs JSON Payload를 간단 정리하면서 끝났는데요,
심화 과정(?) 일 것 같은 category 키의 Action, 알림을 통해 받은 데이터를 가공하는 Extension 개념이 나왔습니다.
그 두가지는 이 글에서 정리하겠습니다.
Declaring your actionable notification types
알림의 종류를 구분하고 알림 인터페이스에 action button을 추가할 수 있습니다.
개요
actionable한 알림은 사용자가 앱을 실행하지 않고도 알림에 응답할 수 있도록 하는 기능 입니다.
다른 알림은 인터페이스에 내용을 표기하지만, 할 수 있는 행동은 그냥 앱 실행 뿐 입니다.
하지만 actionable한 알림의 경우, 시스템은 알림 인터페이스 외에도 하나 이상의 버튼을 표시합니다.
버튼을 탭하면 선택한 액션을 앱으로 전송하고, 앱은 그것을 백그라운드에서 처리합니다.
요구사항
actionable한 알림을 지원하기 위해 다음과 같은 작업이 필요합니다.
- iOS 앱의 launch time 에서 하나 이상의 Notification Category를 등록해야 합니다.
- Notification category에 적당한 액션을 할당합니다.
- 등록한 모든 액션을 Handle합니다.
- Notification을 생성할 때 Payload에 category 식별자를 할당합니다.
👩💻 iOS에서는 category를 Notification Service App Extension과 Notification Content app Extension을 구분짓는데도 사용하고 있습니다.
Declare your custom actions and notification types
앱은 모든 액션을 Handle 해야 하기 때문에, 개발자는 반드시! launch time에서 앱이 지원하는 액션을 등록해야 합니다.
액션을 정의할 때 UNNotificationCategory 와 UNNotificationAction 객체를 조합하여 선언해야 합니다.
UNNotificationCategory 객체는 앱이 지원하는 알림 유형을 정의합니다.
UNNotificationAction 객체는 각 유형에 대해 표시할 버튼을 정의 합니다.
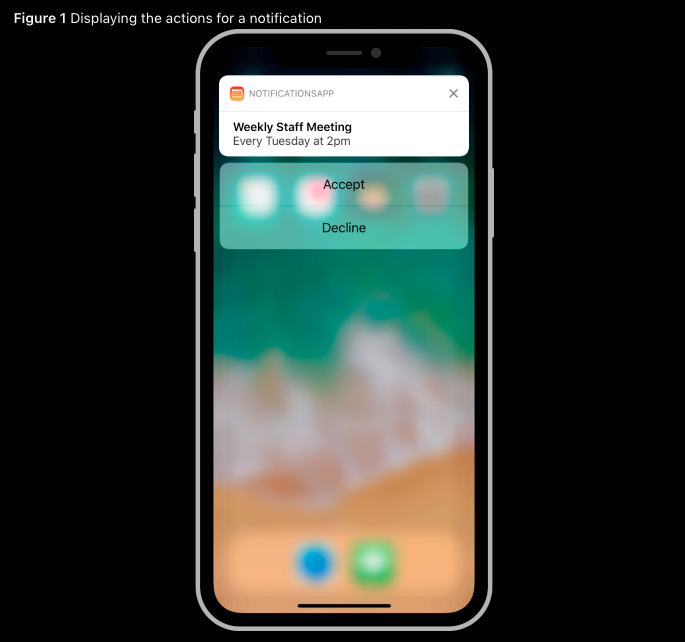
(Ex. Metting 초대 알림은 accept, reject 버튼을 포함해야 합니다)
UNNotificationCategory
이 객체는 고유한 식별자와 해당 유형의 알림을 처리하는 방법에 대한 옵션을 가지고 있습니다.
identifier는 가장 중요한 부분으로, 알림을 생성할 때 해당 문자열을 payload에 포함시켜야 합니다.
시스템은 해당 문자열을 사용하여 해당 하는 카테고리 객체와 작업을 찾습니다.
UNNotificationAction
알림 카테고리에 액션을 연결하기 위해 한 개 이상의 UNNotificationAction 객체가 필요합니다.
각각의 객체는 사용자에게 표시되는 localized string과 해당 액션을 처리하는 방법을 나타내는 옵션을 포함합니다.
예시
일단 Action을 정의합니다.
// Define custom actions
let acceptAction = UNNotificationAction(identifier: "ACCEPT_ACTION",
                                        title: "Accept",
                                        options: [])

let declineAction = UNNotificationAction(identifier: "DECLINE_ACTION",
                                         title: "Decline",
                                         options: [])
다음 카테고리 객체를 만듭니다.
// Define the notification Category
let meetingInviteCategory =
UNNotificationCategory(identifier: "MEETING_INVITATION",
                       actions: [acceptAction, declineAction],
                       intentIdentifiers: [],
                       hiddenPreviewsBodyPlaceholder: "",
                       options: .customDismissAction)
NotificationCenter에 이 카테고리를 등록해줍니다.
// Register the notification Category
let notificationCenter = UNUserNotificationCenter.current()
notificationCenter.setNotificationCategories([meetingInviteCategory])
그 다음! launch 시 등록하는 함수를 넣어줍니다.
func application(_ application: UIApplication, didFinishLaunchingWithOptions launchOptions: [UIApplication.LaunchOptionsKey: Any]?) -> Bool {
	NotificationManager().registerNotificationCategory()
}👩💻 하지만? 버튼이 아니라 Text 편집같은 액션이 있을 수 있겠죠? 이 경우에 UNTextInputNotificationAction 객체를 사용해줍니다.
Include a notification category in the
iOS는 payload에 유효한 category 식별자 문자열이 포함된 알림에만 액션을 표시합니다.
iOS는 category 식별자를 사용하여 앱이 등록한 카테고리와 관련 액션을 찾습니다.
그리고 액션 버튼을 알림 인터페이스에 추가하기 위해 해당 정보를 사용합니다.
local Notification에 카테고리 할당하기
UNMutableNotificationContent 객체의 categoryIdentifier 속성에 적절한 문자열을 세팅합니다.
let content = UNMutableNotificationContent()
content.title = "Weekly Staff Meeting"
content.body = "Every Tuesday at 2pm"
content.userInfo = ["MEETING_ID" : meetingID,
                    "USER_ID" : userID ]
content.categoryIdentifier = "MEETING_INVITATION"
Remote Notification에 카테고리 할당하기
Remote Notification에 카테고리 식별잘르 추가하려면 JSON Payload에 category 키를 추가해야 합니다.
Action에 걸맞는 custom keys 들도 넣어주면 좋습니다. 그럼 userInfo 딕셔너리에서 꺼내 쓸 수 있습니다.
{
   "aps" : {
      "category" : "MEETING_INVITATION"
      "alert" : {
         "title" : "Weekly Staff Meeting"
         "body" : "Every Tuesday at 2pm"
      },
   },
   "MEETING_ID" : "123456789",
   "USER_ID" : "ABCD1234"

}
Handle the selected action
앱은 정의한 모든 액션을 handle 해야 합니다.
유저가 액션을 선택하면, iOS는 앱을 Background 에서 실행한 뒤 UNUserNotificationCenter 객체에 알리며, 이 객체는 대리자에게 통지합니다.
userNotificationCenter(_:didReceive:withCompletionHandler:) 메서드를 사용하여 선택한 동작을 식별하고 적절한 응답을 제공할 수 있습니다.
CompletionHandler를 꼭! 명시적으로 호출해줘야 합니다.
    // 사용자가 앱 내부나 앱 외부에서 알림을 클릭하여 앱을 실행할 때 호출된다.
    func userNotificationCenter(_ center: UNUserNotificationCenter,
                                didReceive response: UNNotificationResponse,
                                withCompletionHandler completionHandler: @escaping () -> Void) {

        // Remote Notification received
        let userInfo = response.notification.request.content.userInfo

        // custom-key 뽑기
        if let gameId = userInfo["gameId"] as? String {
            print("gameId = \(gameId)")
        }

        if let messageId = userInfo["messageId"] as? String {
            print("messageId = \(messageId)")
        }

        // Get The Meeting Id from the original notification
        let meetingID = userInfo["MEETING_ID"] as! String
        let userID = userInfo["USER_ID"] as! String

        // Perform the task associated with the action
        switch response.actionIdentifier {
        case "ACCEPT_ACTION":
            print("\(userID)님이 \(meetingID) 미팅을 수락하셨습니다")
        case "DECLINE_ACTION":
            print("\(userID)님이 \(meetingID) 미팅을 거부하셨습니다")
        case UNNotificationDefaultActionIdentifier:
            print("그냥 액션 정의 안했고 알림 탭 해서 앱 실행시킨 경우")
        case UNNotificationDismissActionIdentifier:
            print("알림 dismiss 시켜버린 경우")
        default:
            break
        }

        // Always call the completion handler when done.
        completionHandler()
    }
주의할 점
만약 액션에 대한 응답이 Disk 상의 파일 접근을 필요로 한다면 다른 방식을 고려해야 합니다.
사용자는 잠금 상태에서도 액션에 응답할 수 있기 때문에 완전한 옵션으로 암호화된 파일에 대한 액세스가 불가능 할 수 있습니다.
이럴 경우, 변경 사항을 일시적으로 저장하고 나중에 앱의 데이터 구조에 통합해야 할 수도 있습니다.
👩💻 UNNotificationDefaultActionIdentifier, UNNotificationDismissActionIdentifier 은 그냥 알림을 탭해서 앱에 들어오거나 dismiss 한 경우의 처리를 할 수 있습니다.
여기까지 Notification에 Action을 추가하는 내용이었습니다.
이제 Extension을 보시죠!
Modifying content in newly delivered notifications
iOS 기기에 display 되기 전에 Remote Notification의 payload를 수정할 수 있습니다.
개요
Remote Notification의 내용을 수정하려는 경우는 대표적으로 다음과 같습니다.
- 암호화된 데이터를 해독해야 하는 경우
- 첨부 파일의 크기가 최대 Payload의 크기(4KB)를 초과하는 경우
- 사용자의 기기에서 데이터를 통합해 Notification의 내용을 업데이트 해야 하는 경우
Remote Notification을 수정하려면, iOS App Bundle 내에 포함된 Notification Service app Extension(알림 서비스 앱 확장) 이 필요합니다.
이 app extension은 시스템이 사용자에게 알림을 표시하기 전에 Remote notification을 먼저 수신하므로, Payload를 업데이트 할 시간을 제공합니다.
app extension으로 notification들을 컨트롤 할 수 있습니다.
👩💻 Notification Service app extension은 시스템에서 사용자에게 alert을 표시하는 경우에만 적용됩니다. 만약 alert이 비활성화 되도록 app에서 disable 시키거나 payload에 sound나 badging을 하라고 했다면, extension은 사용되지 않습니다.
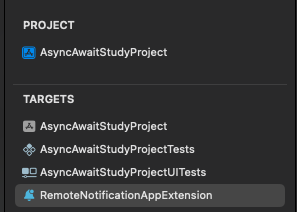
Add a service app extension to your project
XCode -> 상단 File -> New -> Target -> Notification Service Extension
그럼 이렇게 Target 밑에 추가됩니다.
Implement your extension's handler methods
생성한 Notification Service Extension 프로젝트를 보면
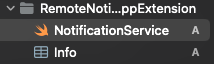
요렇게 NotificationService가 생성됩니다.
import UserNotifications

/*
 Remote Notification의 Payload을 수정할 수 있는 Remote Notification Service App Extension
 */
class NotificationService: UNNotificationServiceExtension {

    var contentHandler: ((UNNotificationContent) -> Void)?
    var bestAttemptContent: UNMutableNotificationContent?

    /**
     이 메서드를 사용하여 업데이트 된 content를 포함하는 UNMutableNotificationContent 객체를 생성합니다.
     Playload를 수정하고 제공된 contentHandelr를 호출하는데 30초의 시간이 있습니다.
     코드가 30초 보다 오래 걸리면 시스템은 자동으로 serviceExtensionTimeWillExpire()를 호출합니다.
     */
    override func didReceive(_ request: UNNotificationRequest, withContentHandler contentHandler: @escaping (UNNotificationContent) -> Void) {
        self.contentHandler = contentHandler
        bestAttemptContent = (request.content.mutableCopy() as? UNMutableNotificationContent)

        if let bestAttemptContent = bestAttemptContent {
            // Modify the notification content here...
            bestAttemptContent.title = "\(bestAttemptContent.title) [modified]"

            contentHandler(bestAttemptContent)
        }
    }

    /**
     이 메서드를 사용하여 실행 중인 Payload 수정 작업을 종료합니다.
     */
    override func serviceExtensionTimeWillExpire() {
        // Called just before the extension will be terminated by the system.
        // Use this as an opportunity to deliver your "best attempt" at modified content, otherwise the original push payload will be used.
        if let contentHandler = contentHandler, let bestAttemptContent =  bestAttemptContent {
            contentHandler(bestAttemptContent)
        }
    }

}
override func didReceive(_ request: UNNotificationRequest, withContentHandler contentHandler: @escaping (UNNotificationContent) -> Void) {
self.contentHandler = contentHandler
bestAttemptContent = (request.content.mutableCopy() as? UNMutableNotificationContent)
if let bestAttemptContent = bestAttemptContent {
// Modify the notification content here...
bestAttemptContent.title = "\(bestAttemptContent.title) [modified]"
contentHandler(bestAttemptContent)
}
}이 메서드를 사용하여 업데이트된 content를 포함하는 UNMutableNotificationContent 객체를 생성합니다.
수정 후 completionHandler를 호출하기 전 까지 30초의 시간이 있고, 30초가 넘어가면 시스템은 자동으로 serviceExtensionTimeWillExpire()을 호출하여 실행 중인 payload 수정 작업을 강제 종료합니다.
두 메서드 중 어느 하나에서 완료 핸들러를 호출하지 않으면 시스템은 원래 알림 내용을 표시합니다.
예시
예를들어 유저의 민감한 정보가 Payload에 암호화된 상태로 왔고, 우리가 이걸 받기전에 복호화 시켜야 한다고 합시다.
{
   "aps" : {
      "category" : "SECRET",
      "mutable-content" : 1,
      "alert" : {
         "title" : "Secret Message!",
         "body"  : "(Encrypted)"
     },
   },
   "ENCRYPTED_DATA" : "Salted__·öîQÊ$UDì_¶Ù∞èΩ^¬%gq∞NÿÒQùw"
}👩💻 modify 할 Payload에는 mutable-content가 꼭 1로 와야 합니다.
또한 alert으로 와야합니다.
    override func didReceive(_ request: UNNotificationRequest, withContentHandler contentHandler: @escaping (UNNotificationContent) -> Void) {
        self.contentHandler = contentHandler
        bestAttemptContent = (request.content.mutableCopy() as? UNMutableNotificationContent)


        // 복호화 하려는 데이터 가져오기
        let encryptedData = bestAttemptContent?.userInfo["ENCRYPTED_DATA"]
        if let bestAttemptContent = bestAttemptContent {

            // 복호화해서 UNMutableNotificationContent에 넣어주기
            if let data = encryptedData as? String {
                let decryptedMessage = self.decrypt(data: data)
                bestAttemptContent.body = decryptedMessage
            } else {
                bestAttemptContent.body = "(Encrypted)"
            }

            // 항상 마지막에 이 handler를 호출해줘야 한다.
            contentHandler(bestAttemptContent)
        }
    }
사용자 정의 Key니까 userInfo를 딕셔너리를 통해 접근합니다.
복호화하여 NSMutableNotificationContent 객체에 넣어주고 마지막에 꼭!!! handler를 호출합니다.
하지만 만약에 약 30초 안에 복호화에 실패했다면..
    override func serviceExtensionTimeWillExpire() {
        // Called just before the extension will be terminated by the system.
        // Use this as an opportunity to deliver your "best attempt" at modified content, otherwise the original push payload will be used.

        if let contentHandler = contentHandler, let bestAttemptContent =  bestAttemptContent {
            // 복호화 실패 시
            bestAttemptContent.subtitle = "(Encrpyed)"
            bestAttemptContent.body = ""

            contentHandler(bestAttemptContent)
        }
    }
이런 방어 코드도 꼭 넣어줘야 합니다.
마무리
APNs Payload 심화과정(?)인 action, extension까지 보았습니다.
다음 글은 마지막으로 provider server <-> APNs 간의 신뢰성 있는 연결을 위한 token-based, certificate-based 인증만 정리하면 되겠네요!