
📌Nuxt 설치
npm init nuxt-app 폴더명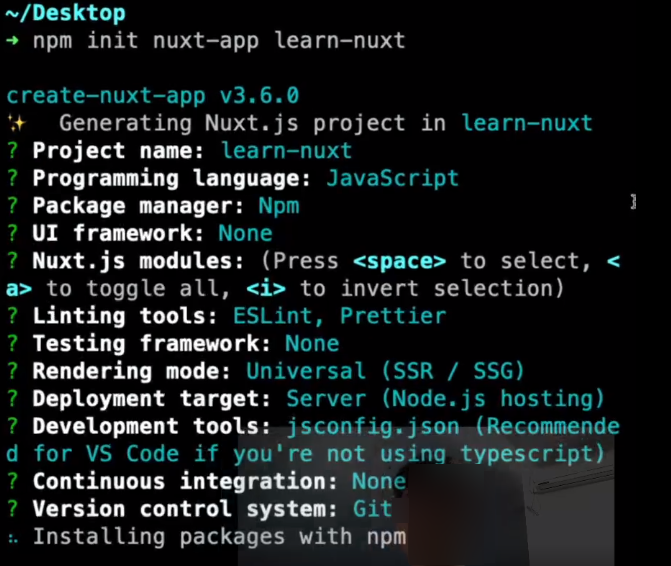
📌scss
$ npm install --save-dev node-sass sass-loader
$ npm install --save-dev node-sass
📃 nuxt.config.js
css: ['@/assets/css/style.scss'],📃 style.scss
@charset "UTF-8";
//공통
@import 'common/reset';
//레이아웃
@import 'layout/layout';
//페이지
@import 'pages/main';
@import 'pages/sub';
📃 reset.scss
@import url('https://fonts.googleapis.com/css2?family=Noto+Sans+KR:wght@300;400;500;700;900&display=swap');
@import url('https://fonts.googleapis.com/css2?family=Roboto:wght@300;400;500;700;900&display=swap');

* {
  margin: 0;
  padding: 0;
  box-sizing: border-box;
}

/* reset */
html {
  //   font-size: 62.5%; /* Sets up the Base 10 stuff */
  background-color: #fff;
  overflow-y: scroll;
}
body,
div,
dl,
dt,
dd,
ul,
ol,
li,
h1,
h2,
h3,
h4,
h5,
h6,
pre,
code,
form,
fieldset,
legend,
textarea,
p,
blockquote,
th,
td,
input,
select,
textarea,
button {
  margin: 0;
  padding: 0;
  font-family: 'Roboto', 'Noto Sans KR', sans-serif;
}
fieldset,
img {
  border: 0 none;
}
dl,
ul,
ol,
menu,
li {
  list-style: none;
}
blockquote,
q {
  quotes: none;
}
blockquote:before,
blockquote:after,
q:before,
q:after {
  content: none;
}
input,
select,
textarea,
button {
  vertical-align: middle;
}
button {
  border: 0 none;
  background-color: transparent;
  cursor: pointer;
}
body,
th,
td,
input,
select,
textarea,
button {
  font-weight: 400;
  color: #222;
  outline: none;
} /* color값은 디자인가이드에 맞게사용 */
a {
  color: #333;
  text-decoration: none;
  outline: none;
  cursor: pointer;
}
i {
  font-style: normal;
}
a:active,
a:hover {
  text-decoration: none;
}
address,
caption,
cite,
code,
dfn,
em,
var {
  font-style: normal;
  font-weight: normal;
}
h1,
h2,
h3,
h4,
h5 {
  font-weight: 400;
}
table {
  border-collapse: collapse;
  border-spacing: 0;
}
legend {
  overflow: hidden;
  display: inline-block;
  *display: inline;
  zoom: 1;
  text-indent: -9999px;
  white-space: nowrap;
  line-height: 0;
}

img {
  vertical-align: top;
  image-rendering: auto;
  image-rendering: crisp-edges;
  image-rendering: -moz-crisp-edges;
  /* image-rendering: pixelated; */
}
📌axios
$ npm install @nuxtjs/axios📃 nuxt.config.js
modules: ['@nuxtjs/axios'],📌swiper
$ npm i vue-awesome-swiper@4.1.1 //version은 환경에 따라 변경
$ npm i swiper@5.4.5 //version은 환경에 따라 변경<template>
<div>
<swiper :options="swiperOption">
<swiper-slide>
<p>1page</p>
</swiper-slide>
<swiper-slide>
<p>2page</p>
</swiper-slide>
<!-- pagination -->
<div slot="pagination" class="swiper-pagination"></div>
</swiper>
</div>
</template>
<script>
import { Swiper, SwiperSlide } from 'vue-awesome-swiper'
import 'swiper/css/swiper.css'
export default {
name: 'Banner',
components: { Swiper, SwiperSlide },
data() {
return {
swiperOption: {
slidesPerView: 1,
spaceBetween: 0,
pagination: {
el: '.swiper-pagination',
type: 'progressbar',
},
loop: true,
autoplay: {
delay: 5000,
},
},
}
},
}
</script>📌error
🔧 multi-word-component-names
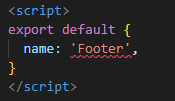
vue파일에 name을 지정해주다보면 이렇게 신경쓰이는 빨간줄-_-이 생기고
Component name "Footer" should always be multi-word vue/multi-word-component-names
이런 오류메세지가 뜬다
Eslint와 같이 사용할 때 발생하는 에러인데,
vue에서 component명을 만들 때 반드시 단어의 조합(CmmMenu) 으로 지어야 한다는 의미고
html 태그와 헷갈리지 않게 하려고 그렇게 설정해놨다고 한다 ,,,
📃 nuxt.config.js
rules: {
	'vue/multi-word-component-names': 'off',
},
추가하면 해결.
구글 서치 해보면서 여러 방법을 사용해보았지만 이 방법이 가장 확실했다 휴
뭔가 추가사항이 있다면 더 붙여야겠다
끝.


프론트짱이될거야
잘보고갑니다~