🎯 목표
- EKS 배포하기
✅ 현황
- 로컬이 아닌 작업용 EC2에서 진행

🏃 진행
1. 작업용 EC2 생성
- 스터디에서 제공해 주신 CloudFormation으로 생성
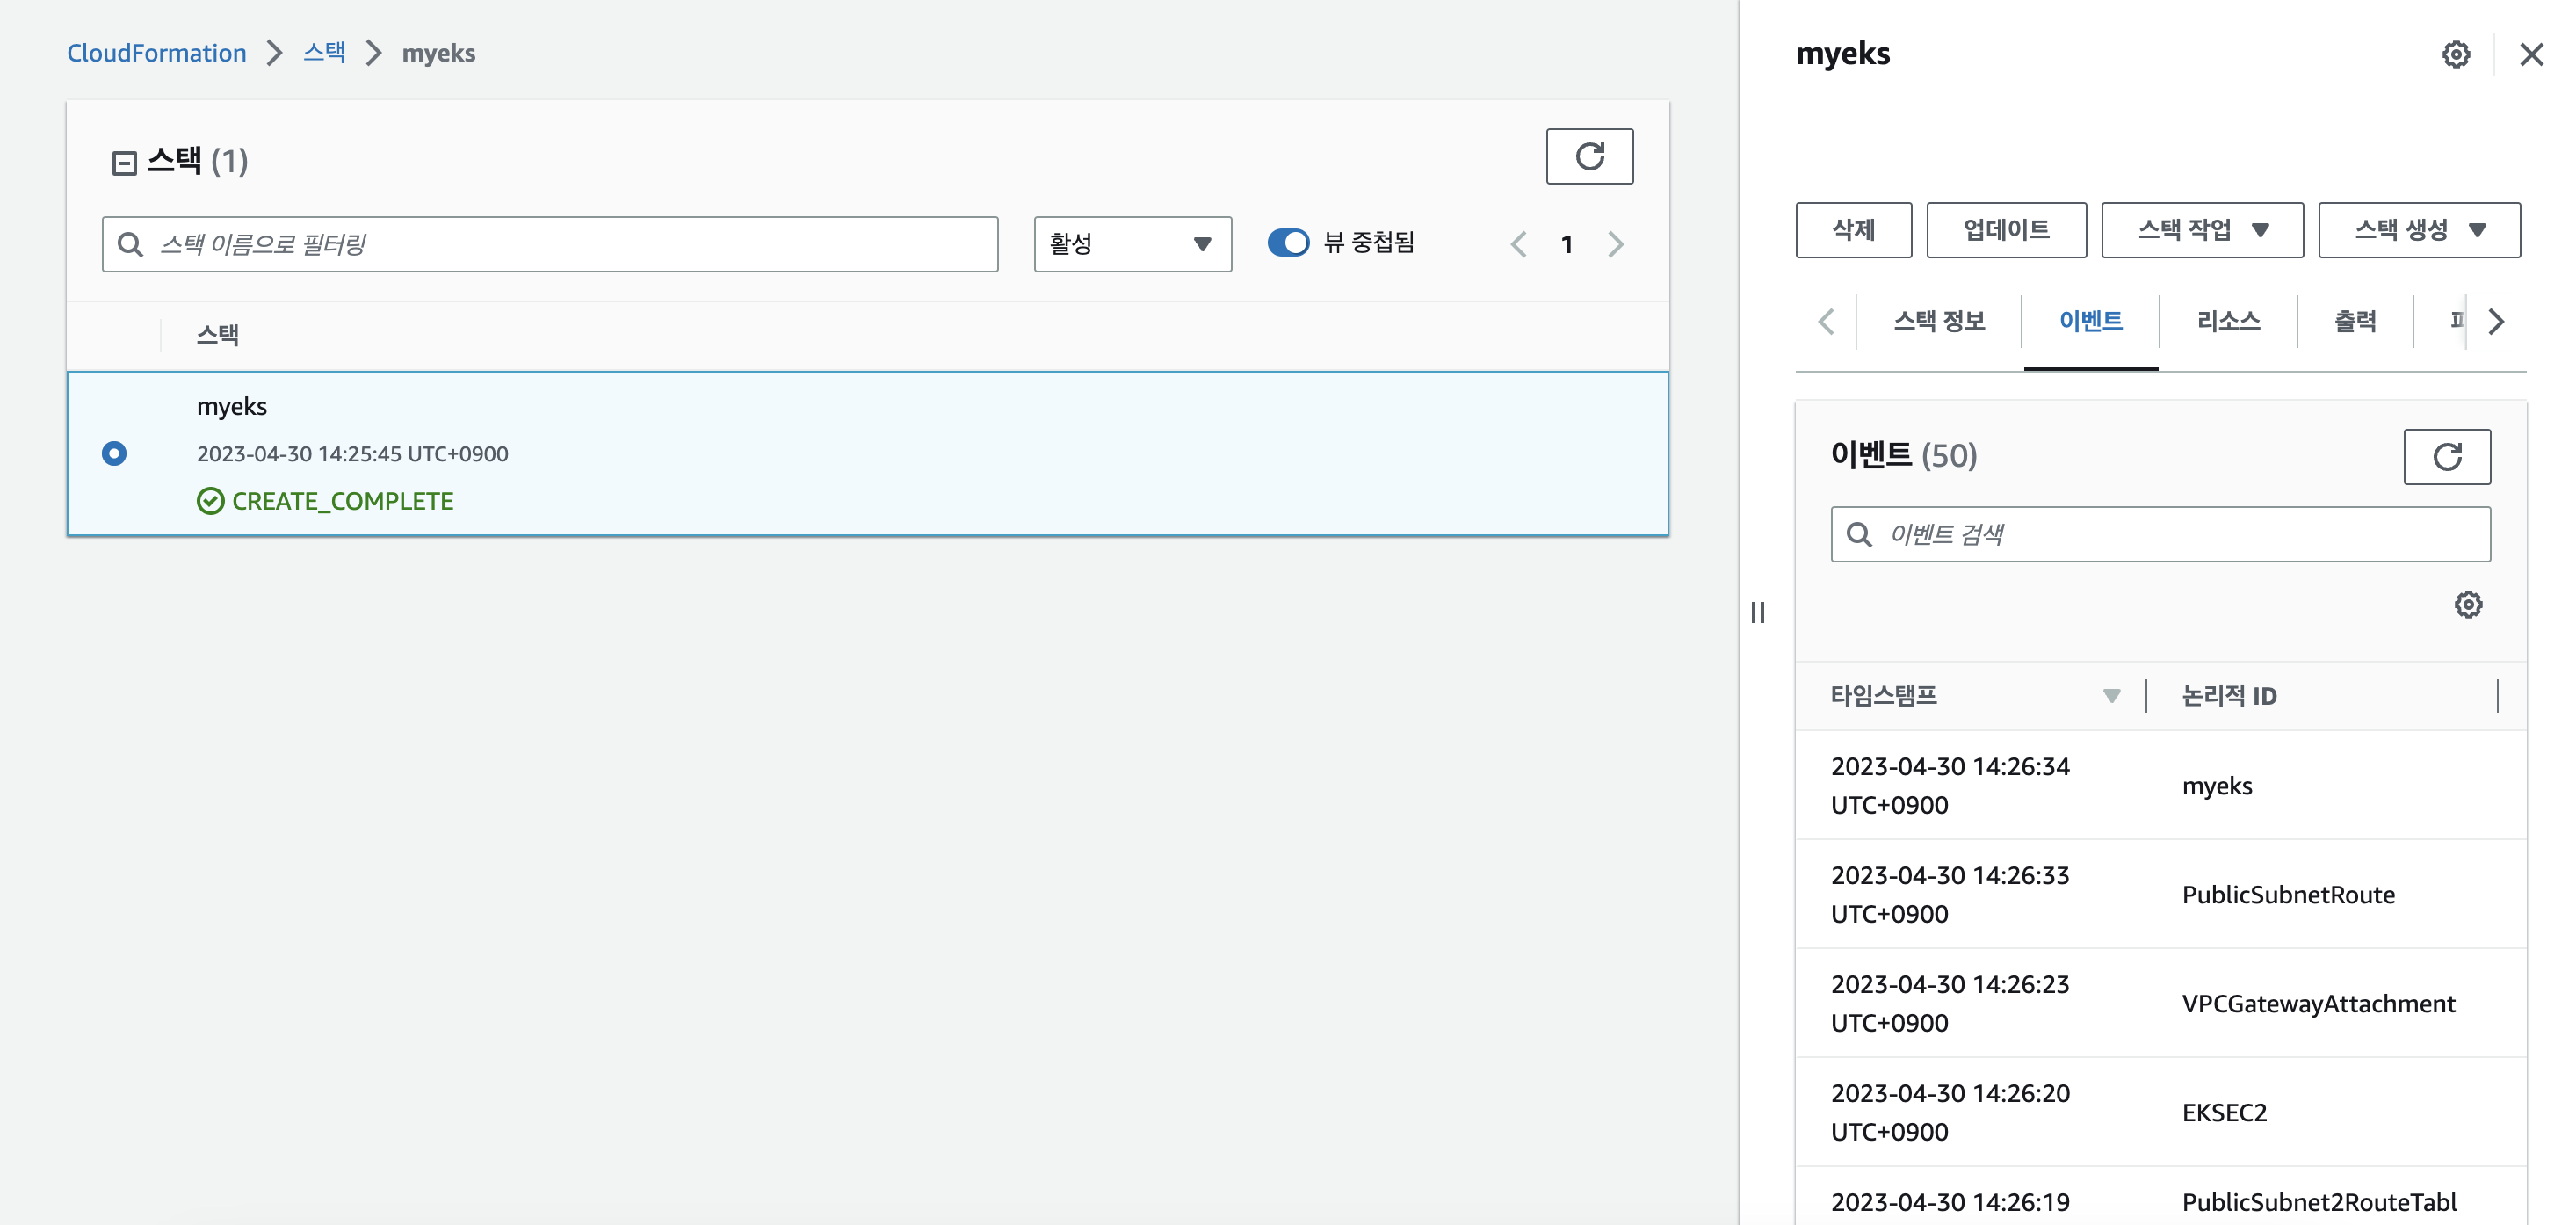
- 생성 완료 후 EKS 배포를 위해 ssh로 EC2 접속
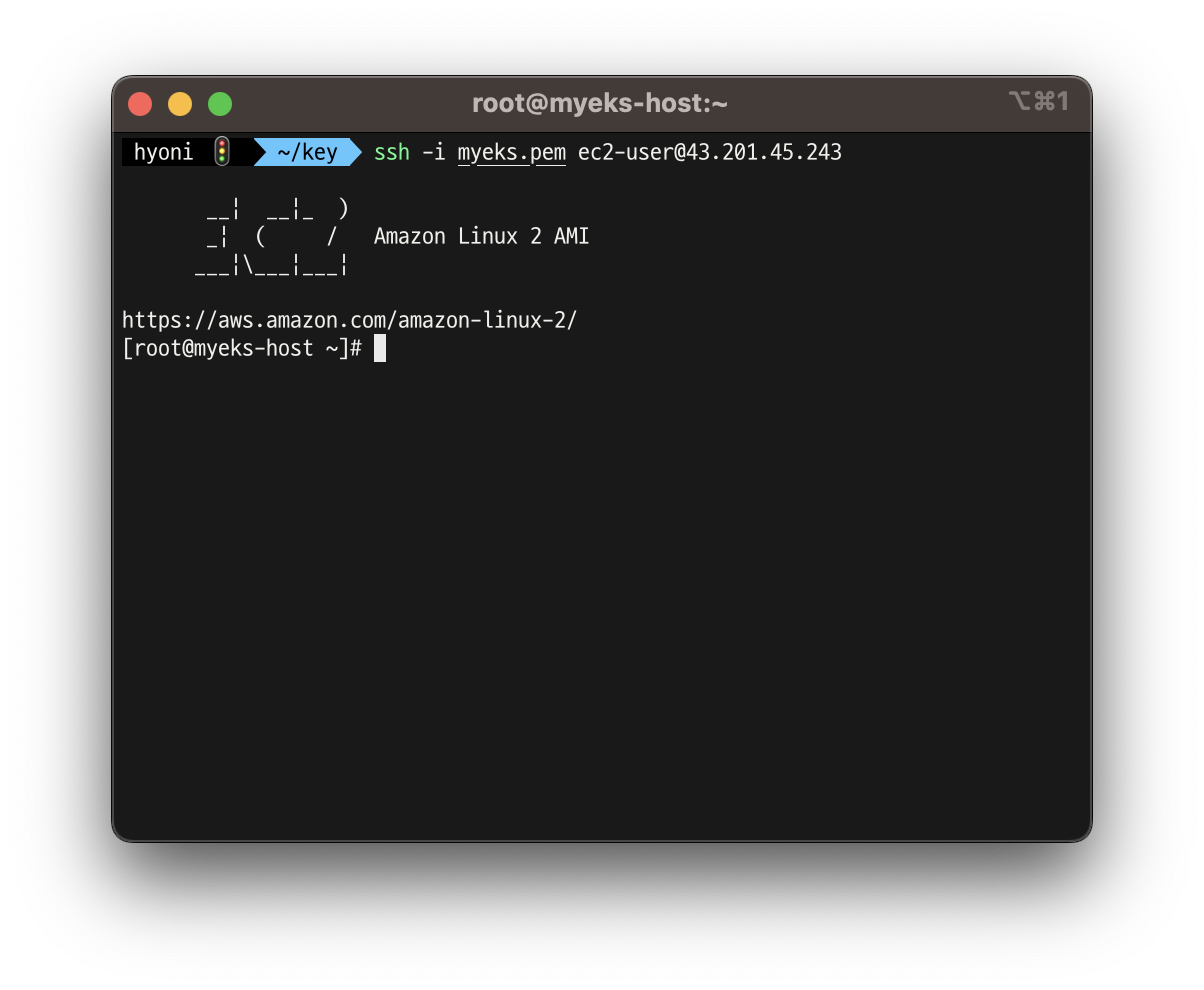
- CloudFormation에서 EC2에 kubectl을 설치 하라고 했기 때문에 kubectl이 설치되어 있는 것을 확인 할 수 있음!

CloudFormation
AWSTemplateFormatVersion: '2010-09-09'

Metadata:
  AWS::CloudFormation::Interface:
    ParameterGroups:
      - Label:
          default: "<<<<< EKSCTL MY EC2 >>>>>"
        Parameters:
          - ClusterBaseName
          - KeyName
          - SgIngressSshCidr
          - MyInstanceType
          - LatestAmiId
      - Label:
          default: "<<<<< Region AZ >>>>>"
        Parameters:
          - TargetRegion
          - AvailabilityZone1
          - AvailabilityZone2
      - Label:
          default: "<<<<< VPC Subnet >>>>>"
        Parameters:
          - VpcBlock
          - PublicSubnet1Block
          - PublicSubnet2Block
          - PrivateSubnet1Block
          - PrivateSubnet2Block

Parameters:
  ClusterBaseName:
    Type: String
    Default: myeks
    AllowedPattern: "[a-zA-Z][-a-zA-Z0-9]*"
    Description: must be a valid Allowed Pattern '[a-zA-Z][-a-zA-Z0-9]*'
    ConstraintDescription: ClusterBaseName - must be a valid Allowed Pattern

  KeyName:
    Description: Name of an existing EC2 KeyPair to enable SSH access to the instances. Linked to AWS Parameter
    Type: AWS::EC2::KeyPair::KeyName
    ConstraintDescription: must be the name of an existing EC2 KeyPair.

  SgIngressSshCidr:
    Description: The IP address range that can be used to communicate to the EC2 instances
    Type: String
    MinLength: '9'
    MaxLength: '18'
    Default: 0.0.0.0/0
    AllowedPattern: (\d{1,3})\.(\d{1,3})\.(\d{1,3})\.(\d{1,3})/(\d{1,2})
    ConstraintDescription: must be a valid IP CIDR range of the form x.x.x.x/x.

  MyInstanceType:
    Description: Enter t2.micro, t2.small, t2.medium, t3.micro, t3.small, t3.medium. Default is t2.micro.
    Type: String
    Default: t3.medium
    AllowedValues:
      - t2.micro
      - t2.small
      - t2.medium
      - t3.micro
      - t3.small
      - t3.medium

  LatestAmiId:
    Description: (DO NOT CHANGE)
    Type: 'AWS::SSM::Parameter::Value<AWS::EC2::Image::Id>'
    Default: '/aws/service/ami-amazon-linux-latest/amzn2-ami-hvm-x86_64-gp2'
    AllowedValues:
      - /aws/service/ami-amazon-linux-latest/amzn2-ami-hvm-x86_64-gp2

  TargetRegion:
    Type: String
    Default: ap-northeast-2

  AvailabilityZone1:
    Type: String
    Default: ap-northeast-2a

  AvailabilityZone2:
    Type: String
    Default: ap-northeast-2c

  VpcBlock:
    Type: String
    Default: 192.168.0.0/16

  PublicSubnet1Block:
    Type: String
    Default: 192.168.1.0/24

  PublicSubnet2Block:
    Type: String
    Default: 192.168.2.0/24

  PrivateSubnet1Block:
    Type: String
    Default: 192.168.3.0/24

  PrivateSubnet2Block:
    Type: String
    Default: 192.168.4.0/24

Resources:
# VPC
  EksVPC:
    Type: AWS::EC2::VPC
    Properties:
      CidrBlock: !Ref VpcBlock
      EnableDnsSupport: true
      EnableDnsHostnames: true
      Tags:
        - Key: Name
          Value: !Sub ${ClusterBaseName}-VPC

# PublicSubnets
  PublicSubnet1:
    Type: AWS::EC2::Subnet
    Properties:
      AvailabilityZone: !Ref AvailabilityZone1
      CidrBlock: !Ref PublicSubnet1Block
      VpcId: !Ref EksVPC
      MapPublicIpOnLaunch: true
      Tags:
        - Key: Name
          Value: !Sub ${ClusterBaseName}-PublicSubnet1
        - Key: kubernetes.io/role/elb
          Value: 1

  PublicSubnet2:
    Type: AWS::EC2::Subnet
    Properties:
      AvailabilityZone: !Ref AvailabilityZone2
      CidrBlock: !Ref PublicSubnet2Block
      VpcId: !Ref EksVPC
      MapPublicIpOnLaunch: true
      Tags:
        - Key: Name
          Value: !Sub ${ClusterBaseName}-PublicSubnet2
        - Key: kubernetes.io/role/elb
          Value: 1

  InternetGateway:
    Type: AWS::EC2::InternetGateway

  VPCGatewayAttachment:
    Type: AWS::EC2::VPCGatewayAttachment
    Properties:
      InternetGatewayId: !Ref InternetGateway
      VpcId: !Ref EksVPC

  PublicSubnetRouteTable:
    Type: AWS::EC2::RouteTable
    Properties:
      VpcId: !Ref EksVPC
      Tags:
        - Key: Name
          Value: !Sub ${ClusterBaseName}-PublicSubnetRouteTable

  PublicSubnetRoute:
    Type: AWS::EC2::Route
    Properties:
      RouteTableId: !Ref PublicSubnetRouteTable
      DestinationCidrBlock: 0.0.0.0/0
      GatewayId: !Ref InternetGateway

  PublicSubnet1RouteTableAssociation:
    Type: AWS::EC2::SubnetRouteTableAssociation
    Properties:
      SubnetId: !Ref PublicSubnet1
      RouteTableId: !Ref PublicSubnetRouteTable

  PublicSubnet2RouteTableAssociation:
    Type: AWS::EC2::SubnetRouteTableAssociation
    Properties:
      SubnetId: !Ref PublicSubnet2
      RouteTableId: !Ref PublicSubnetRouteTable

# PrivateSubnets
  PrivateSubnet1:
    Type: AWS::EC2::Subnet
    Properties:
      AvailabilityZone: !Ref AvailabilityZone1
      CidrBlock: !Ref PrivateSubnet1Block
      VpcId: !Ref EksVPC
      Tags:
        - Key: Name
          Value: !Sub ${ClusterBaseName}-PrivateSubnet1
        - Key: kubernetes.io/role/internal-elb
          Value: 1

  PrivateSubnet2:
    Type: AWS::EC2::Subnet
    Properties:
      AvailabilityZone: !Ref AvailabilityZone2
      CidrBlock: !Ref PrivateSubnet2Block
      VpcId: !Ref EksVPC
      Tags:
        - Key: Name
          Value: !Sub ${ClusterBaseName}-PrivateSubnet2
        - Key: kubernetes.io/role/internal-elb
          Value: 1

  PrivateSubnetRouteTable:
    Type: AWS::EC2::RouteTable
    Properties:
      VpcId: !Ref EksVPC
      Tags:
        - Key: Name
          Value: !Sub ${ClusterBaseName}-PrivateSubnetRouteTable

  PrivateSubnet1RouteTableAssociation:
    Type: AWS::EC2::SubnetRouteTableAssociation
    Properties:
      SubnetId: !Ref PrivateSubnet1
      RouteTableId: !Ref PrivateSubnetRouteTable

  PrivateSubnet2RouteTableAssociation:
    Type: AWS::EC2::SubnetRouteTableAssociation
    Properties:
      SubnetId: !Ref PrivateSubnet2
      RouteTableId: !Ref PrivateSubnetRouteTable

# EKSCTL-Host
  EKSEC2SG:
    Type: AWS::EC2::SecurityGroup
    Properties:
      GroupDescription: eksctl-host Security Group
      VpcId: !Ref EksVPC
      Tags:
        - Key: Name
          Value: !Sub ${ClusterBaseName}-HOST-SG
      SecurityGroupIngress:
      - IpProtocol: '-1'
        #FromPort: '22'
        #ToPort: '22'
        CidrIp: !Ref SgIngressSshCidr

  EKSEC2:
    Type: AWS::EC2::Instance
    Properties:
      InstanceType: !Ref MyInstanceType
      ImageId: !Ref LatestAmiId
      KeyName: !Ref KeyName
      Tags:
        - Key: Name
          Value: !Sub ${ClusterBaseName}-host
      NetworkInterfaces:
        - DeviceIndex: 0
          SubnetId: !Ref PublicSubnet1
          GroupSet:
          - !Ref EKSEC2SG
          AssociatePublicIpAddress: true
          PrivateIpAddress: 192.168.1.100
      BlockDeviceMappings:
        - DeviceName: /dev/xvda
          Ebs:
            VolumeType: gp3
            VolumeSize: 20
            DeleteOnTermination: true
      UserData:
        Fn::Base64:
          !Sub |
            #!/bin/bash
            hostnamectl --static set-hostname "${ClusterBaseName}-host"

            # Config convenience
            echo 'alias vi=vim' >> /etc/profile
            echo "sudo su -" >> /home/ec2-user/.bashrc

            # Change Timezone
            sed -i "s/UTC/Asia\/Seoul/g" /etc/sysconfig/clock
            ln -sf /usr/share/zoneinfo/Asia/Seoul /etc/localtime

            # Install Packages
            cd /root
            yum -y install tree jq git htop lynx

            # Install kubectl & helm
            #curl -O https://s3.us-west-2.amazonaws.com/amazon-eks/1.26.2/2023-03-17/bin/linux/amd64/kubectl
            curl -O https://s3.us-west-2.amazonaws.com/amazon-eks/1.25.7/2023-03-17/bin/linux/amd64/kubectl
            install -o root -g root -m 0755 kubectl /usr/local/bin/kubectl
            curl -s https://raw.githubusercontent.com/helm/helm/master/scripts/get-helm-3 | bash

            # Install eksctl
            curl --silent --location "https://github.com/weaveworks/eksctl/releases/latest/download/eksctl_$(uname -s)_amd64.tar.gz" | tar xz -C /tmp
            mv /tmp/eksctl /usr/local/bin

            # Install aws cli v2
            curl "https://awscli.amazonaws.com/awscli-exe-linux-x86_64.zip" -o "awscliv2.zip"
            unzip awscliv2.zip >/dev/null 2>&1
            sudo ./aws/install
            complete -C '/usr/local/bin/aws_completer' aws
            echo 'export AWS_PAGER=""' >>/etc/profile
            export AWS_DEFAULT_REGION=${AWS::Region}
            echo "export AWS_DEFAULT_REGION=$AWS_DEFAULT_REGION" >> /etc/profile

            # Install YAML Highlighter
            wget https://github.com/andreazorzetto/yh/releases/download/v0.4.0/yh-linux-amd64.zip
            unzip yh-linux-amd64.zip
            mv yh /usr/local/bin/

            # Install krew
            curl -LO https://github.com/kubernetes-sigs/krew/releases/download/v0.4.3/krew-linux_amd64.tar.gz
            tar zxvf krew-linux_amd64.tar.gz
            ./krew-linux_amd64 install krew
            export PATH="$PATH:/root/.krew/bin"
            echo 'export PATH="$PATH:/root/.krew/bin"' >> /etc/profile

            # Install kube-ps1
            echo 'source <(kubectl completion bash)' >> /etc/profile
            echo 'alias k=kubectl' >> /etc/profile
            echo 'complete -F __start_kubectl k' >> /etc/profile

            git clone https://github.com/jonmosco/kube-ps1.git /root/kube-ps1
            cat <<"EOT" >> /root/.bash_profile
            source /root/kube-ps1/kube-ps1.sh
            KUBE_PS1_SYMBOL_ENABLE=false
            function get_cluster_short() {
              echo "$1" | cut -d . -f1
            }
            KUBE_PS1_CLUSTER_FUNCTION=get_cluster_short
            KUBE_PS1_SUFFIX=') '
            PS1='$(kube_ps1)'$PS1
            EOT

            # Install krew plugin
            kubectl krew install ctx ns get-all  # ktop df-pv mtail tree

            # Install Docker
            amazon-linux-extras install docker -y
            systemctl start docker && systemctl enable docker

            # CLUSTER_NAME
            export CLUSTER_NAME=${ClusterBaseName}
            echo "export CLUSTER_NAME=$CLUSTER_NAME" >> /etc/profile

            # Create SSH Keypair
            ssh-keygen -t rsa -N "" -f /root/.ssh/id_rsa

Outputs:
  eksctlhost:
    Value: !GetAtt EKSEC2.PublicIp
IAM 자격 증명 설정
- 작업용 EC2가 EKS에 접근할 수 있도록 자격 증명 설정
- ❗️ 스터디에선 실습 편리를 위해 administrator 권한을 부여했지만, 실제 서비스에서 사용되려면 어떤 권한을 부여해주는게 적절한지 생각해보기
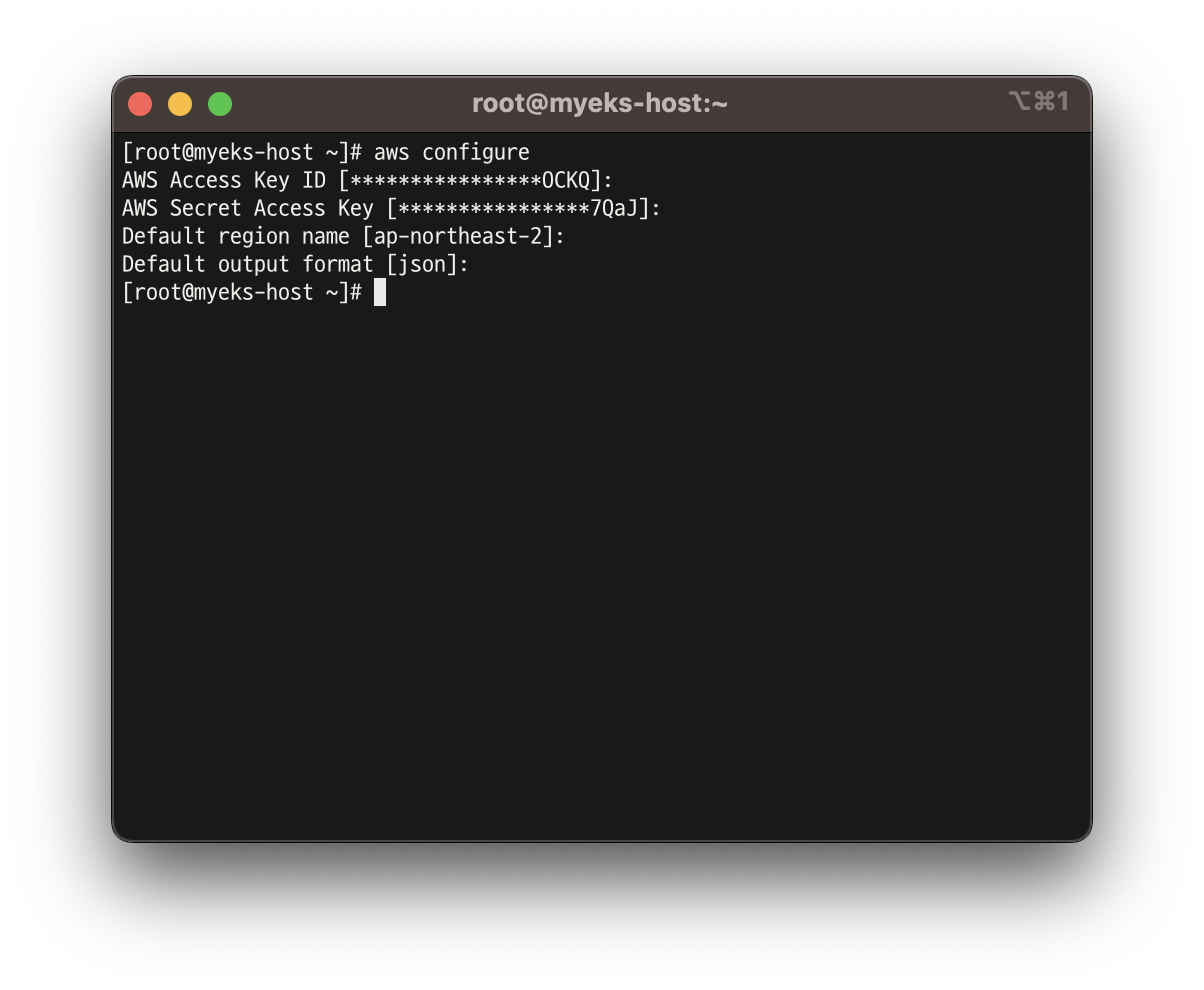
- 자격 구성 적용 확인
aws ec2 describe-instancesVPC 확인 및 변수 지정
- EKS를 배포할 VPC 정보 확인 및 변수 지정
aws ec2 describe-vpcs --filters "Name=tag:Name,Values=$CLUSTER_NAME-VPC" | jq
aws ec2 describe-vpcs --filters "Name=tag:Name,Values=$CLUSTER_NAME-VPC" | jq Vpcs[]
aws ec2 describe-vpcs --filters "Name=tag:Name,Values=$CLUSTER_NAME-VPC" | jq Vpcs[].VpcId
aws ec2 describe-vpcs --filters "Name=tag:Name,Values=$CLUSTER_NAME-VPC" | jq -r .Vpcs[].VpcId
export VPCID=$(aws ec2 describe-vpcs --filters "Name=tag:Name,Values=$CLUSTER_NAME-VPC" | jq -r .Vpcs[].VpcId)
echo "export VPCID=$VPCID" >> /etc/profile
echo VPCID- EKS를 배포할 VPC에 속한 Subnet 정보 확인
aws ec2 describe-subnets --filters "Name=vpc-id,Values=$VPCID" --output json | jq
aws ec2 describe-subnets --filters "Name=vpc-id,Values=$VPCID" --output yaml | yh- 퍼블릭 서브넷 ID 확인 및 변수 지정
aws ec2 describe-subnets --filters Name=tag:Name,Values="$CLUSTER_NAME-PublicSubnet1" | jq
aws ec2 describe-subnets --filters Name=tag:Name,Values="$CLUSTER_NAME-PublicSubnet1" --query "Subnets[0].[SubnetId]" --output text
export PubSubnet1=$(aws ec2 describe-subnets --filters Name=tag:Name,Values="$CLUSTER_NAME-PublicSubnet1" --query "Subnets[0].[SubnetId]" --output text)
export PubSubnet2=$(aws ec2 describe-subnets --filters Name=tag:Name,Values="$CLUSTER_NAME-PublicSubnet2" --query "Subnets[0].[SubnetId]" --output text)
echo "export PubSubnet1=$PubSubnet1" >> /etc/profile
echo "export PubSubnet2=$PubSubnet2" >> /etc/profile
echo $PubSubnet1
echo $PubSubnet2- 변수가 잘 지정 되었는지 변수 확인
echo $AWS_DEFAULT_REGION
echo $CLUSTER_NAME
echo $VPCID
echo $PubSubnet1,$PubSubnet2
배포 전 최종 확인
eksctl create cluster --name $CLUSTER_NAME --region=$AWS_DEFAULT_REGION --nodegroup-name=$CLUSTER_NAME-nodegroup --node-type=t3.medium \
--node-volume-size=30 --vpc-public-subnets "$PubSubnet1,$PubSubnet2" --version 1.24 --ssh-access --external-dns-access --dry-run | yh
2. EKS 배포하기
eksctl create cluster --name $CLUSTER_NAME --region=$AWS_DEFAULT_REGION --nodegroup-name=$CLUSTER_NAME-nodegroup --node-type=t3.medium \
--node-volume-size=30 --vpc-public-subnets "$PubSubnet1,$PubSubnet2" --version 1.24 --ssh-access --external-dns-access --verbose 4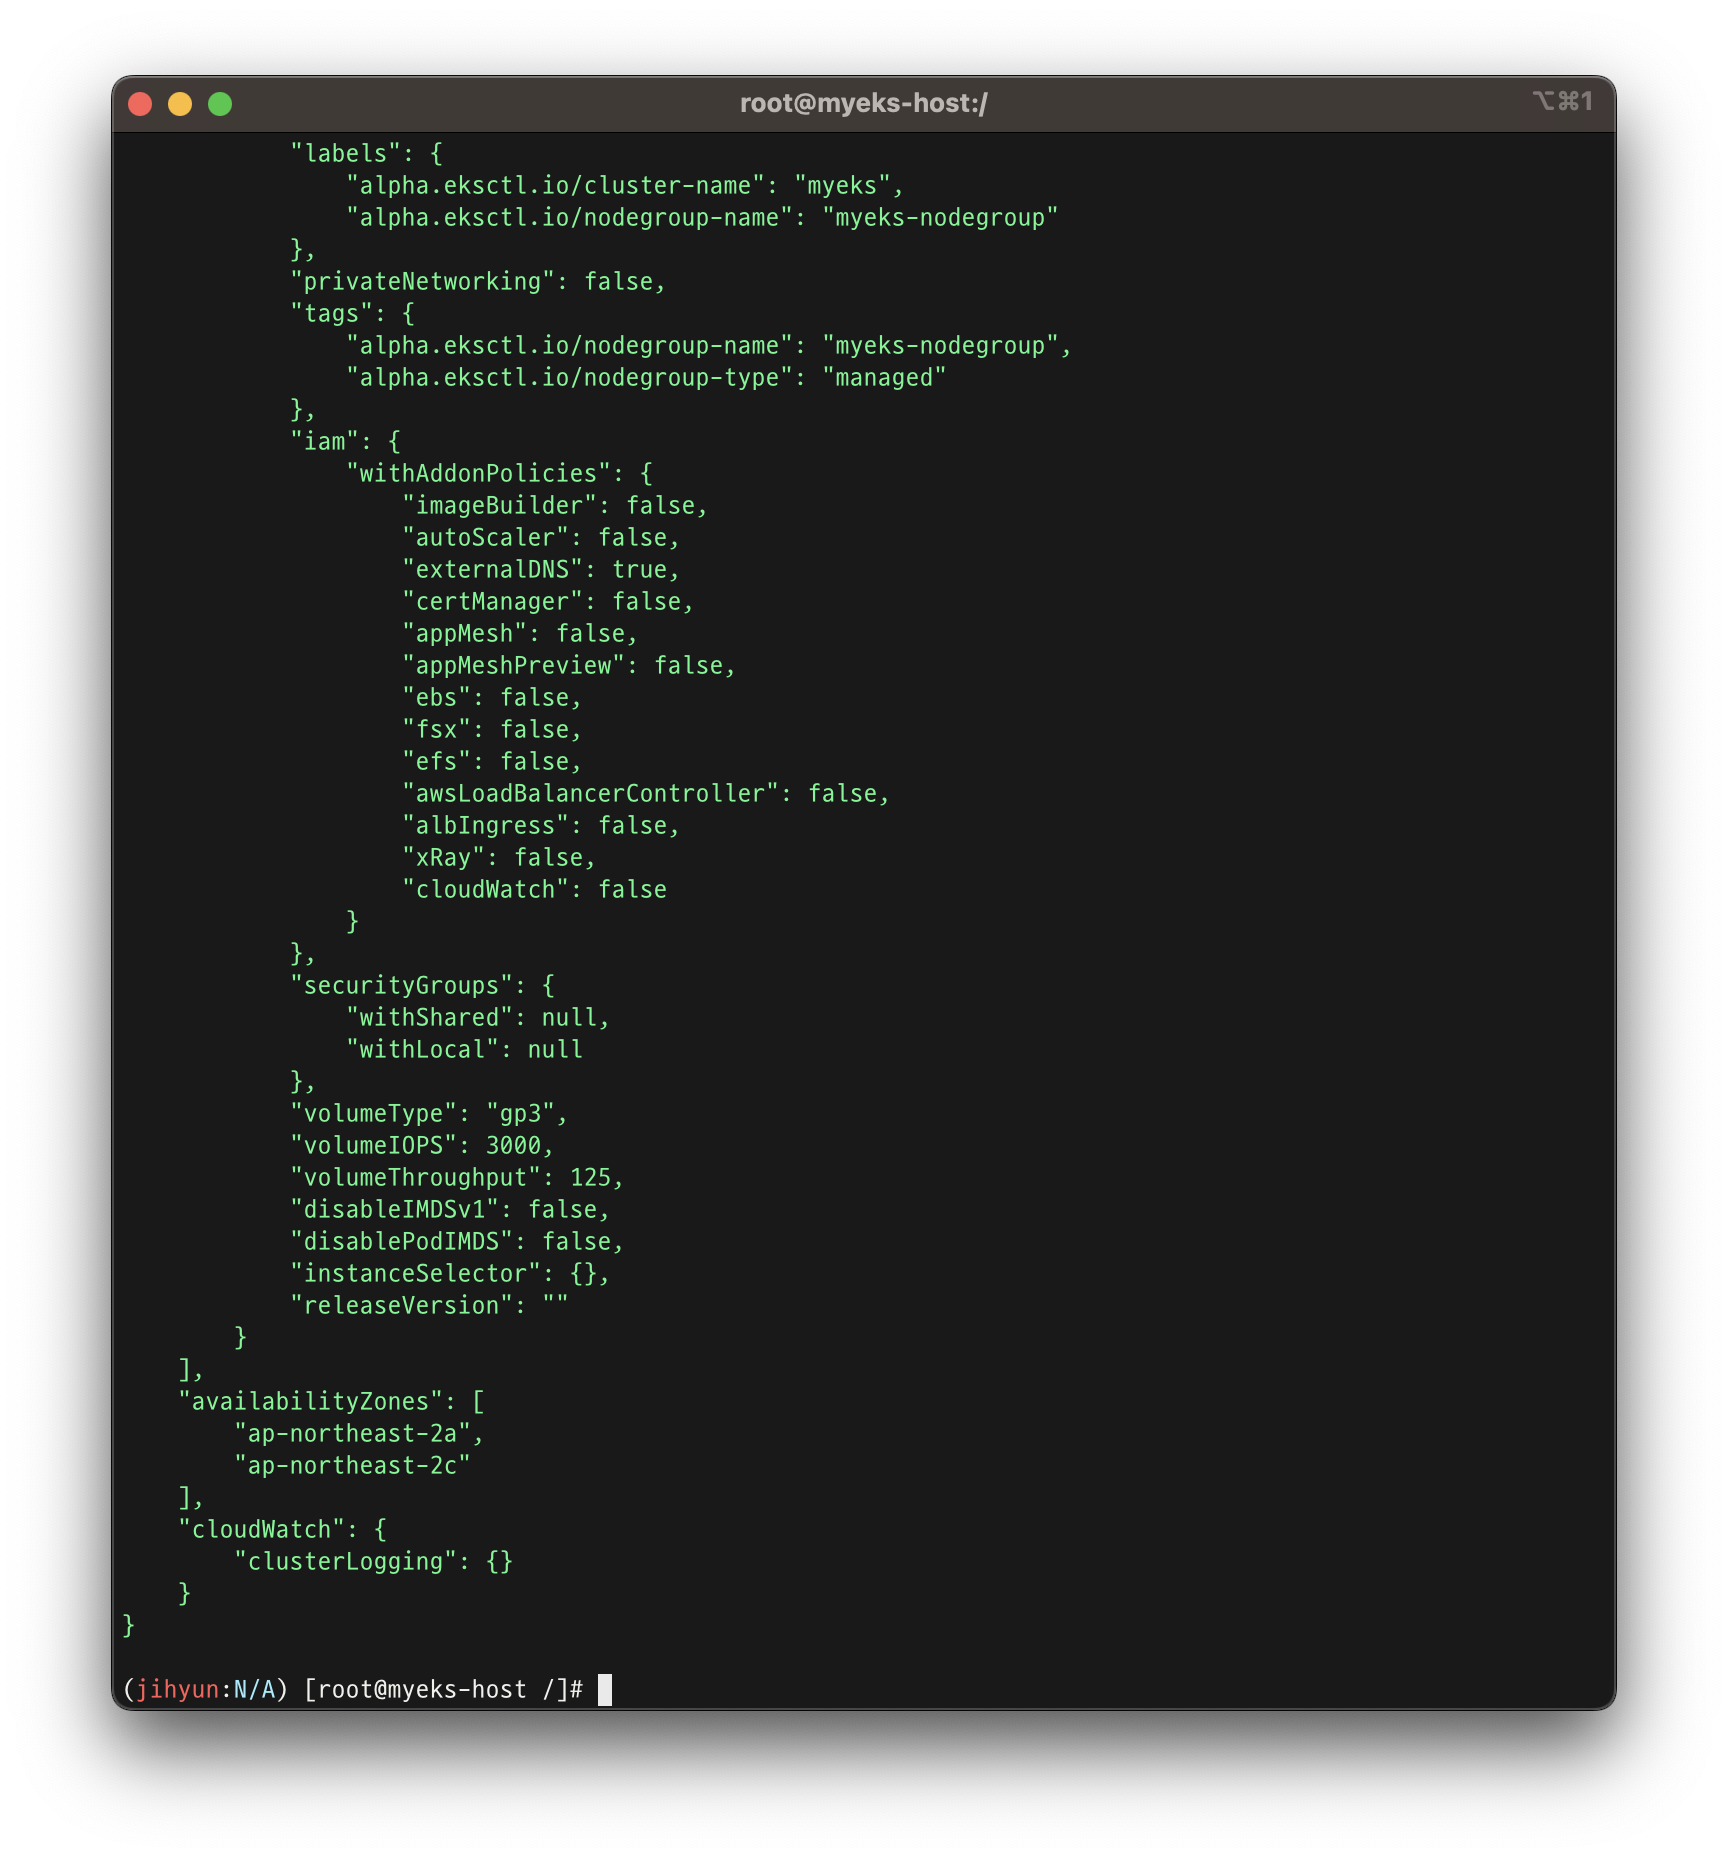
-
배포 확인!
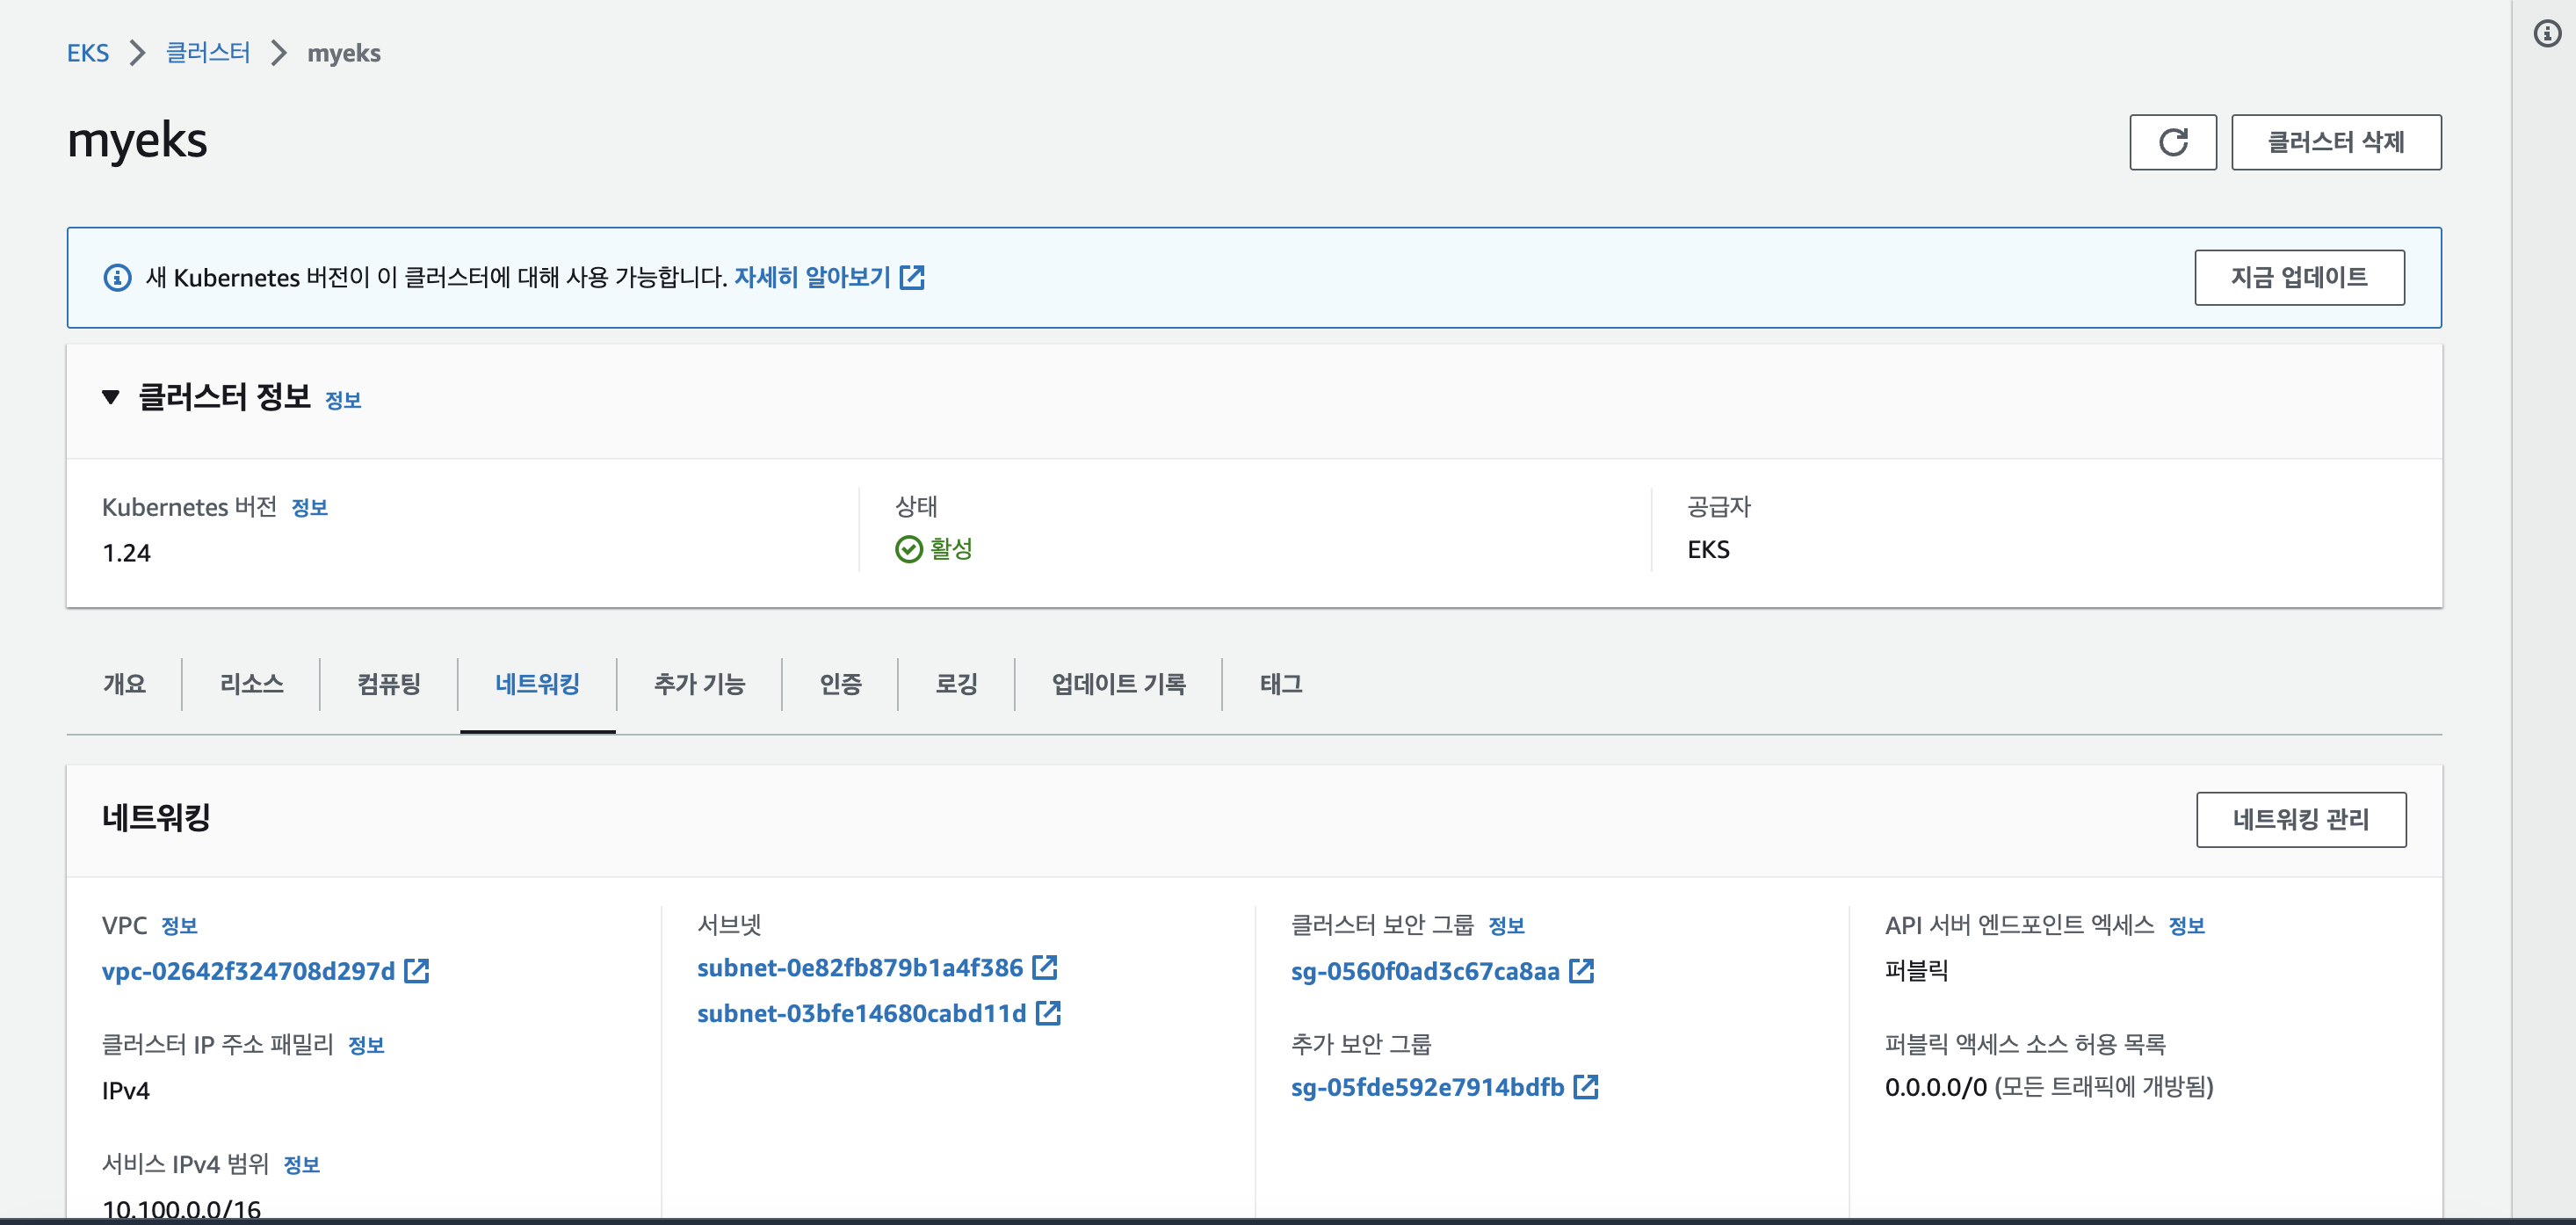

-
퍼블릭 접근도 확인!
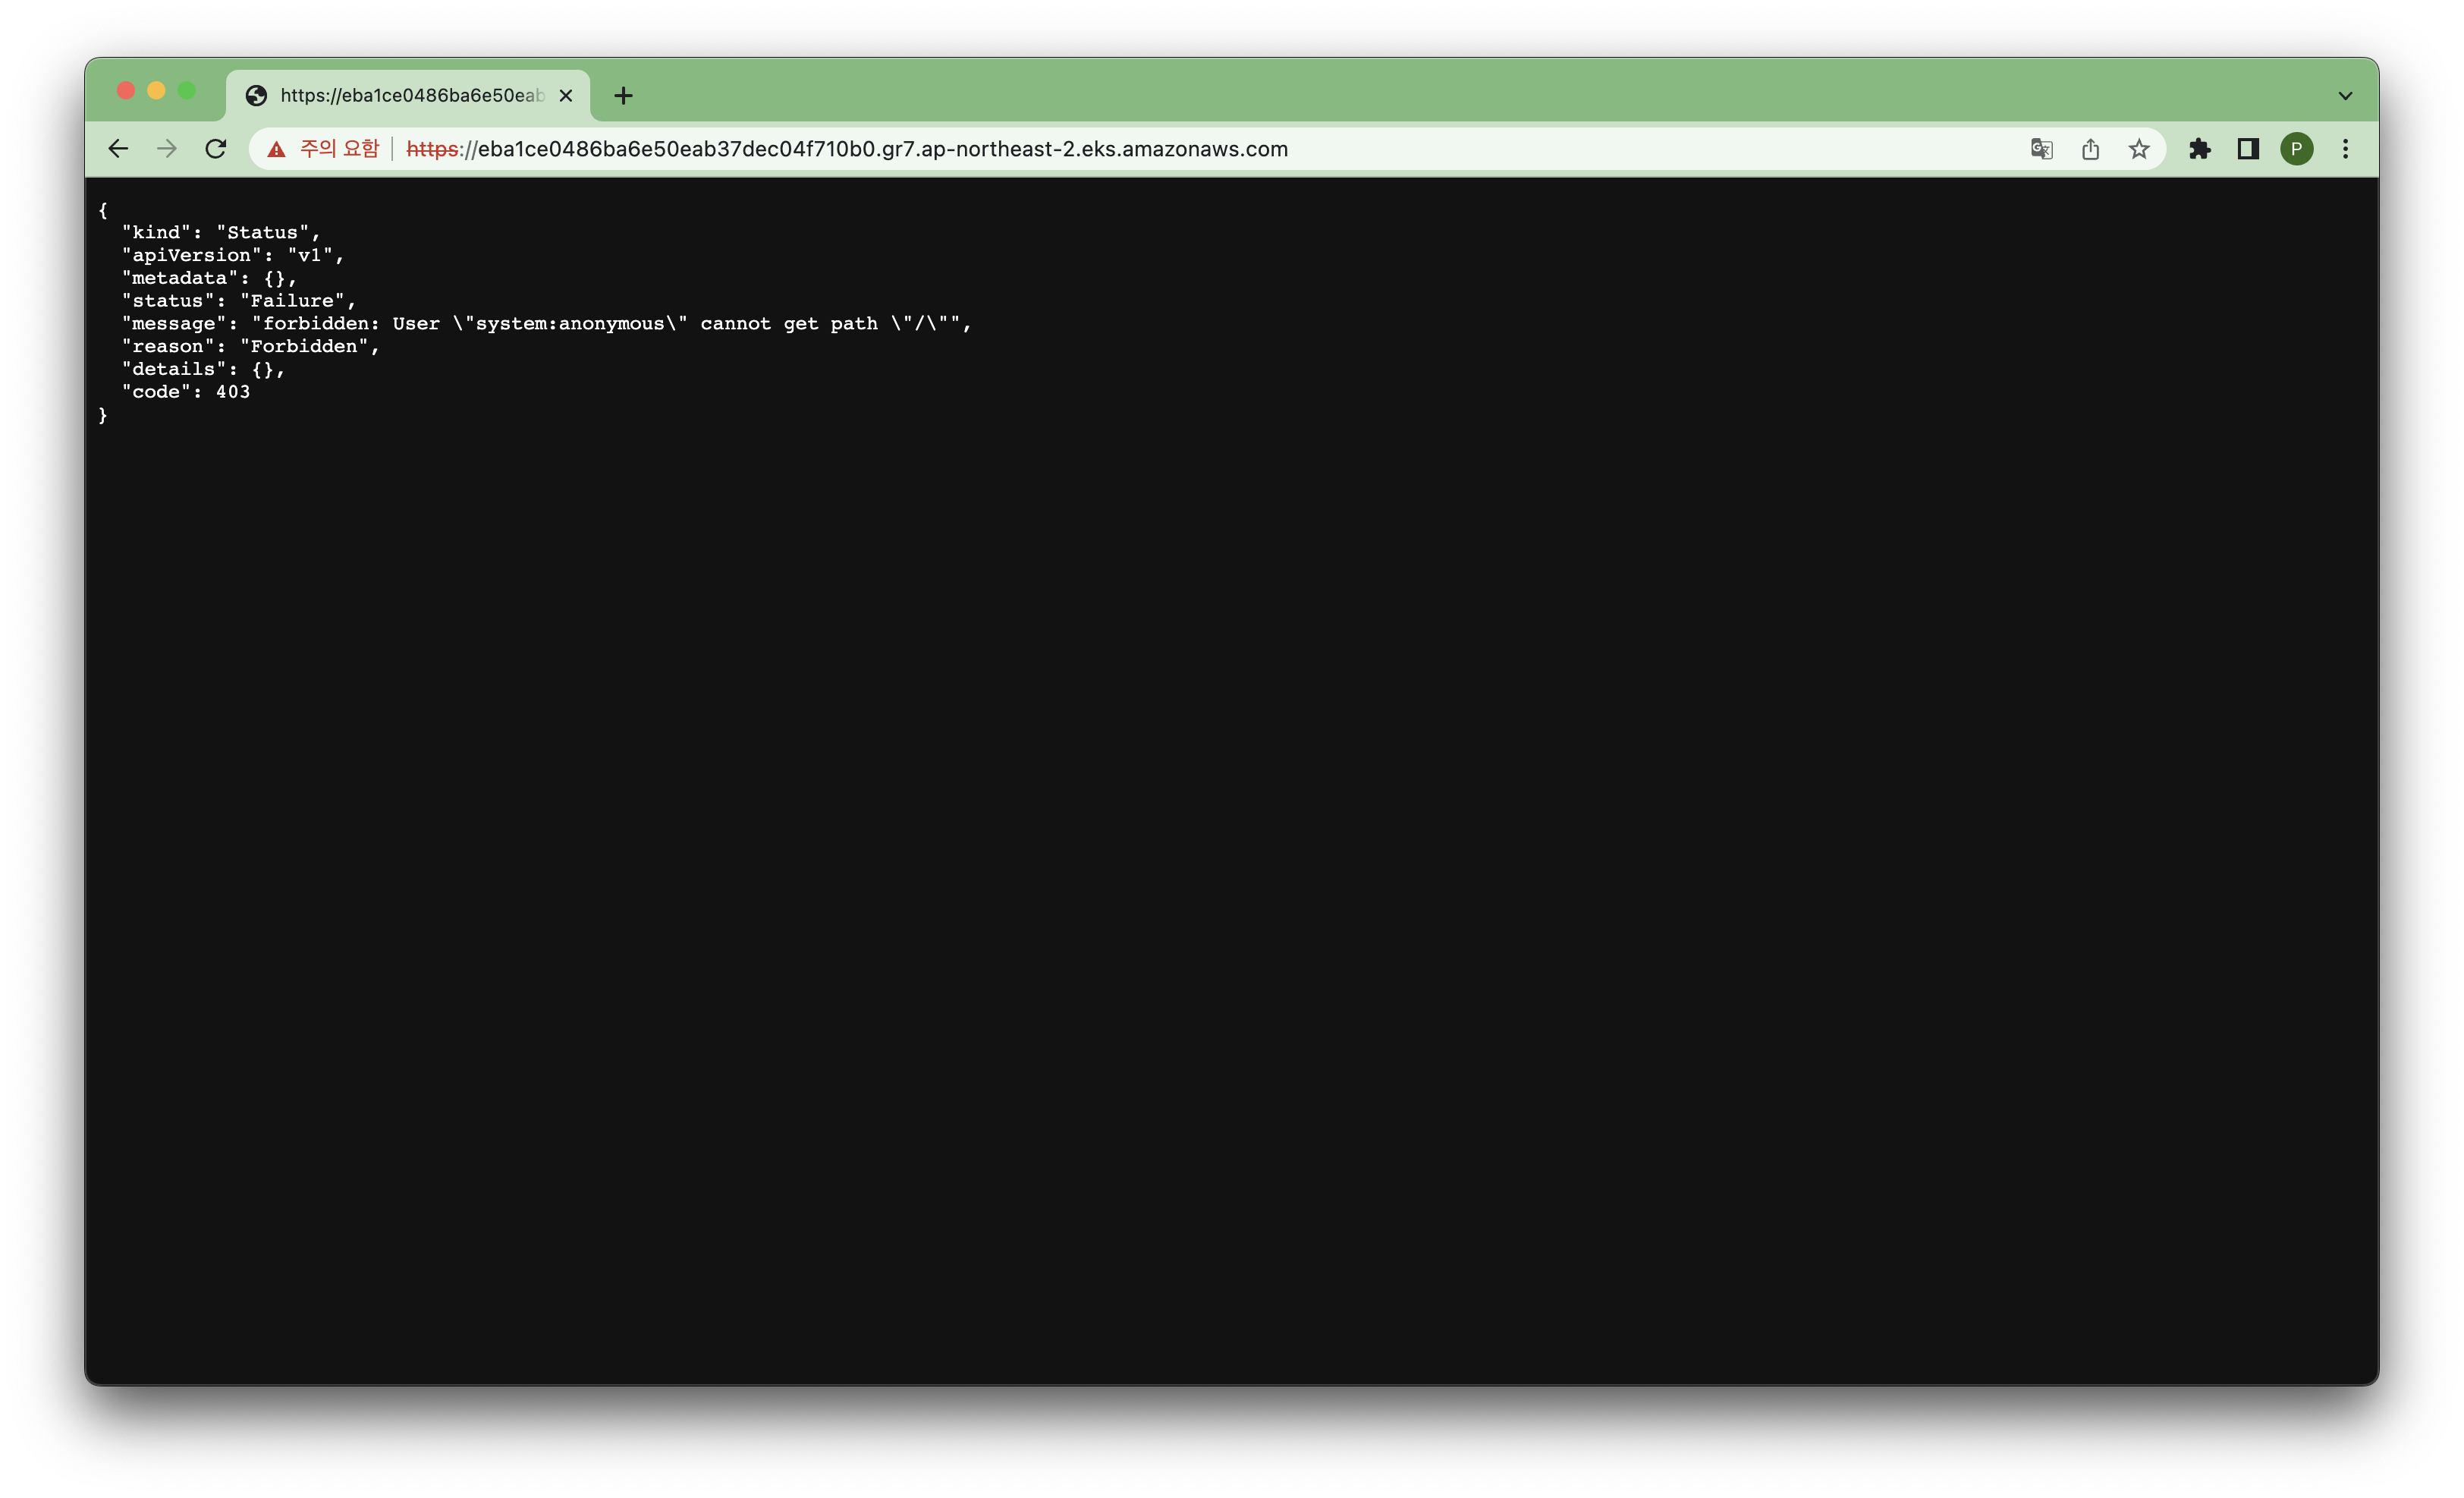
-
❗️ 실습에서는 권한이나 인증정보가 없어서 퍼블릭으로 생성해도 괜찮지만, 실제 서비스는 보안상 프라이빗으로 생성해야 함
-
EC2 인스턴스 생성 확인!
-
AWS 콘솔에서 EC2가 생성 된 것을 확인 할 수 있지만, 터미널에서도 명령어로 확인 가능
aws ec2 describe-instances --query "Reservations[*].Instances[*].{PublicIPAdd:PublicIpAddress,PrivateIPAdd:PrivateIpAddress,InstanceName:Tags[?Key=='Name']|[0].Value,Status:State.Name}" --filters Name=instance-state-name,Values=running --output table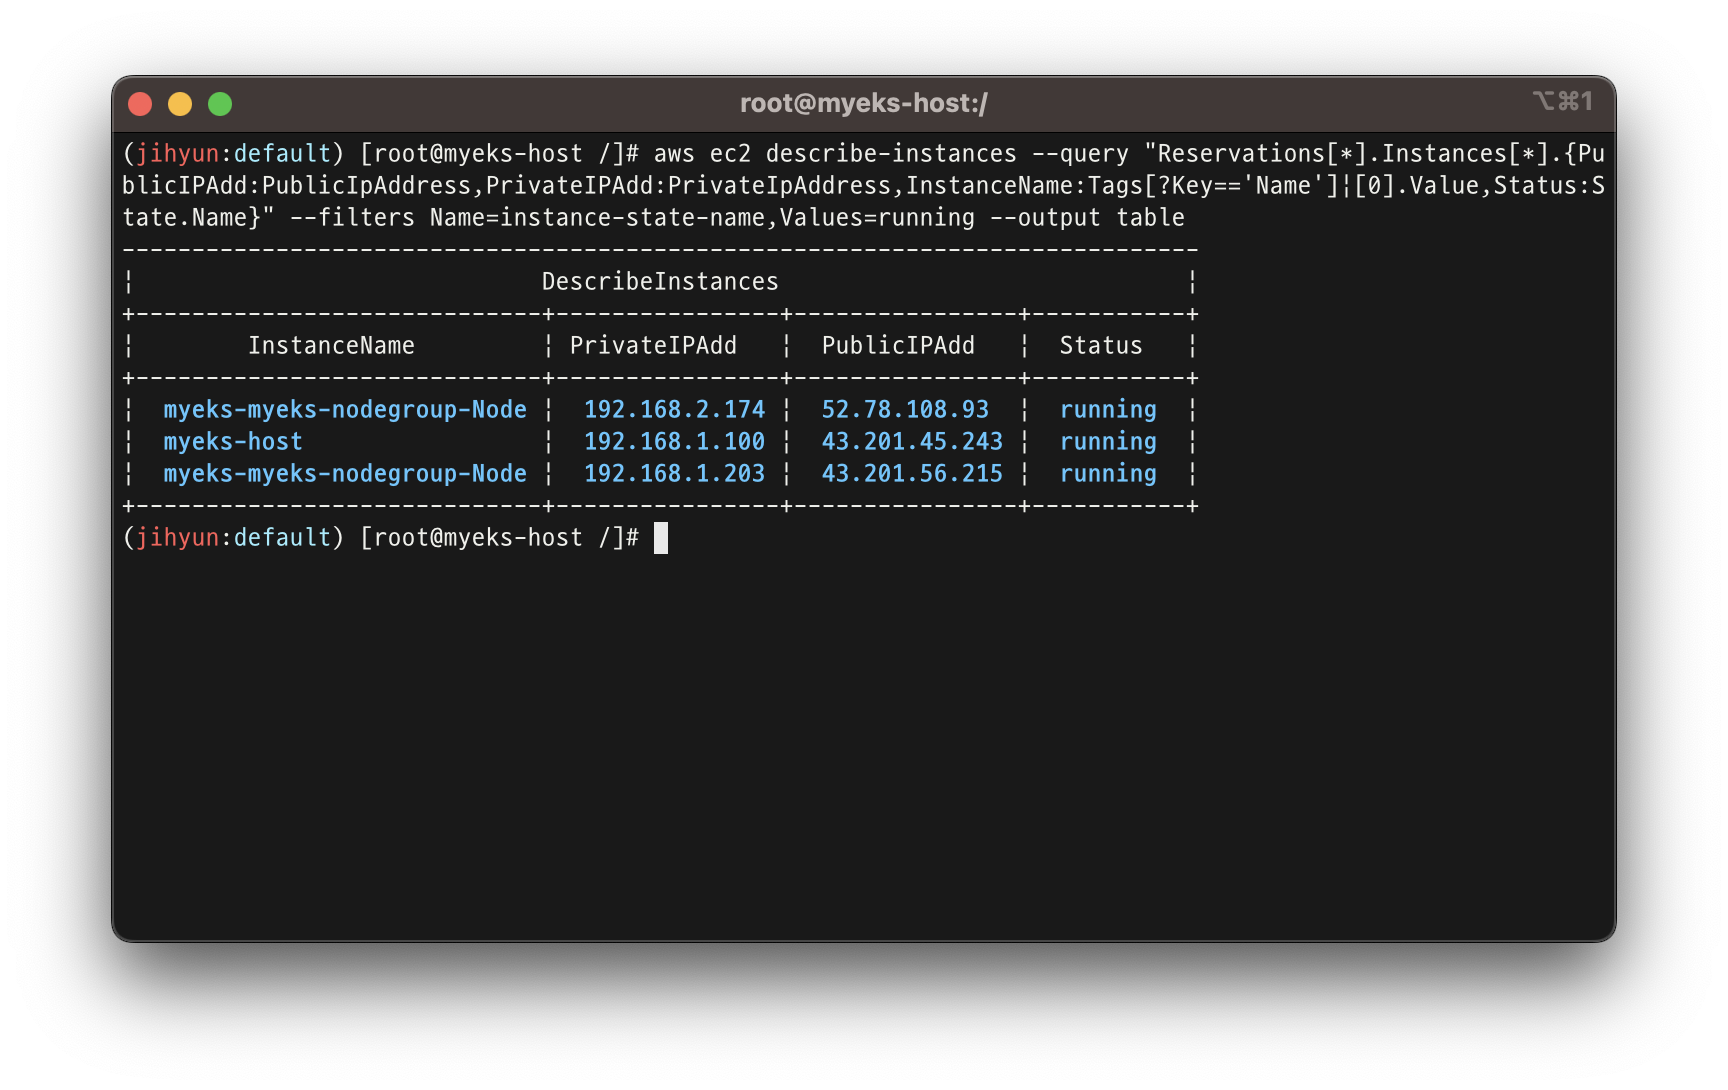
-
EKS를 배포했더니 터미널에서 위의 사진처럼 (jihyun:default)라는 수식어(?)가 생김
-
쿠버네티스는 네임스페이스라는 기능을 이용해서 서비스를 논리적으로 격리해서 운용
-
파란글자(default)는 현재 위치한 네임스페이스
-
해당 내용은 기본적으로 설치되는게 아니라, 스터디에서 제공해준 CloudFormation 안에 설정 되어있음. 되게 편하다!
-
배포 된 EKS 정보는 AWS 콘솔 혹은 터미널에서 명령어로 확인 가능
# krew 플러그인 확인
kubectl krew list
kubectl ctx
kubectl ns
kubectl ns default
kubectl get-all    # 모든 네임스페이스에서 모든 리소스 확인

# eks 클러스터 정보 확인
kubectl cluster-info

eksctl get cluster
aws eks describe-cluster --name $CLUSTER_NAME | jq
aws eks describe-cluster --name $CLUSTER_NAME | jq -r .cluster.endpoint

## dig 조회
APIDNS=$(aws eks describe-cluster --name $CLUSTER_NAME | jq -r .cluster.endpoint | cut -d '/' -f 3)
dig +short $APIDNS

# eks API 접속 시도
curl -k -s $(aws eks describe-cluster --name $CLUSTER_NAME | jq -r .cluster.endpoint)
curl -k -s $(aws eks describe-cluster --name $CLUSTER_NAME | jq -r .cluster.endpoint)/version | jq

# eks 노드 그룹 정보 확인
eksctl get nodegroup --cluster $CLUSTER_NAME --name $CLUSTER_NAME-nodegroup
aws eks describe-nodegroup --cluster-name $CLUSTER_NAME --nodegroup-name $CLUSTER_NAME-nodegroup | jq

# 노드 정보 확인 : OS와 컨테이너런타임 확인
kubectl get node --label-columns=node.kubernetes.io/instance-type,eks.amazonaws.com/capacityType,topology.kubernetes.io/zone
kubectl get node --label-columns=node.kubernetes.io/instance-type
kubectl get node
kubectl get node -owide
kubectl get node -v=6

# 노드의 capacityType 확인
kubectl get node --label-columns=eks.amazonaws.com/capacityType

# 인증 정보 확인
cat /root/.kube/config | yh
aws eks get-token --cluster-name $CLUSTER_NAME --region $AWS_DEFAULT_REGION

# 파드 정보 확인
kubectl get pod -n kube-system
kubectl get pod -n kube-system -o wide

kubectl get pod -A

# kube-system 네임스페이스에 모든 리소스 확인
kubectl get-all -n kube-system

# 모든 네임스페이스에서 모든 리소스 확인
kubectl get-all

# 모든 파드의 컨테이너 이미지 정보 확인
kubectl get pods --all-namespaces -o jsonpath="{.items[*].spec.containers[*].image}" | tr -s '[[:space:]]' '\n' | sort | uniq -c
👀 1주차 실습 소감
- 많은 사람이 빠르고 편리하게 실습을 해볼 수 있도록 세팅을 신경써서 정말 잘 해놓으신 것 같다.
나도 업무를 그렇게 해야하는데..! - EKS 러닝커브가 높다는 얘기를 많이 들어서 걱정했는데, 유명한 만큼 배포나 관리가 정말 쉽네!
- 2주차도 화이팅!

모르면 배우면 된다!