1️⃣ 프로젝트 생성
-
아래와 같이 설정 후, Generate

groupId: 프로젝트를 정의하는 고유한 식별자 정보
artifactId: 버전 없는 Jar 파일 이름
-
IntelliJ에서 generate한 파일들 중 build.gradle open (as project)
✔️ 프로젝트 실행
-
src/main/java/<group이름>.<이름> 클래스의 main method 실행
-
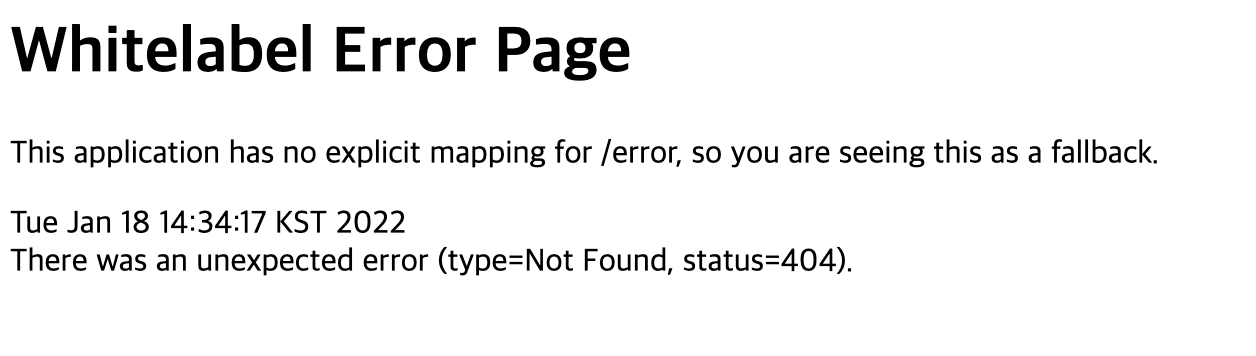
localhost:8080에 접속하였을 때, 에러 페이지가 뜨면 성공!
*참고
- java 에러 해결법
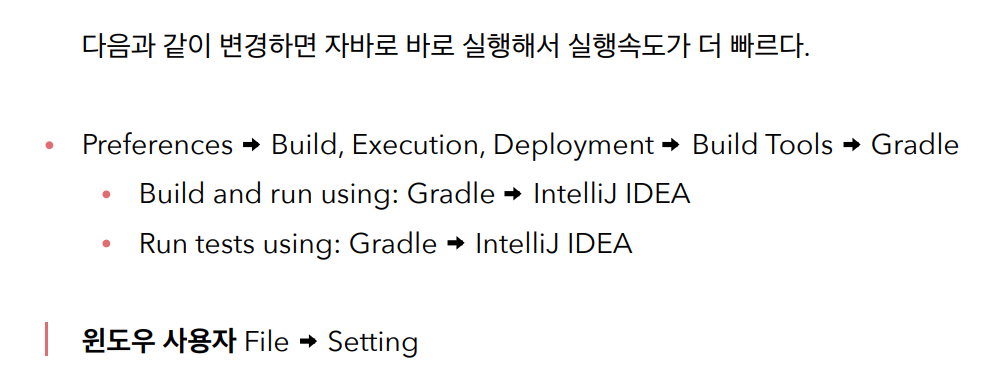
- 실행 속도 높이기 (아래 참조)
2️⃣ 라이브러리 살펴보기
✔️ 라이브러리 의존 관계
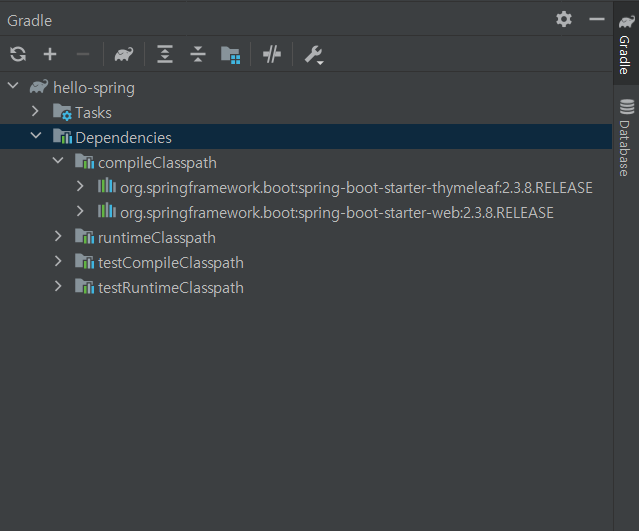
- tomcat → 웹서버 실행시켜 줌
- spring-boot-starter → spring boot 관련된 것들 거의 다 들어있음
- logging

- logging
3️⃣ View 환경설정
✔️ Welcom Page 만들기
src/main/resources/static에 index.html 만들기
- resources/static/index.html
<!DOCTYPE HTML>
<html>
<head>
    <title>Main</title>
    <meta http-equiv="Content-Type" content="text/html; charset=UTF-8" />
</head>
<body>
안녕하세요. <br>
<a href="/login">로그인</a>
</body>
</html>
✔️ Thymeleaf 템플릿 엔진
✔️ Controller
- controller/LoginController.java
package lgcns.internproject.controller;
import org.springframework.ui.Model;
import org.springframework.web.bind.annotation.GetMapping;
import org.springframework.stereotype.Controller;

@Controller
public class LoginController {

    @GetMapping("login")
    public String login(Model model) {
        model.addAttribute("data", "로그인 되었습니다:)");
        return "login";
    }
}
✔️ Template
- resources/templates/login.html
<!DOCTYPE HTML>
<html xmlns:th="http://www.thymeleaf.org">
<head>
    <title>Login</title>
    <meta http-equiv="Content-Type" content="text/html; charset=UTF-8" />
</head>
<body>
<p th:text="'안녕하세요. ' + ${data}" >안녕하세요. 손님</p>
</body>
</html>
th→ thymeleaf
${data} → controller에서의 attribute value
[결과]

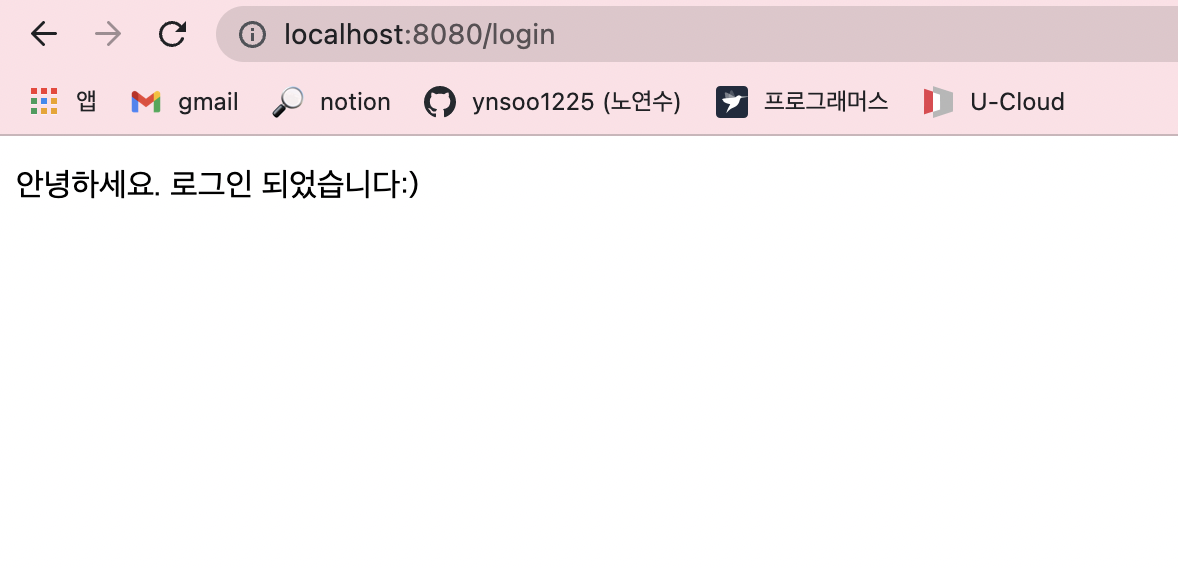
- 컨트롤러에서 리턴 값으로 문자를 반환하면 뷰 리졸버( viewResolver )가 화면을 찾아서 처리한다.
- 스프링 부트 템플릿엔진 기본 viewName 매핑
- resources/templates/ +{ViewName}+ .html
- 참고: spring-boot-devtools 라이브러리를 추가하면, html 파일을 컴파일만 해주면 서버 재시작 없이 View 파일 변경이 가능하다.
- 인텔리J 컴파일 방법: 메뉴 build Recompile
4️⃣ 빌드하고 실행하기
cd {스프링 부트 프로젝트가 위치한 폴더}- (빌드)
./gradlew build cd build/libs- (build된 것 확인)
ls-arlth

java -jar {project name}-0.0.1-SNAPSHOT.jar- 실행 확인
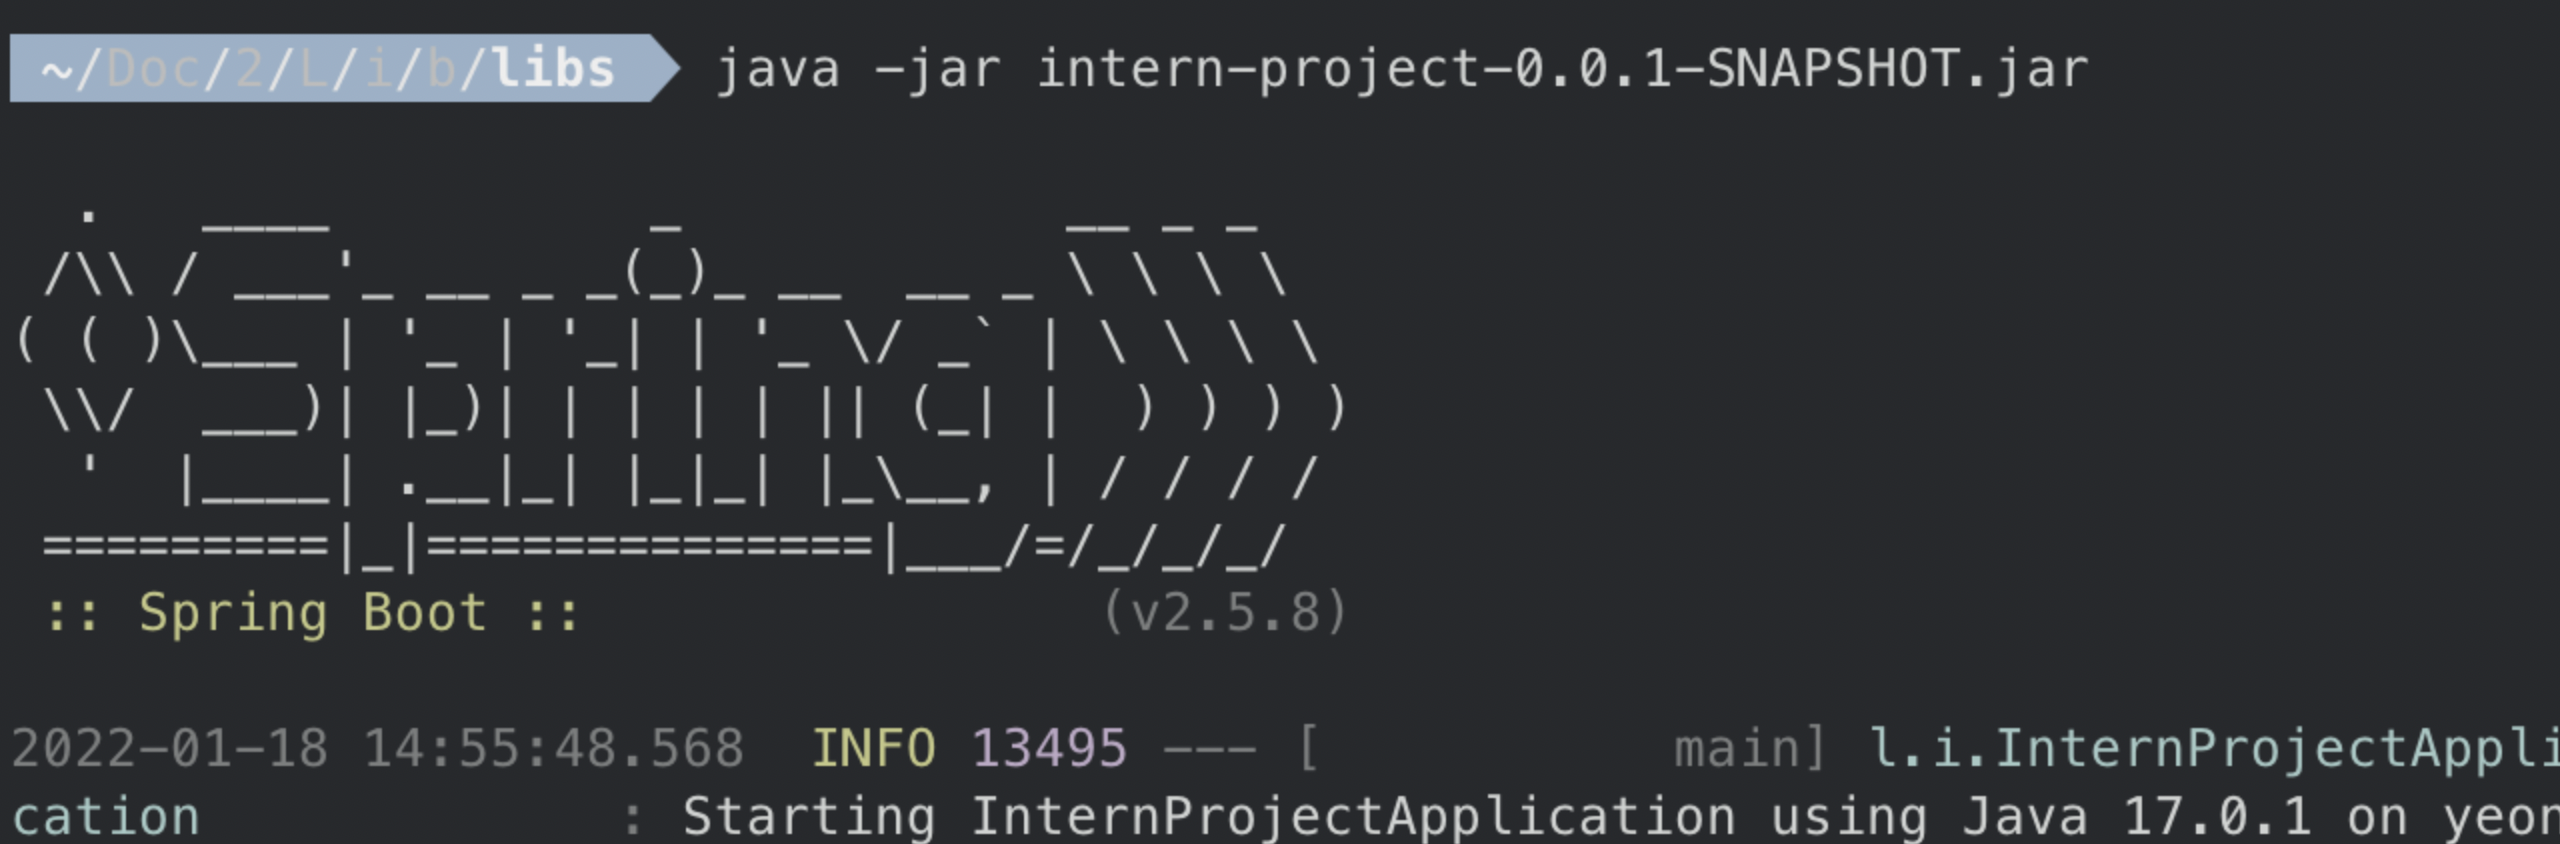
*잘 안될 경우
cd {스프링 부트 프로젝트가 위치한 폴더}./gradlew clean build
[참고][https://www.inflearn.com/course/스프링-입문-스프링부트/dashboard](https://www.inflearn.com/course/%EC%8A%A4%ED%94%84%EB%A7%81-%EC%9E%85%EB%AC%B8-%EC%8A%A4%ED%94%84%EB%A7%81%EB%B6%80%ED%8A%B8/dashboard)
DCDI